-
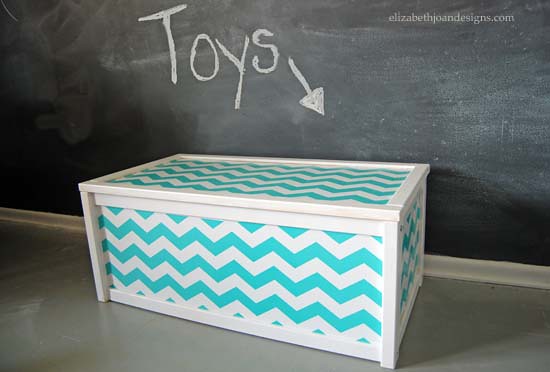
Ikea Apa Storage Makeover
These cute Apa storage boxes from Ikea are so cute and at $14.99 they are the perfect price! I knew I had to have one for our playroom I’ve been working on. It’s the perfect thing to hold some of the larger toys.

(Photo from Ikea.)
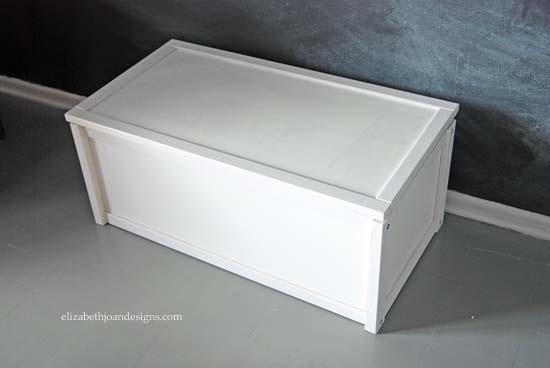
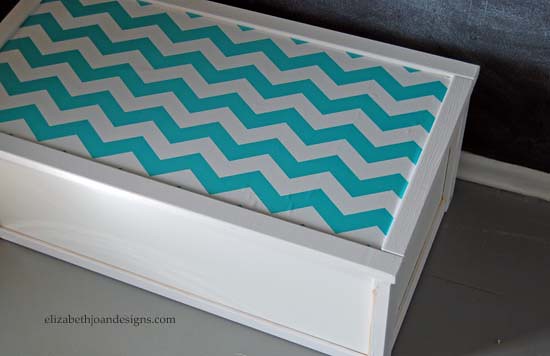
One of my favorite things about Ikea furniture is how easy it is to customize. Here is how I turned this plain box into a fun toy chest for my kids.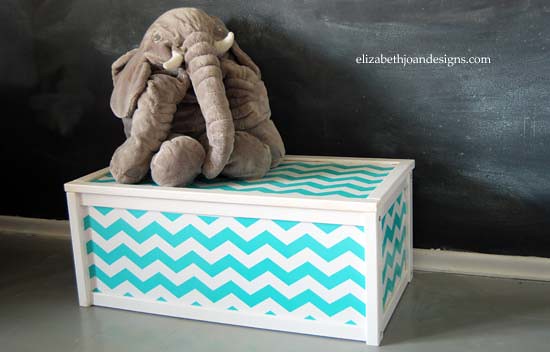


Have you ever customized Ikea furniture? If so, what pieces have you made your own?
<center>____________________________________________________________________________</center>
If you like this post, you may also like: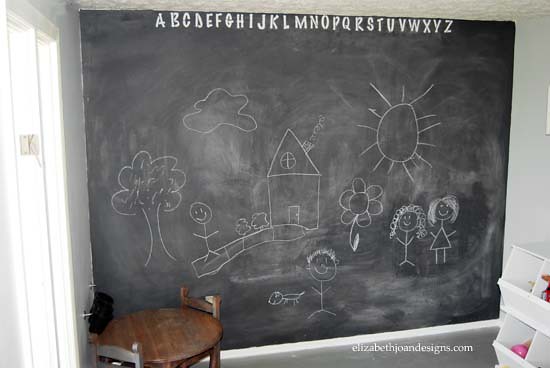

-
Raise Your Bed If You’re Sure
Last time you saw our bedroom was during a sneak peak revealed in this post. It still looks pretty much the same, except for one subtle difference in the form of a lift. See those pretty little dark feet hanging out at the bottom of the bed skirt? Yup, they are new.
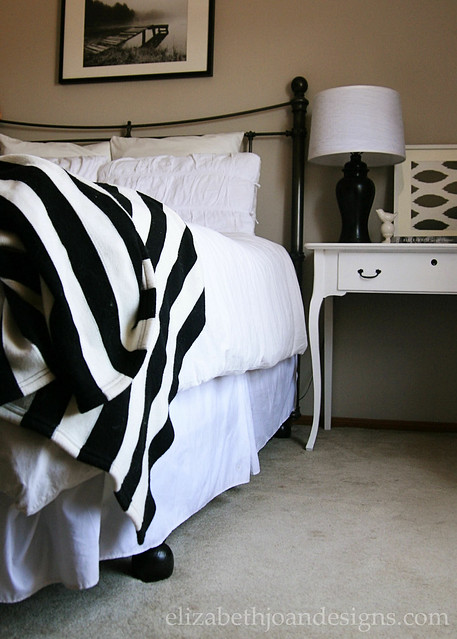
Since we are hosting my office area in the corner of our bedroom, we wanted to add some extra storage space. The best place to achieve this was under the bed, since we didn’t want to add more furniture pieces. So, we researched some different ideas and after eliminating traditional, store bought bed risers (which we heard have a tendency to break in the middle of the night,) we decided to go the DIY route. No surprise there, right?
I found this tutorial on Pinterest and thought it looked cool, but unfortunately, our bed frame is made differently than theirs, so we had to think of another way to do it. After a little brainstorming, my genius husband figured out how to make it work.
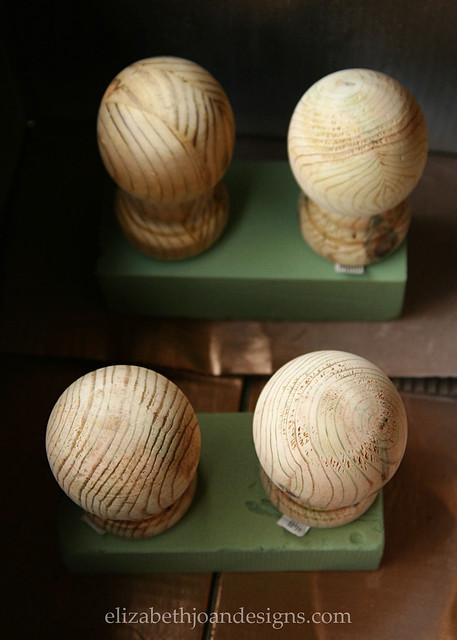
We started out with 4 round, wooden, deck post finials which we bought for around $16 from our local hardware store.
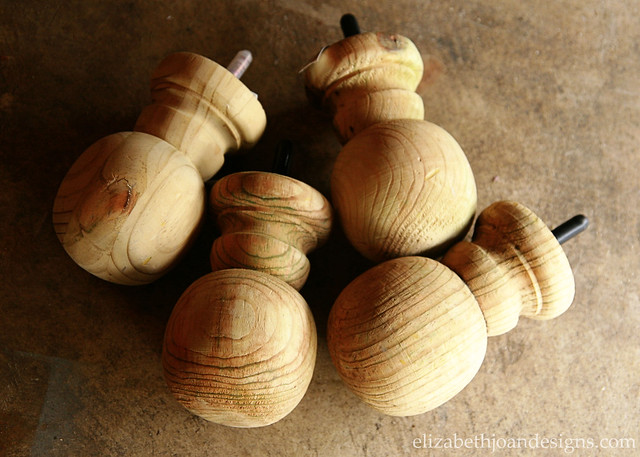
After a quick sanding to smooth them out, we popped the screws into some floral foam so that they would be easier to spray paint. We chose to use Rustoleum Universal Oil Rubbed Bronze spray paint with the hopes that they would semi-match our existing headboard. (I neglected to take a photo of them all together and painted though.)
Here is our old bed frame’s little wheels that held everything up. Kind of pathetic, right?

Well, the hubs figured out how to remove the entire wheel base and the plastic part that kept it tight inside of the leg. Then he pried the plastic piece off with a screw driver.
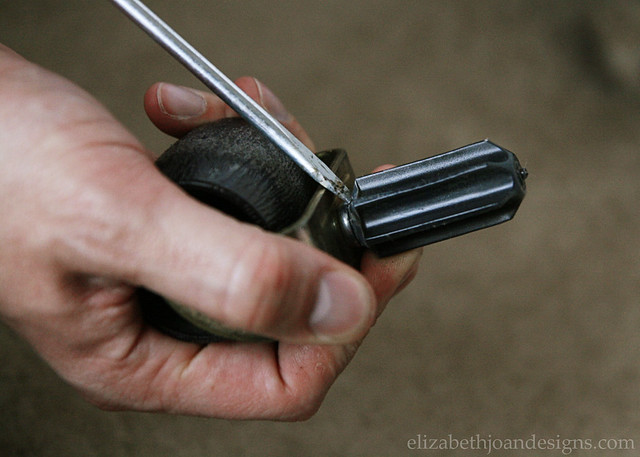
Lucky for us, the post screws fit perfectly inside of the original plastic frame pieces.
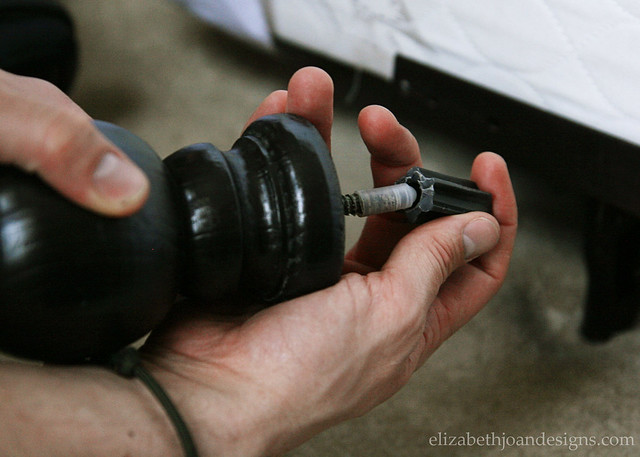
And with a few taps of the hammer, they were secured in place.
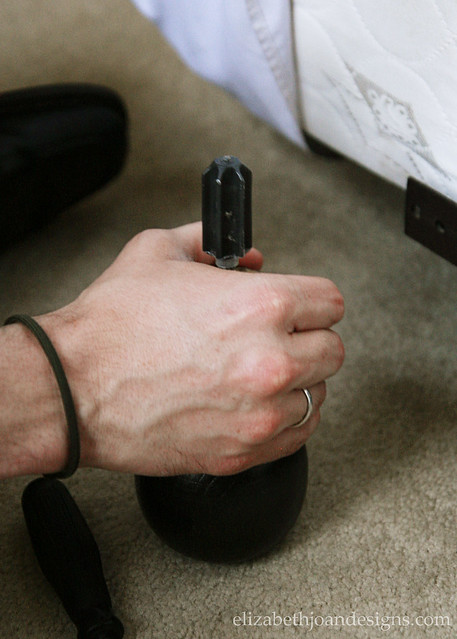
Finally, we just lifted the bed back up and positioned each post in place.

So far, the bed is holding up great and seems to be very secure. The kids even jumped on it a bit to double check the sturdiness. Plus, we gained several inches of storage space, which was exactly what we were looking for. Yay!

Here is my sweet little model showing off the new height of the bed
and how it is perfectly toddler proof.
-
DIY Chalkboard Paint and Accent Wall
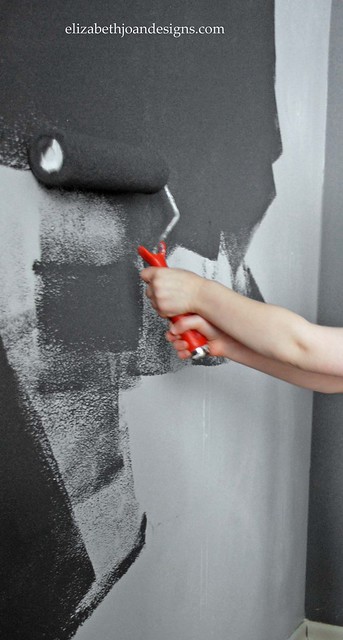
My youngest little guy LOVES to color. I wanted to make sure I incorporated his passion into our playroom designs. That is exactly why I chose to do a chalkboard accent wall.
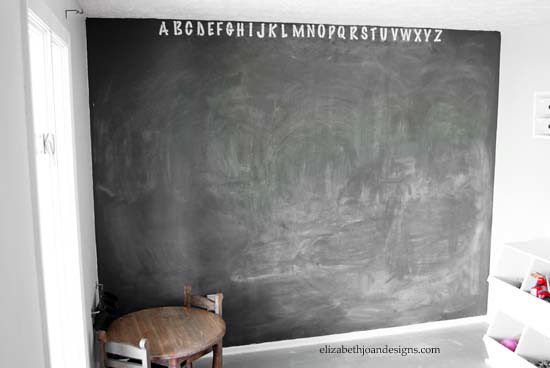
Instead of doing straight up black chalkboard paint, I wanted to choose my own color. My choice; Restoration Hardware Flint. (I had it color matched in latex paint at Home Depot to keep it a little more budget friendly.)
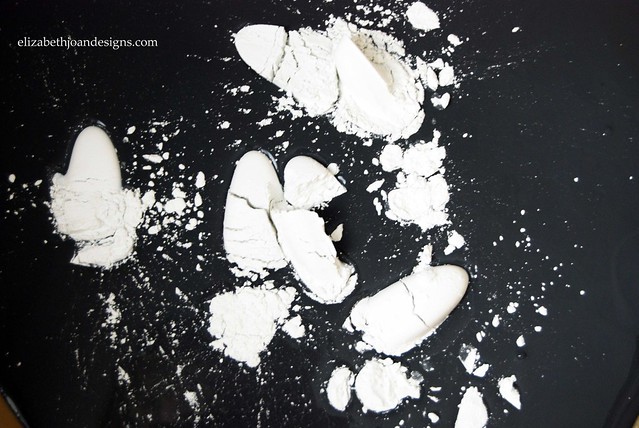
To get from plain latex to chalkboard paint, I mixed 2 cups of the color matched paint and 4 Tablespoons non-sanded grout together. This worked beautifully.
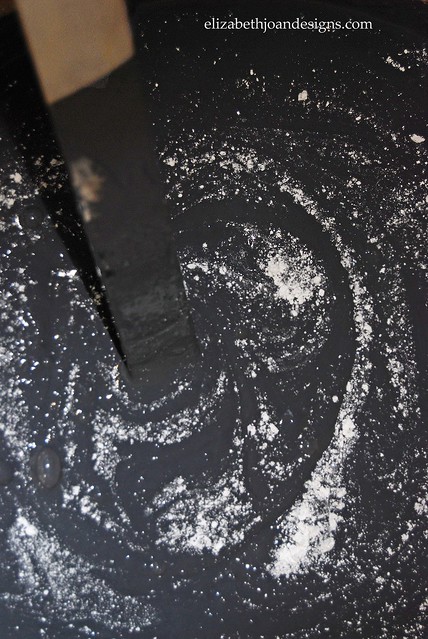
Along with the help of my four year old, I applied two coats of this concoction to the wall and let it dry for 24 hours.
Then, I primed the surface with chalk. That way the first
scribblesdrawings on the wall weren’t our permanent artwork for the room.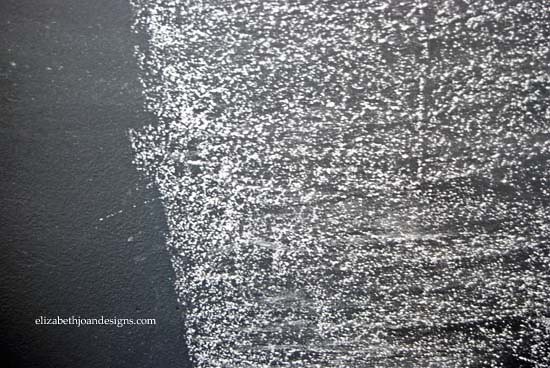
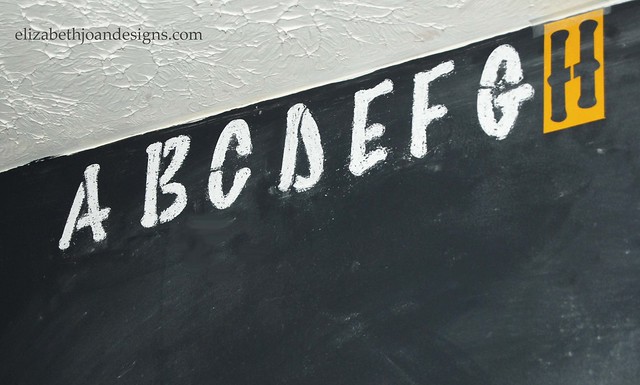
Finally, to add an educational touch to the kid’s space, I choose to stencil the alphabet across the top of the accent wall.
This process took a little while, but was pretty easy.
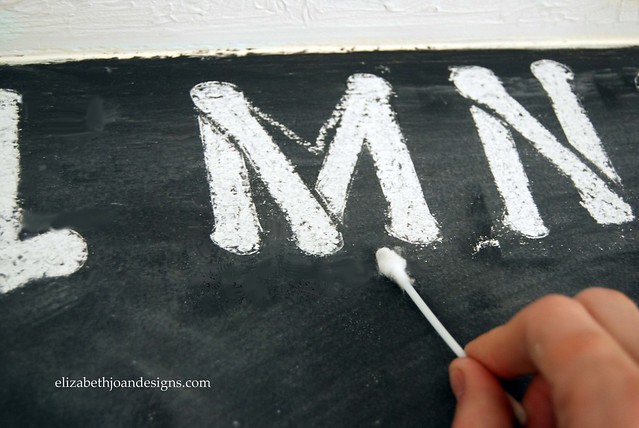
I taped the stencils to the wall and chalked each letter. This way they can be easily changed if we so desire.
To touch up the ABC’s, I used a wet Q-tip to erase any unwanted markings.
We are in love with this wall. The boys enjoy coloring on it and so do I.
Now, if I can only make it clear to my two year old that this is the only wall we chalk on. *sigh*
-
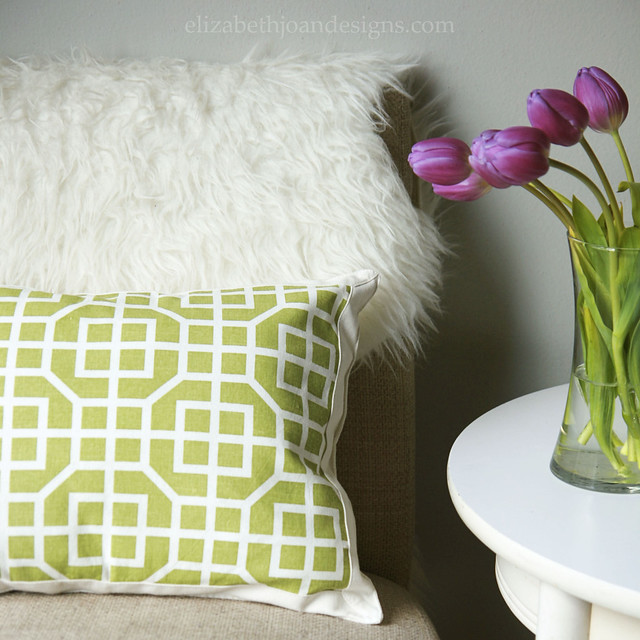
The Placemat Pillow
If you visit this blog very often, then you know that we love a good deal and an easy project. And I’m happy to announce that this post has both of those criteria covered for you. Just like the title states, this is about the placemat pillow. A simple throw pillow made from, you guessed it, a placemat.
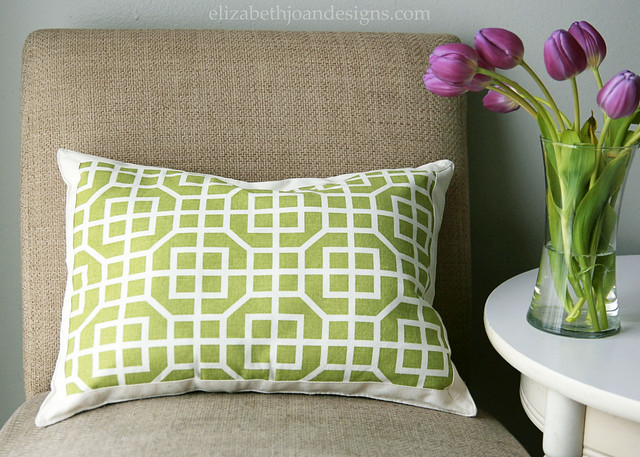
I found this cool green trellis placemat at Target when I was visiting my sister. (Read more about that adventure here.)
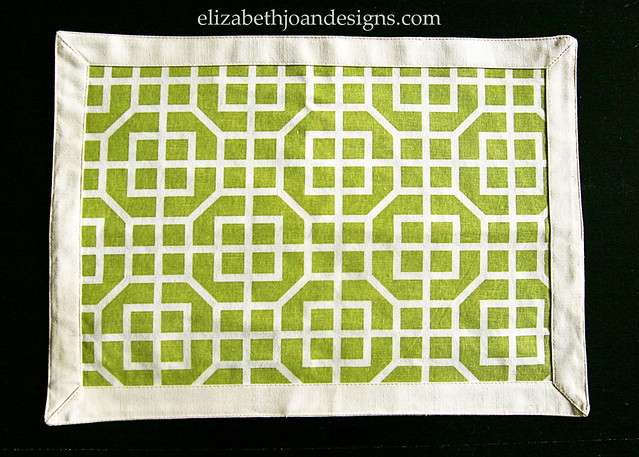
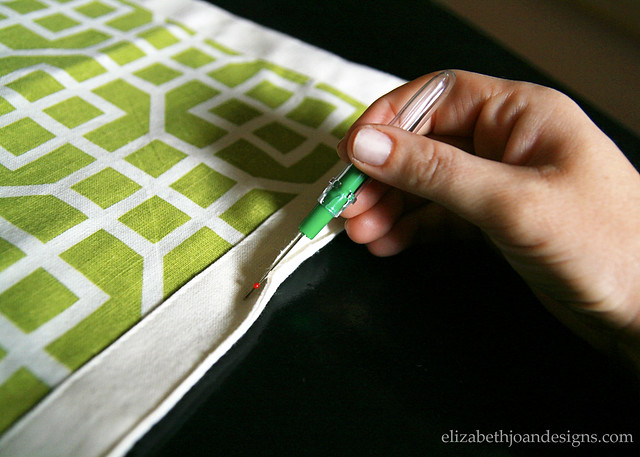
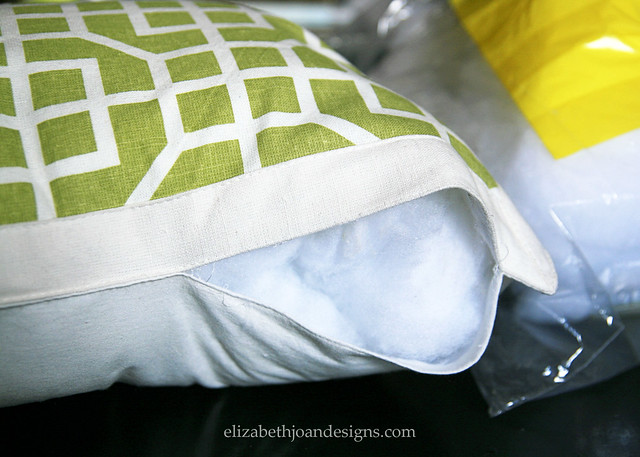
To make a placemat into a pillow, use a fabric placemat that has two panels attached to each other. I started by using a seam ripper to create a hole in one corner big enough for my hand to fit through.
Next, I shoved a bunch of pillow stuffing inside. (This was seriously the most time consuming part of this project.)
Then, using a needle and similar color thread to the original, I sewed the opening closed with a simple stitch. And that was it!

These little pillows are so fun to whip up and would make such a great housewarming or holiday gift.
So, what do you think? Have you ever made a pillow out of a placemat? Or have you used another method to create a throw pillow that is ridiculously simple? Let us know!