-
IKEA Trofast Makeover
Have you ever seen something in a store or online and thought “Wow! That would be perfect! Too bad it’s not the right size or color I am looking for.” That is exactly how I felt about the IKEA Trofast wall storage unit.
When looking around online I saw the Trofast and wanted a white unit for our playroom. This put me in sort of a Goldilocks state of mind. The white ones were too big. The natural wood ones were the correct size and wrong color, but painting a natural colored one white, would be just right. So to give my own fairy tale a happy ending, I did just that.

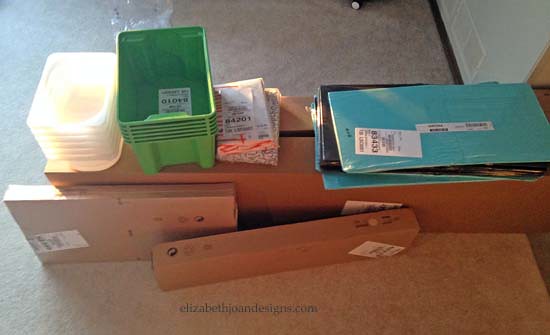
Photo credit: ikea.com I put together a long list of IKEA items I wanted. This included the Apa storage box I recently made-over, and of course the Trosast along with many other items I will be sharing soon, and. After I placed my order online, I anxiously waited for my shipment to arrive.
Yay! It was finally here and time for the transformation to begin.
First, I lightly sanded each wood section of my wall storage.
Next, I painted a coat of primer on the bare wood and I let it dry over night.
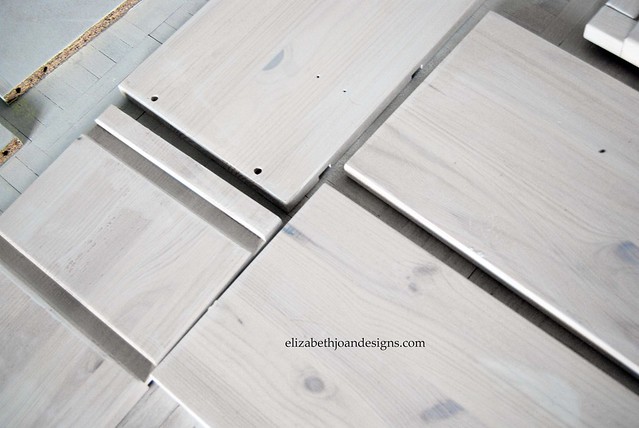
Following that, two coats of white semi-glossy paint were applied and left to dry/cure for a couple days. I didn’t want any chipping paint or my hard work would have gone down the drain.
Just like with the Apa, I enlisted the help of my husband with assembling the unit.
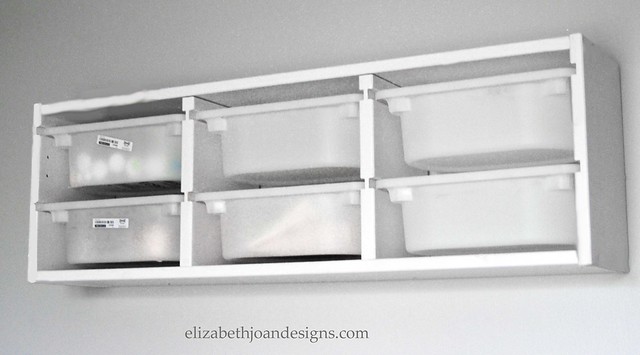
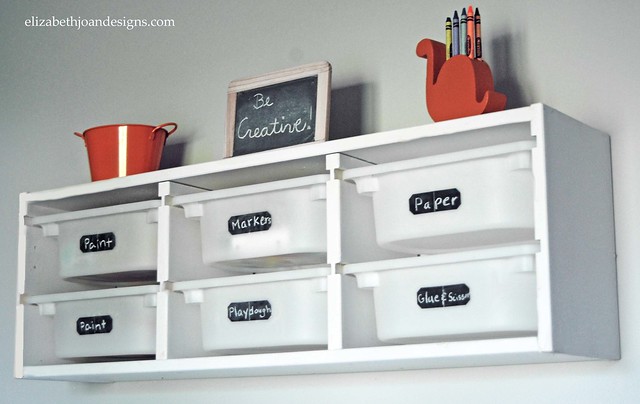
My new white Trofast has six plastic bins that we use to store the kids art supplies in. They were screaming for labels. My love for chalkboards and decisive nature steered me right toward these adorable stickers I found at Target.
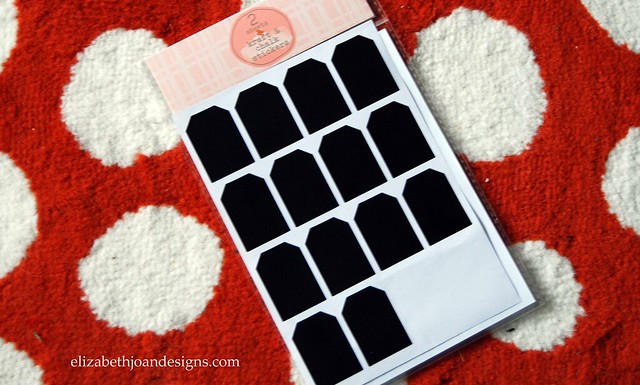
I put two labels on the front of each bin to give myself plenty of writing space. With these I have the freedom to erase my markings, which equals no commitment on what we store in them.
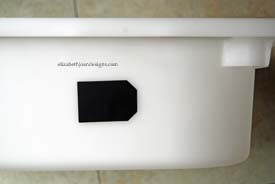
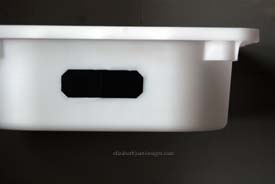
Then, I primed each tag by rubbing chalk on it.
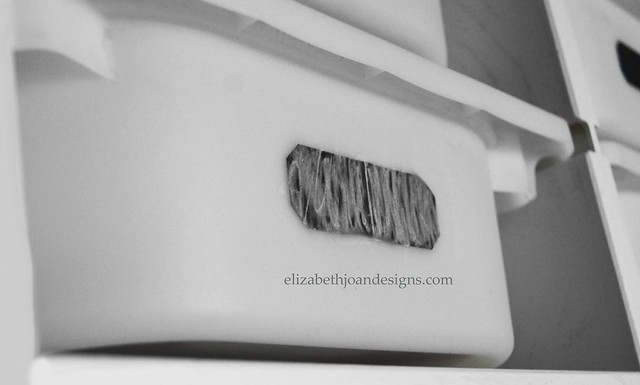
Finally, I labeled each drawer with the appropriate name.
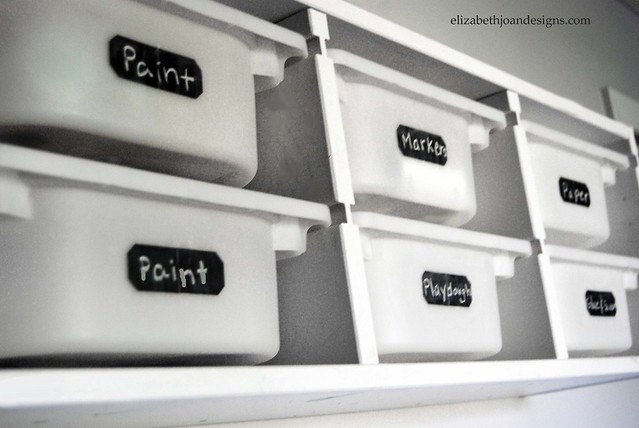
I love how this whole piece turned out! It has been such a wonderful addition to our playroom.
What is your favorite storage piece for kids’ art supplies? Leave a comment; we would love to hear from you!
_________________________________________________________________________________ You may also like: 
Chalkboard Paint Accent Wall 
Ikea Apa Storage Makeover 
Faux Metal Letter 
Paint Dipped Box Baskets 
Clipboard Art Display 
Toy Rotation -
Yum Yum Shrimp Boil
When it comes to seafood, my family seems to devour it like hungry wolves. We seriously can’t get enough. (Emily’s family – not so much, but that’s another story.) Not a week goes by where we don’t eat seafood in some form or another. Maybe we should seek out shrimp-aholics anonymous.
This recipe is one of our absolute favorites. There are many variations and ours is by no means an exact science. (It kind of mimics Old Bay’s Shrimp Boil Shrimp Fest Recipe with several tweaks.) I know we don’t share recipes on EJD very often, but when we do, you can count on them being something that we absolutely love to make and eat.
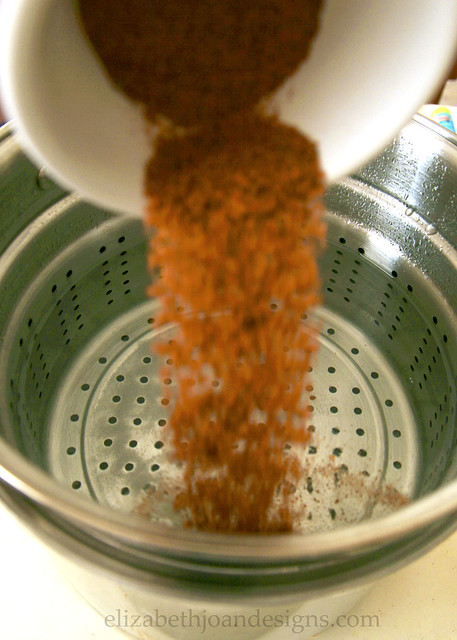
You will need some smoked sausage, polska kielbasa or something similar. I usually choose smoked turkey sausage, which still tastes amazingly sinful, but cuts out quite a few more calories and fat. We also use 5 red potatoes, 3 ears of corn on the cob, 1 lb. of shrimp, 1/4 cup Old Bay seasoning, and 1 Tbsp salt.

To start, fill a stock pot about half way full of water and put in on the stove top to boil.
While that is heating up, chop up the smoked sausage and red potatoes into bite sized pieces and cut your corn into 2-3 inch sections.

Next, add the Old Bay Seasoning and salt to the water, do the hokey pokey, and mix it all around.
Once the whole combo is boiling hot, grab your timer. Throw in the potatoes and set the timer for 7 minutes. When the bell sounds, put in the sausage and allow another 4 minutes to pass. Ding, ding. Next is the corn. That needs about 8 minutes. By now it is smelling super yummy. Toss the shrimp in and allow everything to keep on cooking for another 4 minutes, then strain and serve to your hungry bunch.

There are only 4 of us and with this amount, we definitely had plenty. Feel free to tweak it to your liking.

Yum Yum Shrimp Boil from Elizabeth Joan Designs
Yield
4 servingsIngredients
– 1 lb. Uncooked Shrimp, Shell On
– 1 lb. Summer Sausage, cut into 1 inch portions
– 5 Red Potatoes, cut into bite size pieces
– 3 Ears of Corn, divided into 2-3 inch sections
– 1/4 Cup Old Bay Seasoning
– 1 Tbsp. Salt
– 12 Oz. Beer (optional)
– Water
– ParsleyPreparation
Combine the water, Old Bay Seasoning, salt and beer in a pot and bring to a boil. Add potatoes and allow to boil for 7 minutes. Add sausage and allow to boil for 4 minutes. Add corn and allow to boil for 8 minutes. Add shrimp and continue boiling for another 4 minutes. Strain, garnish with parsley, and serve.___________________________________________________ You may also like:

Buffalo Chicken Meatballs 
Grilled Bread Salad 
Loaded Red Potato Soup -
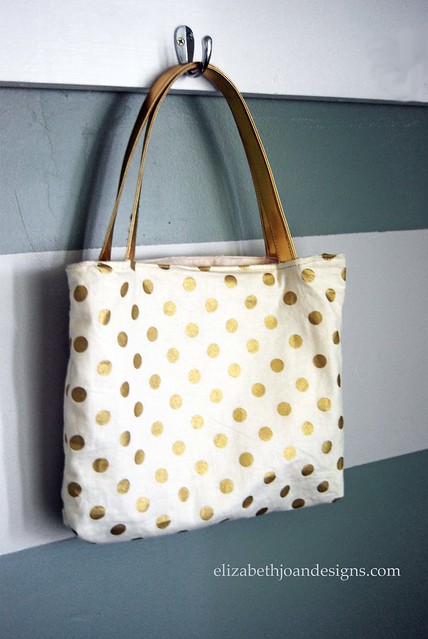
DIY Reversible Tote Bag
I had decided it was time to ditch the diaper bag and prepare for summer with a new tote bag. The traditional size was a bit big for what I was looking for, so I went with making a smaller sized one.
If you would like to make your own, I invite you to follow along with me and I hope to not lose you along the way. I love to sew, but I am not an expert. Just a girl with a sewing machine, trying to make things happen.
Materials:
1 yard of fabric for the outside
1 yard of fabric for the lining and pocket
1 yard of pleather belting for the handles
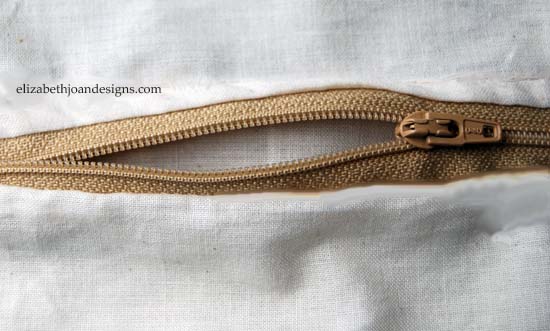
1 7-inch zipper
Sewing machine
Rotary cutter
Cutting mat
Fabric ruler
Straight pins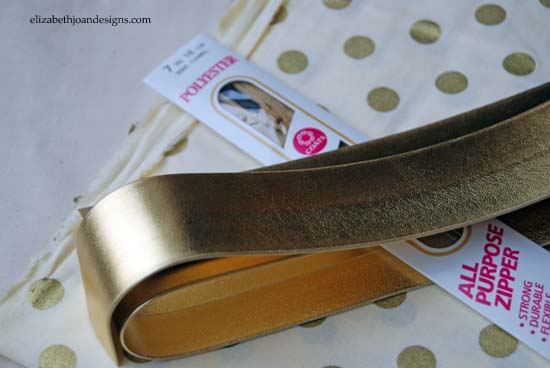
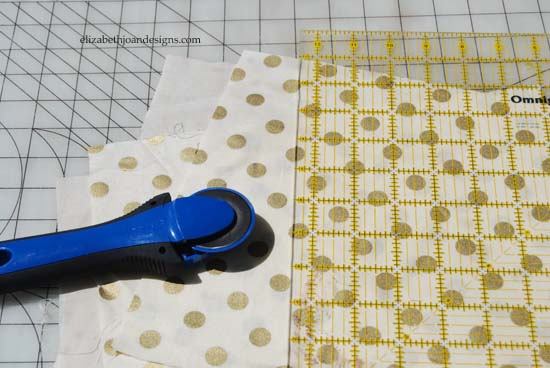
First, I wanted my bag to be more wide that tall, so I used my rotary cutter to make two 12″ x 9″ sections of fabric for the outside, two 12″ x 9″ sections for the liner, and one 9″ x 14″ section of lining fabric for a pocket. (These dimensions can be changed if you are looking for a different size bag.)
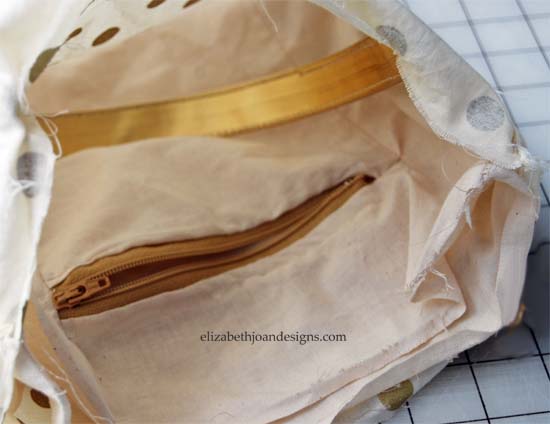
Next, for the inside of the bag, I added a pocket with a zipper. (I referred to this tutorial for installation and used one of the 12″ x 9″ lining pieces along with the 9″ x 14″ pocket piece to do so.)
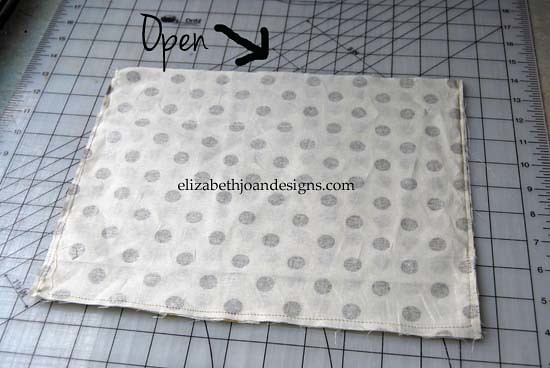
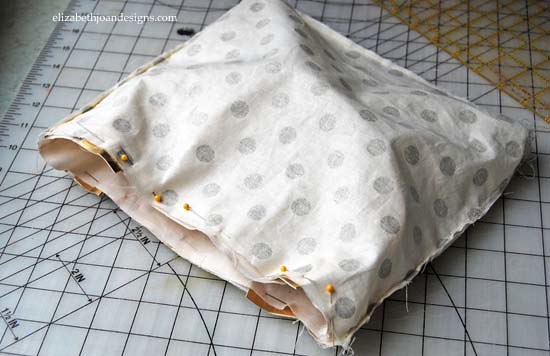
Then, with right sides facing each other, I sewed three edges of the two outer fabric pieces together. I did the same with the pocket section and second liner piece.
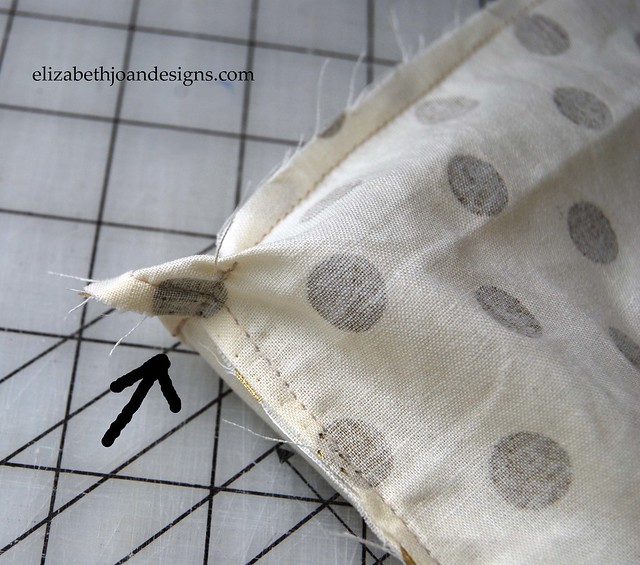
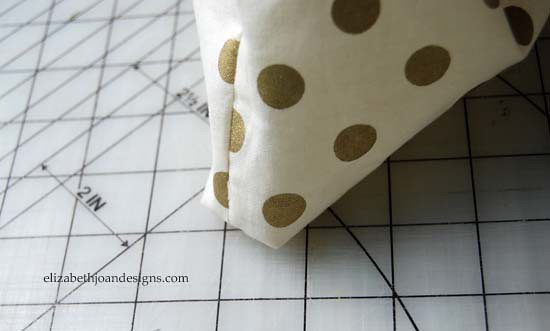
To give the bottom of the bag a squared shape, with the pieces still wrong side out, I made a stitch that went across the seams in the bottom corners of the outside and liner sections. (This is really simple but sounds confusing, so please refer to pictures below.)
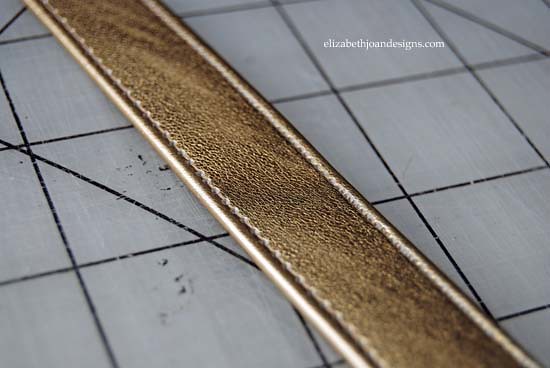
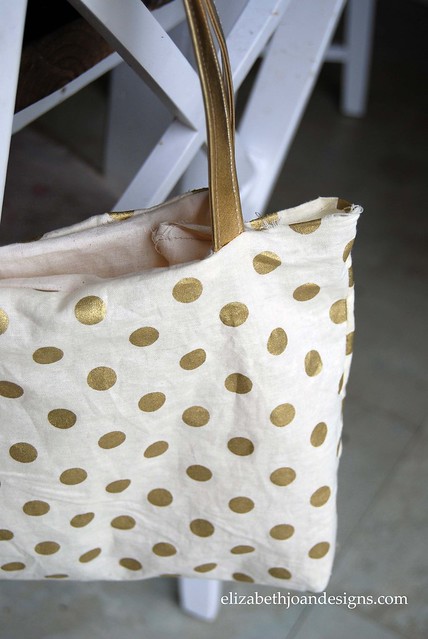
For the handles of the bag, I cut two 16″ long pieces of 1 1/2″ wide gold metallic pleather belting. I folded them in half width wise and sewed using 1/4 seam allowance down both edges. This created two flat thin straps.
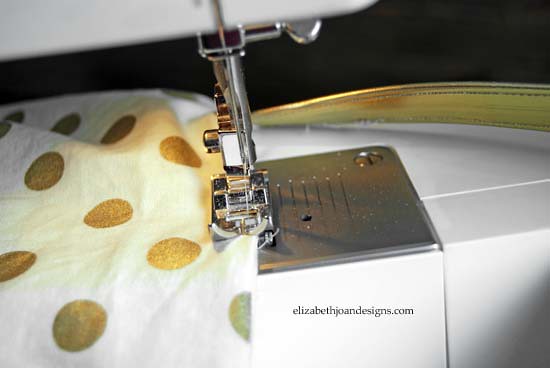
After that, I put the liner section in the outside section with right sides facing each other, making sure to line up the seams. I took one handle and tucked it in between fabric pieces where the right sides touch. Making sure it wasn’t twisted, I pinned the ends of the straps 2″ from where the seams lines meet up. I did the same on the opposite side too and pinned around the whole top edge of the bag.
Then, I sewed all the way around the top leaving a small area open. I turned the bag right side out through the opening. I learned that pulling the handles out first, made this process easier.
To finish off the bag, I closed up the hole by top stitching around the bag 1/4 inch from the top edge. This made it lay flatter and be less bulky.
This bag is pretty awesome! It can also be reversible, which puts the pocket on the outside.

Click on the edge of the next photo to see what’s in the bag and how we are preparing for summer outings with toddlers.

We would love to see what is in your bag! We invite you to take a photo and share it on Instagram with the tag #ejdmybag.
-
Mama’s Got A Brand New Bag
This shop is part of a social shopper marketing insight campaign with Pollinate Media Group™ and U by Kotex but all my opinions are my own. #pmedia #UbKKmart http://my-disclosur.es/OBsstV
Before becoming a mom, I always carried little purses. I loved having just the “necessities” with me. But once I started to hear the pitter patter of little feet, (well, actually before that, but you know what I mean,) my days of tiny clutches were over and the years of lugging around a giant diaper bag were here. It is completely true that the bigger bag you have, the more stuff you will carry.
My little men are now two and four and I have decided it is time to lose the big ol’ diaper bag and move on to something a little cuter. Because of my DIY nature, I decided to make my own bag. Plus, this way, it could be just the size I want it. (Tutorial on the blog tomorrow!)
Once I had my new bag, it was time to stock it with everything this mama needs to be prepared for summer.
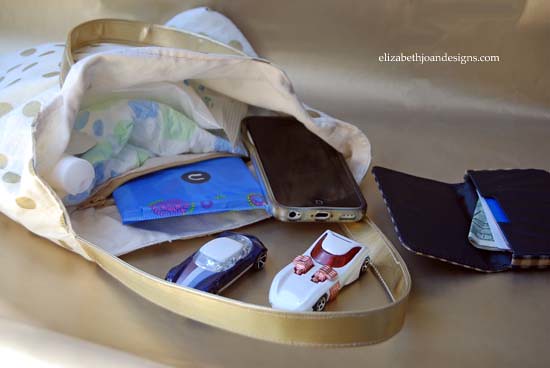
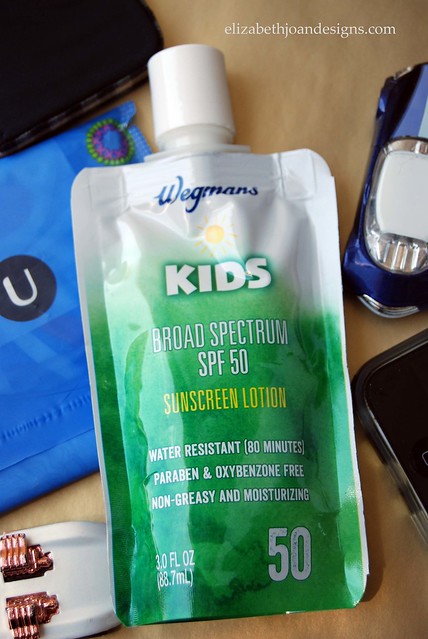
1. Sunscreen- My boys inherited my extremely fair skin. So, sunscreen is a must have for all of us!
2. 1 Diaper – I still have one kid in diapers so, I like to keep one with me at all times in just in case.
3. U by Kotex Cleanwear Pads- Perfect product to keep me covered no matter what and I love the packaging! If my little ones dump out my bag, the pretty colors are not so in your face about what’s inside. It makes the situation less embarrassing, when my two year old son is running away with it.
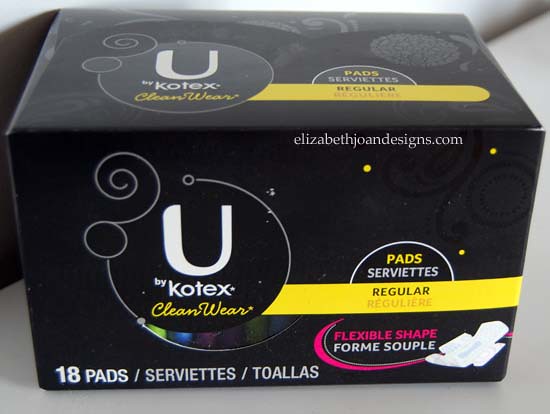
(If you follow me on Instagram, then you know that I can’t pass up a great deal. Right now you can buy 2 U by K products and save $3 instantly at Kmart with their “Shop Your Way Rewards” program. If you are not a member yet, you can sign up here.)4. Mini pack of Wipes – Obviously, wipes would be needed in the case of a messy diaper, but they are also wonderful for messy faces and fingers.
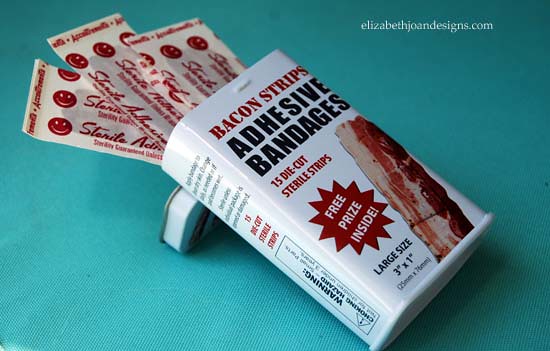
5. Bandages- You know, for the boo boos. I have two boys. What more is there to say?
6. 2 toy cars- These babies are life savers! They make the perfect entertainment for waiting rooms, restaurants or even the car.
What’s in your bag? Take a photo and share it with us on Instgram with the tag #ejdmybag.