-
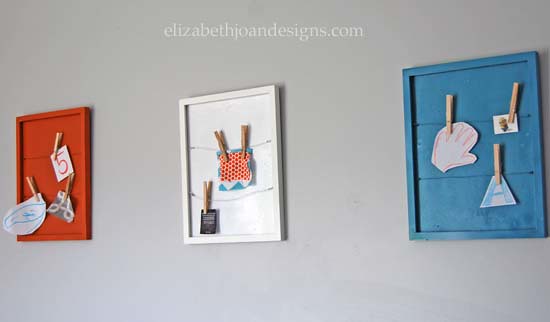
Land of Nod Inspired Memo Boards
Our playroom is still coming along slow and steady. It is the “Little Engine That Could” of the rooms in our house. I constantly have to keep telling myself, “I think I can. I think I can. I think I can.”
Recently, I have been working on completing the final touches. For some of the wall decor, I wanted to make something that brought in color, but still served a purpose. That is when I stumbled upon these cute Memo Boards from Land Of Nod. They are perfect for our needs and an easy DIY project.
They are really easy to make with a picture frame with a backing, eye-hooks and wire. Here is how I made them:
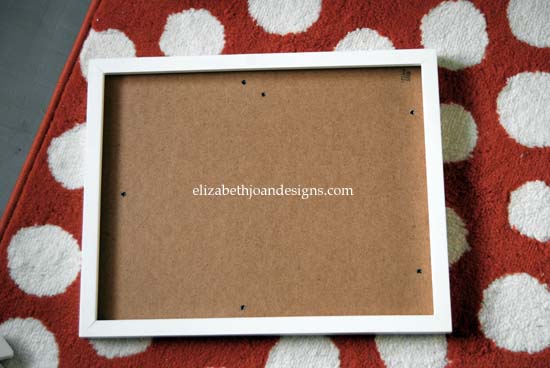
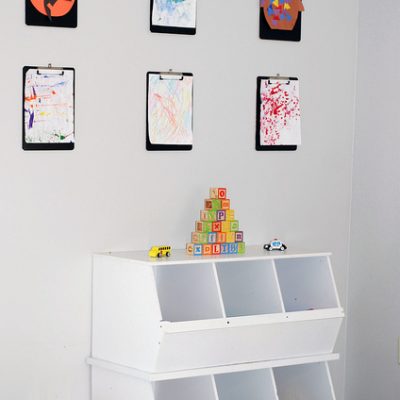
First, I went through our unused picture frames we have in our basement and came across a few of these awesome IKEA Ribba frames to use.
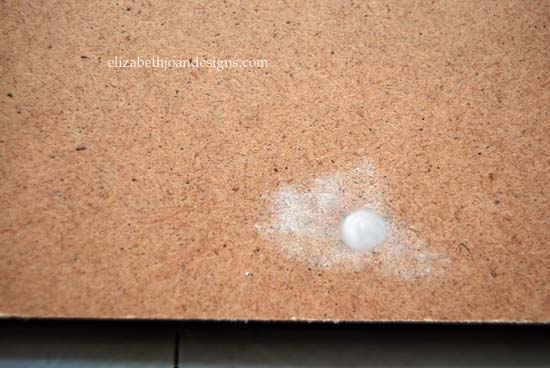
To cover up the tiny holes in the backing, I smeared a bit of nail hole filler across the spots.
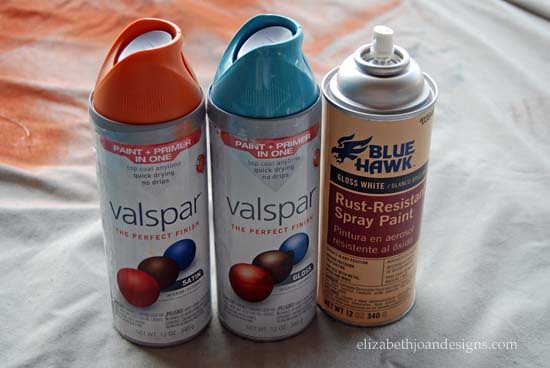
Next, I spray painted all of the components. I wanted three of these memo boards to hang up. One in orange, one in aqua and one in white. (For the white one, I did not paint the frame, as it was already white.)
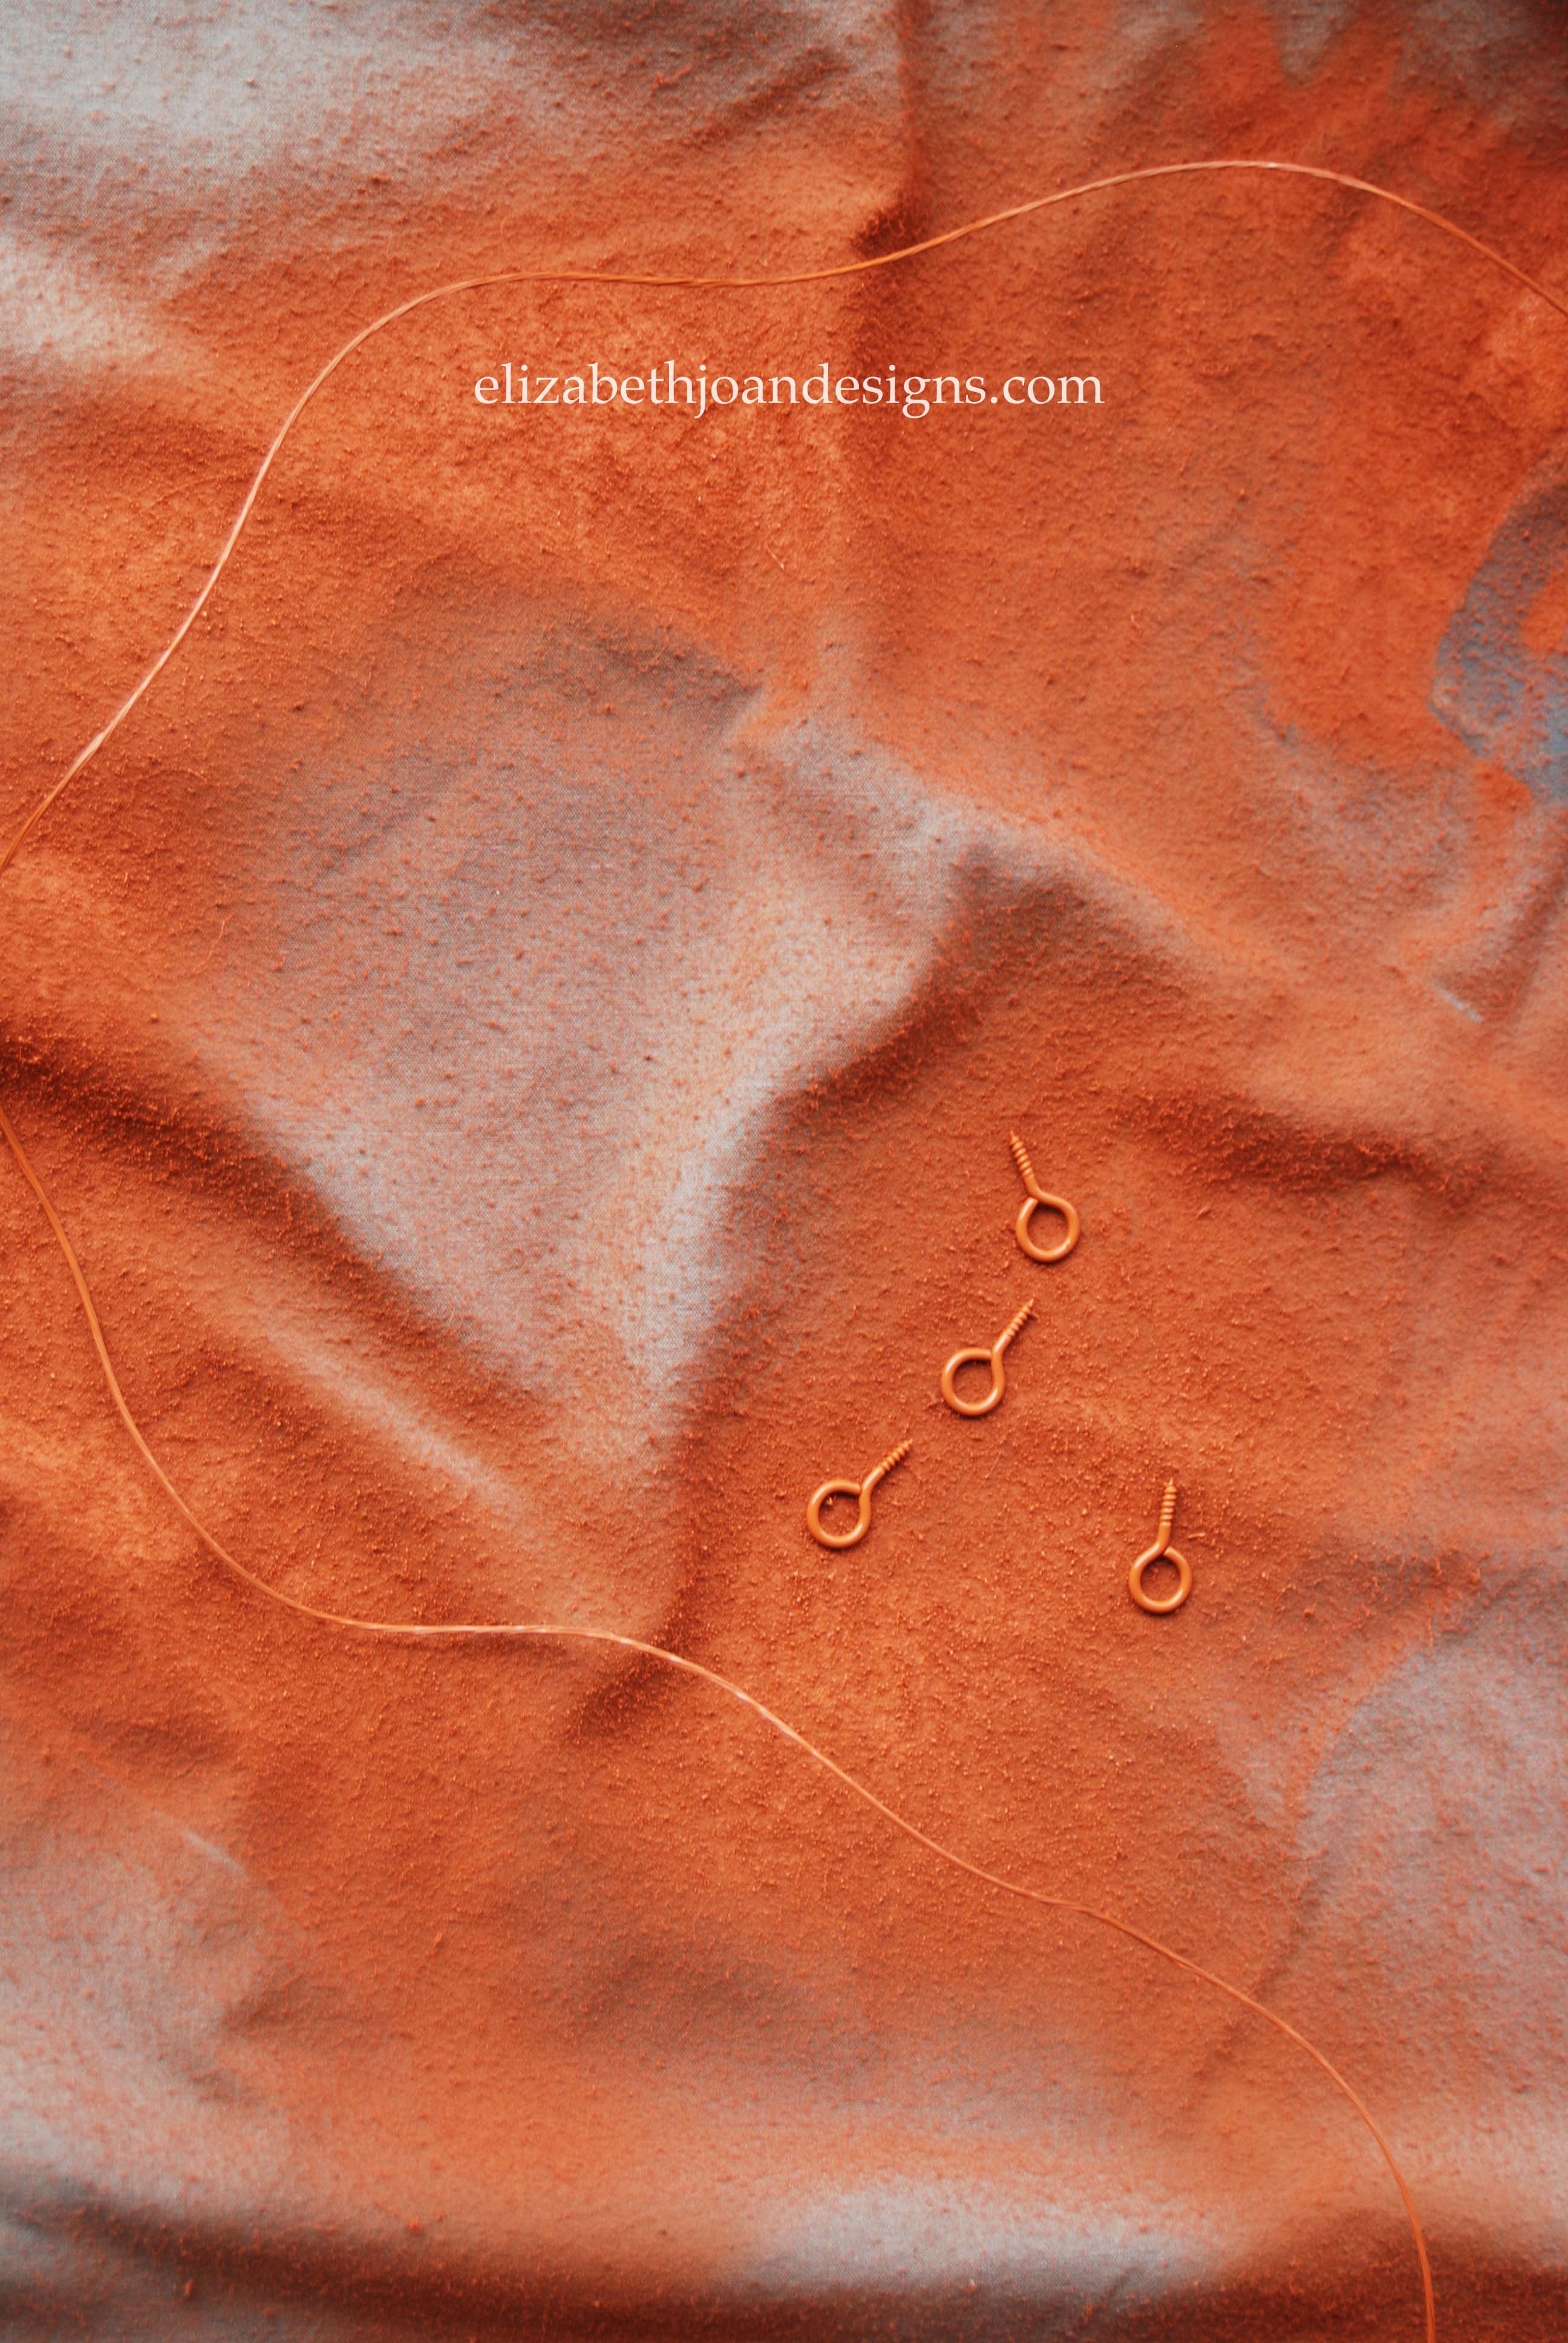
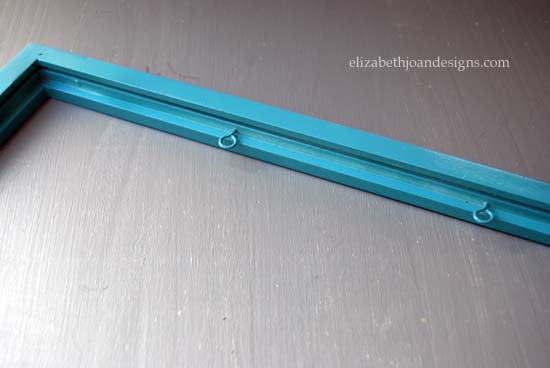
Then, I measured along the edge of the frame. Once I had decided where I wanted the wire to go across, I drilled holes for the eye-hooks and screwed them in.

I continued until all four hooks were inserted into each frame.
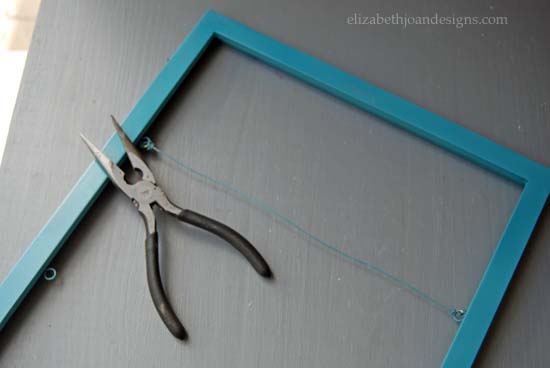
After that, I used pliers to tightly string the wire across the frame, through the eye-hooks and twisted at the ends.
Finally, I placed the backing on the frame and starting hanging artwork using clothes pins. (The large clothes pins are working fine for now, but I think the next time I am out shopping I may consider picking up some of the smaller ones.)

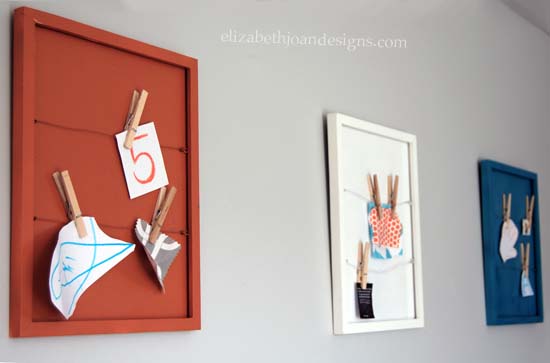
Aren’t they cute? I am in love with them! Perfect for displaying the kids’ art! How do you display your child’s artwork?
_______________________________________________________________________ You may also like:
Clipboard Art Display 
Paint Dipped Box Baskets 
Ikea Trofast Makeover 
Toy Rotation -
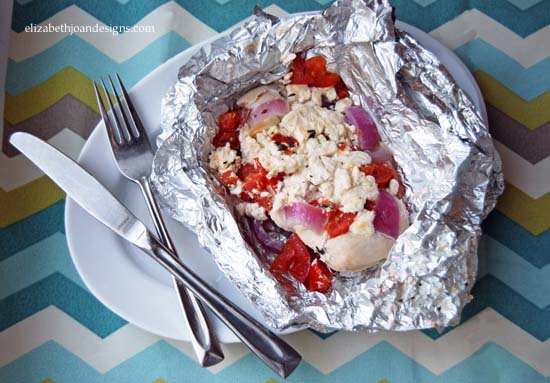
Mediterranean Chicken Foil Packets
Now that grilling season is on it’s way, I wanted to share one our family’s favorite recipes with you: Mediterranean Chicken Foil Packets. They are super easy to whip up and Mmm Mmm good!
Note: This recipe is for one packet. Please multiply the ingredients by the number of people you will be serving.
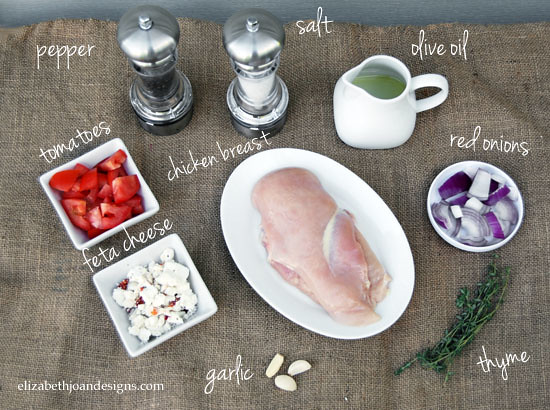
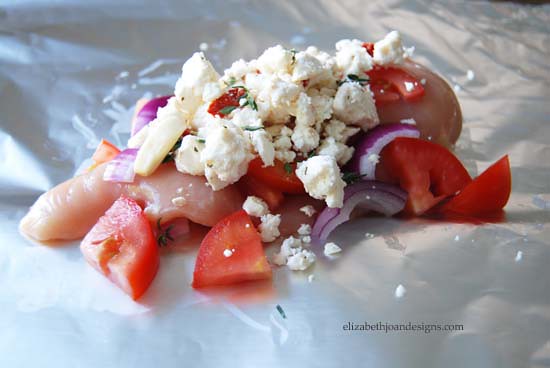
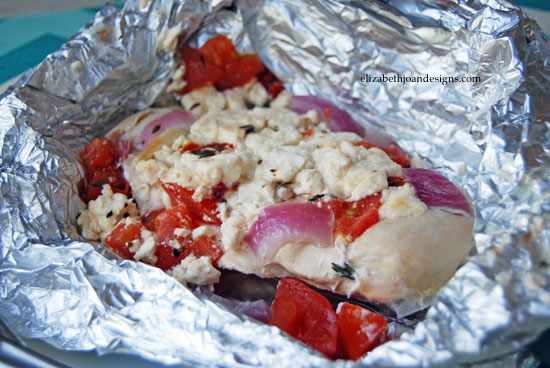
To start, you will need a boneless skinless chicken breast, a Roma tomato, a red onion, feta cheese (I like the tomato-basil favored kind,) extra virgin olive oil, a couple of garlic cloves, thyme, salt, pepper and foil.
Next, place the chicken breast on a cutting board between two pieces of plastic wrap, and use a meat tenderizer to thin it out. (I appologize, as I forgot to take a photo of this process.)
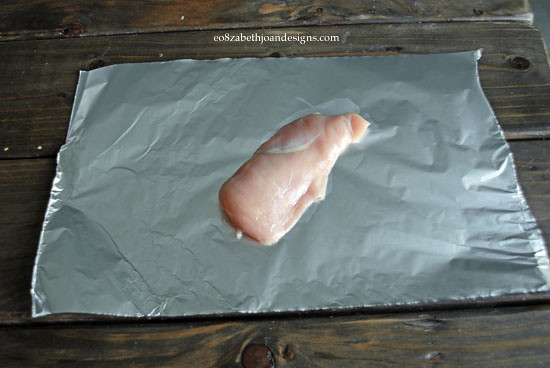
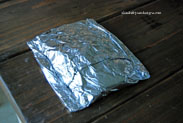
Then, put your breast on the center of a large piece of aluminum foil. And by breast, I am referring to the chicken’s, not your own. Hehe.
After that, layer the onions, tomatoes, and feta on top of the chicken and season with salt, pepper, and thyme leaves.
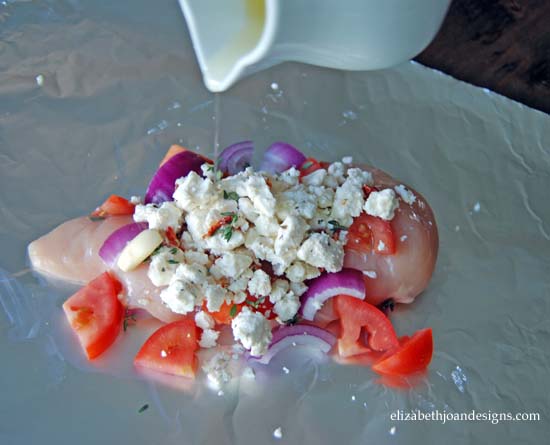
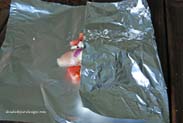
Now that all the yummy goodness is on the foil, it is time to fold it up. There is no real science to this, just fold it up and roll in the sides. I usually will fold a second piece of foil around my first, just to make sure none of the deliciousness seeps out.
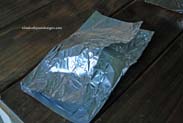
Finally, toss your packet on the grill or in an oven for 25-30 minutes until the meat is cooked through. Carefully unfold the hot packet and enjoy your meal.
Mediterranean Chicken Foil Packets from Elizabeth Joan Designs
Yield
1 packet/servingIngredients
– 1 Boneless Skinless Chicken Breast
– 1 Roma Tomato, chopped
– 1/2 Red Onion, chopped
– 3 Tbs. Crumbled Tomato-Basil flavored Feta Cheese
– 1 Sprig of Thyme
– 2-3 Cloves of Garlic
– 1 Tbs. Extra Virgin Olive Oil
– Salt, to taste
– Pepper, to taste
– Aluminum foilPreparation
Pound out the chicken breast with a meat tenderizer. Place the chicken on the center of a large piece of foil. Layer tomatoes, feta, onions, salt, pepper and thyme leaves on top. Drizzle with olive oil and fold up packet. Bake in a 350 degree preheated oven or grill for 25-30 minutes or until chicken reaches 170 degrees. Carefully unfold packet and serve.___________________________________________________
You may also like:
Yum Yum Shrimp Boil 
Loaded Red Potato Soup 
Buffalo Chicken Meatballs 
Grilled Bread Salad -
Monogrammed Stamped Clay
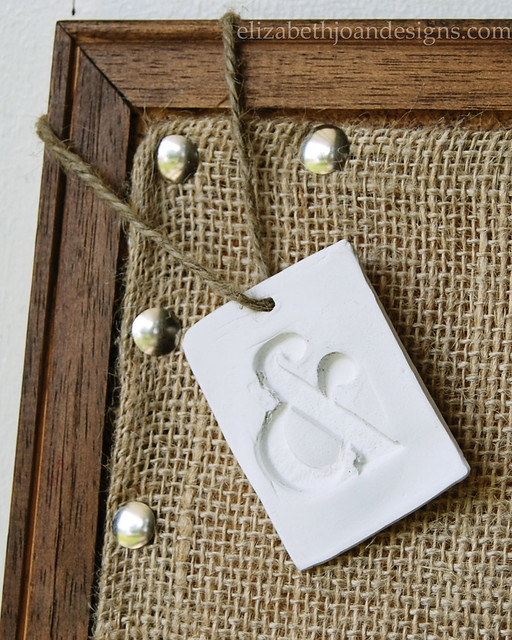
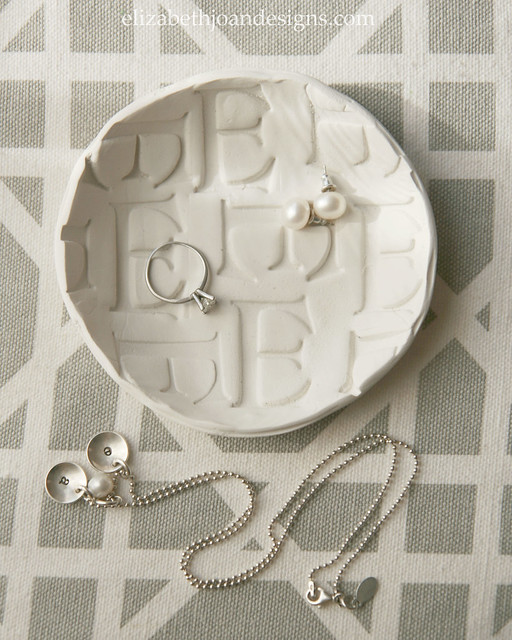
Last week, Emily came to visit. Yay! While we were at our parent’s home, they shared with us that they had found our grandfather’s old letter stamp set. So cool!
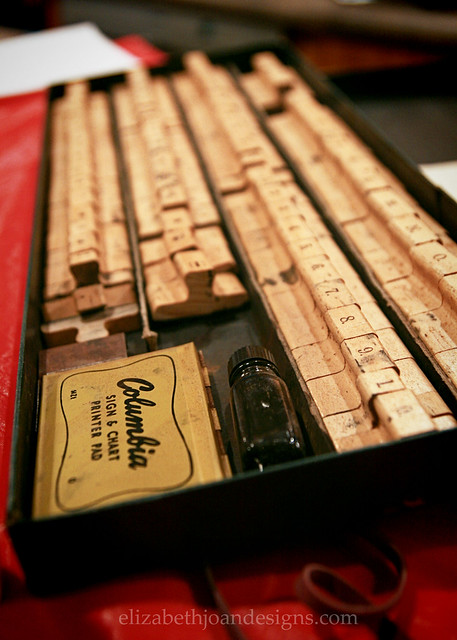
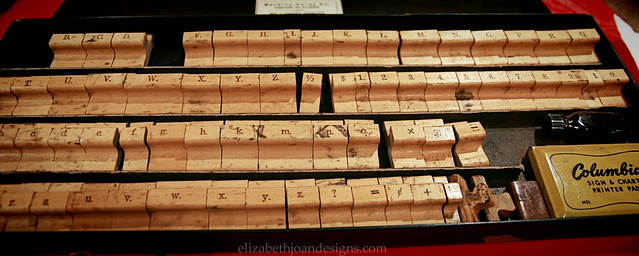
There was this great idea from a Better Homes & Gardens magazine (I believe the original photo from the magazine had a super cute leaf pattern stamped onto clay) and our step mom, Beth, suggested that we use Grandpa’s stamp set to make our own stamped clay project. So we rounded up some oven bake clay and got to work.
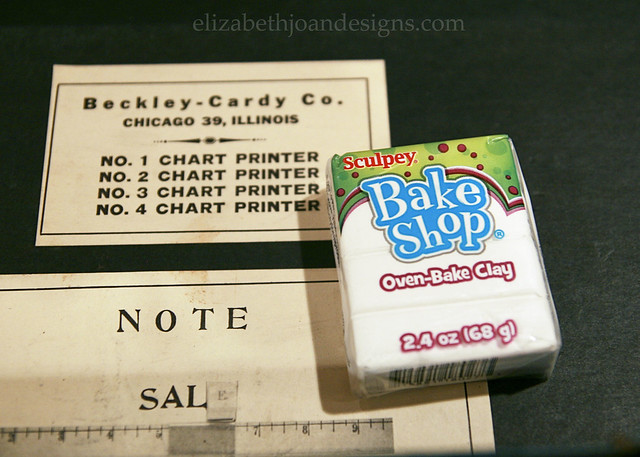
First, we each took a portion of the clay and worked it in our hands to loosen it up. Like we were giving it a deep tissue massage. Ahhhhhh. Next, we used a rolling pin to flatten clay.

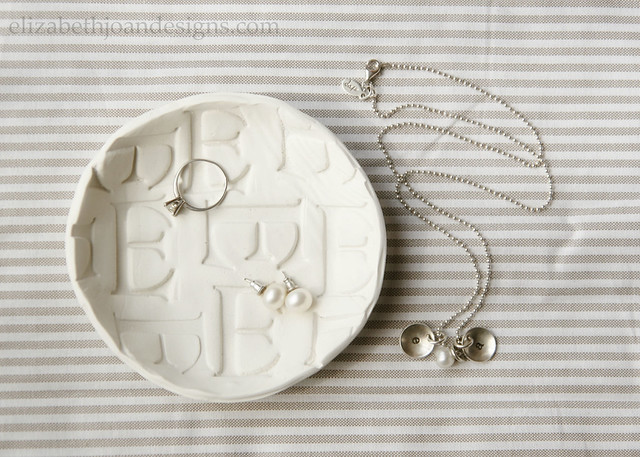
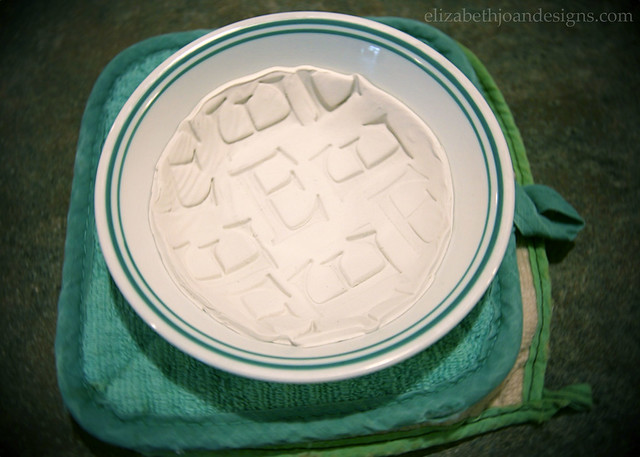
Then, with a little oil on each stamp to keep it from sticking, we pushed the stamp into the clay. Emily chose an ampersand, which she cut around and poked a hole through to make a hanging ornament.

And I did a pattern with the letter E. Natural choice, right? You can see that I put the circle into a small bowl (oiled) to form it into a dish shape.
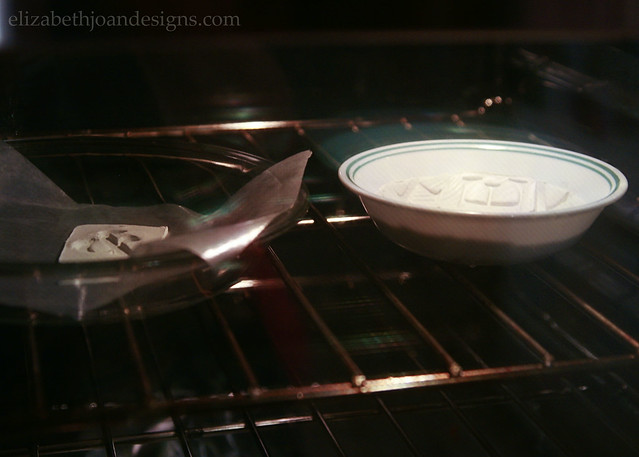
Each piece was baked in the oven at 250 degrees for 15 minutes. Just enough time to take a quick shower or straighten your hair. Or whatever you like to get done in 15 minutes.
After everything is cooled, you can sand the edges if things need smoothed out a bit. We love how both of our projects turned out!
____________________________________________________________ You may also like:

Ruler Drum Shade 
Closet To Office Part 3 
DIY Dining Table 
Wire Mesh Pin Board -
The Summer List
School will be out for the summer soon (we are done tomorrow) and even though the kids may be eager to be home, it will only be a matter of time before that excitement will turn to boredom. Enter the Summer List.


The Summer List
- Visit Zoo
- Go Camping
- BBQ
- Make Stepping Stones
- Smores
- Picnic
- Popsicles
- Visit Parks
- Plant Seeds
- Scavenger Hunt
- Ride Bikes
- Watch Fireworks
- Hiking
- Splash Park
- Family Vacation
- Water Balloons
- Swimming
- Car Wash
- Visit a Farm
- Pick Berries
- Ice Cream
- Identify Bugs
- Movie Night
- Bird Watching
- Star Gazing
- Build Fort
- Lemonade Stand
- Garage Sale
- Fly Kites
- Summer Reading Program
Follow us on Instagram (@erinejd and @emilyejd1) to see our progress or join in the fun by tagging your own summer entertainment photos with #ejdsummerlist.
I also whipped up this simple printable so that you can have a pretty space to write down all of the fun stuff on your Summer List.
This printable is free of charge and for personal use only. Click the image below for the PDF link. Please download the file and open with Adobe Reader to ensure proper print sizing. When printing, make sure that Page Scaling is set to “Fit Printable Area” and Borderless Printing is selected. Enjoy!

______________________________________________________________________ You may also like:

Chalkboard Lettering 
Laundry Basket Planter 
Nautical Theme Invitation 
Patio Makeover