-
Strawberry Avocado Salsa

*Repost*
One of our first posts was this super yummy Strawberry Avocado Salsa recipe. We only have a handful of recipes on the site, but all of them are tried and true favorites. And what better way to add a little love to a summer grill dish than with this mouth-watering savory/sweet salsa.
To start out, you need to grab some fresh strawberries. These were ripe from the patch!

Gather all of the ingredients. (Maybe fresh jalapenos and non wilt-y cilantro would look more appetizing?)

Don’t forget a dash of salt!

Chop up all the fruits and veggies in to small pieces.

Then mix everything together in a bowl and serve.

Seriously, this is one of the easiest and yummiest recipes! It is magically delicious. Like Lucky Charms. Minus the leprechaun.

Strawberry-Avocado Salsa from Cooking Light magazine
Yield
4 servings (serving size: 1/4 cup)Ingredients
• 1 cup finely chopped strawberries
• 1/4 cup finely chopped peeled avocado
• 2 tablespoons finely chopped red onion
• 2 tablespoons chopped fresh cilantro
• 1/2 teaspoon grated lime rind
• 2 tablespoons fresh lime juice
• 2 teaspoons finely chopped seeded jalapeno pepper
• 1/4 teaspoon sugarPreparation
1. Combine all ingredients in a medium bowl; toss gently. Serve immediately with roast chicken, sauteed fish, grilled pork tenderloin or tortilla chips._______________________________________________________________________________ You may also like:

Mediterranean Chicken Packets 
Yum Yum Shrimp Boil 
Grilled Bread Salad 
Buffalo Chicken Meatballs -
Dollar Store Owl Makeover
*Repost*
In celebration of our one year blogiversary, we are re-sharing a few of our first projects with you this week. This was the first blog post I published a year ago.
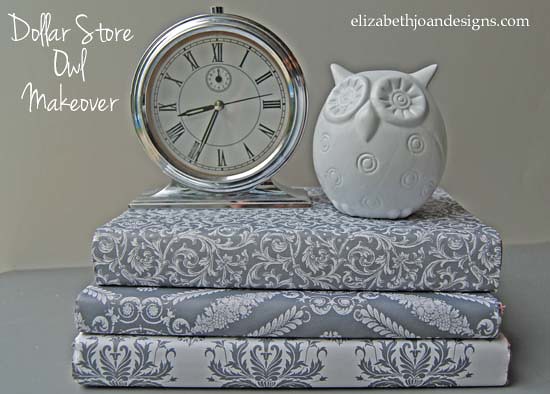
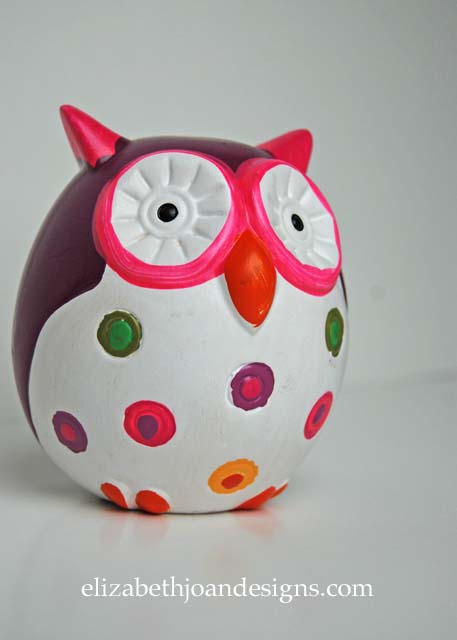
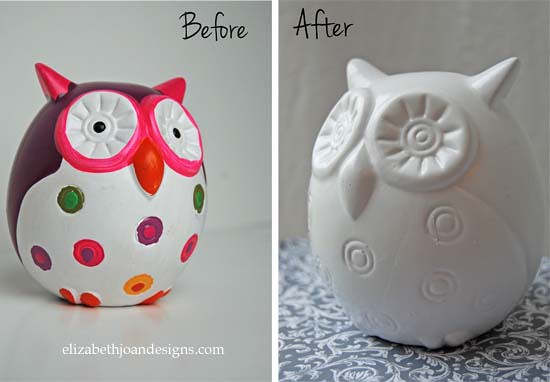
I purchased this little ceramic owl friend at one of my favorite stores, The Dollar Tree. I found him to be quite cute, but a tad brighter than my typical gray, black, and white décor. To help him blend into my neutral colored home, I decided a makeover was just what he needed and turn him owl-white.
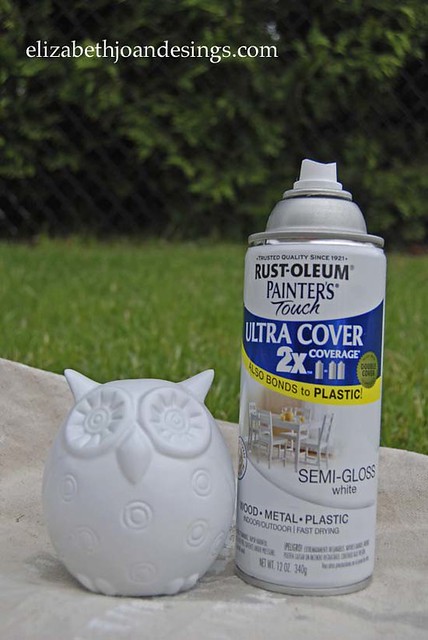
I applied two coats of Rust-oleum Painter’s Touch Ultra cover semi-gloss white spray paint to the owlet and let him dry. Look he’s owl-done!
Isn’t he a hoot? Whoo wouldn’t want one of these? I think he turned out owl-dorable! (Sorry, I could resisted all of the over the top owl puns. Hehe!)
What are your favorite purchases from the dollar store?
___________________________________________________ Giveaway
Don’t forget to enter for a chance to win a $50 Pottery Barn Gift Card here. Good luck!___________________________________________________
You may also like:
Wall Decal Coasters 
Budget Friendly Glass Hurricanes 
Mason Jar Ring Pumpkin 
Faux Metal Letter -
30 DIY Projects Under $10

Monogrammed Stamped Clay 
Placemat Pillow 
DIY Note Cards 
Spring Moss Wreath 
Chalkboard Clothes Pins 
Anniversary Art 
Closet To Office Part 2 
Heart Candle Holder 
Heart Stamps 
Laundry Basket Planter 
Pocket Hand Warmers 
Ten Minute Infinity Scarf 
Book Page Wreath 
Mercury Glass Ball Jars 
Wire Mesh Pin Board 
Mason Jar Paint Storage 
Toilet Paper Roll Plant Starters 
Pinecone Fire Starters 
Dollar Store Scarf Wreath 
Knit Vases 
Paint Dipped Box Baskets 
Numbered Mailbox 
Chalkboard Tins
Faux Metal Letter
Mason Jar Ring Pumpkin 
Fringed Streamers 
Freezer Paper Stenciled Treat Bag 
Barn Wood Sign
Budget Friendly Glass Hurricanes 
DIY Roman Shade -
Adventures in Upholstery
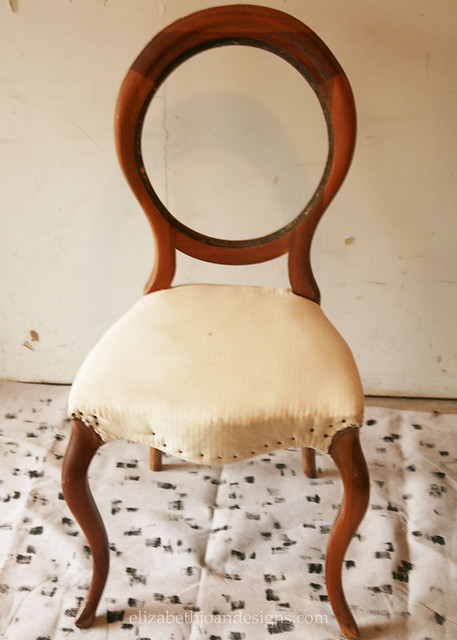
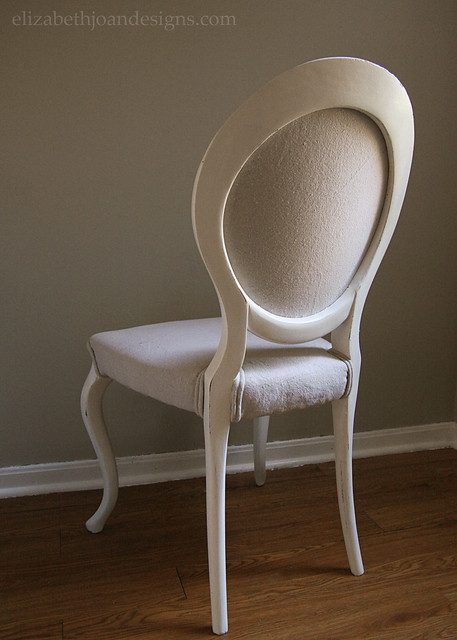
When I posted about my vanity/nightstand/desk, we were considering a chair to go with it from Ikea. This is not that chair.
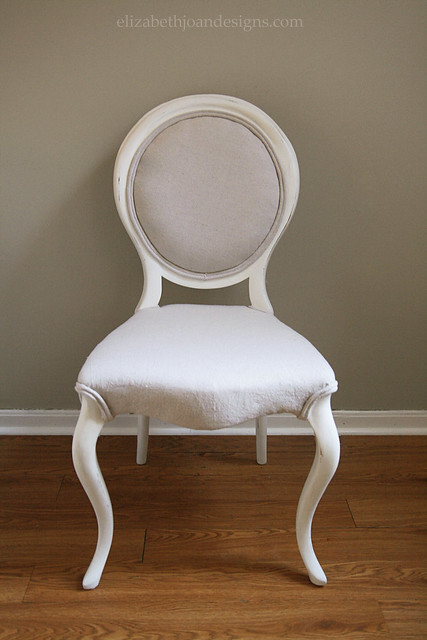
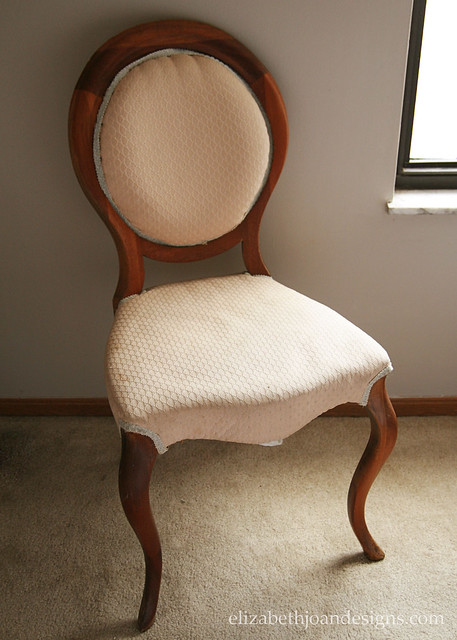
Back in April, while visiting Emily, I mentioned that I was still needing a chair for our “office.” Lucky for me, Emily keeps a hoard of curbside treasures in her basement and among them was a beautiful old chair that needed a little love. And since she didn’t have room on her plate to take on another project at the time, she graciously helped me squish this chair, along with about 700 other items from her house into my car. 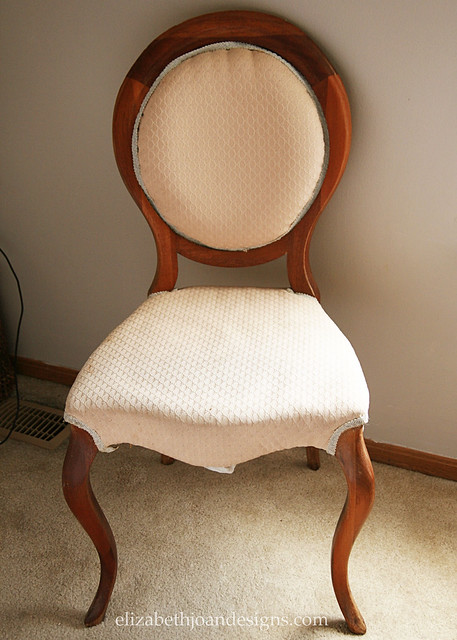
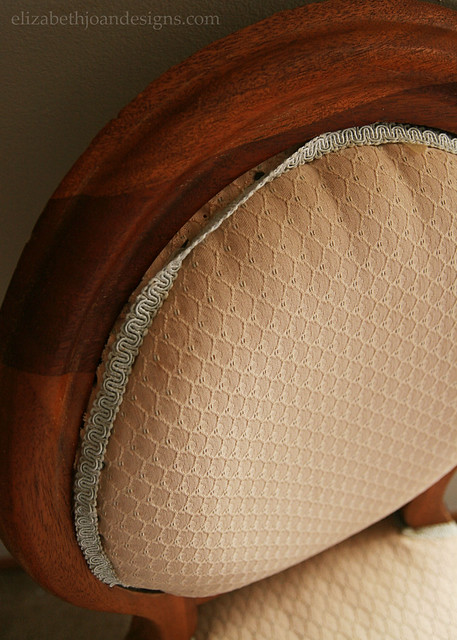
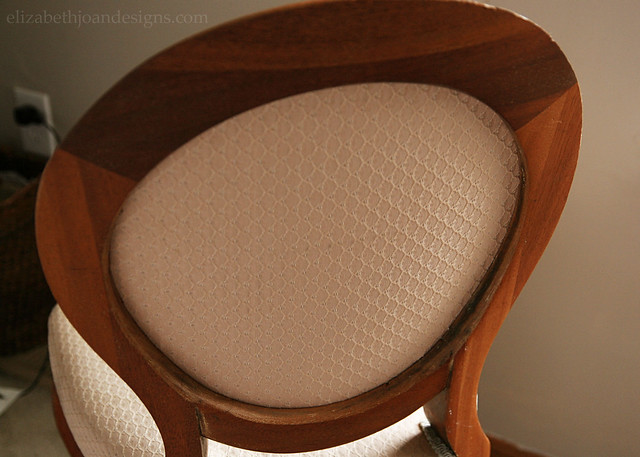
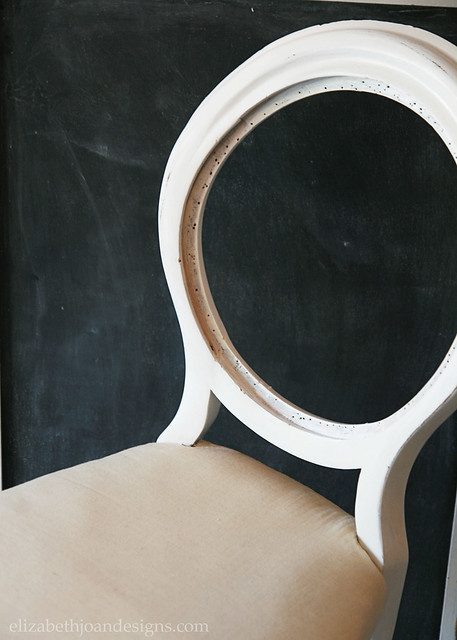
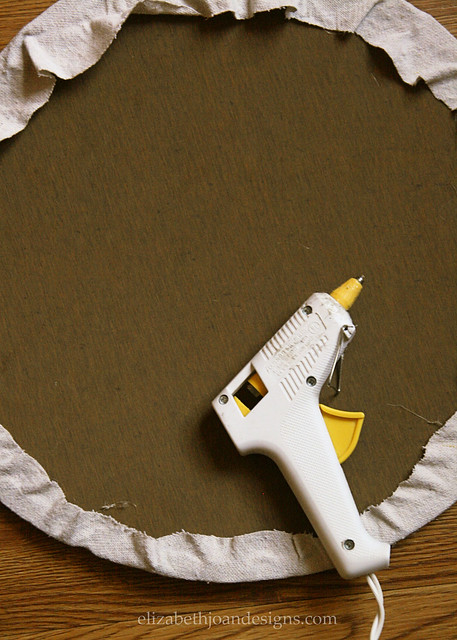
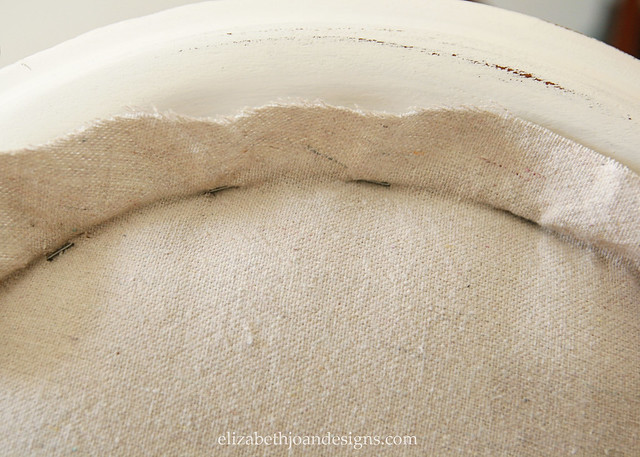
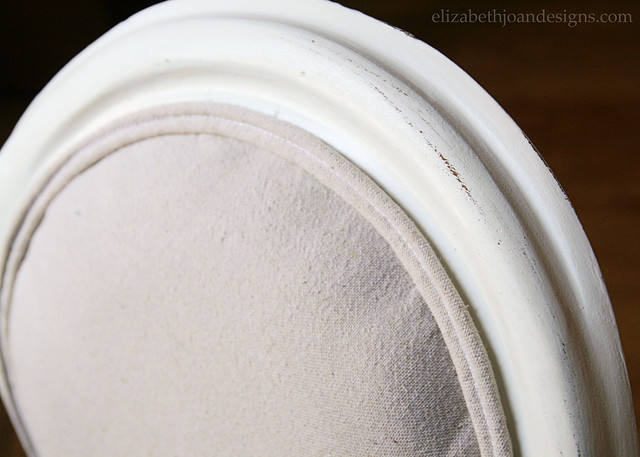
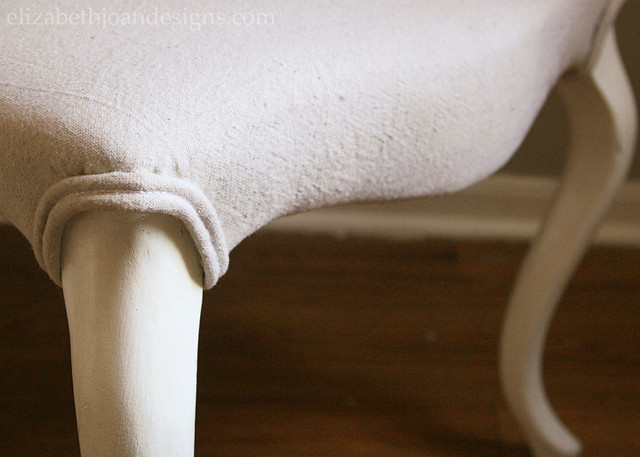
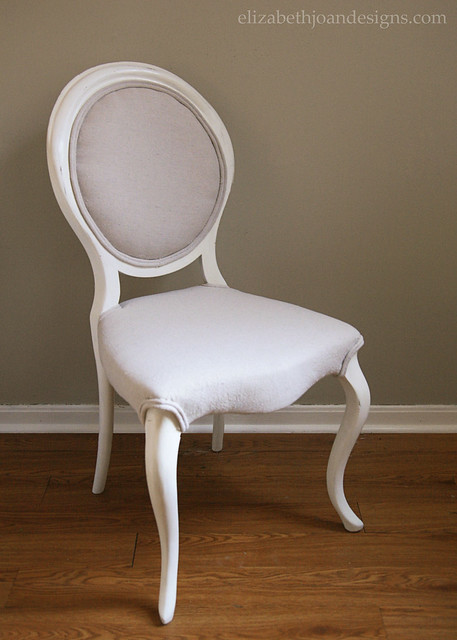
After a little looking around, I found this inspiration piece from Restoration Hardware. So, I grabbed my supplies and got started. First, I rippedremoved the existing fabric, back cushion, etc., and set it aside. Unlike the fabric, the seat was in pretty good condition, as well as foam back piece. The hardest part was pulling out all 2 million of the rusty, tetanus laced upholstery tacks that attempted to hold the whole shebang together.Next, the frame got a few coats of white paint and primer, plus a little sanding to give it an aged look.
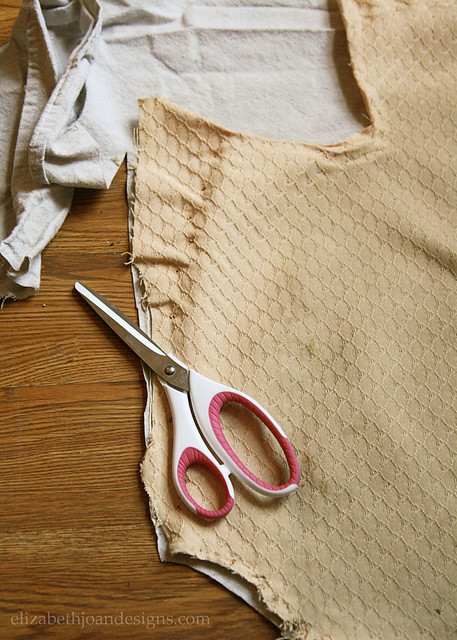
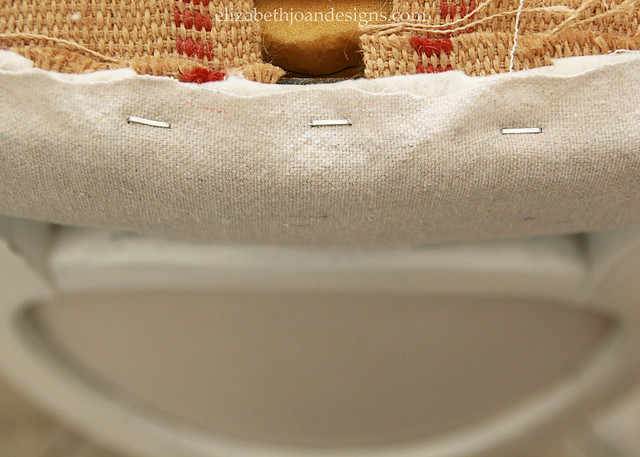
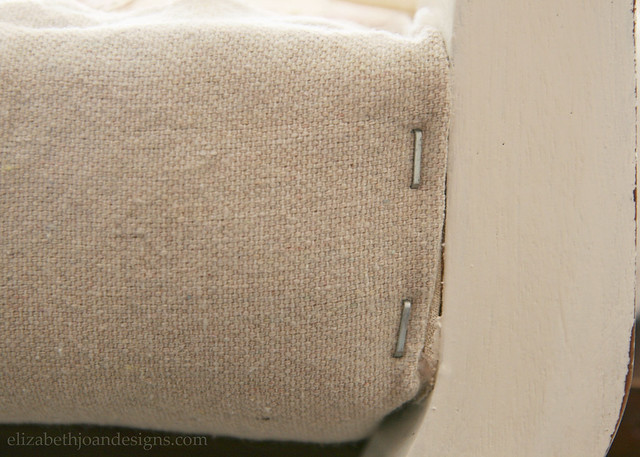
I made sure to trim any excess fabric beyond the staples.
_______________________________________________________________________ You may also like:
Scoop Chair Redo 
Vanity Makeover 
Lazy Upholstering 
Painting Upholstery