-
Pet Food Canister
While I was browsing the web the other night, I came across these awesome {pet food canisters} from Ballard Designs. They are super stylish and much cooler than a dog food bag to store Fido’s food in. I especially love that they have a lid to keep everything dry and fresh. I do not love the price tag. Ouch! $55-$59? For that price it would make more sense for us to leave the food in the bag or make our own version. Of course, I chose the latter of the two.

My first thought was to go see if I could snag one of those white food grade buckets from the grocery store, but unfortunately, I found out when I got there they no longer give/sell them to customers. So, I stopped at the thrift store on the way home and, luckily, found this popcorn tin for a buck fifty. Woot! I knew that it would work perfectly to make my Ballard Designs inspired pet food canister.


Next, after a little deliberation, I nixed the chevron pattern of my inspiration, even though I love it, and opted for stripes because they are so much easier to work with. Using painter’s tape, I taped off sections down the sides of the tin.


-
Personalized Utensil Crock
Recently, while sitting at my kitchen table, staring at everything in sight and waiting for inspiration to hit, I saw my boring black utensil crock and asked myself “Self, how can I make that more interesting?” Then, answering myself, I said “I should write something on it. Oh, I know. My mom’s delicious chocolate chip cookie recipe.” After realizing I need more human interaction, I got to work.
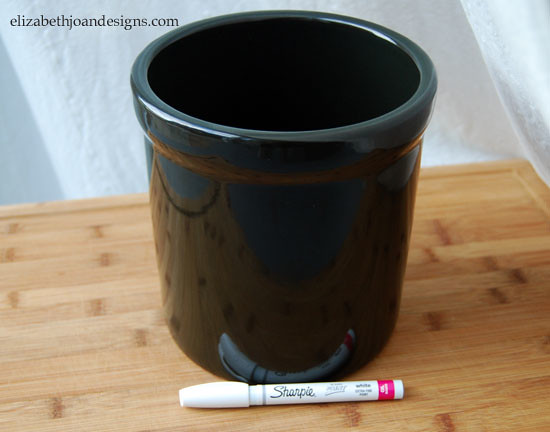
I dragged my entire family with me to Jo Ann Fabrics to pick up one of these handy dandy oil based paint pens. Let me tell you, my husband Adam, is a trooper. My 3 year old was directing us though the store with his pretend Buzz Lightyear laser beam, while our youngest was kicking and screaming and absolutely refusing to ride in the shopping cart. Adam didn’t complain once.

Once we were home, and the kids were tucked in bed, I starting writing. I completely free handed the text. To make the letters appear more bold, I went over them twice and let the paint dry in between. There are a lot of mixed reviews about paint pens and I was not sure what type of experience I was in for. This pen is AWESOME! It wrote so smoothly and there was absolutely no mess to clean up.
This project took no time at all, except for the shopping portion, but for that, I only have myself to blame. I love the handwritten look and every time I am in the kitchen, it brings a smile to my face to see my mom’s recipe.

What does your utensil holder look like?

-
Ruler Drum Shade
If you follow us on {Facebook}, you may recall earlier this week that I posted a teaser photo of a project I was working on using 43 rulers. And for the 2 people who actually care, I’m here to share with you the fate of those foot-long wooden measuring sticks. Behold, the ruler drum shade, aka, the thing that hides a boring, ugly light fixture.


Do you know what I can’t stand? Boring, ugly light fixtures. Yup. Especially, this particular one (pictured below) in our dining room. Why we would need to illuminate other areas outside of the dining room with this trio of directional spot lights is beyond me. I want to see my food and not the corner of the floor!

Unfortunately, we can’t change out the fixtures because we are currently renting. However, since they are directional, we can point them down over the dining table and cover them up with a removable shade.

I actually only used 37 of the 43 rulers, but it was good to have a few extras around in case of mess ups. I also used a 14” embroidery hoop, gray acrylic paint, foam craft brushes, wood glue, binder clips, string and some little white ceiling hooks. Only about half of these items actually appear in my supplies photo. Oops.

To start out, I mixed a 1 ½ to 2 ratio of water and paint in a cup. I wanted to give the rulers a gray washed look and still be able to see the numbers and marks. Using a foam craft brush, I applied a thin coat over the front and back of each ruler. I also separated and painted both pieces of the embroidery hoop with my water and paint mixture.


Once everything was dry, I grabbed some wood glue and attached my rulers around the outside of the embroidery hoops; one hoop on the bottom and the other on the top. The spacing was completely guesstimated and the last ruler I added had to go on the inside of the bottom hoop to avoid the screw on the outside. My binder clips held everything in place while the glue dried.

Next, I screwed 3 hooks into the ceiling around the light fixture, tied 3 equal pieces of string to the top of the shade, and looped the strings around the hooks, making sure the shade stayed even and level. (This involved a lot of climbing up and down to check things out.)

Then, I admired my new dining room shade. Here’s an interesting view from below. Nevermind the mismatched bulbs.

From this angle, it kind of looks like the boogeyman when the lights are on. See the two eyes and wide smile? Eat your veggies, children, or the monster in the ceiling will get you.

We love not having to look up and see the weird spot lights all of the time, and I’m so glad that I gray washed everything because it gave it a cool vintage look. What do you think?

Oh, and just in case you are wondering, here is the cost breakdown of the shade itself.
- 37 Rulers ($.25 each from Walmart): $9.25
- 14” Embroidery hoop (from garage sale): $0.25
- Gray acrylic paint (from Walmart): $0.97
- Foam craft brushes, wood glue, binder clips, string and ceiling hooks (all already owned): Free
Total cost: $10.47 plus tax
-
Range Hood Makeover
This month marks the four year anniversary that we have lived in this house. When we moved in, it was like traveling back to 1984, the year the house was built. We are slowly making updates to bring it to present time.
Our kitchen has changed the most. The cabinets were originally stained oak, in need of updating. First, I decided to paint them green. I didn’t hate the green, but it did look like Dr. Seuss lived here. A year later, my grey obsession took over and I repainted them. We had the grey for two years and were ready to brighten things up, so once again I got out my rollers and brushes and this time painted them white.
With white cabinets and black appliances, my 1980’s almond colored range hood suck out like a sore thumb. After doing a little research, we decided spray painting it was the best option for us.

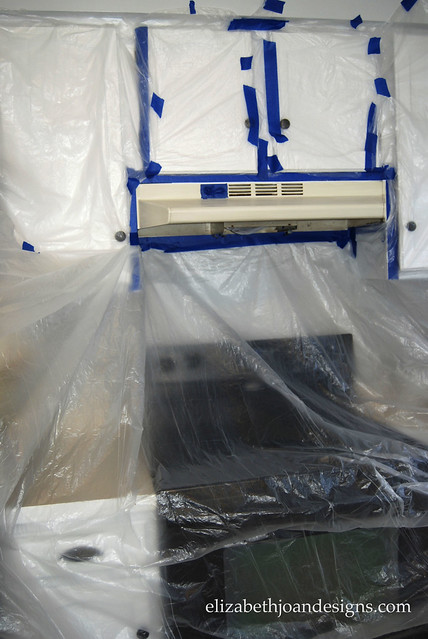
This post contains affiliate links for you convenience. I was very hesitant to spray paint in the house, as I had never done anything like this before. So I tried to remove it. After about 2 minutes, I could tell that was not going to happen. I took a little break, gave my self a pep talk, and tried to erase the thought of black over spray all over my bright white cabinets out of my head.
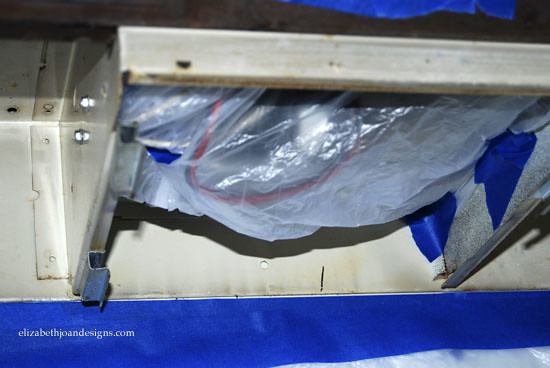
Then, it was back to work as I cleaned, lightly sanded, and wiped off all dust on the vent. I covered literally everything near the hood with a plastic drop cloth, secured by painters tape.

After spray painting a couple coats, I removed the drop cloth to reveal my pretty hood.
Ain’t it purdy? Now if only I could figure out what to hang on the wall between the hood and stove. Any ideas?