-
Build It Yourself, Furniture Makeovers, Home Decor, Neat & Tidy, Organization & Storage, The Country House
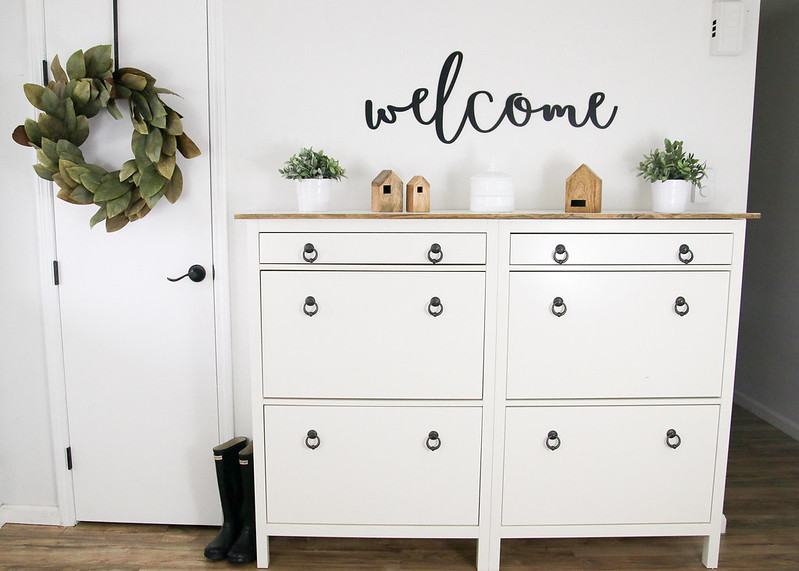
Create Extra Storage In The Entryway
Since we’ve moved to The Country House, something that we’ve struggled with is storage space. Especially, after we turned our master closet into a sweet little nursery. Living in only 1300 square feet with 5 people makes finding or adding storage solutions many times difficult. However, we’ve been able to create an entryway with extra storage by whipping up a cool Ikea shoe storage hack!
Disclosure: This post may contain affiliate links, which means we may receive a commission if you click the link and purchase. Clicking a link won’t cost you any extra money and helps keep this site running! Please check out our disclosure policy for more details.
Once we knew that our master closet was going to be transformed, we had to come up with a game plan for all of the stuff already inside.
We sorted and donated the things we didn’t love. Our clothing took up residence in a small hallway closet. But that left us with no place for our shoes, hats, belts, scarves, etc. We did try to hang a shoe rack over the inside of the closet door. However, the shoes hit the hanging clothes and fell off the rack constantly. It was just a huge mess!
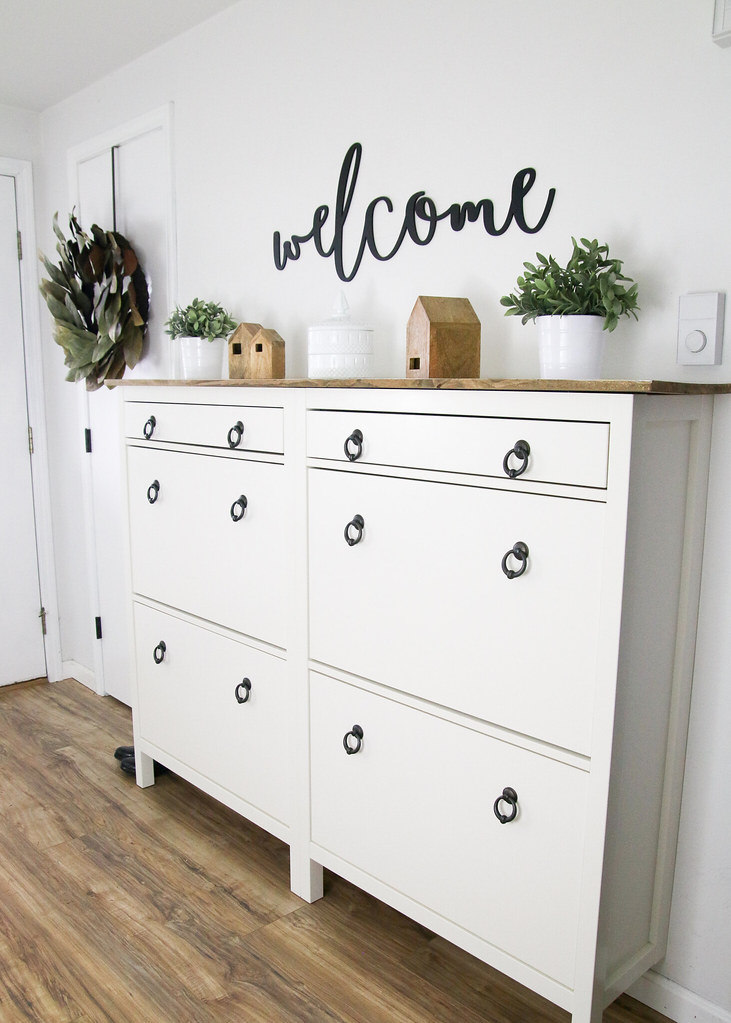
After some brainstorming and online storage system browsing, we decided to buy two Ikea shoe storage cabinets and add them to our entry area. The original set up of each cabinet left several inches of space between the center of the cabinets. They ended up extending beyond the hallway wall just a bit, which looked pretty wonky.

So, we decided to remove the original tops, slide the cabinets together, and attach a new stained/painted top to make them look more like one unit. We also replaced the old knobs for some ring pulls that have a more unique look.

Welcome Sign | Nesting Houses | Ring Pull
Each cabinet is supposed to hold a minimum of 12 pairs of shoes, but depending on the size and style, you can definitely fit more. I’m a size 7.5-8 and have over 20 pairs inside of one cabinet!
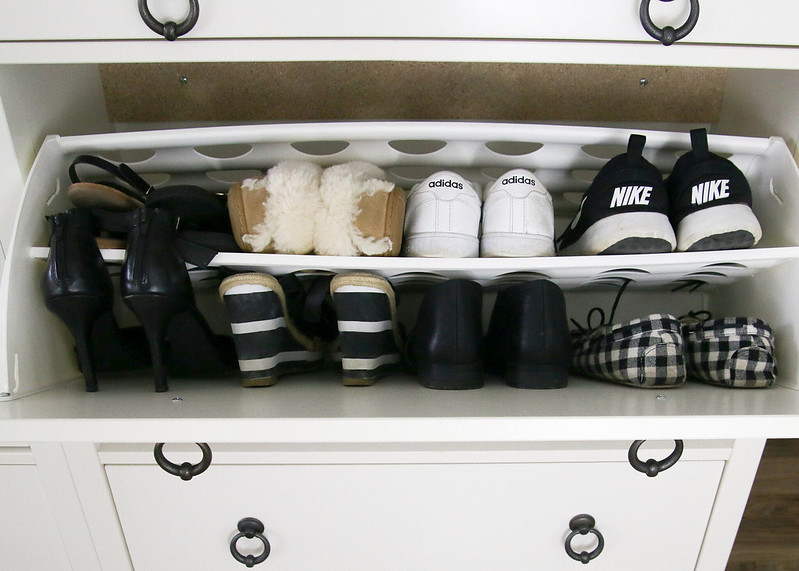
I love the extra drawers at the top of the cabinets too! Perfect for cold weather accessories.

You truly realize how much stuff you have when you don’t have a place to put it. Adding this shoe cabinet storage to our entryway has helped us with a major storage struggle. The depth of the cabinets is perfect for our small space and doesn’t impose too much on the room. We are so happy with how this project/hack turned out!
-
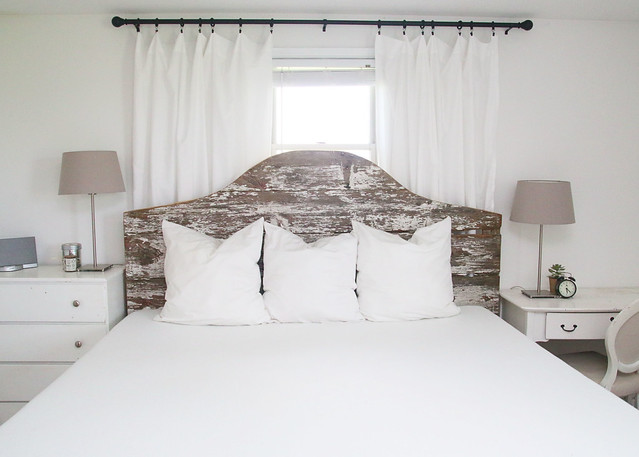
$100 Room Challenge Week 3 – DIY Barn Wood Headboard
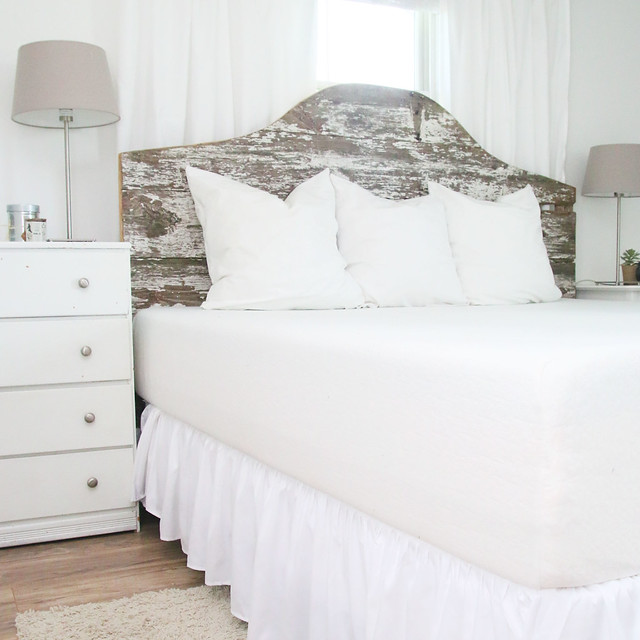
About 1.5 months ago, we finally purchased the king sized bed that we had been wanting. Woohoo! Do you know how awesome it is to have so much space for sleeping? If you don’t, I will tell you that it is absolutely amazing!!! Anyway, since we already have the bed and we are working on our bedroom for the $100 Room Challenge, we decided to make a DIY Barn Wood Headboard for week 3.
See the before pics and our plan for the master bedroom.
This post contains affiliate links. Click here to read my full disclosure.
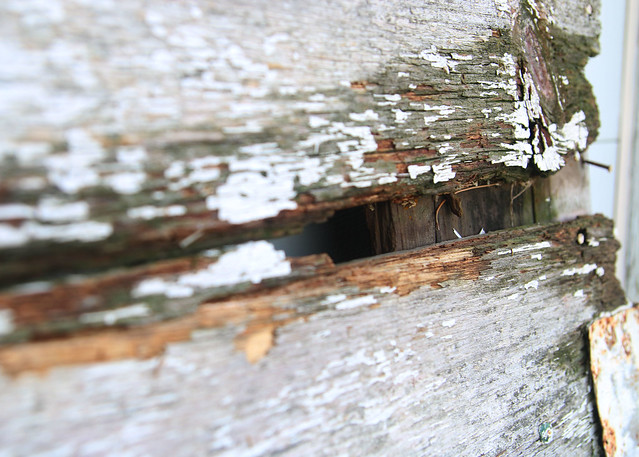
This piece of barn wood is actually a door from an old building that was at my grandparents’ house. After my grandparents passed away, my parents moved in and were nice enough to give it to us when they redid the building. It has just been sitting around waiting for the right time/use to come along.
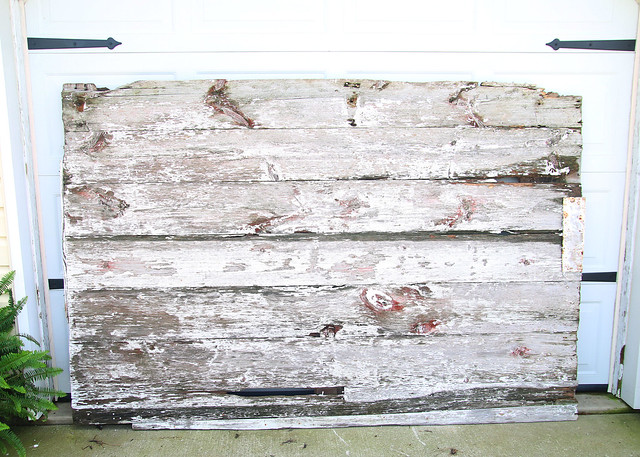
See how distressed it is, with the chippy paint and cracked wood? But that just gives it that much more character!
This project was a two person job. While my hubby, Chris, cleaned up the barn wood, I free handed a template for the top of the headboard. Then, I just taped it on and traced it with a sharpie. After that, Chris cut it out using a jigsaw and sanded while I made lunch. He also added a few coats of Polycrylic to seal everything in, just in case the existing paint had lead in it.

Finally, we lugged it inside and put it in place. Doesn’t it look good?

We noticed that after adding the Polycrylic, the wood actually darkened. I’m not sure if I will eventually add some white wash to the headboard to lighten it just a bit, but for now, we are sticking with it as is.
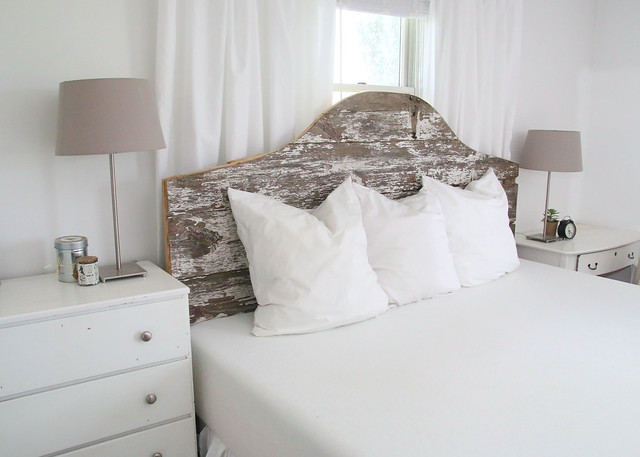
With just this one project, our master bedroom looks so much better! Not only are we sleeping better because of our new mattress and foundation, but this headboard really adds some farmhouse feels to the space. And that is just the look we are going for!
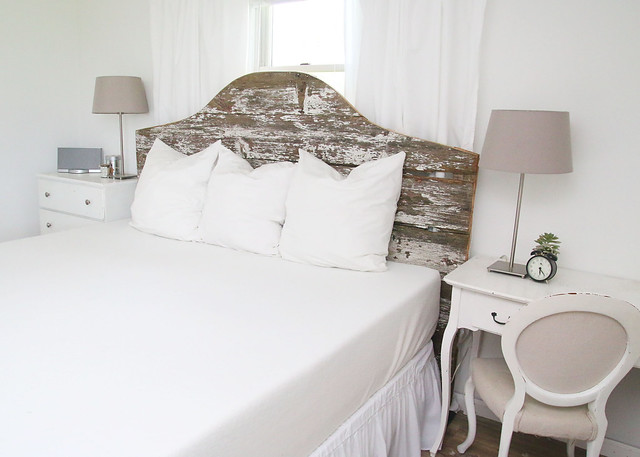
Oh, and I almost forgot! I finally put on the dust ruffle we purchased when we got the bed. #slacker
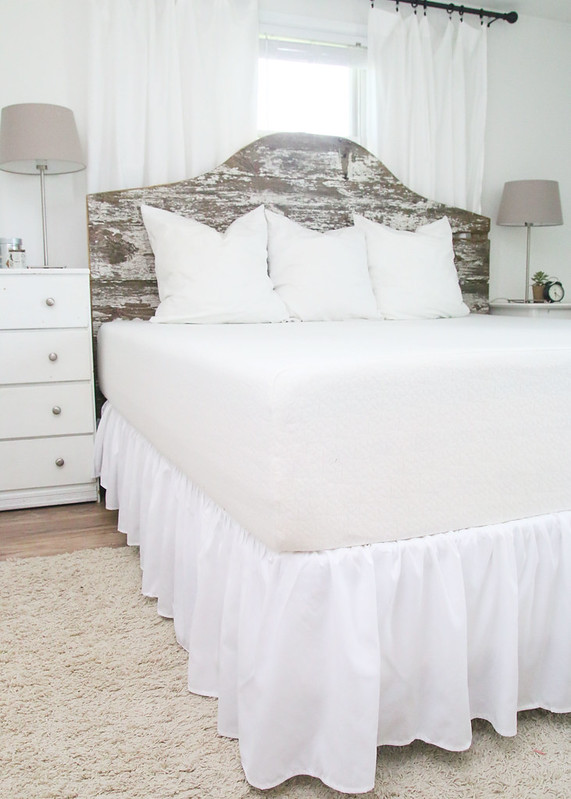
Don’t you think our DIY barn wood headboard turned out great?
This headboard adds the perfect amount of romance to the room with the soft curve but also keeps things from getting too girly with the rustic, chippy paint.
Did you miss a week of the $100 Room Challenge? Catch up now!
Week 1| Week 2 | Week 3 | Week 4 |See how the other participants are progressing by clicking the links below!
-
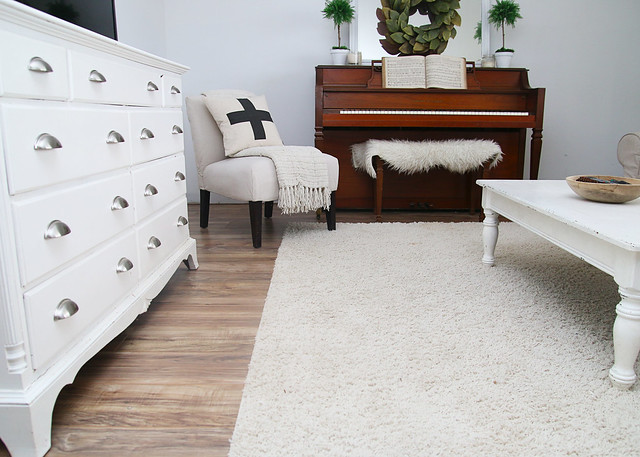
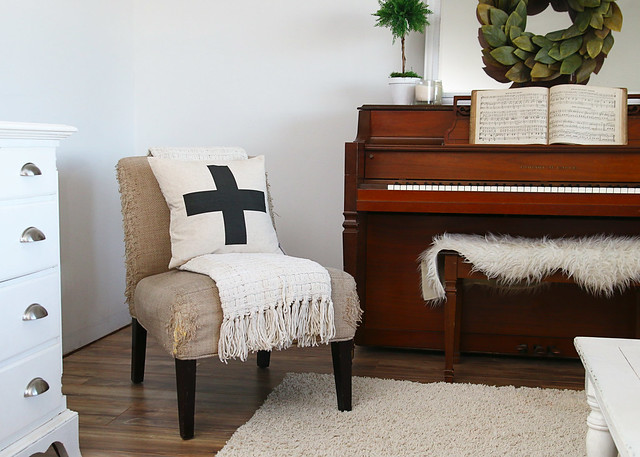
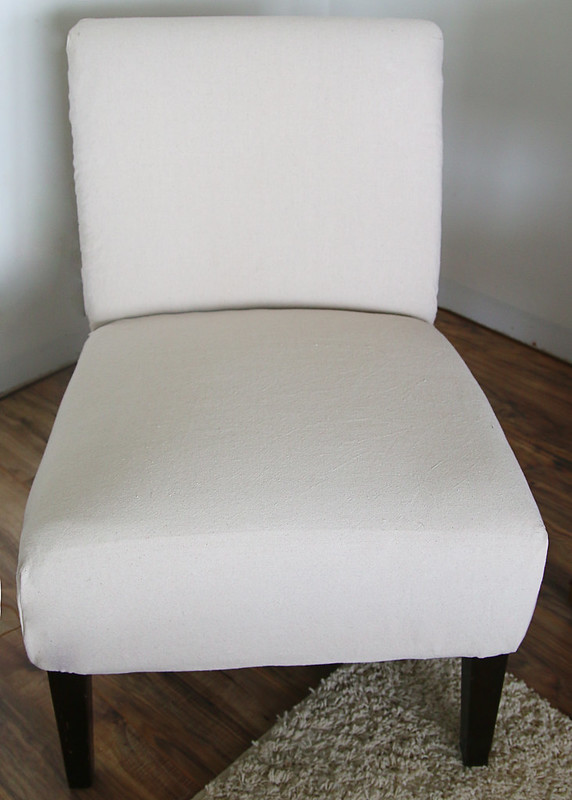
Slipper Chair Upholstery Makeover
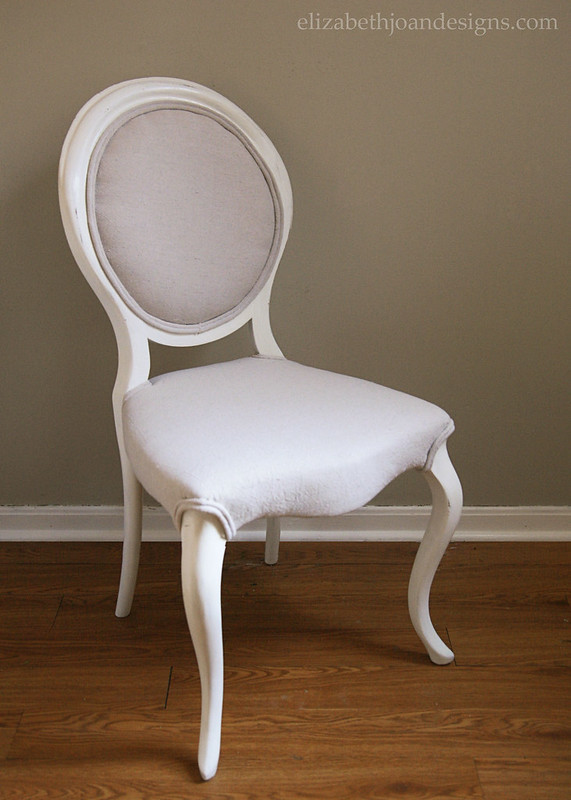
Sometimes with DIY, I pretend like I know what I’m doing. For example, check out this chair in the corner of our living room. I mentioned on Instagram that it needed a little help. However, I’m not a seamstress, upholsterer, or a person who really knows anything about sewing/upholstery. But I definitely faked it to look like I do with this slipper chair upholstery makeover.
Here you can see how bad the chair was damaged.
Yeah. All of that was done by our sweet kitty, Rowan.
I’m not sure if it was the weave of the fabric that attracted him (it wasn’t very tight) or the sleek style of the chair *wink*.

The chair was also rocking some pretty creepy looking stains. Once or twice, our son had spilled a drink on the chair and even though I soaked up the liquid and cleaned the fabric, it remained stained.
Trying to clean it possibly stained it more!

This chair is pretty comfy and we wanted to keep it, so obviously, it needed some help. I started by un-velcroing the fabric on the bottom of the chair and removed the back and legs to dismantle the chair into pieces. Our pup, Harper, helped out too.

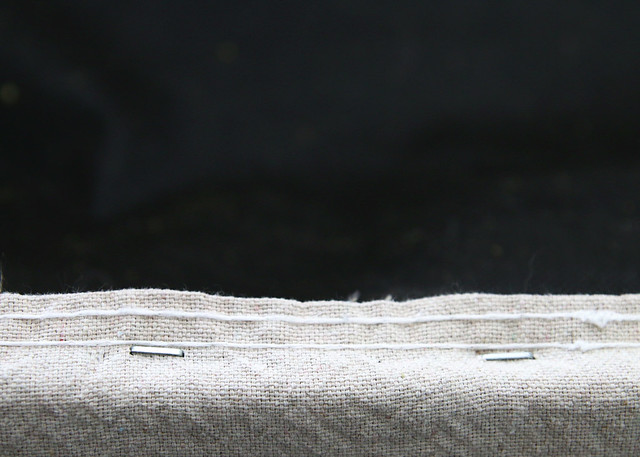
I hope not to offend those who do upholstery (am I using that word correctly?), but honestly, this project with pretty much just tucking, folding, pulling, and stapling the fabric (canvas drop cloth) around the base and back pieces.
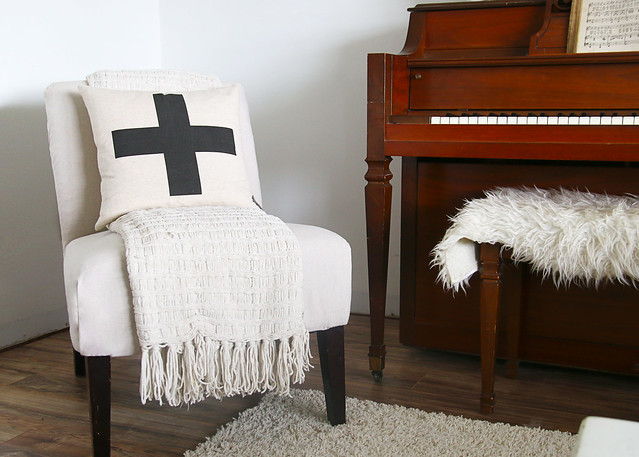
And I must say that it looks a lot better!
Because I’m not the best with a sewing machine, I opted to just fold all of the edges under to make a straight line down the corners.

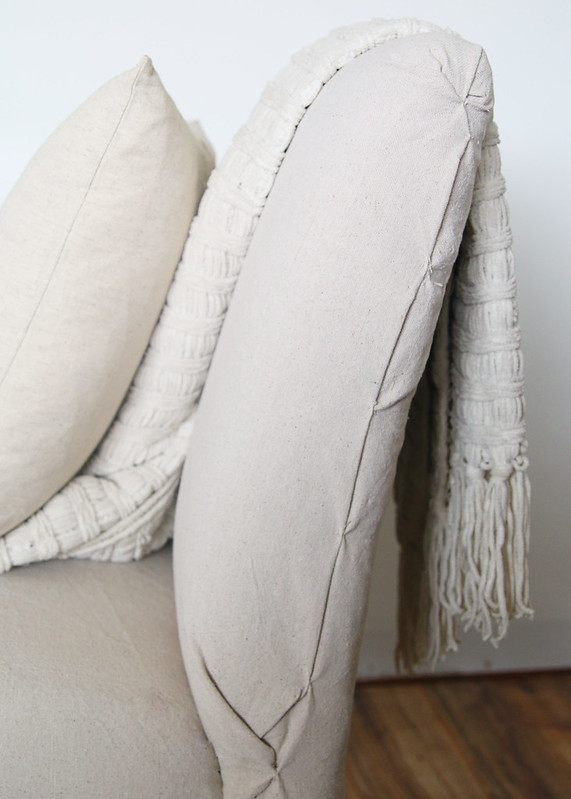
The back piece was another story. Even though I still folded everything, I had to sew the pieces together with a few quick knots of thread every few inches. I’m not really sure what this is called or if it is even a real technique that people use, but it worked for me.
This chair is by no means perfect, but I think it turned out pretty good for a girl with no upholstery skills whatsoever. The best part thus far is that the cat has left the chair alone!
What do you think of this chair’s new look? Did I totally ruin the good name of upholsterers everywhere by botching this up more? Or did it turn out reasonably enough to pass the test?
_______________________________________________________________________________
Looking for more? Check out these posts!
-
Build It Yourself, Family, Kids, Pets, Furniture Makeovers, Home Decor, One Room Challenge, Organization & Storage, Painting Projects, Room Makeovers, The Country House
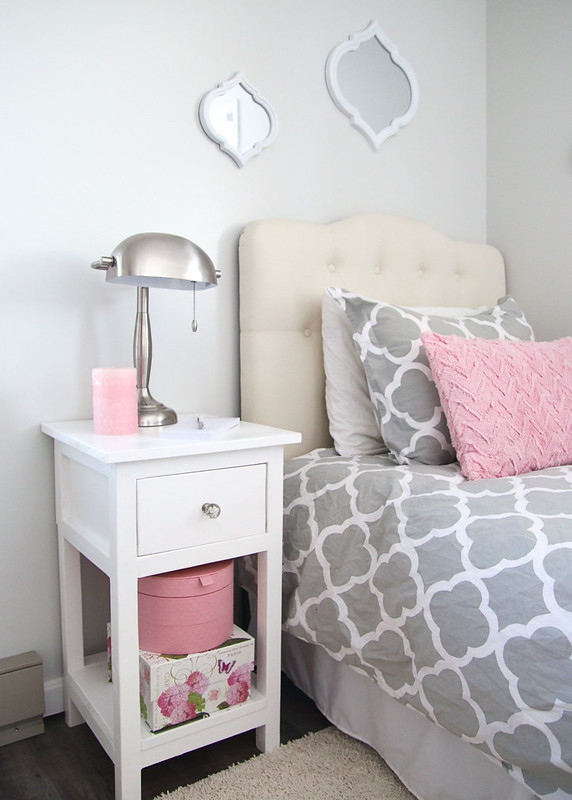
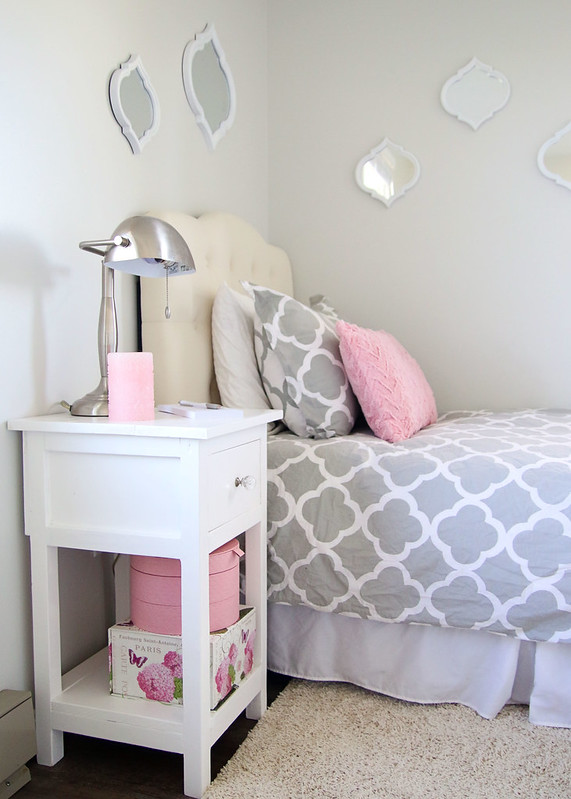
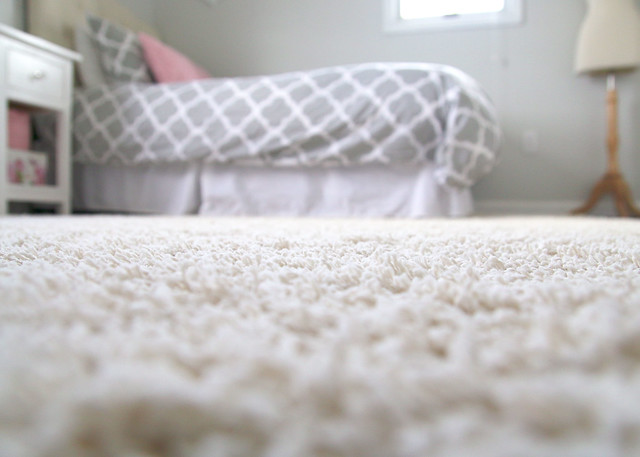
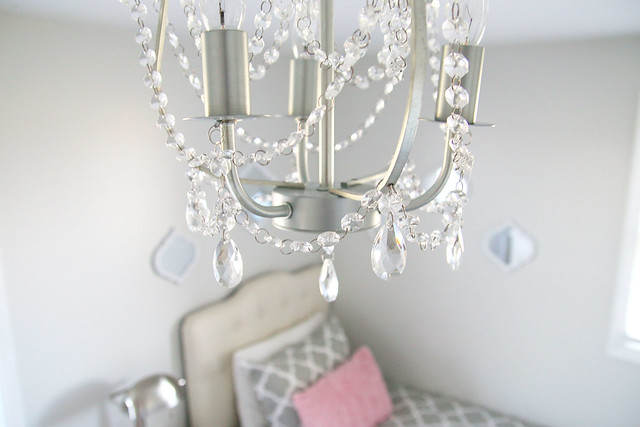
Tween Bedroom Reveal
You guys! It is the end of week six of the One Room Challenge and to say that I am ecstatic would definitely be an understatement. These past six weeks have been a crazy whirlwind of work, but we are so excited with the way everything turned out. Check out our Tween Bedroom Reveal!
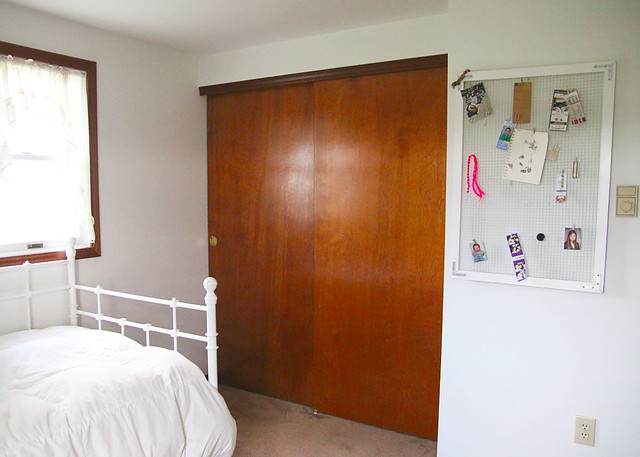
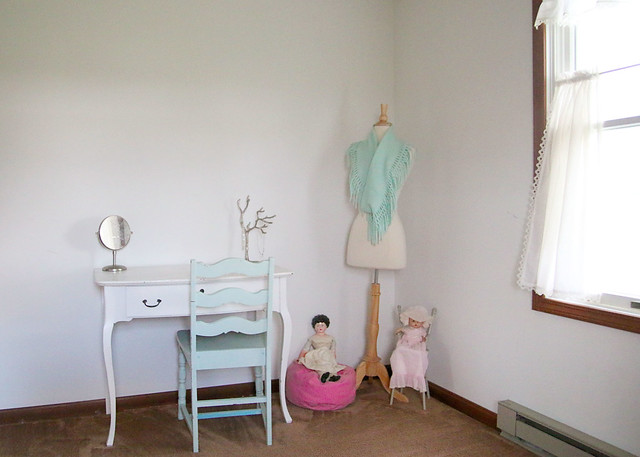
But first, let’s go back to the beginning and review where we started. Ugh. This room really needed some help.
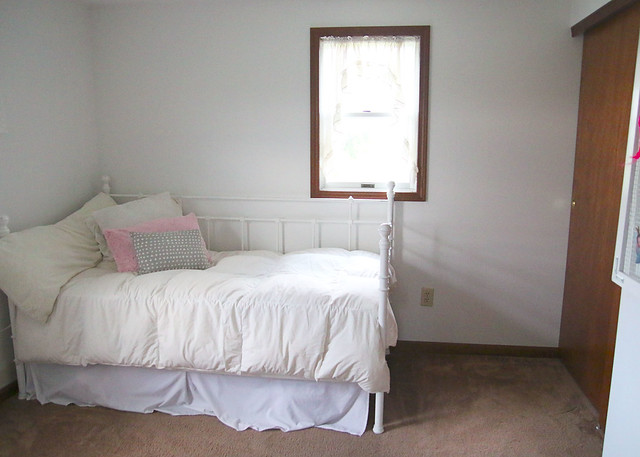
The old carpet and dark trim were just not working for us, not to mention the mismatched random furniture and lack of accessories just made to room look blah.
OK. Now, scrub your brain of those old, mismatched images and let’s move on to the pretty pics!
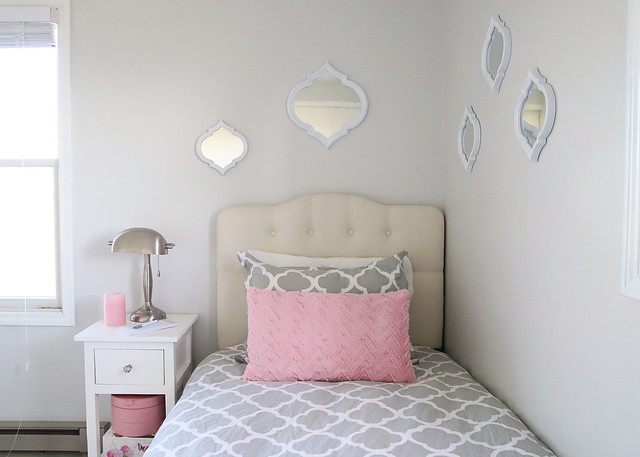
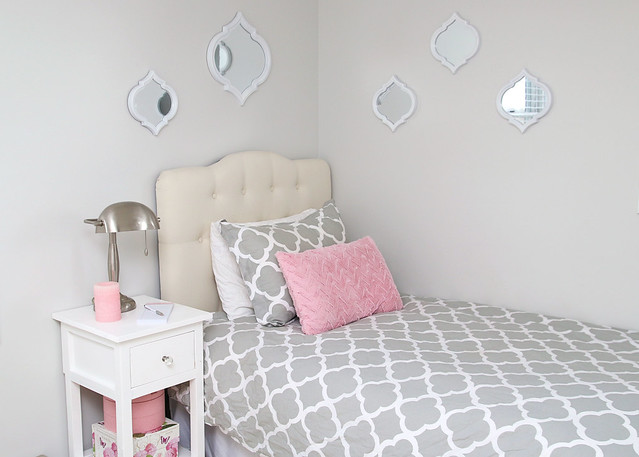
After some brainstorming with my daughter about how she wanted her room to look, plus some research to achieve that look on a budget, we came up with a beautiful and affordable mood board and design plan.

Here’s what was on the to-do list…
- Remove old carpet and replace flooring
- Paint walls, trim, & doors
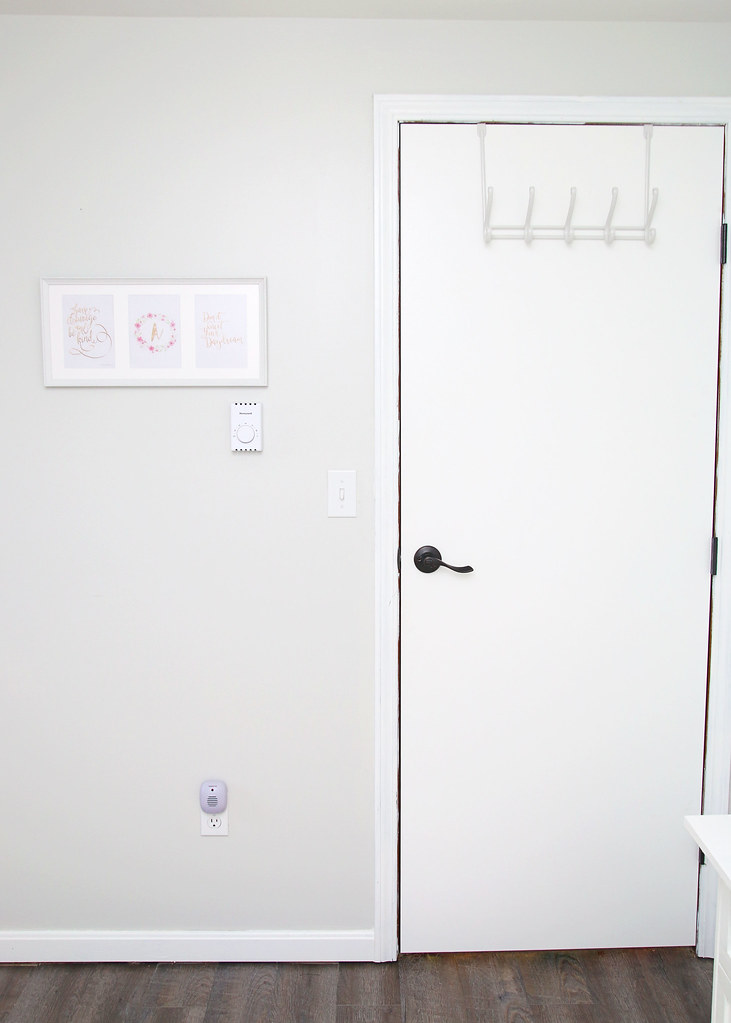
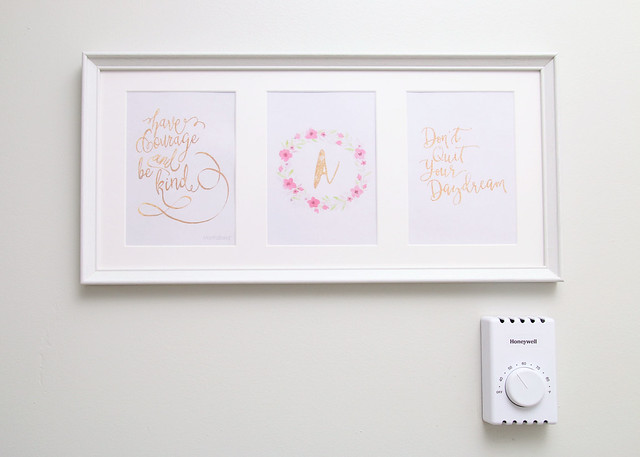
- Replace old electrical plates, outlets, and switches
- Add new lighting
- Install window coverings
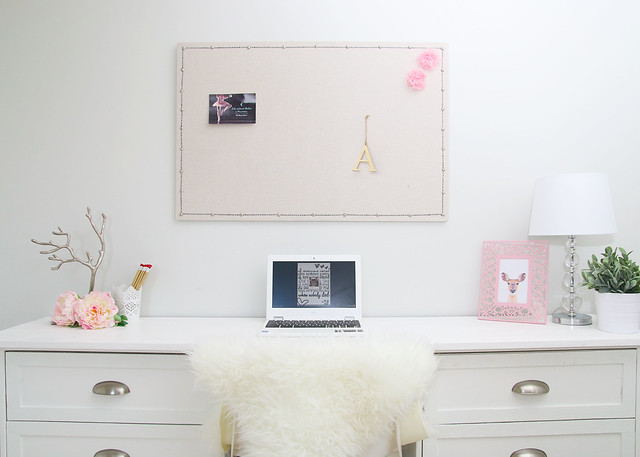
- Create a workspace that can also double as clothes storage
- Bring in color and textures with accessories
- Organize craft & art supplies, books, toys, and clothing
Come on in. Stay awhile.
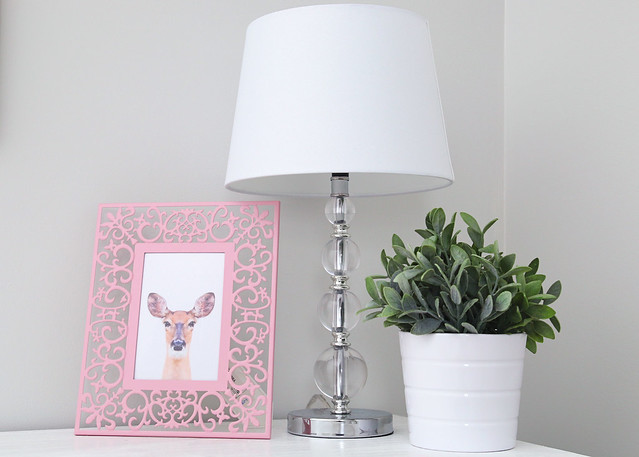
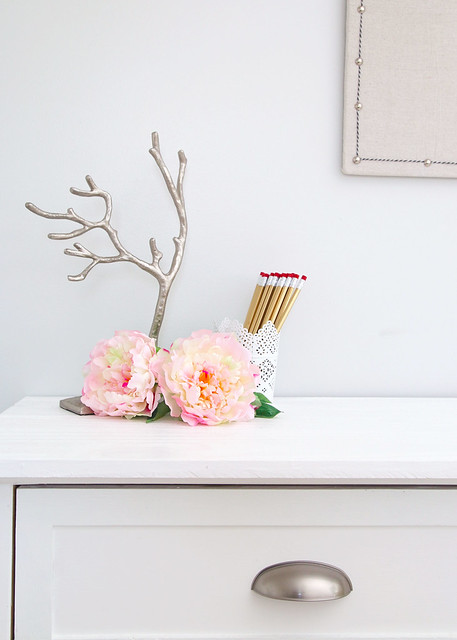
This room is now our favorite in the house and we hope you enjoy the visual tour as much as we (especially our daughter) are loving the real thing. Let’s start at the entry door and work our way around the room.
Since this reveal is so pic heavy, I will be sharing more details and all of the sources next week in a separate post. Enjoy!


There was so much to do and we didn’t know if six weeks would be enough time to finish! Thank goodness we’ve lived to tell the tale of our first One Room Challenge. Now I think it is time to hibernate for the winter and recover from this whole process. Well, maybe just for the weekend. *Wink*
If you have missed any of the progress in this room, feel free to go back and check out how we went from meh to marvelous!