-
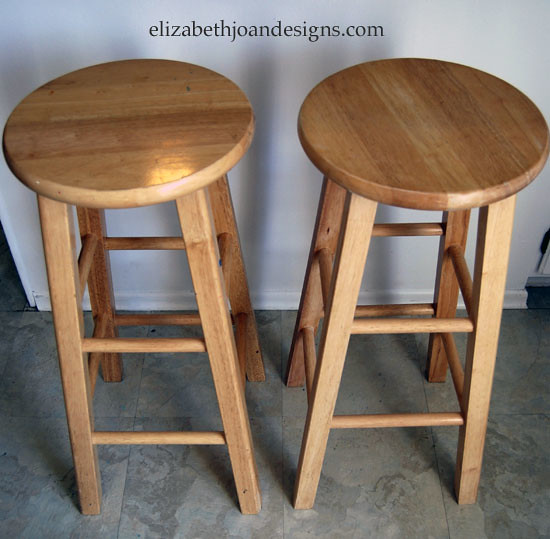
Numbered Counter Stools
These stools are another curb find. I attempted to sell them at 2 different garage sales and there were no takers. After our last sale, I brought them into the house and my son loved being able to sit at the counter to “help” make dinner. Their original look didn’t match anything in our home, so I opted to give them a makeover to match our {dining table.} I also decided to jump aboard the numeral infatuation train my sister is conducting.
First, I sanded them and I sanded some more. Once I thought I might be done sanding, I sanded them one last time. Next, I primed the legs.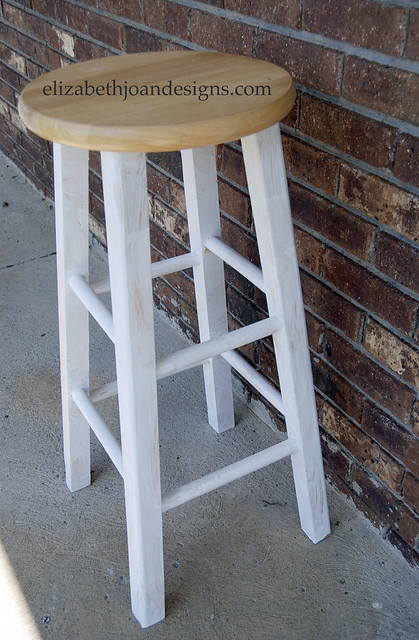
Then, I gave them two coats of latex paint. To keep the legs bright white, I draped the base of the stools with a plastic drop cloth.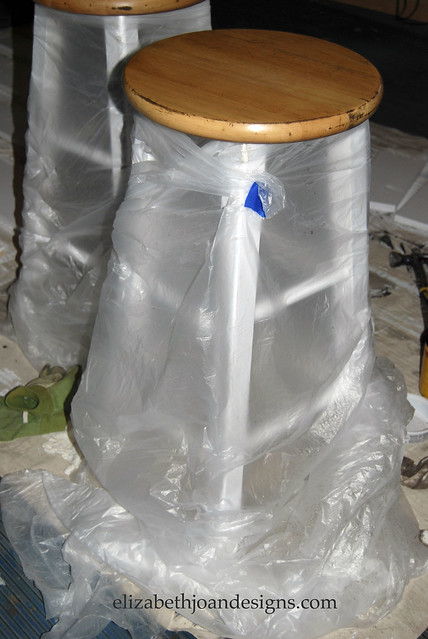
After that, I stained the seat with Minwax Special Walnut.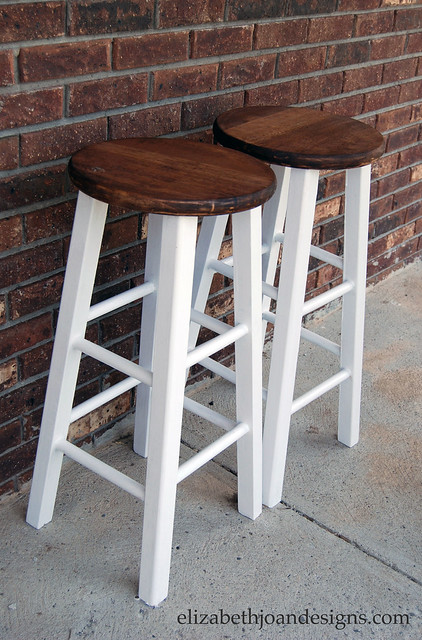
Using the same technique Erin used in her {Numbered Wooden Crates,} I painted a 1 and a 2. Finally, I slapped 4 coats of Minwax Water Based Polycrylic on the seats. Yeah! Now they go with the rest of the kitchen!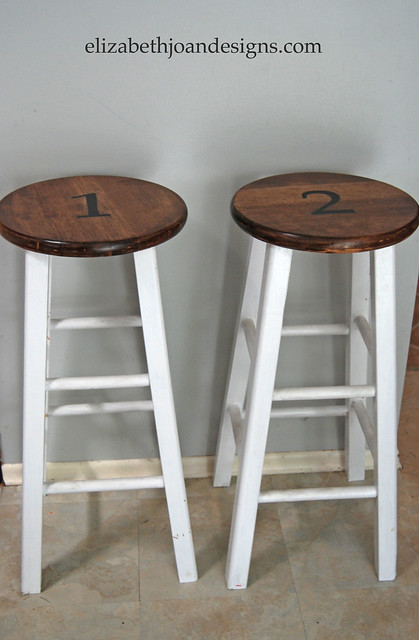

-
Range Hood Makeover
This month marks the four year anniversary that we have lived in this house. When we moved in, it was like traveling back to 1984, the year the house was built. We are slowly making updates to bring it to present time.
Our kitchen has changed the most. The cabinets were originally stained oak, in need of updating. First, I decided to paint them green. I didn’t hate the green, but it did look like Dr. Seuss lived here. A year later, my grey obsession took over and I repainted them. We had the grey for two years and were ready to brighten things up, so once again I got out my rollers and brushes and this time painted them white.
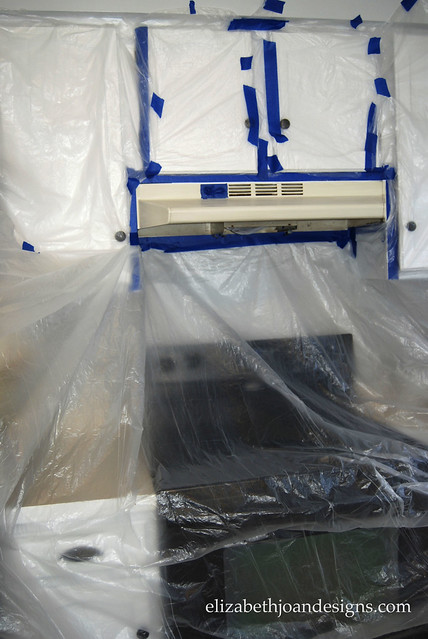
With white cabinets and black appliances, my 1980’s almond colored range hood suck out like a sore thumb. After doing a little research, we decided spray painting it was the best option for us.

This post contains affiliate links for you convenience. I was very hesitant to spray paint in the house, as I had never done anything like this before. So I tried to remove it. After about 2 minutes, I could tell that was not going to happen. I took a little break, gave my self a pep talk, and tried to erase the thought of black over spray all over my bright white cabinets out of my head.
Then, it was back to work as I cleaned, lightly sanded, and wiped off all dust on the vent. I covered literally everything near the hood with a plastic drop cloth, secured by painters tape.

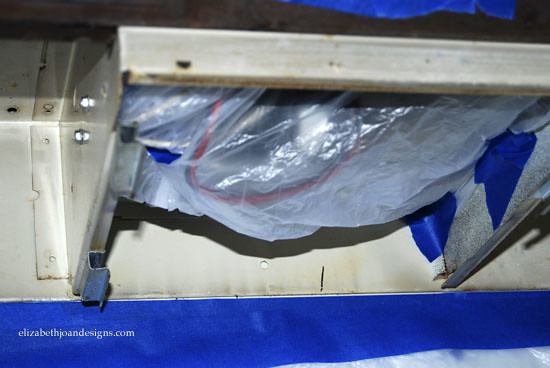
After spray painting a couple coats, I removed the drop cloth to reveal my pretty hood.
Ain’t it purdy? Now if only I could figure out what to hang on the wall between the hood and stove. Any ideas?
-
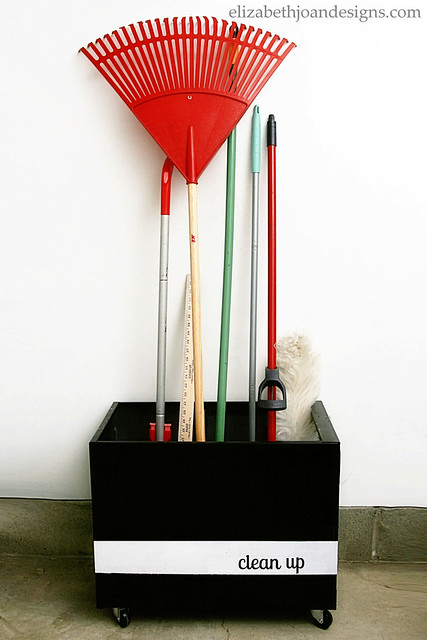
The Garage Files
At one point, I even tried my hand at stenciling in an attempt to spiffy it up and you can see how well that worked out. Oops.

I started out by giving it a good wipe down to remove the dust. And cobwebs, which don’t really go well with anything except Halloween decor. Next, I removed the drawers and sent them packin’.

Stripes are pretty cool and I knew I definitely wanted to put a stripe on my cabinet, but I also wanted to include some type of text. I figured “clean up” was pretty motivational for garage organization, so that’s what was printed on a large waterproof label. The problem was that I didn’t realize that the label I had just printed out on my inkjet printer was actually for a laser printer. Oops #2. The ink attached itself to everything my hands touched, as I struggled to cut it out. Smudgy Smudgerson.

However, I didn’t let a little ink stop me. On went the painter’s tape and the sullied words.
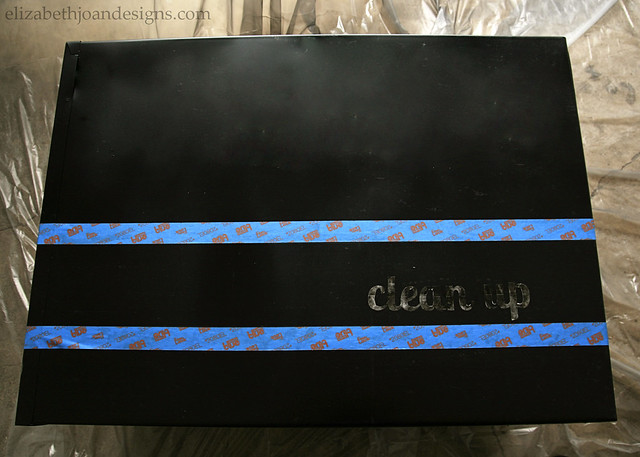
Using semi–gloss white paint, I carefully brushed over the words, being mindful of the tape edges. After a bit, everything was dry. When I removed the tape and letters though, I found that the paint had leaked through (under?) and messed up my cute wording. Oops #3.
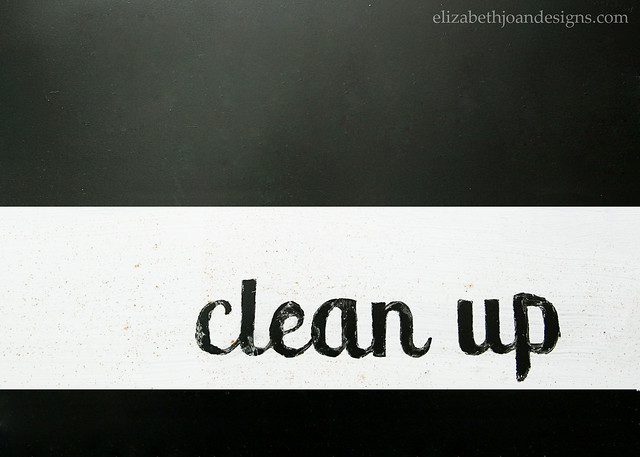
So I used a handy dandy craft knife to carefully peel the excess off. It actually worked pretty well.
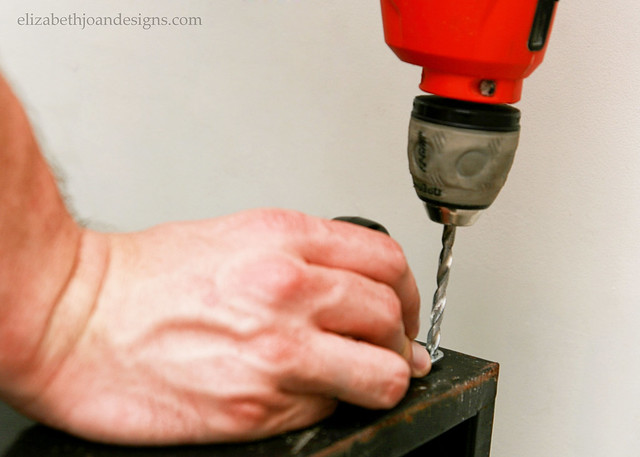
Then, my hubby helped attach four casters to the bottom, which would make it much easier to move our new garage storage around.

As simple as this project should have been, it ended up being a big pain in the rear because of all the little Oopsies. Luckily, they were able to be recovered, for the most part. (Sorry drawers. Enjoy your new life on the curb.)
The best thing about this project is that it was F-R-double-E. Free. In the future, we may add some sort of dividers along the top to help keep things more upright, but we are happy with how it turned out for now.


Linked up with East Coast Creative #cwts2014
-
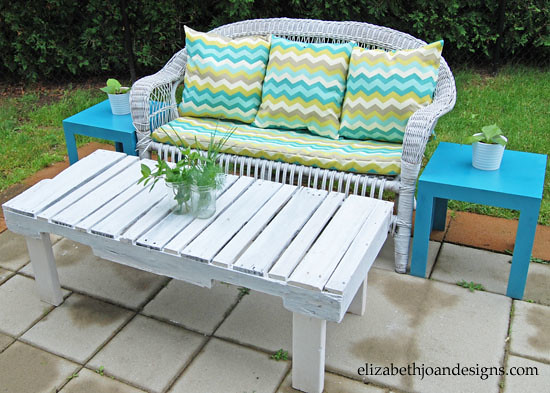
Patio Makeover Part 3: The Final Reveal
Adam and I have been working hard on our patio furniture, and we can finally say we are finished. That means it’s time for the Patio Makeover Part 3: The Final Reveal. Yay!
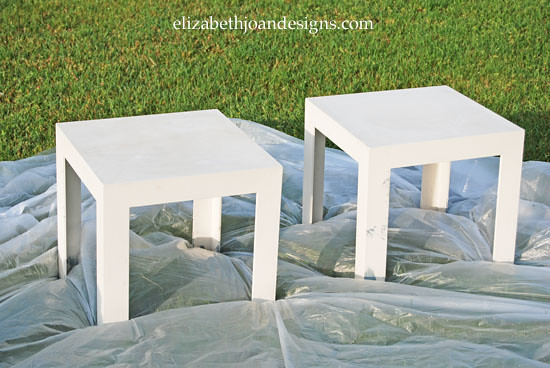
These little white tables were more curb finds. After a little spray paint, they work perfect with the love seat and pallet table.

Making the cushion and pillows for the love seat has kept me extremely busy. I am a fairly experienced sewer, so I was completely surprised and embarrassed when this happened. I guess it is true what they can, “Measure twice, cut once.”
(Cushion) Too Big.

(Pillow) Too Small.
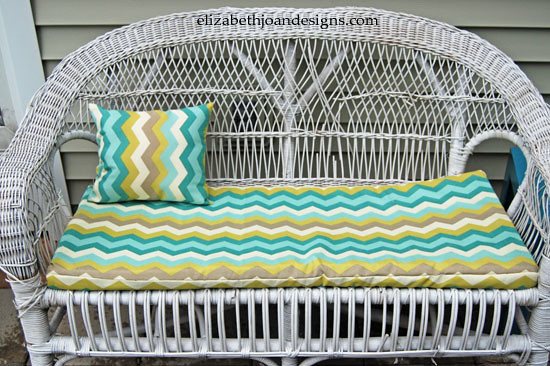
Finally, just right. Yay!
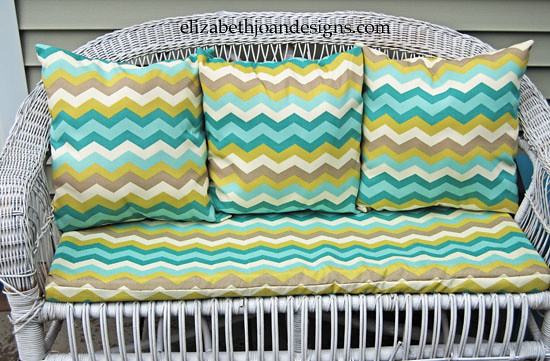
We love out “new” patio furniture. It’s so nice to have a relaxing outdoor space to hang out.