-
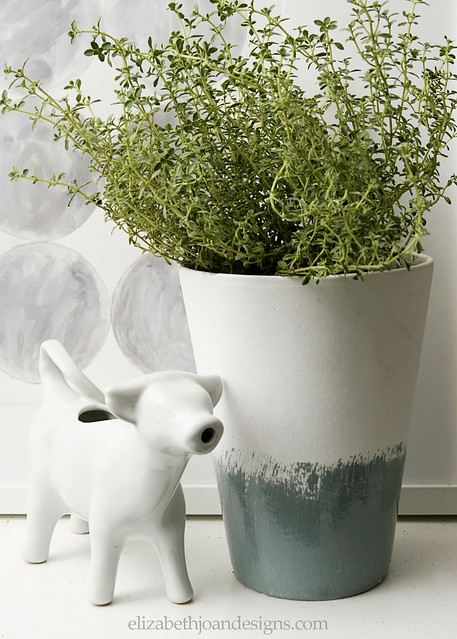
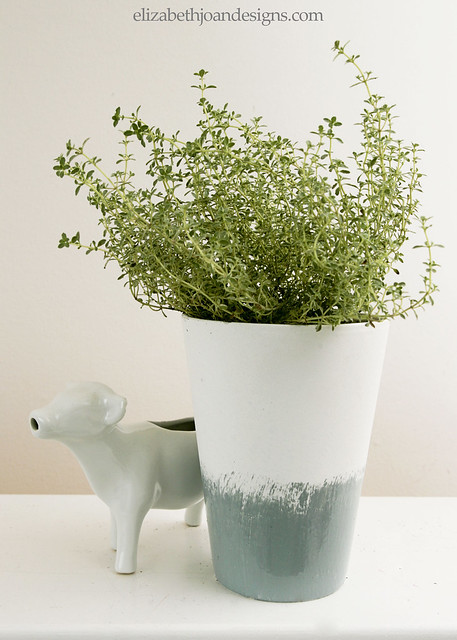
Glazed Herb Planter
I love to have fresh herbs around the house. Don’t you? Even if you don’t use them to cook, many times they are just lovely to smell.
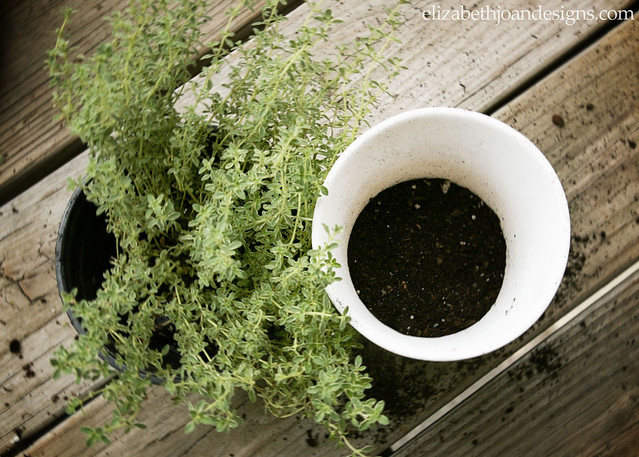
My husband brought home a potted grouping of random, not labeled herbs for me from Trader Joe’s. I didn’t have a planter big enough for all of them, so I had to find something to put one remaining herb plant in.
Lucky for me, I found this totally-not-my-style pot at Goodwill for a song and knew I could make it over with my wicked awesome DIY skills. (Technically, I’m just good at trial and error, but whatever.)

I knew that I wanted some sort of hand dipped/glazed look, so I started out by spray painting it with Zinsser primer to cover up all of those splattered speckles. This gave the planter a flat finish and would allow for other paint to easily adhere.

Once it was dry, I used a paint brush to apply high gloss gray paint to the lower portion. Did you know that The Home Depot doesn’t sell paint samples in any finish other than flat? I didn’t, that is, until yesterday when I went to get some gray paint. And I wanted high gloss. Bummer. So, I had to be resourceful and decided to purchase some spray paint instead. I sprayed it into a puddle onto a piece of cardboard and dipped my brush right into it to apply my gray paint.

Then I waited for that to dry. Once it was ready, I filled the bottom of the planter with stones for drainage, added some potting soil and my lonely little leftover herb plant.
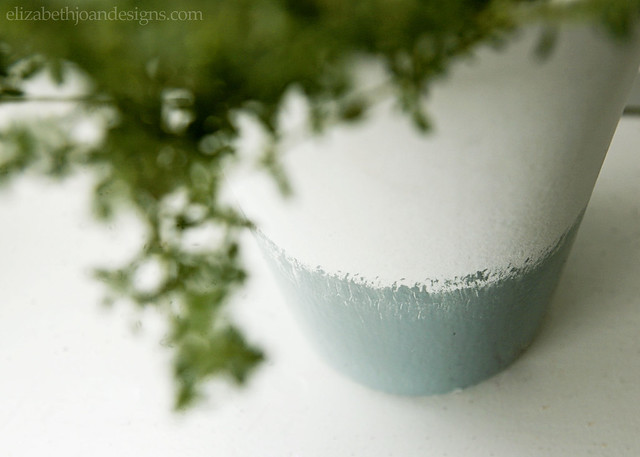
You can see here how my planter doesn’t have that perfect crisp edge where the color ends. I did that intentionally, because as much as I love the look of hand dipped pottery, I wanted something with more of an organic feel. The flicked brush strokes at the edge do just that, since they are more haphazard.
We love how it turned out, but I still can’t figure out what kind of herb this is. If you know, we would love to hear from you in the comments below!

-
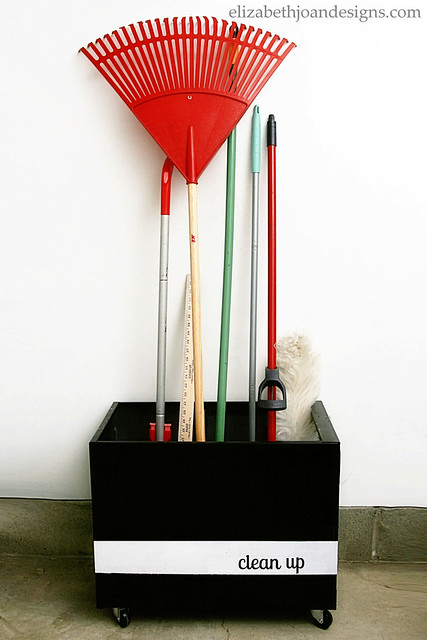
The Garage Files
At one point, I even tried my hand at stenciling in an attempt to spiffy it up and you can see how well that worked out. Oops.

I started out by giving it a good wipe down to remove the dust. And cobwebs, which don’t really go well with anything except Halloween decor. Next, I removed the drawers and sent them packin’.

Stripes are pretty cool and I knew I definitely wanted to put a stripe on my cabinet, but I also wanted to include some type of text. I figured “clean up” was pretty motivational for garage organization, so that’s what was printed on a large waterproof label. The problem was that I didn’t realize that the label I had just printed out on my inkjet printer was actually for a laser printer. Oops #2. The ink attached itself to everything my hands touched, as I struggled to cut it out. Smudgy Smudgerson.

However, I didn’t let a little ink stop me. On went the painter’s tape and the sullied words.
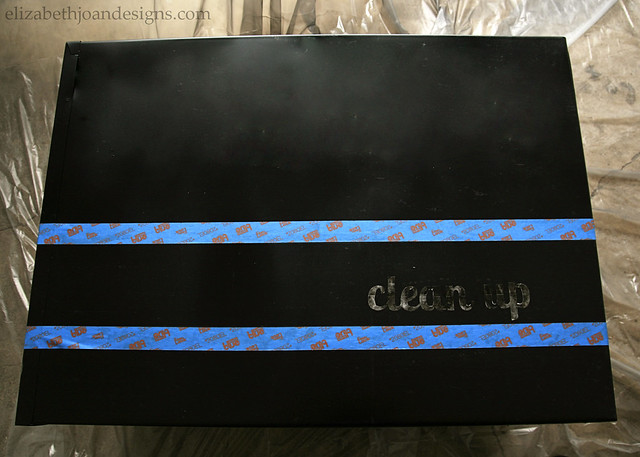
Using semi–gloss white paint, I carefully brushed over the words, being mindful of the tape edges. After a bit, everything was dry. When I removed the tape and letters though, I found that the paint had leaked through (under?) and messed up my cute wording. Oops #3.
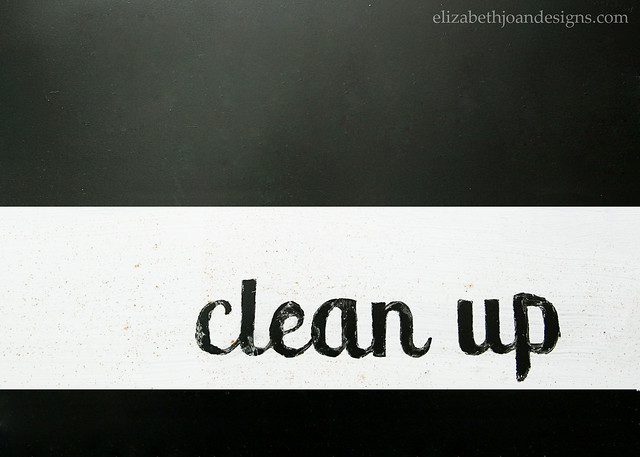
So I used a handy dandy craft knife to carefully peel the excess off. It actually worked pretty well.
Then, my hubby helped attach four casters to the bottom, which would make it much easier to move our new garage storage around.

As simple as this project should have been, it ended up being a big pain in the rear because of all the little Oopsies. Luckily, they were able to be recovered, for the most part. (Sorry drawers. Enjoy your new life on the curb.)
The best thing about this project is that it was F-R-double-E. Free. In the future, we may add some sort of dividers along the top to help keep things more upright, but we are happy with how it turned out for now.

Linked up with East Coast Creative #cwts2014
-
Dining Table
About a year ago, I searched the internet for the perfect dining table. At the time, we had a four person table that was starting to get a little crowded, especially when we had guest. To purchase one of the tables I really liked, would have cost us an arm and leg. That’s when the idea hit me, why don’t we built our own. I then turned to Pinterest for inspiration and and found this amazing DIY table from Our Vintage Home Love.
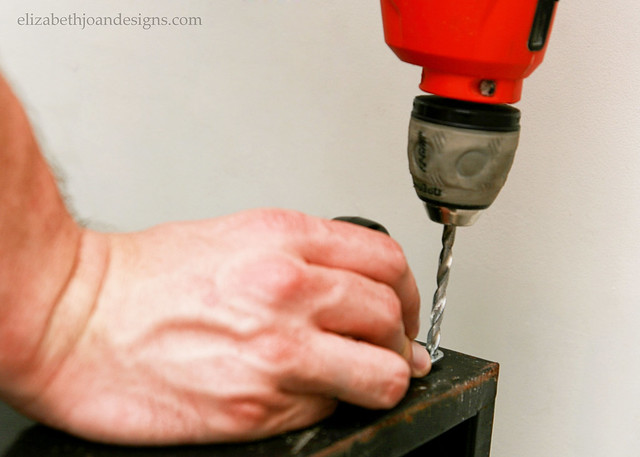
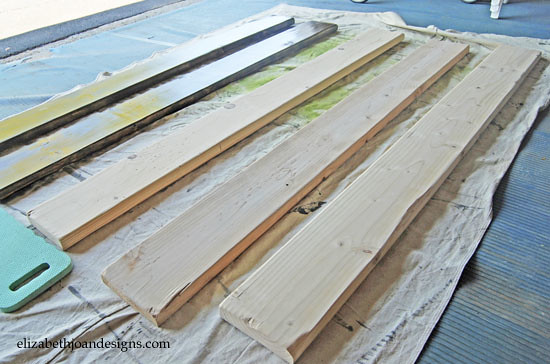
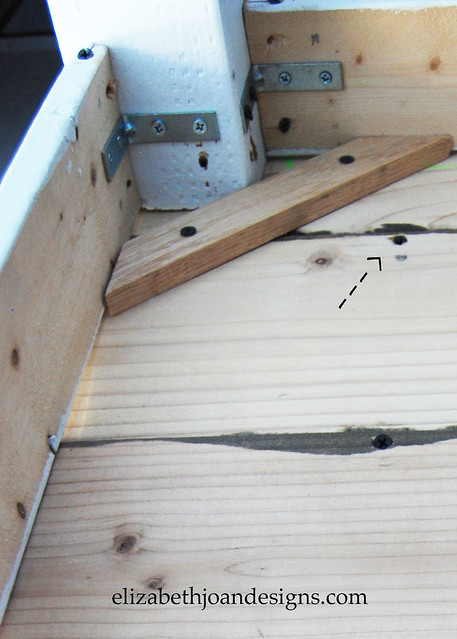
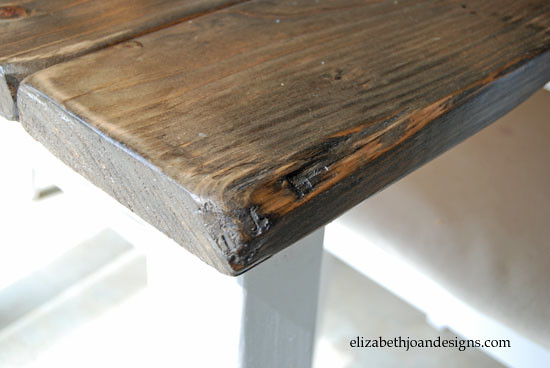
After showing my husband this beautiful piece of furniture, we were off to The Home Depot to buy some lumber. We purchased five 2″ x6′ of douglass fir for the top, 1″ x 5″ of pine for the apron and 4″ x4″s for the legs. Using a palm sander, we sanded down the boards for the top and rounded the corners. Then I used a chisel on the corners and edges to give it a worn look.
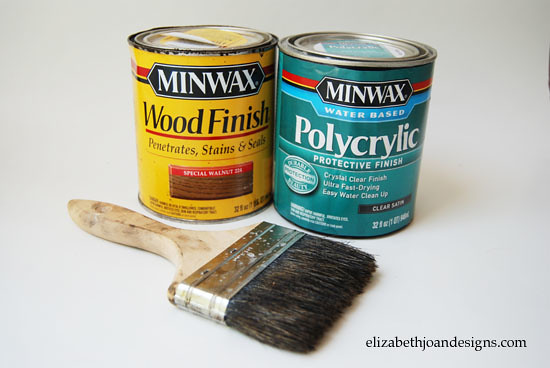
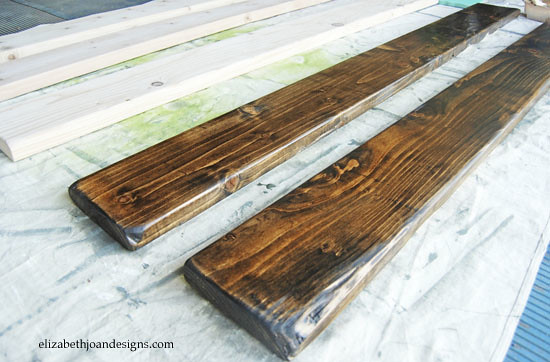
For the table top we used Minwax Special Walnut stain. We finished with four coats of Minwax Water Based Polycrylic. An oil based poly would have given us much more shine and would have warmed the look of wood, which were two things I was trying not to do. I was hesitant to use a water based polycrylic vs. an oil based, thinking it may not hold up as well with the kids. This table has had a lot of abuse, and I am more that happy with the finish we chose.

We painted the legs and apron white to match our kitchen cabinets. To assemble the table, we followed this tutorial here pretty closely. We did insert a few screws on 45 degree angle from plank to plank to add more stability to the top.


-
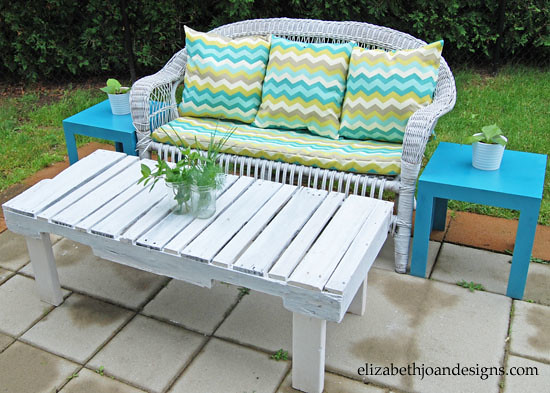
Patio Makeover Part 3: The Final Reveal
Adam and I have been working hard on our patio furniture, and we can finally say we are finished. That means it’s time for the Patio Makeover Part 3: The Final Reveal. Yay!
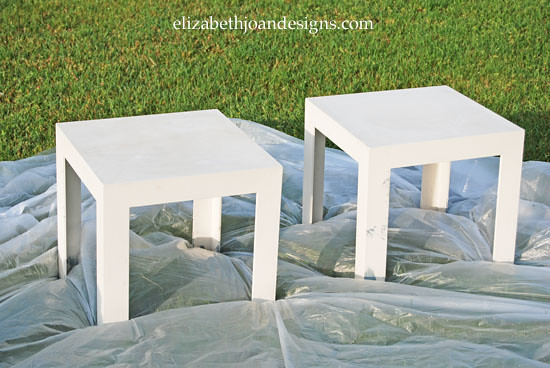
These little white tables were more curb finds. After a little spray paint, they work perfect with the love seat and pallet table.

Making the cushion and pillows for the love seat has kept me extremely busy. I am a fairly experienced sewer, so I was completely surprised and embarrassed when this happened. I guess it is true what they can, “Measure twice, cut once.”
(Cushion) Too Big.

(Pillow) Too Small.
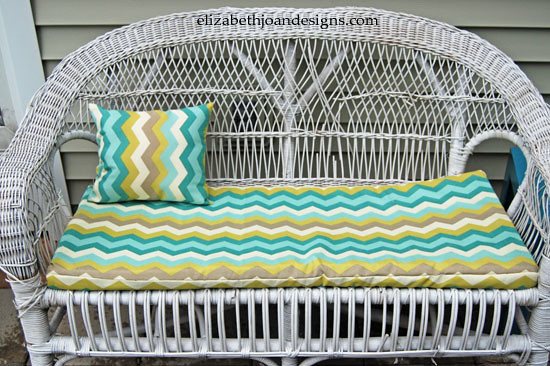
Finally, just right. Yay!
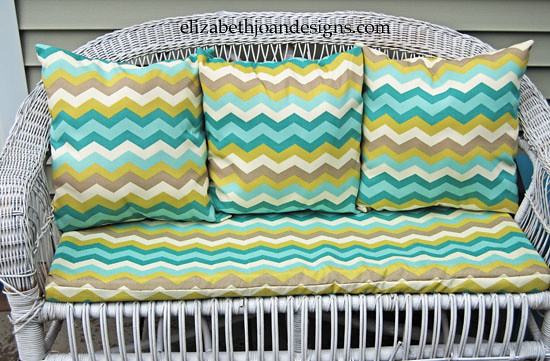
We love out “new” patio furniture. It’s so nice to have a relaxing outdoor space to hang out.