Dining Table
About a year ago, I searched the internet for the perfect dining table. At the time, we had a four person table that was starting to get a little crowded, especially when we had guest. To purchase one of the tables I really liked, would have cost us an arm and leg. That’s when the idea hit me, why don’t we built our own. I then turned to Pinterest for inspiration and and found this amazing DIY table from Our Vintage Home Love.
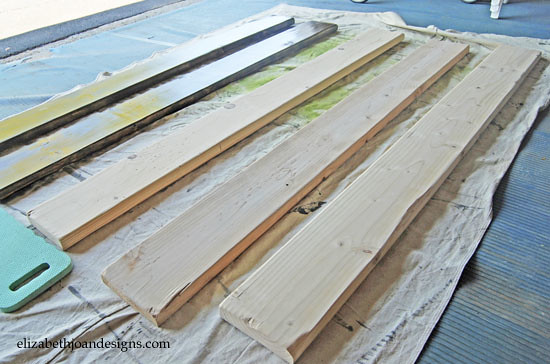
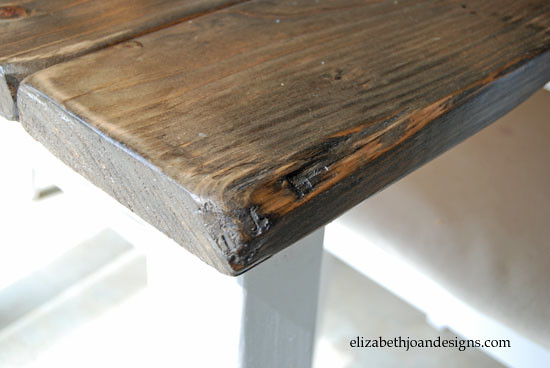
After showing my husband this beautiful piece of furniture, we were off to The Home Depot to buy some lumber. We purchased five 2″ x6′ of douglass fir for the top, 1″ x 5″ of pine for the apron and 4″ x4″s for the legs. Using a palm sander, we sanded down the boards for the top and rounded the corners. Then I used a chisel on the corners and edges to give it a worn look.
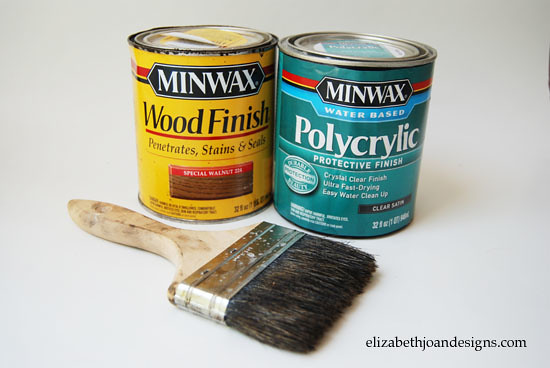
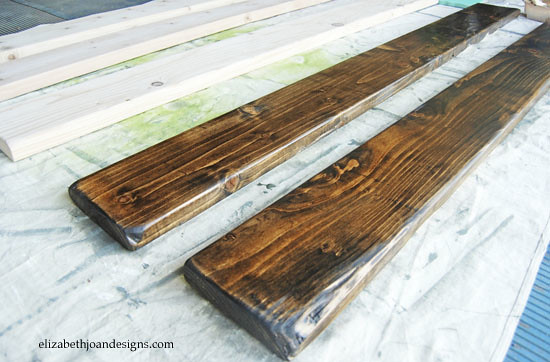
For the table top we used Minwax Special Walnut stain. We finished with four coats of Minwax Water Based Polycrylic. An oil based poly would have given us much more shine and would have warmed the look of wood, which were two things I was trying not to do. I was hesitant to use a water based polycrylic vs. an oil based, thinking it may not hold up as well with the kids. This table has had a lot of abuse, and I am more that happy with the finish we chose.

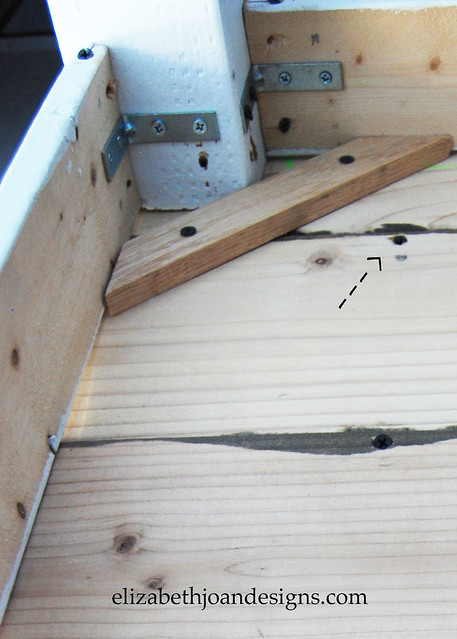
We painted the legs and apron white to match our kitchen cabinets. To assemble the table, we followed this tutorial here pretty closely. We did insert a few screws on 45 degree angle from plank to plank to add more stability to the top.


9 Comments
Hanna Caldwell
I found your blog from your link on Our Vintage Home post about the dining room table. I love your blog by the way and all the cute projects! I’m a new follower! Anyway, I’m looking into doing a similar thing with a table I already have and was just wondering how you connected all the 2×6’s together. With wood brackets and screwing in underneath? And did you distress you wood before?
Emily
Thanks Hanna! I attached the 2×6’s with three 1″x4″ boards that stretched across the bottom of the 5 table top planks. Then screwed, on a 45 degree angle, board to board.
I distressed the wood, before staining, with a chisel and by sanding down the corners and edges. Good luck and let us know how it turns out.
Pingback:
Hanna Caldwell
I finally finished my table and LOVE it! Thanks for the help! I did pretty much everything you did. Here’s the link if you want to check it out http://caldwellcouple.blogspot.com/2013/12/ikea-dining-table-makeover.html. Thanks again!
Pingback:
Kendra @ www.joyinourhome.com
Love, love this table!! You ladies are so talented!
Emily
Thanks. Glad you like it Kendra! It was so much fun to work on!
Lina
Gorgeous dining set! Where did you get your chairs?
Erin
Hi Lina,
The dining chairs were purchased from Walmart. Thanks!