-
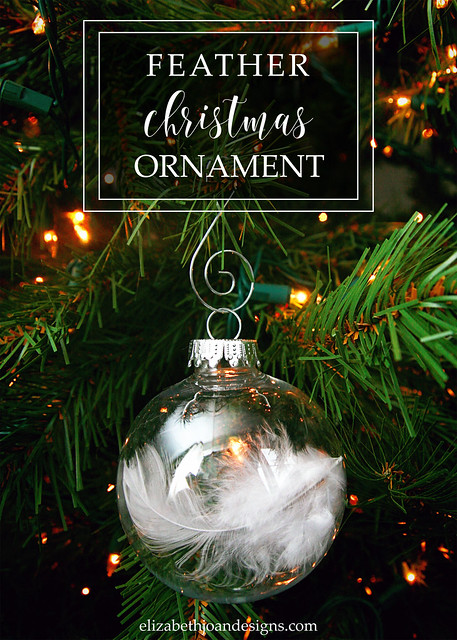
Five Minute Friday: Feather Christmas Ornament

This post contains affiliate links.
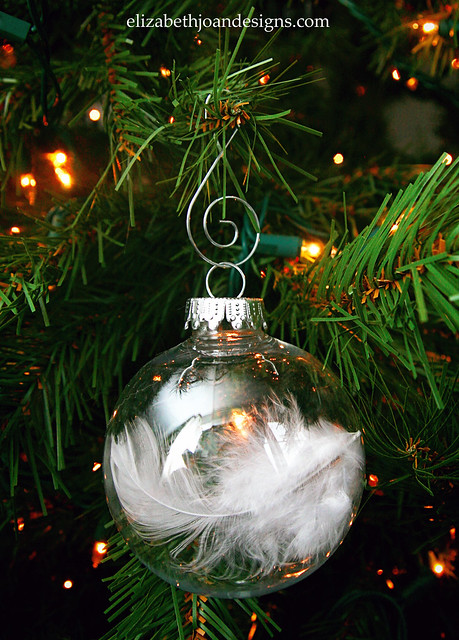
This is probably one of easiest, yet elegant ornaments you could possibly make. And it actually only takes about one minute (or less!) to complete each one, so that makes it a major score in my book.
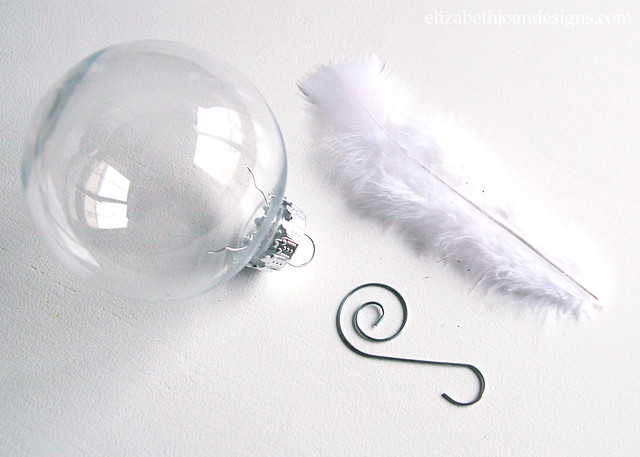
You will need:
- Glass or Plastic Clear Ball Ornament
- White Feather
- Ornament Hanger
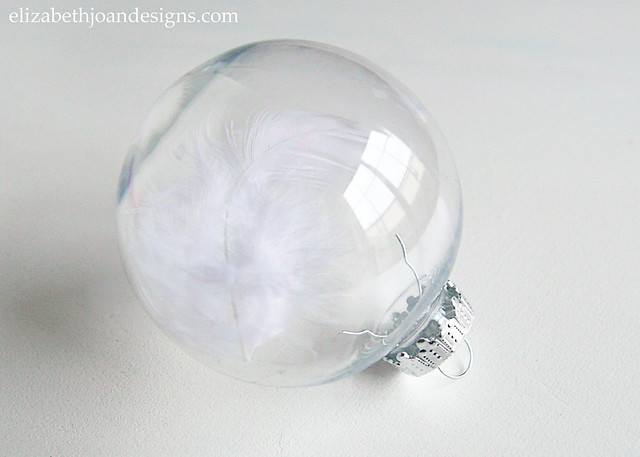
Remove the top piece from the ornament. (I chose plastic because… Kids, Puppy, Cat.)

Insert one white feather. (Depending on the size of the feather, you may want to cut it down a bit. Or not.) If needed, use a pencil or something similarly slim to move the feather around inside of the ornament until it is situated to your liking. Replace top piece.
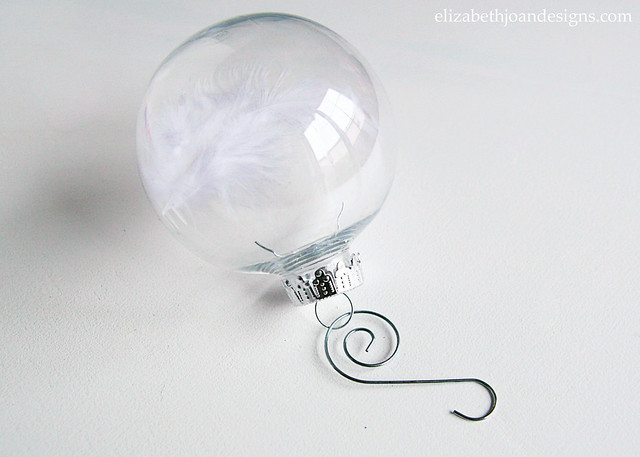
Attach ornament hanger.
And you are done! Super easy, right? I love the way these ornaments look on a Christmas tree. They are very simple, but the light reflects perfectly off of the ball. It kind of gives them an ethereal presence.
We’ve had these pretty ornaments hanging on our Christmas tree for over 10 years and they are still one of our favorites! Check back soon to see our Christmas tree all decked out for the holidays.
______________________________________________ You may also like:

Last Minute Silhouette Ornament 
Gift Wrapping Ideas 
Dollar Store Scarf Wreath 
Festive Paper Stars -
We Dig It: DIY Gifts
The holiday season is in full swing. As you are searching for gift ideas for your loved ones, keep in mind our wonderful list of gifts for $10 and under and our rustic style gift guide. Since we are a DIY blog, it only seemed natural to compile a list of fabulous DIY Gifts for you too. Whether you are on tight budget, a crafty sort of person, or want to try something new, these DIY Gifts are a wonderful way to wish your friends and a family happy holidays.

Dip Mix Ornaments by Bubbly Nature Creations

Clementine Wreaths by Omiyage Blogs

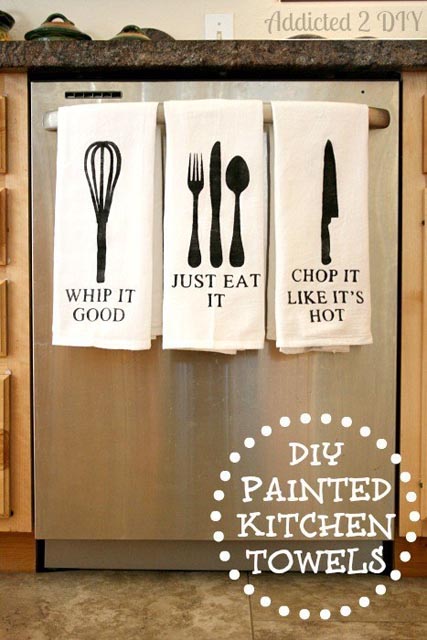
DIY Painted Kitchen Towels by Addicted 2 DIY
DIY Bath Fizzy Bombs by Sarah Titus

Quote Pillow by Inspired by This

Anniversary Art by Elizabeth Joan Designs

Jack Daniels Soap Dispenser by Curly Birds

Magnetic Wristband by My Altered State

Bragg Book by Nalle’s House

Sock Monkey by Craft Passion

Kids’ Tool Belt by Elizabeth Joan Designs

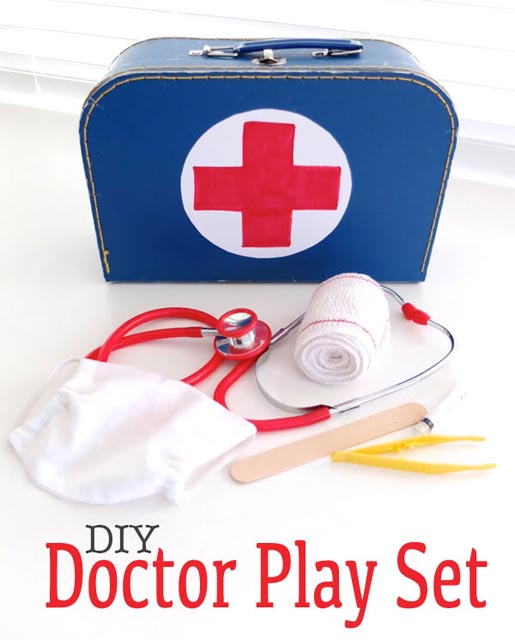
DIY Doctor Play Set by My Poppet
We hope you liked this week’s round up! Do you make your own holiday gifts? We would love to hear from you!
_______________________________________________________ You may also like:

Easy Drop Cloth Dog Bed 
10 Minute Curtain Tie Backs 
Grain Sack Stripe Stool 
How to Make a Custom Basket Liner -
Holiday Home Tour 2015
Welcome to the Holiday Home Tour 2015! If you are new to our blog or a frequent reader, we are so excited to have you here. Also, if you are coming over from Up to Date Interiors, welcome to you too. My name is Emily and I blog here at Elizabeth Joan Designs with my sister, Erin. Today, I’m sharing my a tour of my home decorated for the holidays. (Check out Erin’s My Home Style Blog Hop: Christmas Tree Edition coming up next week.)
Are you recovering from Thanksgiving okay? I have been so bombarded with sickness over the past month, I can’t wait to start feeling better. Soon, I hope. Well, come on in and see our simple holiday decor for the year.
I recently shared an entryway update, but now I get to show it off all decked-out for the winter season.


Your next stop is Pretty Practical Home. Become inspired by hopping around and take a look at all of these amazing home tours happening all week!
Monday, November 30th
Green With Decor
3 Little Greenwoods
Our House Now a Home
Lehman Lane
Designing Vibes
Tuesday, December 1st
Our Crafty Mom
Domicile 37
Shabby Grace Blog
Dream Design DIY
Wednesday, December 2nd
My Life from Home
Up to Date Interiors
Elizabeth Joan Designs
Pretty Practical Home
Thursday, December 3rd
Casa Watkins
The Deans List Blog
Craving Some Creativity
Vintage Romance Style
Friday, December 4th
Flourish & Knot
Around the Watts House
Karen’s Up on the Hill
What Rose Knows
Creatively Homespun
-
Framed Wallpaper Panels
Several years ago, while my aunt and uncle were remodeling their home, they passed along to me some awesome wallpaper they had leftover. I was totally smitten with the design and had plans to use the wallpaper on the inside of a bookshelf, but later decided not to, for fear that it’s loveliness would get covered up. Then, one day, I came across a post from The Hunted Interior with the idea of creating DIY framed wallpaper panels. And I loved it.
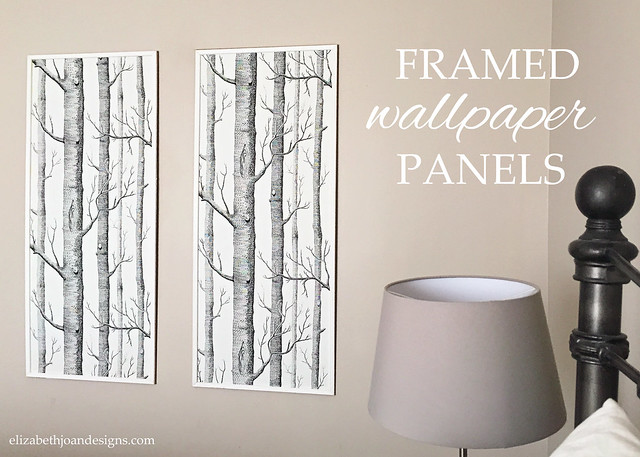
This post contains affiliate links.I knew that creating the framed wallpaper panels was the perfect solution to showcase my amazing wallpaper. I followed Kristin’s tutorial with a few tweaks here and there.
Supplies:
- Woods Wallpaper
- Paint Brush
- Wallpaper Paste
- Credit Card (for smoothing out the bumps)
- MDF Board (cut to size)
- Decorative Trim
- White Paint
- Wood Glue
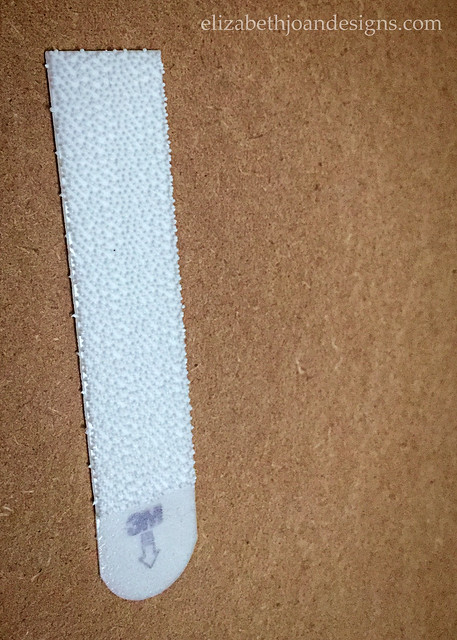
- Command Large Picture-Hanging Strips
I started by cutting the MDF board and trim pieces to my desired lengths (with a little help from the hubs). Mine measured 21″ X 49″, which was just a 1/2 inch wider than the original width of the wallpaper.
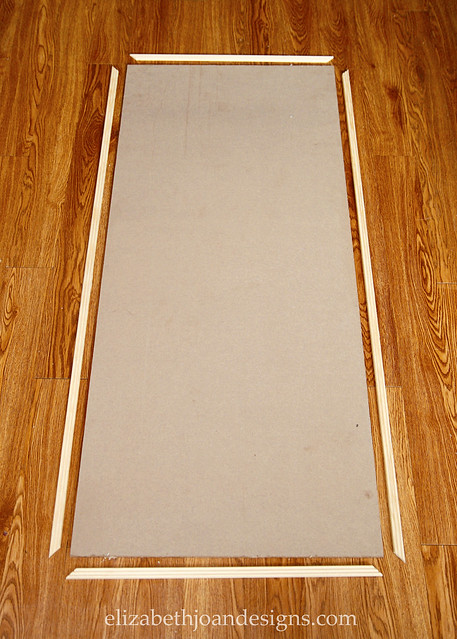
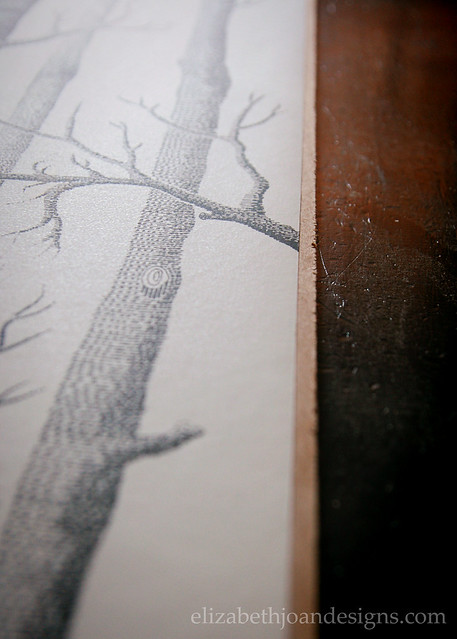
Next, I measured and cut the wallpaper to fit on the board. Using the paint brush, I applied wallpaper paste to the back of the wallpaper and attached it to the board.

While that dried, I painted the mitered trim pieces and then used wood glue to stick them on around the edges of the panel, creating a pretty frame. (Sorry, I forgot to photograph that step!)
Finally, using Command Strips, I carefully hung the panels on the wall (after measuring where they would go.) They only weighed about 6.5 lbs each, so hopefully they will stay up on the wall without a problem.
The panels are now happily hanging in our bedroom and I love that I can enjoy them everyday.
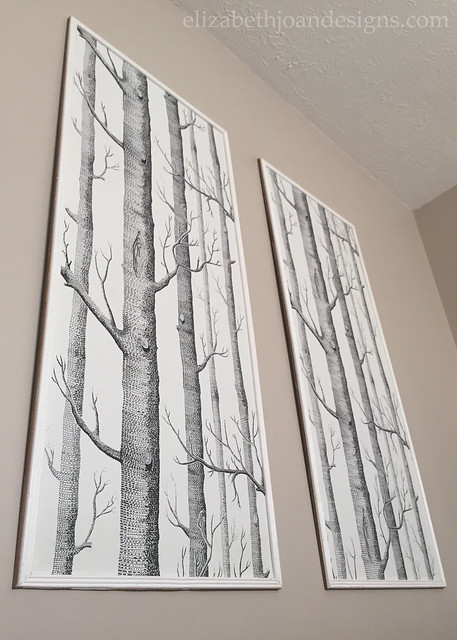
They were super easy to put together, but the most exciting part it that if we ever decide to move, we can easily take our framed wallpaper panels with us!