-
Budget Friendly Glass Hurricane
When I saw these pretty {glass hurricanes} a couple of years ago from Williams Sonoma (priced for a pretty penny), I knew that I could find something similar for a lower price. At the time, I jumped on {Pinterest} and did a quick search. Luckily, I found {this tutorial} from the blog Decorating Cents to make a hurricane inspired by the same Williams Sonoma version for a lot cheaper using dollar store supplies. I ran to the closest store and grabbed everything I needed to start putting them together. Since this was such an easy (and cheap) project, I shared it with a few friends at the time and one of them even ended up using her budget friendly glass hurricane as her wedding centerpieces.

After a last minute project fail this week, I was scrambling to come up with something to share and thought back to those glass hurricanes. I headed to the dollar store and unfortunately, my store no longer had the exact same supplies I had previously used. (Imagine a small tear running down my cheek at this point.) So, I had to improvise.
Here is the new and improved tutorial and the best part is that it only costs two bucks, less than what I paid before, assuming you already have glue at home. Cha-ching!
You will need:
1 glass vase
1 glass candlestick holder
Gorilla Glue (or Epoxy)
The instructions are so easy. Just glue your glass candlestick holder to the bottom of your glass vase and let it cure per the gluing instructions.

Presto! One super cheap, yet elegant glass hurricane.

Can it really get much easier than that? Pop in your favorite scented candle and you are done. I think these would also look great with a monogram etched on them or as a way to display treats or candy at a party. How will you embellish your glass hurricanes?

-
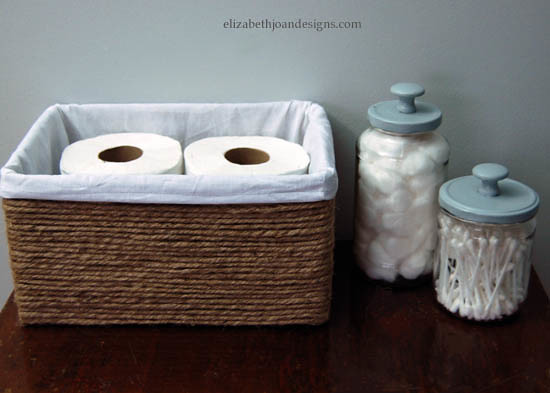
Boxes into Baskets
As you all know, I am still working on my {Half Bathroom Remodel}. *Sigh* We have now added some shelving and I have been looking for some budget storage. Cheap, cute baskets can be hard to come by. So I racked my brain and came up with this wonderful substitute, turning boxes into baskets.
Affiliate links are provided below for convenience. Click here to read my full disclosure.
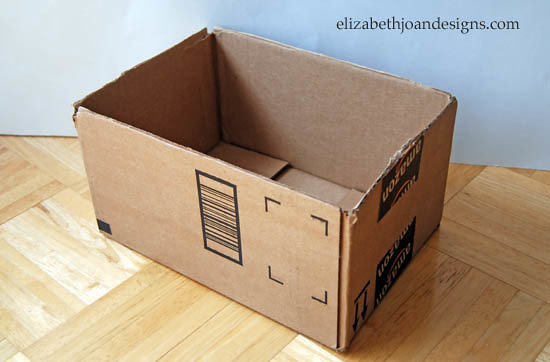
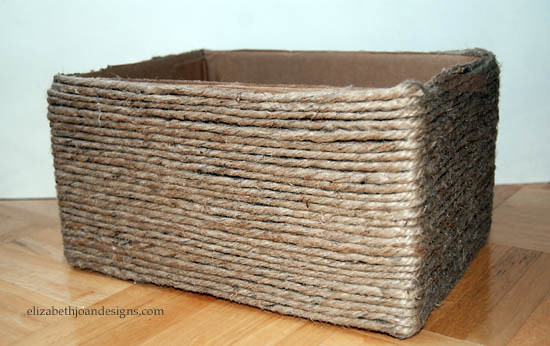
This basket is made from an ordinary cardboard box, 4 ply jute, a hot glue gun, many glue sticks, and a whole lot of love.
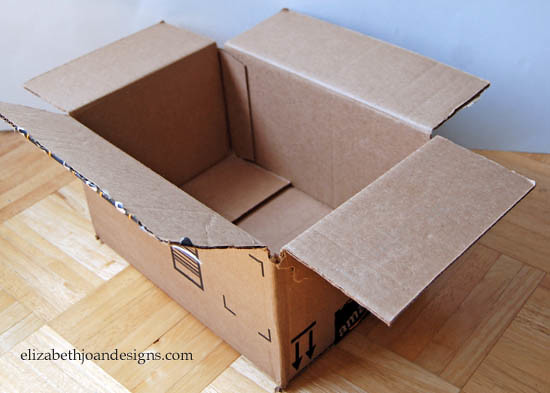
First, using scissors, I cut the flaps off the box.
Next, I wrapped my sad, flap-less box with the jute, gluing every bit of it along the way.
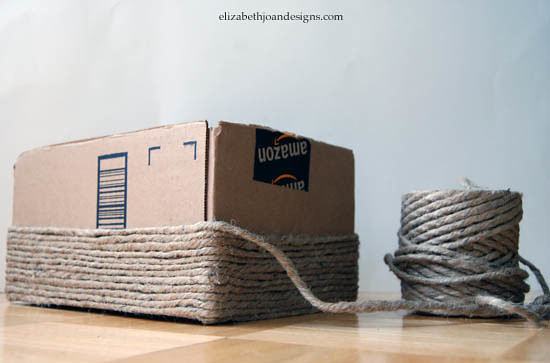
Then, I continued wrapping and wrapping and wrapping.
Finally, when I reach the top, I was so excited, as if I had just climbed my way to the peak of Mt. Everest.
To finish off the basket, I quickly whipped up a custom size liner using inexpensive, white muslin fabric.
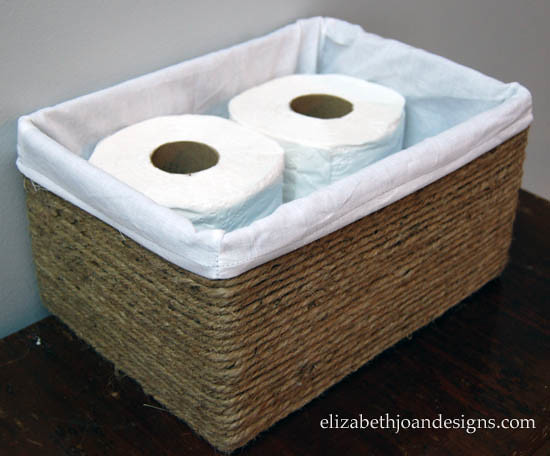
I love the look and it really didn’t take too long. Now, I just need to make a few more of these to shove on my bathroom shelves.
* Update: A tutorial on How to Make a Custom Basket Liner is now available!
-
Reusable Snack Bag
I previously mentioned in my {Packing A Carry On} post that I had a reusable snack bag that I took with me on my flight to Atlanta. Even though I may not be down with the lingo, I’m going to try and share a sewing tutorial on how to create these fun little clutches. They are cheap to make, pretty easy to whip up, and washable too. Plus, you won’t be THAT person. You know, the one who everyone is staring at as they crinkle and crunch a plastic snack bag. I hate being that person.


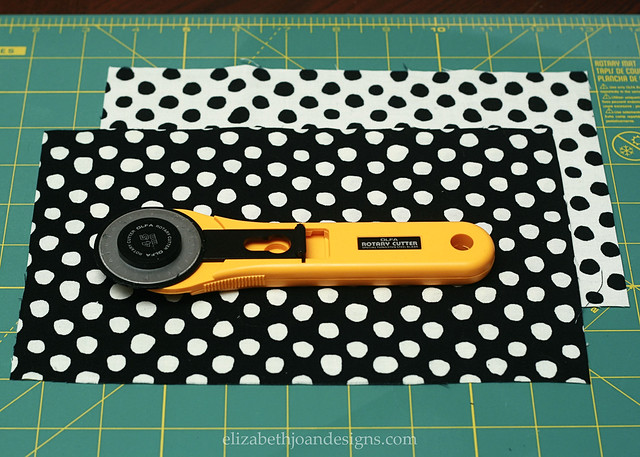
Here is what you will need to make your own 4″ X 5 1/2″ bag.
1 Piece of fabric (outside)
1 Piece of fabric (lining)
5″ of velcro
Cutting mat & rotary cutter (or scissors)
Sewing machine
To start, cut both pieces of fabric into 9 1/2″ X 6″ sections. This will obviously be easier if you us a rotary cutter and cutting mat, but fabric scissors will also work. You could also try to use your teeth or a steak knife, but neither of these are recommended. *wink*
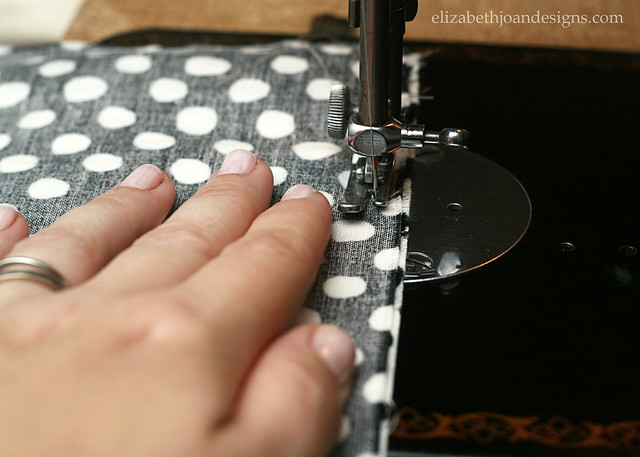
Next, pin one piece of the velcro to each of the fabric pieces on the ends of the right sides and sew them on. (Photo below.) Naturally, I realized at the last minute that I didn’t have a heavy needle for circumstances like these, so I improvised with adhesive velcro instead. Doh! I don’t imagine it will withstand the washing machine, but it has held up so far with multiple uses. But you can disregard all of this, because YOU are going to SEW your velcro on and have no problems. Good job!
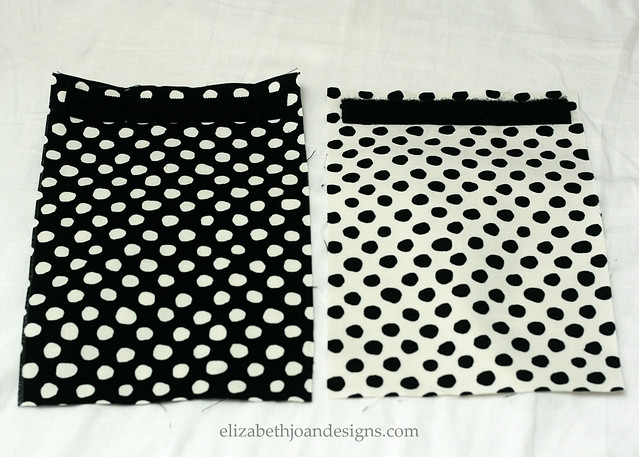
Once the velcro is attached, place the right sides of the two pieces of fabric together with the velco on the inside at opposite ends and pin them together, like in the image below.
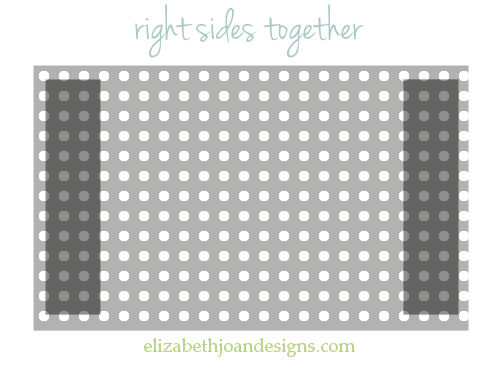
Then, sew along both ends and about 1 1/4″ down both sides of the end where the lining piece’s velcro is attached.

(The white fabric with black polka dots was used as my lining, so I sewed down the sides of the end where my velcro was attached to the white piece.)
After that, turn the fabric right side out and fold it so that the lining is on the outside and the flap is left free. Pin the sides.

Finally, sew along each side and turn it right side out when you are finished. The bag is then ready for use. If you made it this far with these instructions and you still remember your own name, you deserve a medal. If you now understand how to make this bag, I deserve a medal. Hopefully someone is getting a medal.
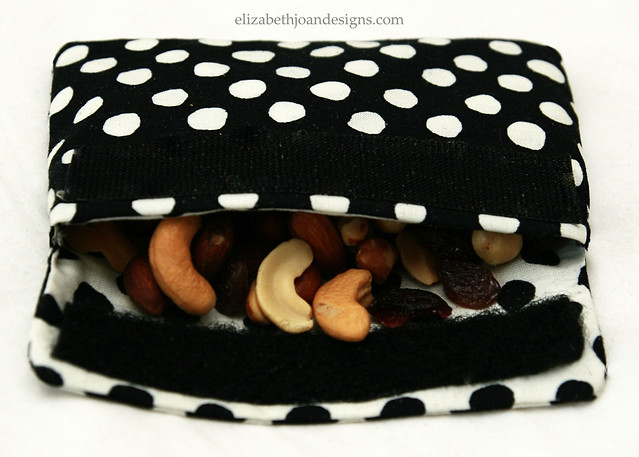
I originally, made this with the intention of using it as a snack bag, but have since thought of other great uses as well. Make up bag, jewelry holder, floppy iPhone case, etc. Let us know if you give this a try!
-
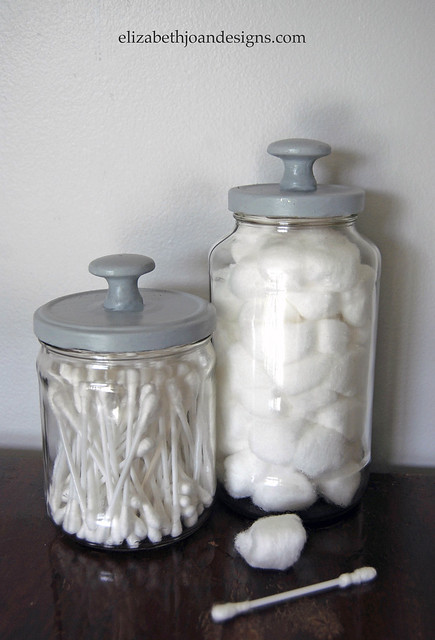
Easy DIY Apothecary Jars
As I continue to work on the finishing touches to my {Half Bathroom Remodel}, I developed a NEED for two apothecary jars for storing Q-tips and Cotton balls. My budget for such a specific storage option was right around $0.00, so I had to get creative.
Looking around my house, I didn’t find much. I remembered my sister had given me some different glass containers last Halloween to use as decorative specimen jars. After digging around my basement, through the bin of Halloween costumes and decor, I came across a gorilla costume. I put it on and scared my kids, just a little. Then, I was back to looking for those glass pieces.Well, I only found one and it wasn’t going to work for this, which made that a giant waste of my time and this story a giant waste of yours. I am sorry for that. Then I went in the garage, looked in the recycling and under a lot of other recyclable materials and found glass a salsa jar and a pasta sauce jar. I felt like a pirate finding buried treasure. I knew these were going to be perfect.

First, I gave them a bubbly bath to help eliminate the odors they were sharing with me. Next, after they were dry, I painted the lids and two knobs I had left over from another project. Using paint I had on hand, multiple coats were added to eliminate the streaks.
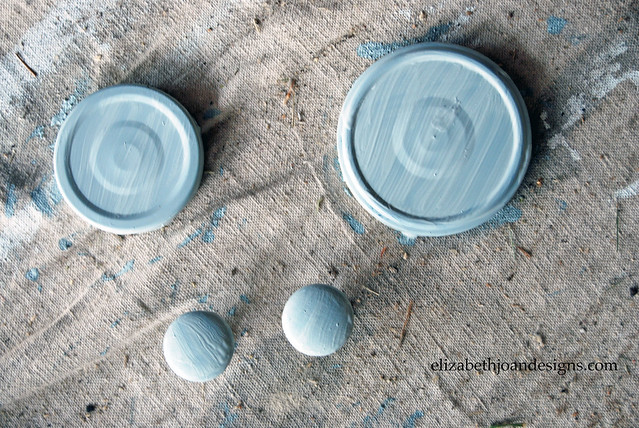
Then, my three year old and I screwed the knobs on tight to the top, center of the lids.
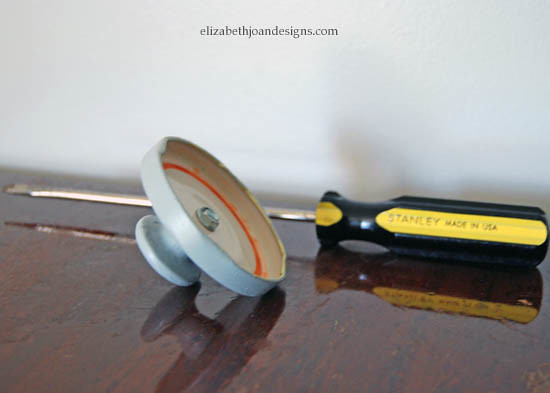
After that, he thought it would be fun to use the screwdriver to scrape the paint off my freshly painted lids, and it was. My apologies, for not taking a photo of this.
Finally, I re-painted the lids and knobs to cover all of our scratch marks.
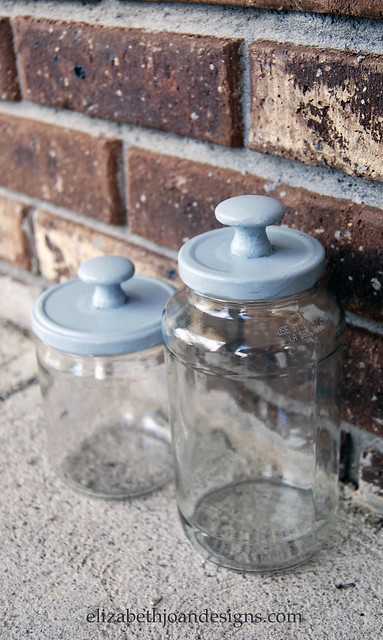
There you have it folks, diy apothecary jars that cost nuttin’. These simple jars make a great storage addition to any room.