-
Half Bathroom Remodel Part 2: The Final Reveal
Pop the cork on the champagne! Pull out the streamers and balloons! The big Half Bathroom Remodel Part 2: The Final Reveal is finally here! Since we started our remodel way back in January, to finally be done with the bathroom is definitely a reason to celebrate. Woohoo!

To see where it all began check out {Half Bathroom Remodel Part 1}.We have recently added some shelving above our commode, to give our washroom some added storage. For the shelves, we picked a 1″ high x 1′ deep x 6′ long piece of pine from The Home Depot. While we were there, we had them cut it into 3 equal pieces. Once we were home, I slapped a couple coats of white paint on each board.
To attach the shelves to the wall I used some brackets leftover from another project. They can be picked up at your local hardware store for around a buck a piece. For these shelves, I like how chunky these brackets are.

My diy {baskets} and {apothecary jars} provide cute, functional storage in our bathroom. I also added a picture frame with the words You Are Beautiful in it. Who doesn’t like a good ego bust in the mornings?
During this remodel, I had my first adventure in basic electrical work. When I flip the switch, the light comes on, so I called it a success. And I didn’t get shocked! Yay! I do not have a picture of the before light, but I assure you, this one is a huge improvement.
The mirror was a great find by my awesome sister, who picked it up for free. I happily traded her an old window I wasn’t using for it.
We love our new bathroom! I am impressed that we were able to do it all ourselves. It was hard work and took us several months but so worth it.


-
We Dig It September 2013
Each month we will be sharing some of our favorite finds from around the web. Enjoy!
1. We are loving track doors {like this one}.

2. How cool are these {wrench hooks}???
3. {Giant floor pillows} are definitely on the to-do list.
4. Fall decorating is fun, especially with neutral white pumpkins, like in this {beautifully styled hutch}.

5. This {tween bedroom makeover} would make any girl swoon.
6. Aren’t these {hanging beds} awesome!!
7. Here is a great tutorial on {how to print on paper napkins}.


-
Printable Paper
I absolutely love browsing the craft store’s supply of printed card stock. There are always so many fun patterns and colors to choose from, plus you can use the printable paper for a gazillion different projects.
The other day, I wanted a specific design of card stock for something I was working on, but didn’t have time to run to the craft store. Boo. You see, the closest store is about 30 minutes away, so a trip there and back would have eaten more than an hour of my time up. Luckily, I’m resourceful and in less than 5 minutes I had whipped up exactly what I need in Photoshop and was able to print my own designed card stock. Of course, I thought that maybe other people may be able to benefit from my resourcefulness, so I created a small collection of printable papers to share.
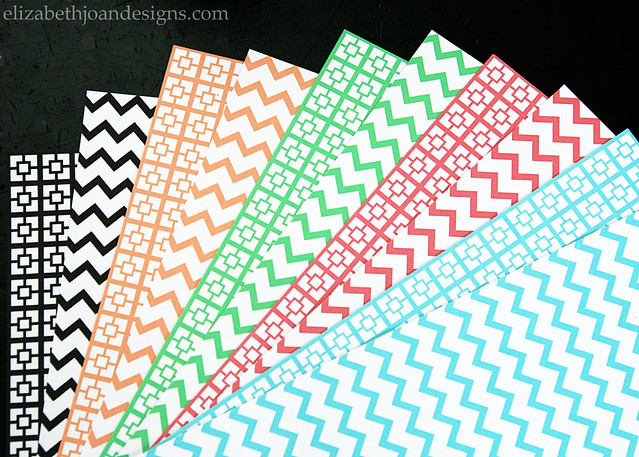
The colors are black, orange, green, pink and light blue. For some reason, they are appearing a little bolder in the photo above than they actually are. Hmmm…
Just download and print onto white card stock.
Download this printable from THE GALLERY.
There are so many things you can use these for.
You can create a new look for your cell phone. (I purchased {this cell phone case
} from Amazon.) Trace around the case on the paper and cut it out a little smaller than your lines. Then you can place the paper inside your case and change them out whenever you are looking for a new look or feeling a little fickle.

Or cut the paper to make a last minute thank you card.

The possibilities are endless. Let us know what you are going to make with your new printable papers!
-
Apple Candle Holders
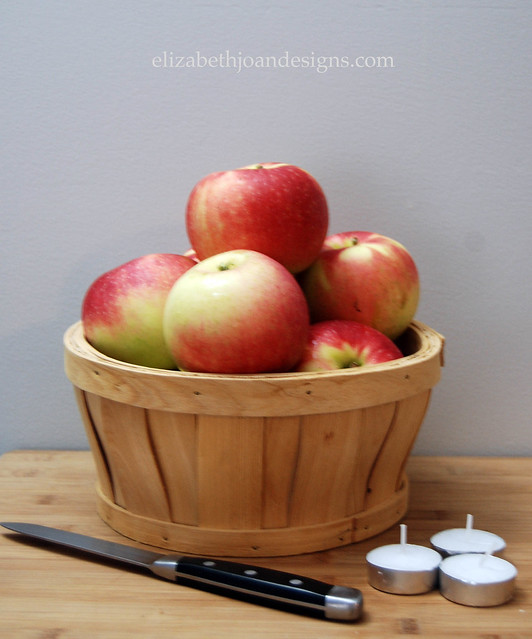
My home decor is mainly of the colors black, white, and gray, but Fall always inspires me to add a little warmth into my color pallet. I LOVE Fall. Apples, pumpkin spice lattes, colorful leaves, and slightly cooler weather; what’s not to love? With this simple centerpiece, I can bring a little bit of that love right to my table.

If you need a quick table centerpiece or an easy decoration for a fall gathering you are hosting, then this project is for you. (It may take me longer to write how I made this, than it actually did to make it.)
Supplies
Level apples
Tea light candles
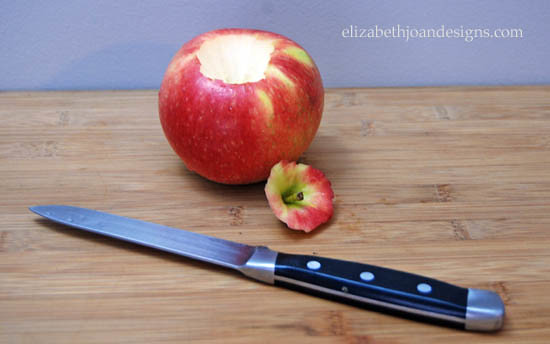
Sharp paring knife
Plate for displaying apples
Lighter or matches
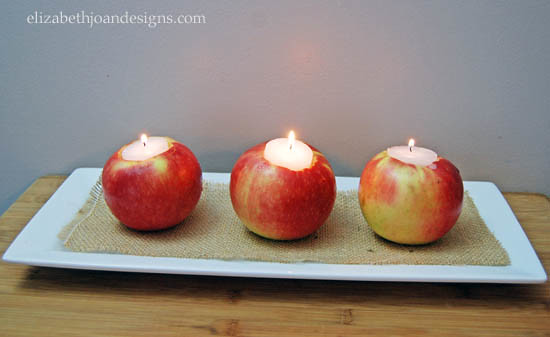
Next, place the tea lights in the holes, display on the plate, light each candle, and keep away from children.
I was originally going to use tapered candles but as I was cutting the holes, I made them a little too big. Thankfully, I had some tea lights that worked in a pinch. What do you like to use for your fall decor?