-
DIY Chalkboard Paint and Accent Wall
My youngest little guy LOVES to color. I wanted to make sure I incorporated his passion into our playroom designs. That is exactly why I chose to do a chalkboard accent wall.
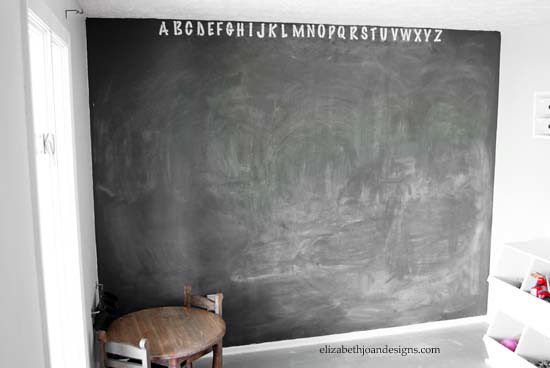
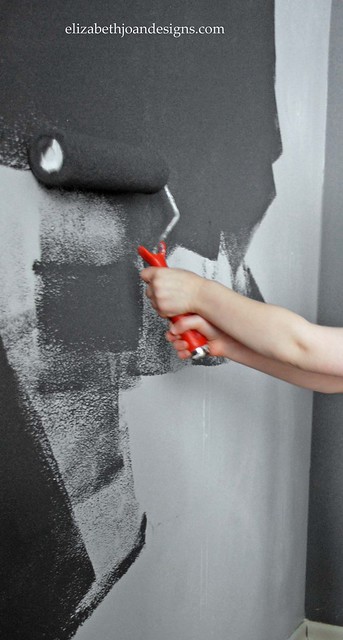
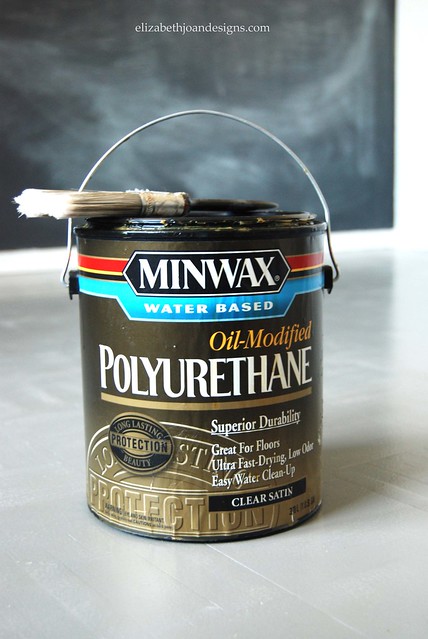
Instead of doing straight up black chalkboard paint, I wanted to choose my own color. My choice; Restoration Hardware Flint. (I had it color matched in latex paint at Home Depot to keep it a little more budget friendly.)
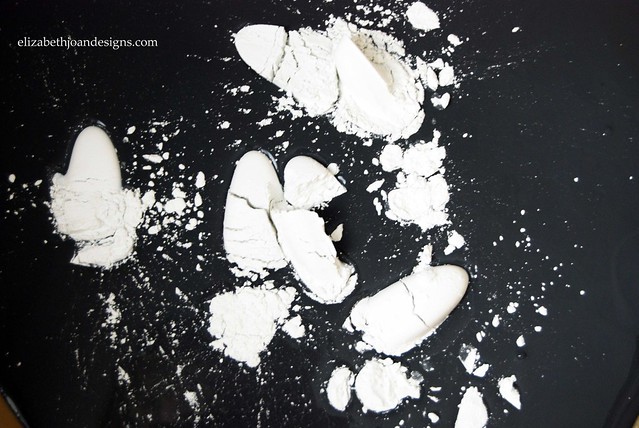
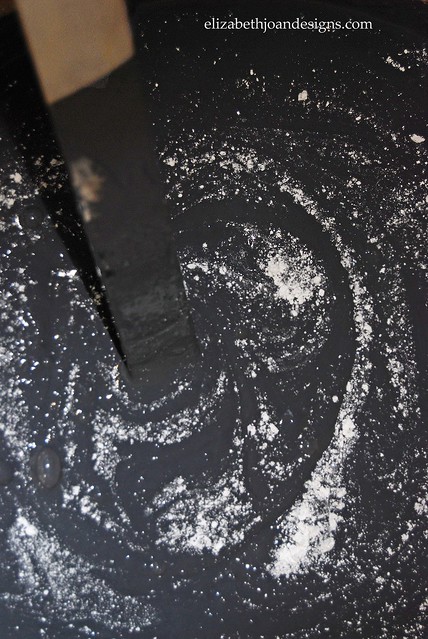
To get from plain latex to chalkboard paint, I mixed 2 cups of the color matched paint and 4 Tablespoons non-sanded grout together. This worked beautifully.
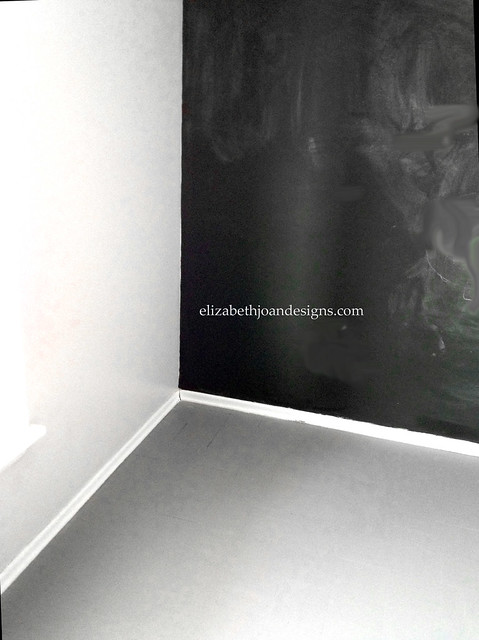
Along with the help of my four year old, I applied two coats of this concoction to the wall and let it dry for 24 hours.
Then, I primed the surface with chalk. That way the first
scribblesdrawings on the wall weren’t our permanent artwork for the room.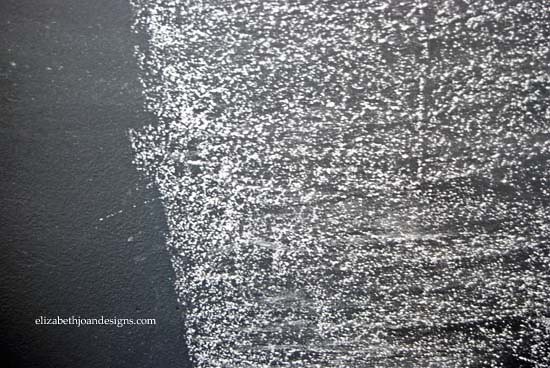
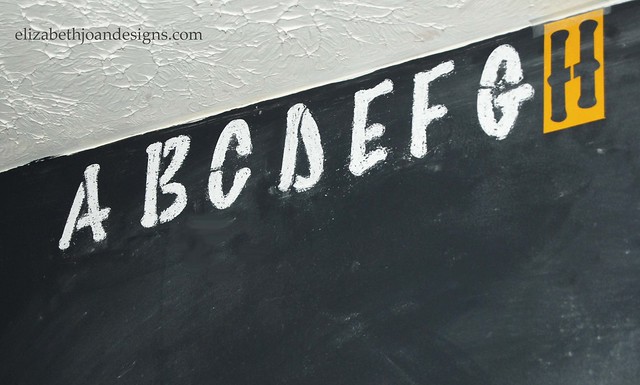
Finally, to add an educational touch to the kid’s space, I choose to stencil the alphabet across the top of the accent wall.
This process took a little while, but was pretty easy.
I taped the stencils to the wall and chalked each letter. This way they can be easily changed if we so desire.
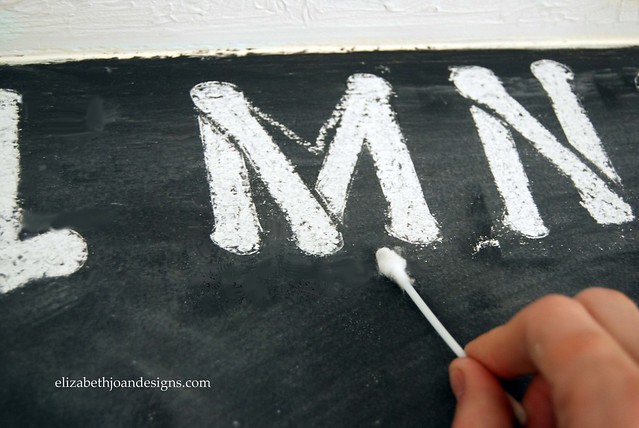
To touch up the ABC’s, I used a wet Q-tip to erase any unwanted markings.
We are in love with this wall. The boys enjoy coloring on it and so do I.
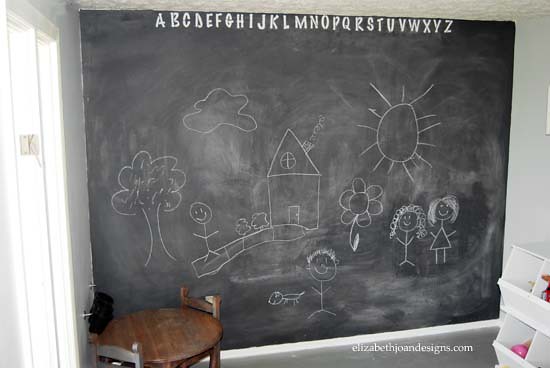
Now, if I can only make it clear to my two year old that this is the only wall we chalk on. *sigh*
-
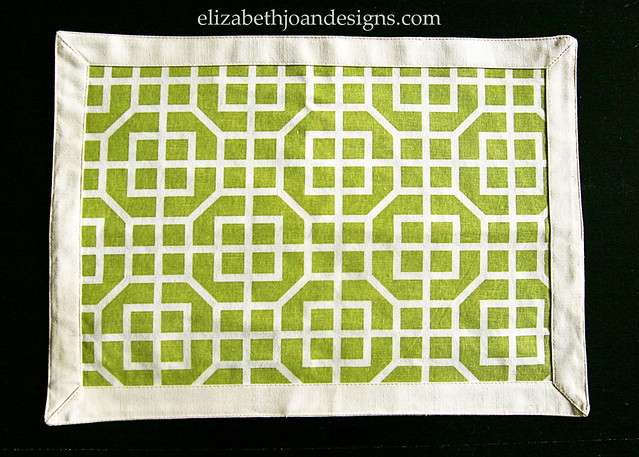
The Placemat Pillow
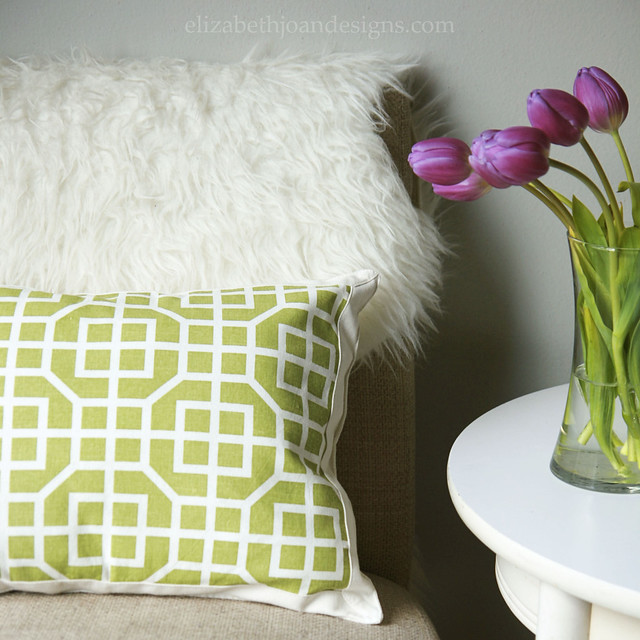
If you visit this blog very often, then you know that we love a good deal and an easy project. And I’m happy to announce that this post has both of those criteria covered for you. Just like the title states, this is about the placemat pillow. A simple throw pillow made from, you guessed it, a placemat.
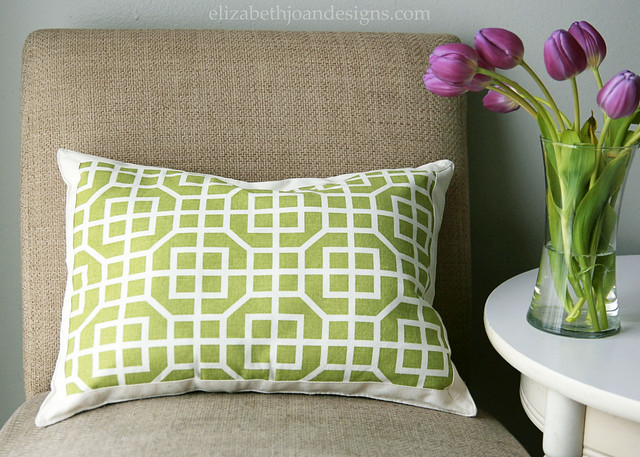
I found this cool green trellis placemat at Target when I was visiting my sister. (Read more about that adventure here.)
To make a placemat into a pillow, use a fabric placemat that has two panels attached to each other. I started by using a seam ripper to create a hole in one corner big enough for my hand to fit through.
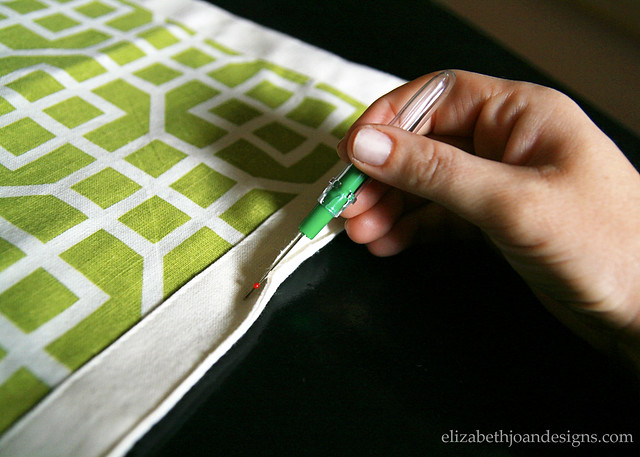
Next, I shoved a bunch of pillow stuffing inside. (This was seriously the most time consuming part of this project.)
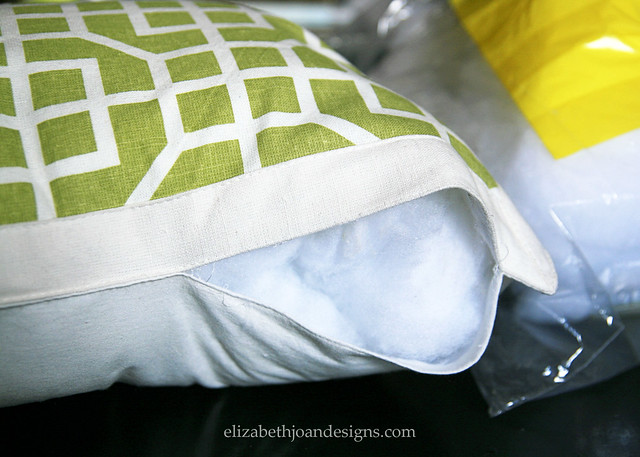
Then, using a needle and similar color thread to the original, I sewed the opening closed with a simple stitch. And that was it!

These little pillows are so fun to whip up and would make such a great housewarming or holiday gift.
So, what do you think? Have you ever made a pillow out of a placemat? Or have you used another method to create a throw pillow that is ridiculously simple? Let us know!
-
Project Success: Painted Parquet Floors
I have been working on redoing the flooring in our soon to be playroom and my first attempt didn’t go quite like I had planned. You can read all about my failure here.
After the disaster of the white washed parquet floors, I decided that straight up painting it was going to be my best bet.
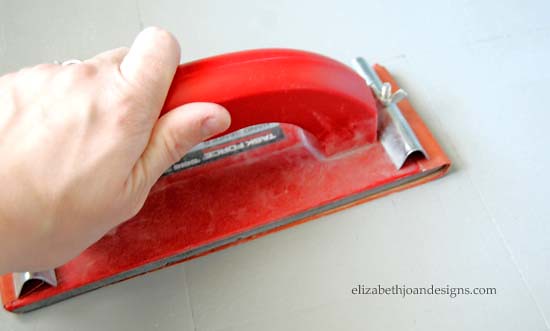
First, I got to work by sanding the entire space and wiping off the dust. I wanted to remove all of the previous finish. I was hoping that this would fix all of the discoloration problems I had before, but it seems like most of the yellowing was actually seeping up from the wood, not just from the polyurethane I applied.

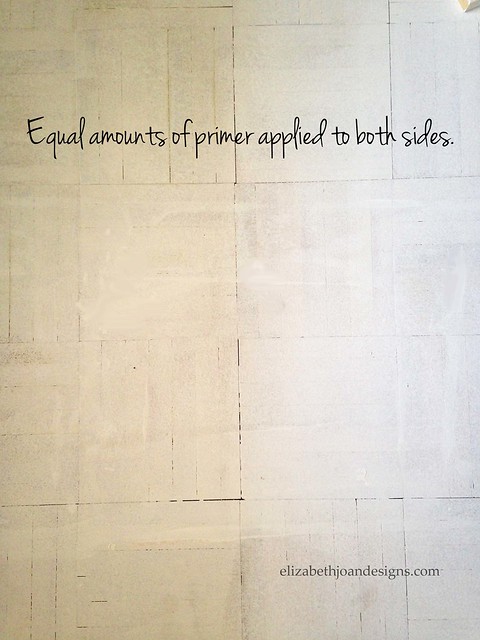
(I figured since I was no longer worried about what the floor looked like, I could work on other projects in that room before finishing it for the second time. I’ll share more on those projects in later posts.)Next, a coat of primer was applied to the parquet. (You can see the yellow color bleeding through the primer on some of the tiles.)

____________________________________________________________________________
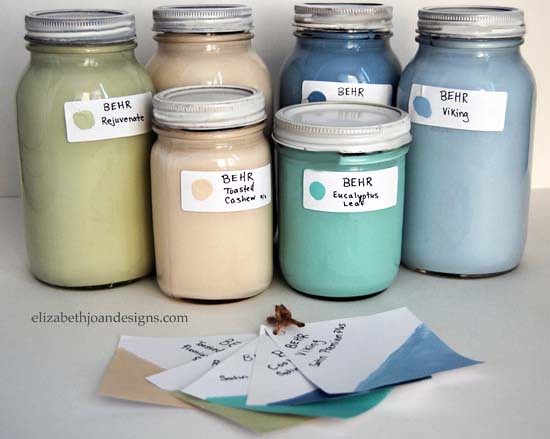
If you like this post, you may also like:Tips for Mixing Your Own Paint Color


-
We All Scream, For Ice Cream!
“This shop is part of a social shopper marketing insight campaign with Pollinate Media Group™ and Wet-Nap, but all my opinions are my own. #pmedia #showusyourmess http://my-disclosur.es/OBsstV”
Here in upstate New York, everyone is eagerly awaiting the warm weather to arrive and stick around a bit. But, as usual, mother nature is taking her sweet old time. To show her that she can’t bring us down with her frigid windy weather and casual snow storms, I decided to have an ice cream party for
myselfmy boys.
I headed off to Walmart, you know, because of their every day low prices, to pick up some of the essentials for the party. While I was there, I decided to forgo the traditional napkins and picked up a canister of Wet-Nap. After all, this was a party for a 2 year old and 4 year old. Things were bound to get messy. (I used a $0.55 off coupon. You can get it here, while supplies last.)

As party time was approaching, my four year old kept reminding me “Mommy, it’s not just any party. It’s an ice cream party!” To say that he was excited would probably be an understatement.
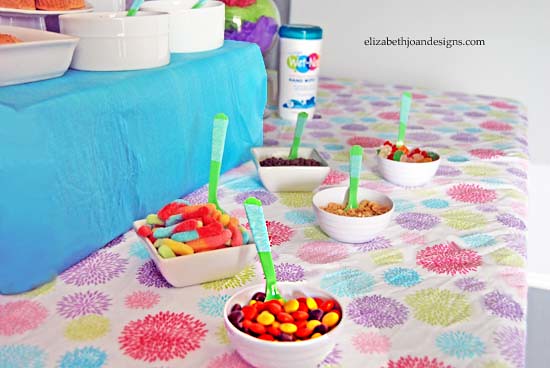
I set up the ice cream bar, using a fun colorful bed sheet I had purchased at the thrift store for only $2 as my table cloth. It was the perfect thing to bring some bright cheeriness to our gathering.
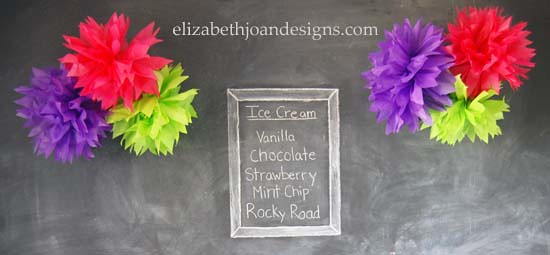
I also made a few tissue paper flowers for more color. The back drop of my display was a chalkboard wall we have in our playroom. This made for inexpensive decorating.
Aqua washi tape was added to my neon green plastic spoons to jazz them up a bit. Super simple!

My little men had a blast with this party.

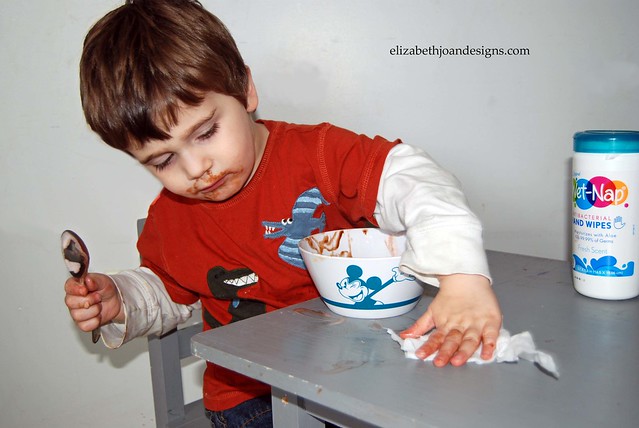
As predicted, things got pretty messy.
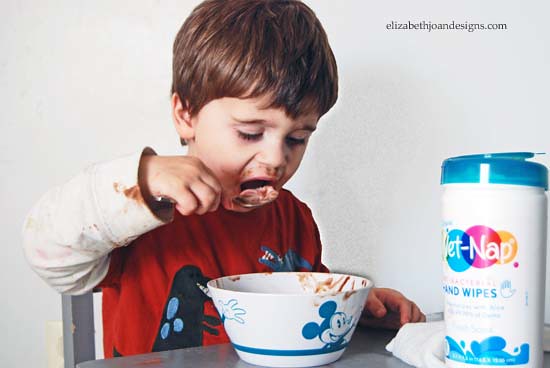
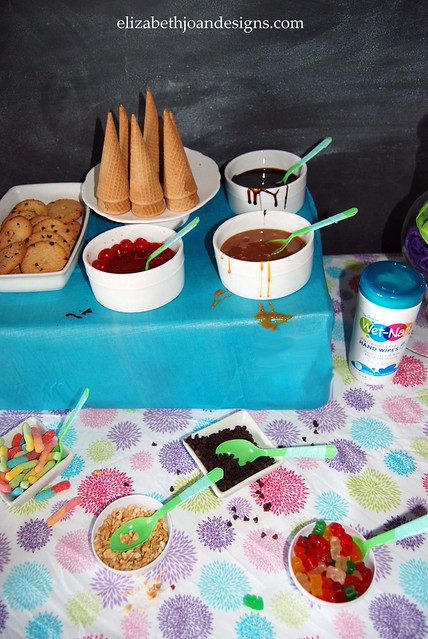
But nothing my two year old couldn’t clean up. The Wet-Nap made it a breeze!
So, take that mother nature! Finally, a win for us!