-
Fabulous Faux Topiaries
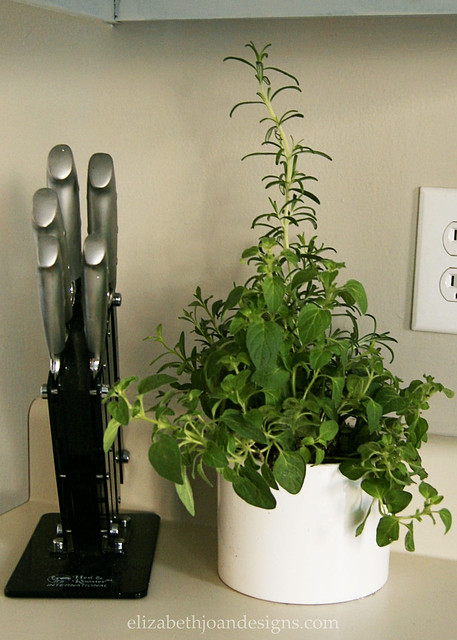
I want to share a secret with you. I have a dark gray thumb. Surprise! Meaning that I tend to kill most plants quicker than you can say “house plant.” Hence the Faux Topiaries. (We do have a few live plants that we have managed to keep around for a couple of years, but I’m chalking that up to luck.)

When I shared our Entertainment Stand Dresser, I talked about wanting to add topiaries. I knew that that would have to be faux, because the area they would be in just doesn’t get good lighting and I wasn’t up for killing any more plants. After a little Pinterest perusing, I found a couple that I liked from Liz Marie Blog and In My Own Style. I ultimately went with the latter, making a few tweaks along the way.
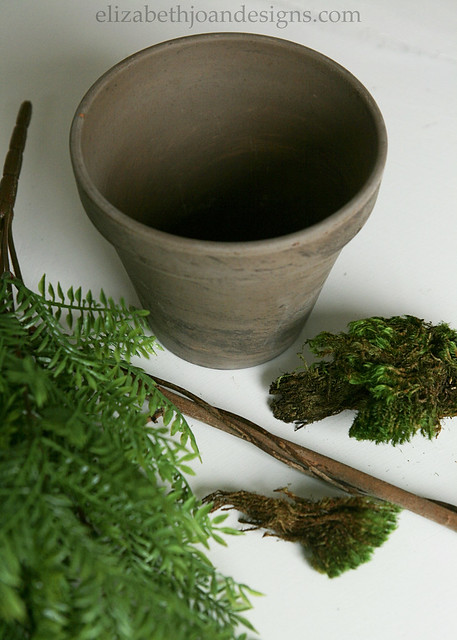
Ready to make your own? You will need:
- planter
- faux greenery
- straight stick
- floral foam
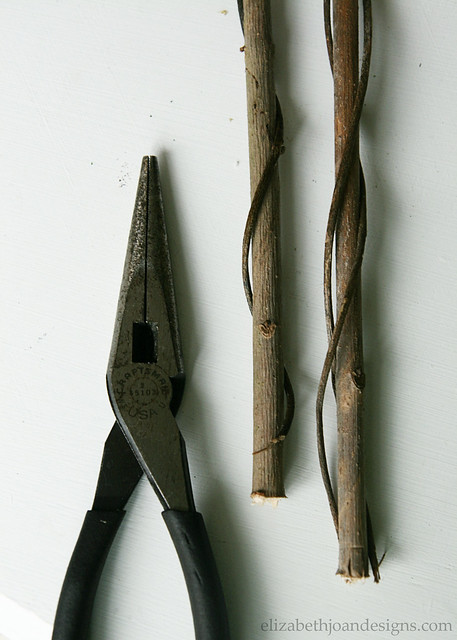
- wire cutter
- needle nose pliers
- floral wire
- moss
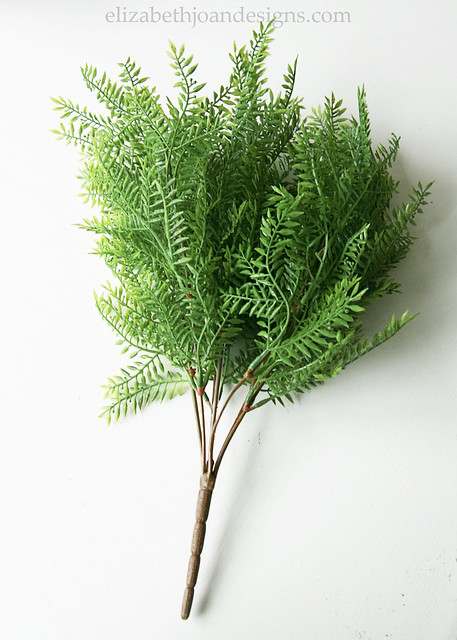
I started with the faux greenery…
and began cutting each of the pieces off of the main stem.

Next, I popped the top piece off of each section, set it to the side, and bent the wire at the top with needle nose pliers, so that the other pieces would not fall off.
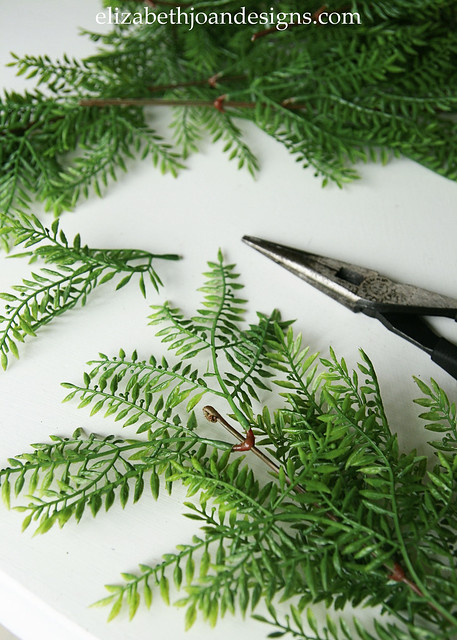
Using my fingers, I pushed all of the little leafy sections towards the top. (I did this for each of the pieces I had cut off.)
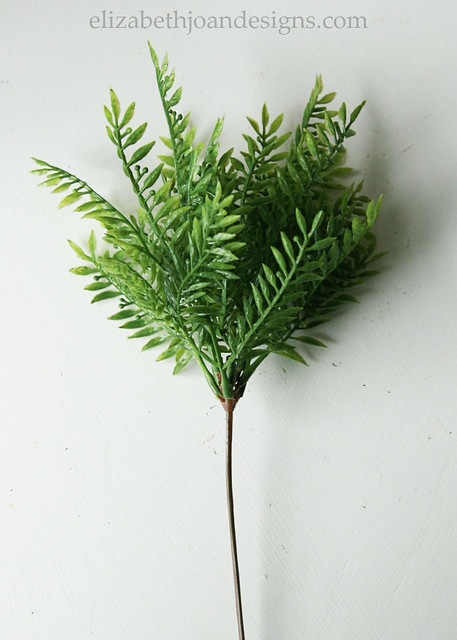
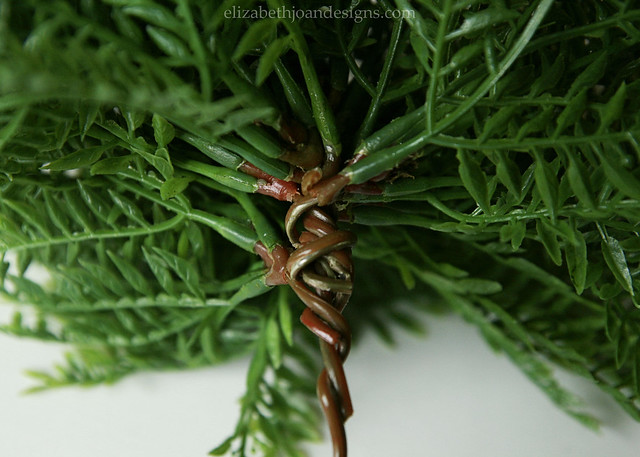
Then, I chose one stem to be the main one and started wrapping all of the other stems around it. Each stem was wrapped around twice and any excess was cut with the wire cutters.

After that, I cut the straight stick (found it in the woods with the vines already around it) so it was about 15 inches long and pushed it into the floral foam that I had already placed in the planter.
Finally, I attached the ball of greenery to the top of the stick by wrapping the long stem around it and secured it in several places with floral wire.
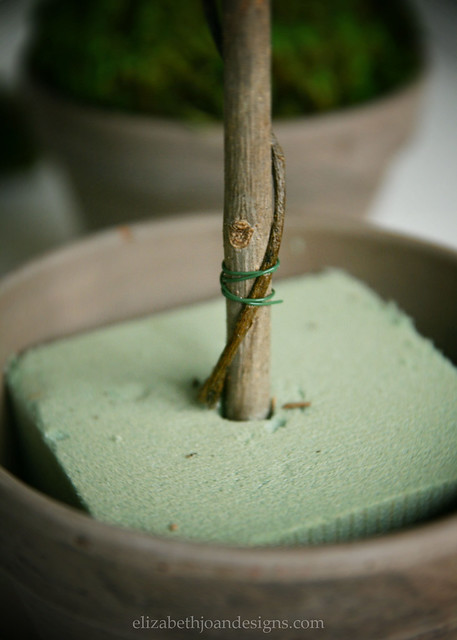
Oh yeah. I also threw some pretty green moss on the top of the foam to cover it up.

And that’s it! I chose not to add anything extra stems or “groom” them any more. I really like the organic look of these, with the little stems all going every which way.
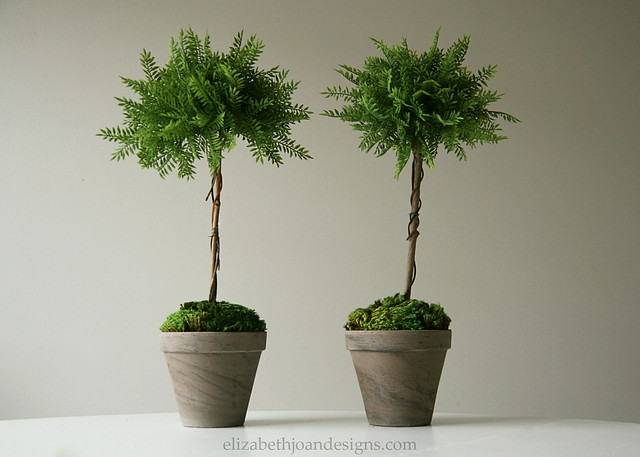
I know that these topiaries may look a little Spring-y right now as we are entering the colder months of the year, but they add the perfect amount life and cheer to our home. What do you think of faux topiaries?
-
Kitchen Happenings
So, this is our kitchen. Galley style. Pretty plain and simple.

And this is what it looked like on move in day. Check out that mustard yellow wall color. And the horrible faux wood/almond cabinets. If this doesn’t scream late 80’s/early 90’s I don’t really know what does.
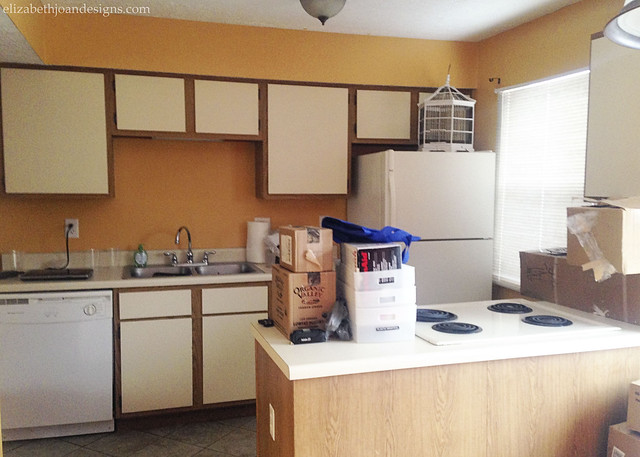
Anyway, let’s get back to the good stuff. The kitchen does look a lot brighter and open, don’t you think?
We couldn’t wait to get our hands on the space to start transforming it, bit by bit. However, a complete gut and renovation are just not in the cards for us right now, so we decided to update the existing pieces with some paint. For the cabinets, we primed them with oil based primer and then added a couple of coats of Behr Ultra Pure White paint. We will probably get around to adding some poly to them soon for some extra protection, but for now, things seem to be holding up pretty well.
The wall color is Revere Pewter by Benjamin Moore. (Same as the Breakfast Nook.)
And here are a couple of other areas of the kitchen we’ve already shared:
Faux Roman Shade 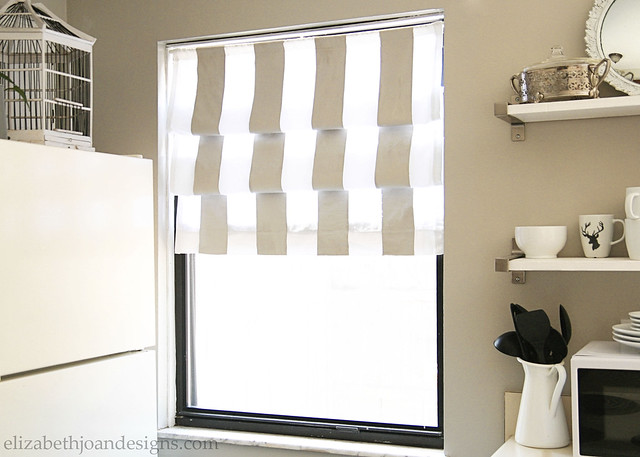
Open Shelving 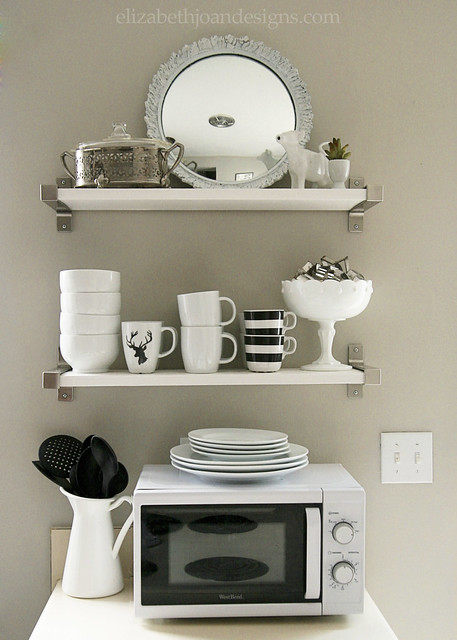
In addition to painting, there’s still tons to do, like…
- Update the hinges – These dark hinges stick out like a sore thumb. Or like a dark hinge on a white cabinet.
- Replace all the lighting – There is an ugly boob light and a cheap over-the-sink-light that both need to get the boot.
- Paint the almond colored appliances – I’m a little leery of the outcome. Cross your fingers that it works out for the best!
- Install new flooring – Thinking about something warm to balance out the brightness.
- Update the almond colored countertops – We are going to try DIYing them, but if it is a complete failure, we do have a back up plan to get something new.

You can pretty much guarantee that we will be sharing all of these upcoming projects with you, even if they don’t turn out as planned. But, we’ve certainly come a long way already. Woohoo! So, have you had your own kitchen painting extravaganza? How did it turn out? Anything you would have done differently? Let us know. We would love to hear from you!
-
Entertainment Stand Dresser
I know, I know. Dressers weren’t made to for T.V.’s. But I love the idea of having an dresser as an entertainment stand because there is so much storage inside! It completely eliminates the need for a separate place to store DVDs and the like. When you are low on extra space like we are, being able to remove unnecessary furniture and storage equipment is a blessing.

We’ve had this particular piece for about 6 years now. We purchased it on Craigslist for around $25, which was totally a steal. Originally, it had a warm light oak stain and finish on it, but we quickly decided that we wanted it painted white. It also came without any knobs, so we ordered these cool round drop pulls.

Inside we store tons of stuff…
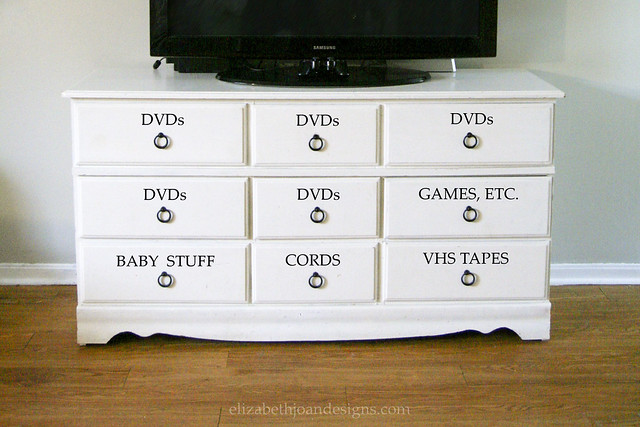
GAMES, ETC. – This drawer holds all of our Wii and PlayStation games and accessories. (Both of those consoles are behind the T.V.)
BABY STUFF – I babysit for my cousin’s son a few days a week and we keep all of his extra diapers, wipes and clothing corralled in here.
CORDS – USB cords, extra electronic cords, random chargers, etc.
VHS TAPES – Yes, I still have a few hanging around, even though we do not have a player for them. Most of them are dance performances and family videos that I just can’t let go.
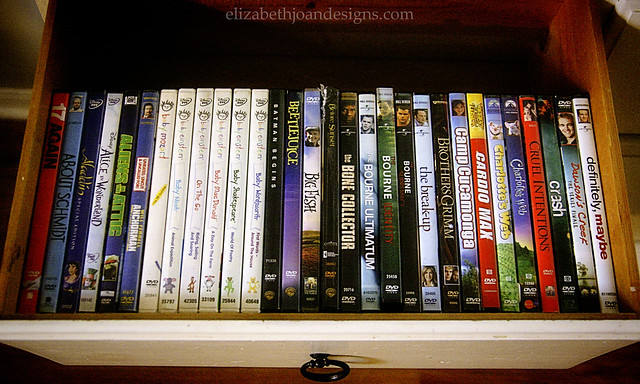
DVDs – The top row of drawers (and middle two on the left) hold all of our DVDs which are kind of alphabetized. That means they used to be, but my two kids and husband threw my Type A tendencies to the wind. Makes me want to re-organize just thinking about it.
I would love to be able to consolidate our DVDs, but that is a project for a later date!
Obviously, this dresser is super useful to our family. It needs a little help in the decor area, but I’ve mocked up a little vision that I had for the space.

The hubs seems to think we should forgo any decorating to keep the space simple, but I kind of like the idea of adding a little faux life in the form of topiaries and a rustic touch with an old shutter. What are your thoughts? Have you ever used a random piece of furniture as entertainment stand?
-
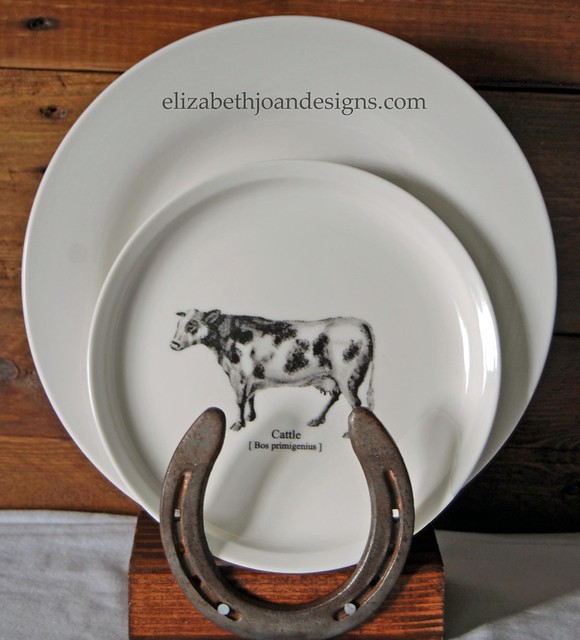
Horseshoe Plate Holder
Anthropologie is so inspiring. Every time I am in the mall, I have to stop in and get a peak of their amazing home items. During my last visit, something sort of caught me by surprise. I came across some really beautiful plates, but the dishes were not what caught my eye. It was the horseshoe plate stand that really had me drooling. It was a shock to me that my biggest inspiration stemmed from their display and not their product. But I was in love. I had to make one.
This project was super simple. If you would like one of your own, just follow along with me through these easy steps.
Supplies
– Horseshoe
– Block of wood- 2″ high x 4″ deep x 6″ wide
– Scrap wood- 10″ high x 1/4″ deep x 3″ wide
– 3 Nails
– Hammer
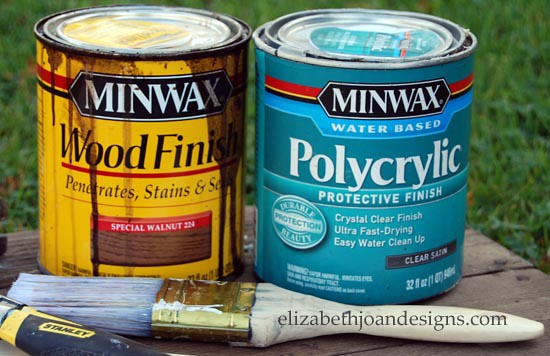
– Your favorite wood stain. – I used Minwax Special Walnut.
– 2 Brushes
– Minwax Polycrylic – or other choice of finish.
– Hand Saw – (not pictured)
– Drill (optional/not pictured)
– 120 Sand paper (not pictured)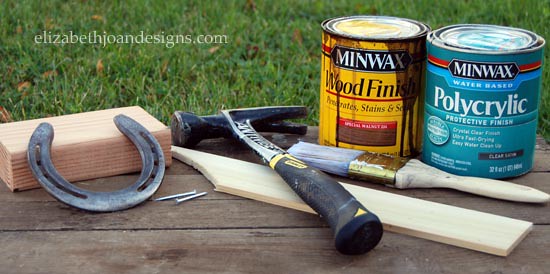
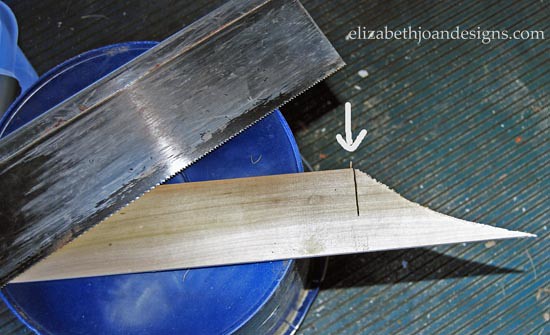
1. I cut my scrap wood to measure 10″ high x 1/4″ deep x 3″ wide. This piece was used as the back support for the plates.
2. Using the 120 grit sandpaper, I smoothed out the edges of the wood. This step helped make the final product splinter free.
3. Next, it was time to stain and finish. I applied Mixwax Special Walnut with a natural brush to both the block of wood and the support piece. Once dry, I used a synthetic brush to give the wood two coats of Minwax Polycrylic.
4. I assembled the plate holder by placing the horseshoe front and center on the block and hammered 2 nails into it to hold it together.
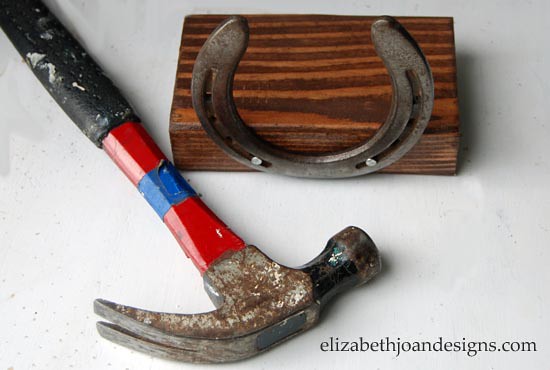
5. Finally, I drilled a hole through the support piece and block to avoid splitting the wood. This is optional. Then I hammered a nail through the pre-drilled spot.
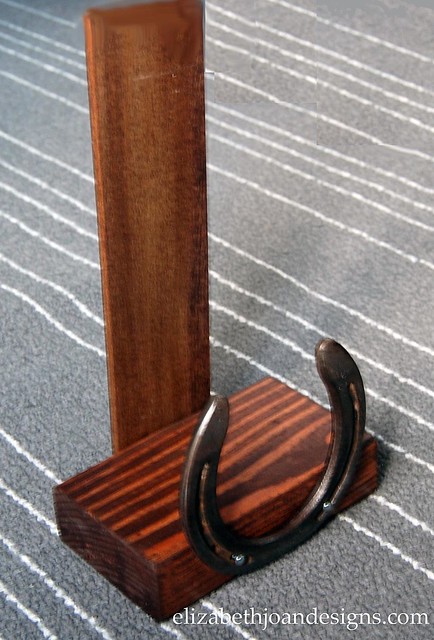
I love this as an accessory in our kitchen. It turned out just as I had hoped. Since I had everything already on hand, the cost to me was $0. I call that a win!

Good luck to you if you try this and let us know if you do. We’d love to see pictures!
____________________________________________________________________ You may also like:
Barn Wood Sign 
Cable Spool Clock 
Nightstand Makeover 
Numbered Wooden Crates