Create & Share Challenge: Holiday Wreath Display
The holidays are almost upon us! Can you believe how fast 2016 went? Me neither. For my last attempt at holiday decor (I’ve shared my Christmas tree and entryway decor) I wanted to share this holiday wreath display that is currently hanging in our dining area.
This post is brought to you by Elizabeth Joan Designs in collaboration with Cutting Edge Stencils. Although I did receive a product from Cutting Edge Stencils, all opinions are my own. Click here to view my full disclosure.

This month, I’m joining up for my second Create & Share Challenge, hosted by Casa Watkins and Pocketful of Posies! Thanks, Ladies! There are 9 other amazing projects, so make sure to check them out at the bottom of this post! (View my first Create & Share Challenge project.)
So wait… what is this challenge? Well, participants are tasked with using their personal decor style to create a project centering around one main item. And this month, we are working with holiday stencils from Cutting Edge Stencils! For this project, I made a fun and neutral holiday wreath display and it was so easy to create!

This post contains affiliate links. Click here to view my full disclosure.
To make this holiday wreath display, you will need:
- Holiday Cheer Christmas Stencil from Cutting Edge Stencils
- Painter’s Tape
- 48″ X 26.5″ Plywood
- Trim Pieces cut to 26.5″ and 45″
- Wood Stain
- Old Rag
- Paint Brush
- 2 Paint Colors (I used Waverly Chalk Acrylic Paint in White and Silver Lining.)
- Small Paint Roller
- Screwdriver and Screws
- Hammer and Nails
To start, I used an old rag to apply Minwax stain (Early American) to the trim pieces.

While the trim pieces were drying, I painted one side of the plywood with white paint.

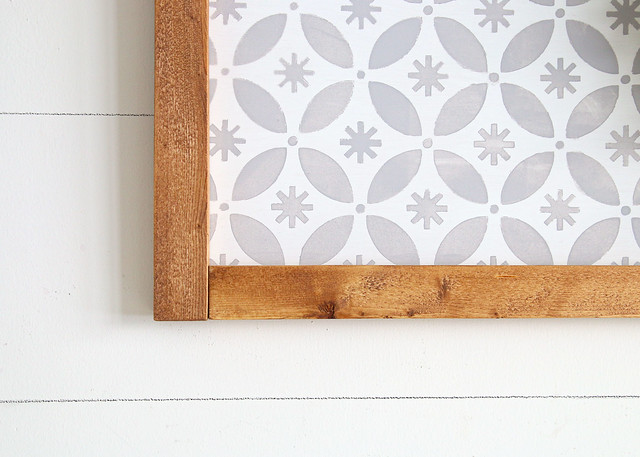
When the white paint was dry, it was time to stencil! I don’t think I’ve ever used a larger stencil like this before and I could not believe how simple the process was. I simply used painter’s tape to attach the stencil to the middle of my board and used a smaller paint roller to apply the gray paint. Once I was finished with one section, I carefully pulled up the stencil and repositioned it in a new spot with part of it overlaying a previously painted section.

Next, I assembled the trim pieces to make a frame. I used screws to attach the ends together. (Oops, I forgot to get a photo of that!)
Then, I laid the plywood on top of the frame and nailed around the back edges.

You can see below that the corners of the trim were not mitered. I just put the straight edges together with the shorter pieces on the outside.
Easy peasy!
If you want to hang your creation, you can attach sawtooth picture hangers or D-rings to the back. Didn’t this turn out lovely?

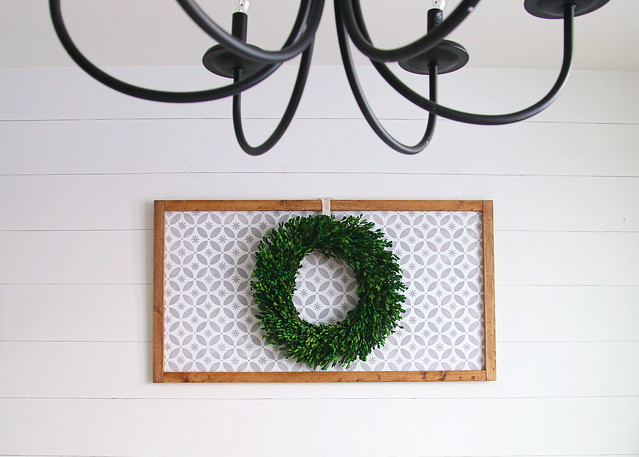
To finish, add your favorite wreath! I chose a pretty boxwood wreath and attached it with a ribbon and thumb tack at the top. This holiday wreath display is currently hanging in our dining area and we love how it looks! You may have noticed that the dining area is starting to look a bit different. (See the before photos in our Country House Tour.) We’ve been working on it bit by bit and I will have a full update of the entire space after the holidays!
One of my favorite things about this holiday wreath display is that is can be used well beyond the holiday season and into the new year!
Thanks so much for stopping by to visit Elizabeth Joan Designs and don’t forget to check out the other awesome stenciled holiday creations below!

- Kim Six Fix – Stenciled Spray Snow Flakes
- Green With Decor – How to Stencil A Pillow For Christmas
- Vintage Romance Style – The True Meaning of Noel Sign
- Southern Couture – Wooden Reindeer Stencil
- One Mile Homestyle – Stenciled Holiday Coloring Page Place Mats
- DIY Beautify – Stenciled Wall Hanging Christmas Decor
- Elizabeth Joan Designs – Stenciled Wall Hanging
- Farmhouse 40 – DIY Reindeer Antlers Bulletin Board
- Iris Nacole – Stenciled Christmas Tree Stand Box
- Pocketful of Posies – The Easiest Christmas Cookie Decorating Hack Ever
10 Comments
BonBon
Wow….this is so pretty. I love the idea. Thanks for sharing.
Erin
Thank you, BonBon!
Cindy diy beautify
It’s gorgeous, and I love that it could actually be used all year!
Erin
Thanks, Cindy! That is my favorite thing about it!
Kim Six
This is fantastic, the fact you can just change out the display makes it so versatile! LOVE!
Erin
Thanks, Kim! We are looking forward to using it beyond just the holiday season!
Stephanie @ One Mile Home Style
Beautiful! I love that you can use this throughout the year too!
Erin
Thanks, Stephanie! We love that it can be used throughout the year too!
Iris Nacole
It’s the perfect backdrop for your wreath. Just gorgeous!
Erin
Thank you, Iris!