-
Entryway Remodel Part 2
Our hallway closet was a space in our home that we didn’t utilize to it’s fullest potential. We stored our vacuum cleaner on one side, a few coats on the other and tossed our shoes on the floor. This way may have been easy, but it wasn’t really working out so great. I was inspired by this entryway makeover to build a bench in that area and shelves for storage. I thought this would be more pragmatic and inviting.

First things first. I painted the entryway and closet gray. That’s right, more gray walls in this house!
Next, my husband, Adam, built a grid like structure on the floor to create a base for a platform I was wanting to store shoes and what not. No more shoes on this floor! Right?


Then, he screwed plywood to the base.
After that, a second grid like structure was constructed at bench level.

To add a little pop of color in our home, I decided to paint horizontal stripes in the nook. The process of taping and painting in a relatively small area was kind of a pain in the tush, but well worth it. The greenish color was mixed by yours truly and was also applied to the walls in our half bathroom.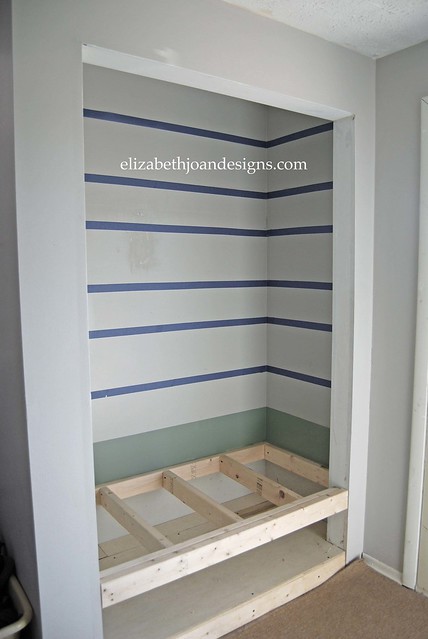
Before we were finished, Adam manufactured and installed a beautiful shelf above the bench.
Finally, we completed the bench with another piece of plywood.

Now, we just need to attach some trim, paint, add a bench cushion and probably a few more details I am forgetting.
Check back soon to see more work on this remodel and the final reveal!
-
Entryway Remodel Part 1
One year ago, to almost the day, Adam and I started remolding our entryway. There were these unsightly 8 x 8 orange-red tiles that covered the floor and a 1980’s light fixture that welcomed all of our guest. They both needed to go.

Adam and I had just taken our two little boys on a week long vacation to California to celebrate our 5 year wedding anniversary. We had discussed the remodel of this entryway for quite some time and decided to wait until we returned home to start.With less than 24 hours home, and before our bags were even unpacked, I started demo on those hideous tiles. I used a crowbar and a hammer to pry up every single one of those bad boys.

Once the plywood was clear of all things red-orange and ugly, I had to get to work on removing the leftover mortar. This proved to be quit difficult, and I had to smash each piece with a hammer to get it to budge. Luckily, my boys were both able to nap during the enormous amount of noise the hammering was causing.
Next, It was time to lay the backer-board. I used roofing nails to secure it to the plywood. A little extra strength was given to the seams by spreading mortar on them.
I love the look of placing tiles on an diagonal, but this meant a lot more cutting work. I was a bit intimidated by the wet saw and didn’t want to loose any limbs, so I enlisted Adam for the tile cutting.
Then, we used a trowel to apply the mortar to the backs of the tiles before placing them onto the backer-board. I placed quarter inch spacers between the tiles.
I love duct tape and it’s endless amount of uses! You can see below how neon green duct tape helped secure our carpet during the tiling process.

With a trowel, we smeared grout between the tiles and leveled it out.

Finally, we finished the new floor! Hip hip hooray!
More to come on this remodel soon!
-
Book Page Wreath
It is super cold here right now. A thick layer of snow is covering the ground and the wind is blowing like a banshee. And apparently it is only supposed to get colder in the coming days. Like frost bite cold. So what do you do when it is freezing outside and your eyelashes freeze from the tears being blown out of your ducts by the wind? You DIY a book page wreath, of course. All you need are a few supplies and a couple of hours. Yes, I said hours, because these things take time. So grab your favorite movies and start a marathon.
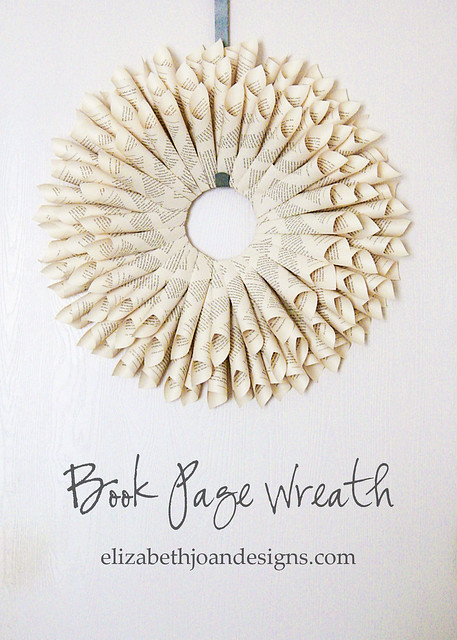
Book page wreaths are nothing new. I’ve made a few over the years and Emily just shared a cool way to decorate a gift with one. There are a million different ways to do it, but my favorite way is to roll the pages into a cone shape.
My supplies for this wreath include:
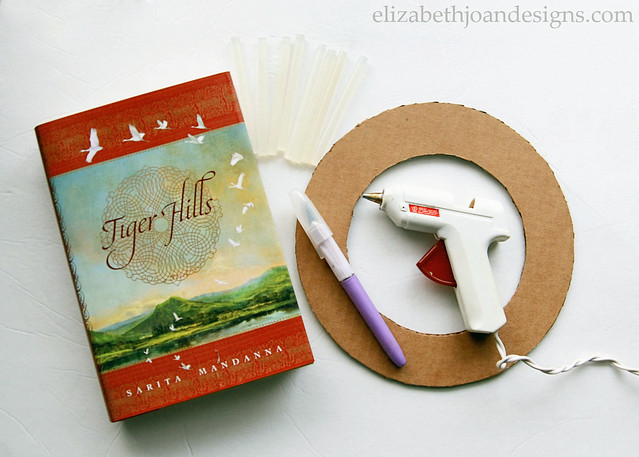
– Book from the dollar store
– Wreath form of some sort
– Craft knife or scissors
– Glue gun
– Glue sticks, lots of themI may have felt a little bit bad that I had to murder a book for this project, especially since is had such good reviews on Amazon, but it only cost a buck, so it was worth it.
To start out, I used my craft knife to cut out a bunch of pages from the book and then ripped a few of them into strips.
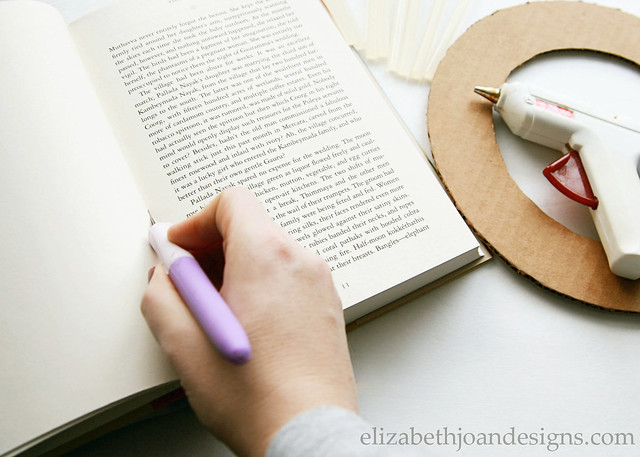
The strips were then wrapped around a homemade cardboard wreath form. I usually buy wreath forms from the dollar store, but they were sold out, so I had to improvise.
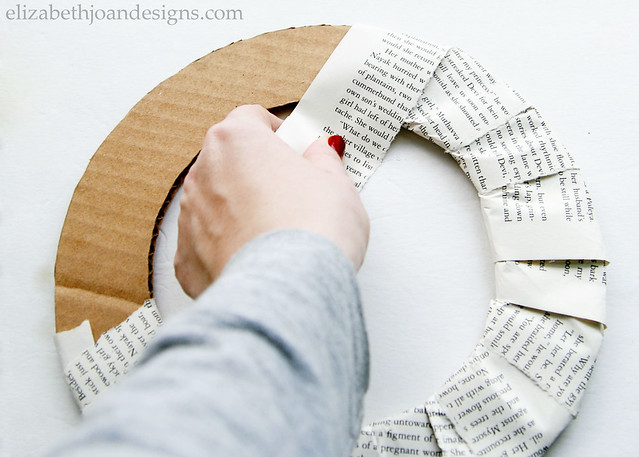
Next, I started rolling papers. That sounds a little weird, huh? I rolled individual book pages into a cone type shape and added a spot of glue on the side to secure them.

Working on one side of the covered wreath form, I attached the rolled pages, one by one, all the way around the circle.
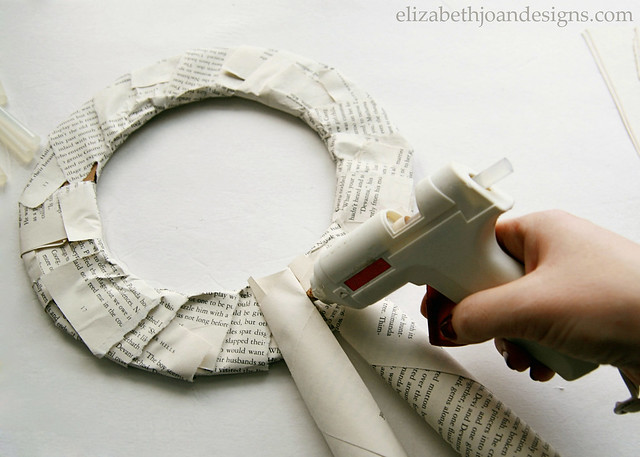
Aren’t glue guns wonderful? My blistered fingers are telling another story, but I quite enjoy the ease of attachment that the handy little
phalanges burnerglue gun provides.
Once I was finished with the first side, I flipped it over and started gluing more pages onto the second side, kind of staggering them between the ones behind them.

The rest of the wreath is completed by adding more layers on top of the previous ones and gradually moving everything in towards the middle until desired fullness is achieved. For this wreath, I used only fours layers of rolled book pages, but I’ve done up to seven in the past. It all depends on how much time and how many fingers you are willing to sacrifice.
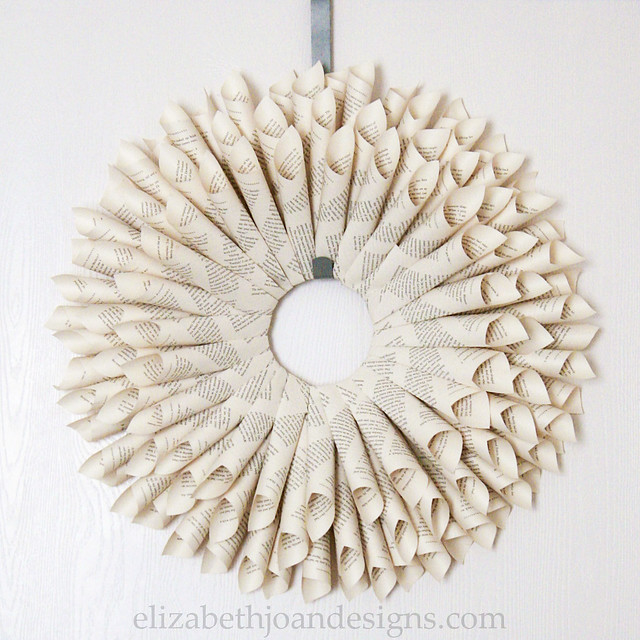
When you are finished, you can hang your wreath up on a door hanger or over a mirror. Both look quite lovely. Oh, and try not to glare too hard at anyone who comes within a few feet of it, threatening the hard work and long hours you put into your beautiful literary work.
-
Stained Wood Mantel
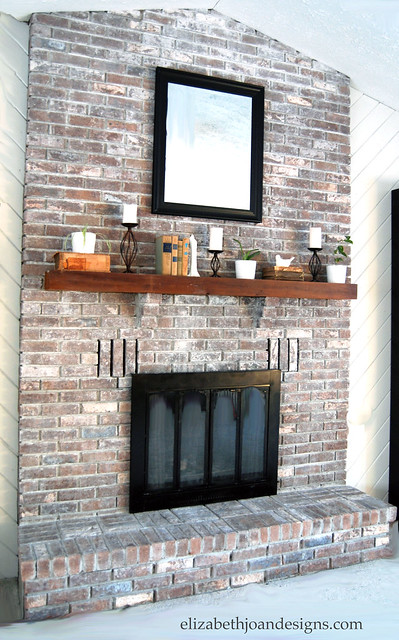
I recently whitewashed our brick fireplace and was hoping someday I would have time to stain our mantel black to match the bookshelves in our great room. Our great room is the main room of our house that we all hang out. Any project in our there requires strategic planning. With Adam off work for two weeks, it gave me a little extra time and help with the kiddos to be able to tackle this project.
Here is what it looked like after whitewashing but before staining.
First, I covered the hearth and carpet with a canvas drop cloth to reduce the chance of a major accident.
Next, I lightly sanded the wood to remove the old finish. It also removed some bird poop looking paint spots from the spill I had while whitewashing. (Oops!)


Then, using a rag, I wiped off all the dust, dirt, and gunk.
Finally, I applied Rust-Oleum Ultimate Wood Stain in ebony with a paint brush to the mantel.

I worked in small sections.

After about 2 minutes, I used an old rag to wipe off any excess stain that did not soak into the wood. I chose to skip a finish on the mantel because it is not an area that gets a lot of use.

We love the cohesive look this gives our great room and I am super excited I didn’t spill any black stain on our beige carpet. Whoohoo!
