-
Closet To Office: Part 2
We have been turning our closet into an office. You can catch up here.
Finding room for everything has been a challenge. This closet is so teeny and with all of our office supplies in it, it was an insane mess. I really needed to find a way to utilize my space better.
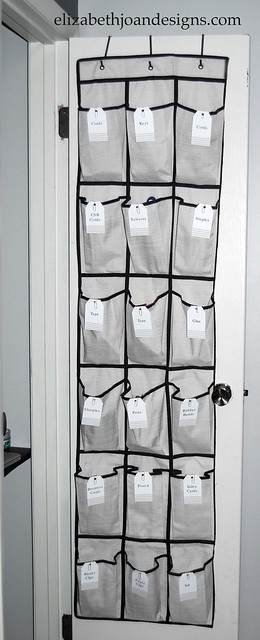
My brilliant idea: an over the door shoe organizer. There are so many pockets to stash an array of office necessities. I picked up one of these bad boys at Target.
There was one itty bitty problem with it, though. The pocket organizer was too wide to fit against our miniature door.

In fact, when I would close the door, I couldn’t actually close the closet door. This was completely unacceptable!

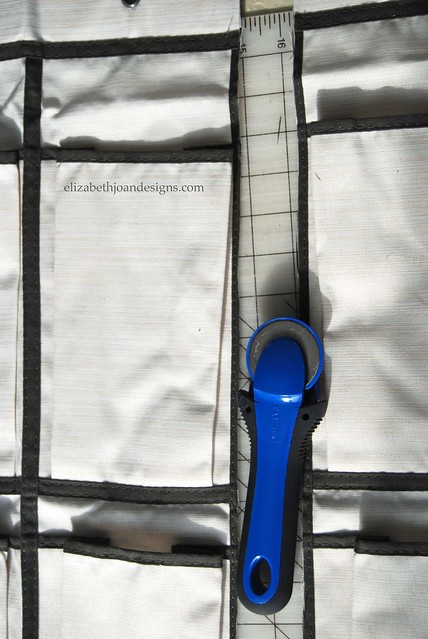
First thing I did was round up my cutting mat, rotary cutter, and straight edge ruler.
Next, I turned that twenty four pocket organizer into an eighteen pocket organizer by cutting off one column of pockets.
Ah, that was a much better fit! But there was still one little problem. When I would close the door, the organizer would bounce around. To remedy this situation, I needed to secure it to the door.


After that, I printed out label tags and secured them with paper clips to help locate my supplies with minimal effort.

I love the cute chevron pattern on these tags!

Doesn’t it look great?

This has been such a simple way to maximize our space!
Check back soon for more of our closet to office makeover!
-
Closet To Office: Part 1
We have been wanting to turn our office into a fun playroom for the kids which should be pretty simple. The challenging part though, has been trying to find a new home for all of the office stuff.
I will show you how we did it, but due to my kid’s nap times, husband’s work schedule and bad lighting, we did things a little out of order. So, try to keep up and consider yourself forewarned.
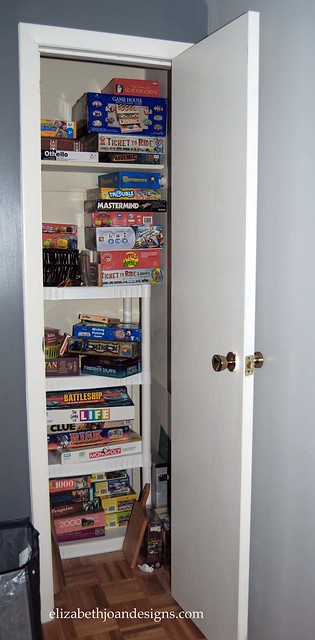
First, we removed our amazing, and not at all geeky, board game collection.
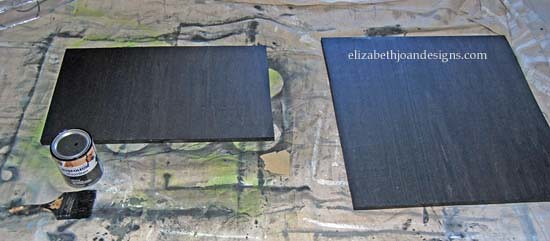
Next, we attached the shelving unit from our office in the closet. My husband, Adam, cut each board with a circular saw. He also made two additional shelves out of plywood we had leftover from our entryway remodel.

Then, I coated the two new shelves with Rust-Oleum wood stain in ebony.
After that, we removed the shelving unit and started to prepare the walls for paint by filling all holes (except the ones for the shelving unit) and cracks with spackle.

Then, I recruited my oldest son to help with the painting.
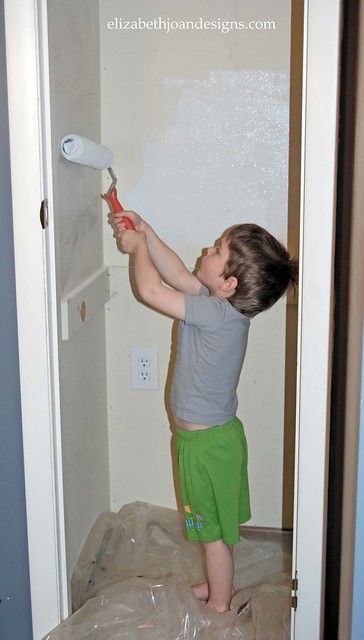
He had a blast and my walls got painted so it was a win-win for everyone.

Finally, we reattached the shelves. Again.

Check back soon to see how we organized all of this junk into our itty-bitty closet.

-
Anniversary Art
I’m always up for a simple and easy way to decorate our home. Somehow though, I tend to take on projects that look easy enough, but end up taking way more time than they should. And time is something that we really don’t want to waste right now. However, I have good and bad news. The good news: today I’m sharing a super easy anniversary art idea with you that pretty much anyone can crank out in no time flat. The bad news: I forgot to wish my parents happy anniversary yesterday. Oops! Maybe I can make up for it by making another one of these for them.

Anyway, we’ve actually had this same frame with the date of our anniversary in our home for the past 6 years or so. But to share the detail photos, I decided to redo it for visual effect. Honestly, the hardest part of this project is picking out the fonts you want to use. Especially if you are a font-alholic like me!
First, I chose the 3 fonts I wanted to use for my numbers. I used Jailbird Jenna for the 05, Algerian for the 17, and Edwardian Script ITC for the 03. Then, I just centered each on a 5×7 canvas in Photoshop. (Note: You can also do this using another photo editing/graphics program or even with Microsoft word, etc.)

Next, I printed each of my date numbers out on white card stock. Totes simple. Yeah, I just said “totes,” meaning totally, for all of you who aren’t up on the current lingo of teens and tweens. My 9 year old taught me that.

Then, I cut the card stock numbers to fit the mat board of my frame and used some washi tape to secure them on the back.

After that, I just reassembled the frame and it was ready to hang on the wall. Voila!

This idea would be great as a gift for a wedding and could also be used for other important dates, such as birthdays, etc. The best part is that my husband now has no excuse to forget our anniversary, since the date is hanging on the wall in plain sight all year long.

-
Entryway Remodel Part 3: The Reveal
Trim. Check. Paint. Check. Bench cushion. Check. This check list can only mean one thing: the reveal of entryway is here!
When we last left off, it looked a little something like this:

Here are the final detail steps we took to get our beautiful hallway…
First, I filled all holes and gaps with nail hole filler and caulking. As you can see, there were tons of them on the shelf.


Next, we secured 5 hooks to the shelf. This provided more hanging space for coats, bags, scarves, etc.

Then, Adam framed the closet area with trim. He found that the air compressor nail gun attachment was the most efficient way to do it.


After that, it was time to paint the trim. I taped off everything with frog tape. Frog tape has proven to leave cleaner lines than plain old regular painter’s tape. Well, at least when I am painting.

Here are a couple great buys I found at Target. I love Target! These baskets were on clearance for $2.68 each. I purchased three of them. We mainly use them for school papers.

I also found these fun little chalkboard for a steal for $0.30 for a pack of eight.

I made this seat cushion out of foam and upholstery fabric purchased at Jo Ann Fabrics. Don’t be fooled. I found this cushion to be extremely challenging to make. I just couldn’t seem to get the fit right, but once I did, it was awesome. Yippee!

On the wall opposite of the bench, we hung a few hooks to hang our coats and backpacks.

Now the details are all wrapped up.
Can I get a drum roll please?
Tada!

I added five of my boxes to baskets on the top shelf. They house hats, gloves, reusable bags, umbrellas and other items we like to grab on the way out.Once the weather is a bit nice, I am hoping to get out in our garage and build a couple crates to toss our shoes in.

What do you think? We are so pleased with this area. Yes, it did take over a year to complete, but we LOVE it!