-
Vanity/Workspace Reveal
Back in March, I shared my old vanity that we re-purposed into a nightstand/desk. Since, the original post, we’ve refinished a lovely chair, painted the lamp base, and added some hidden storage to help the area function as more of a workspace.

I love this quiet little corner of our bedroom. It is just perfect for writing blog posts, designing graphics and printables, and also a great place to set a glass of water and a book at night when I go to bed.
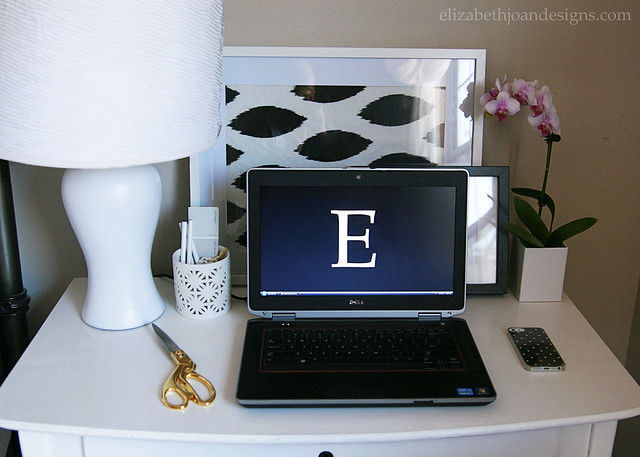
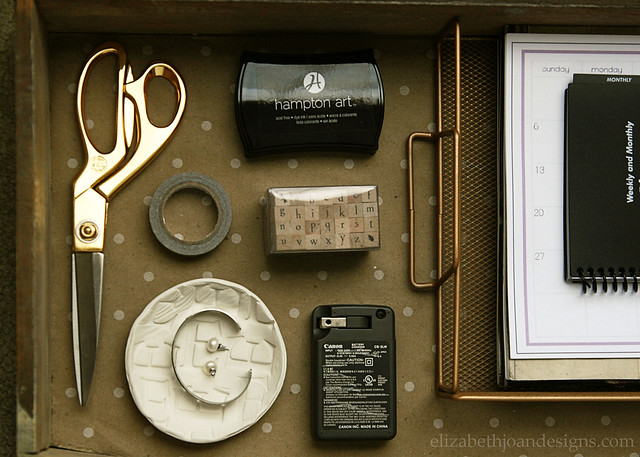
The drawer is usually kept fairly clean, thanks to the paper tray and clay dish that help corral loose items. I keep things in here I use often, like the alphabet stamp set, planner and EJD calendars, camera charger and wicked awesome gold scissors. Some people may not keep weapons in their nightstand, but you’d better believe I will cut someone if they break into my house. Just kidding. Kind of.

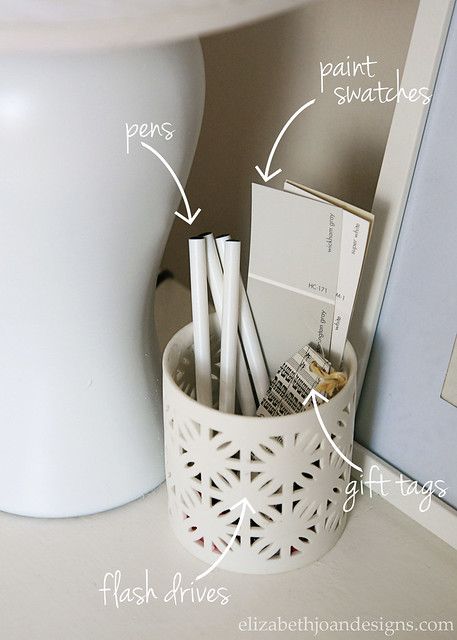
On the top of the desk, I use this cute candle holder to catch paint swatches, extra pens, tags and a cluster of flash drives. (Am I the only one who has way too many of these?)
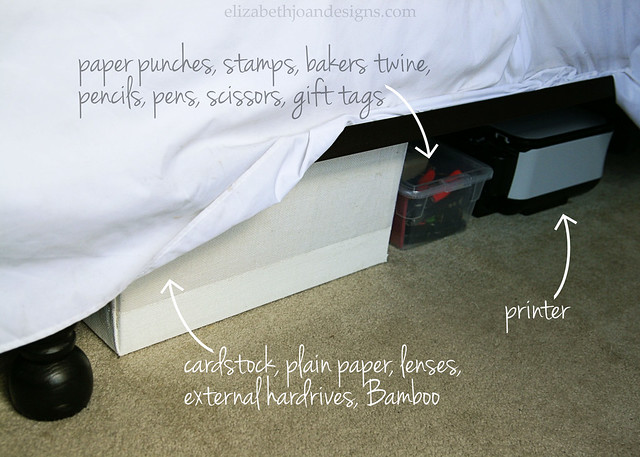
You may also remember when we raised our bed up several inches by adding deck post finials to the frame. This has been a huge help, since we can now store a ton of stuff underneath that would not have fit there before. Plus, it is nice that the printer can be hidden from plain view, but is still easily accessible.
Since we obviously can’t store every office-type supply and craft item in this area of the bedroom, we do have an armoire downstairs allocated for all of those items that aren’t used quite as often.

I’m so happy with how this space turned out. It’s OK to be a little jealous of it. I know I would be.
___________________________________________________
You may also like:
Vanity Makeover 
Monogrammed Stamped Clay 
Paint Dipped Box Baskets 
Adventures In Upholstery -
Hosta Wreath
This project didn’t go exactly like I had planned it.
As a part of the ProFlowers All Year Wreath Project, I wanted to create a wreath that was beautiful and smelled amazing. My original idea was to make an herb wreath. I was off to a good start with a grapevine form and homegrown rosemary, mint, basil, dill and parsley. What I did not take into account was the weather. I harvested my herbs and started assembling the wreath. Within 5 minutes, it looked like this:
I hadn’t even finished and it was already wilted and gross! I guess 85 degree temperatures and super humidity are not conducive to herb wreath making. Lesson learned.
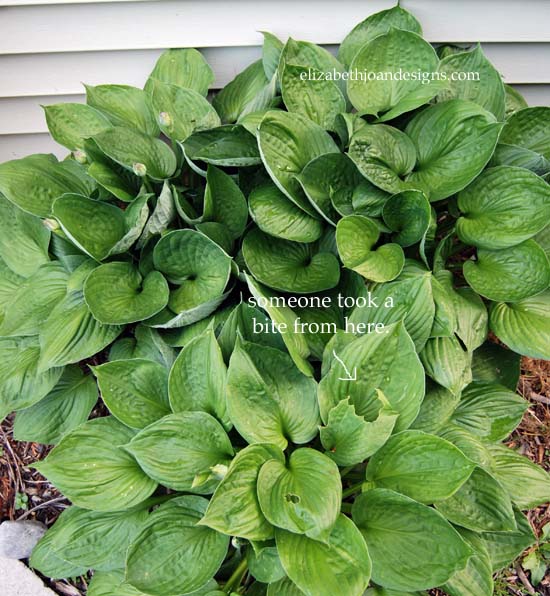
Well, I didn’t let that failure stop me. I attempted 3 other types of wreath that just didn’t give me that look I was going for either. At that point, I was about to give up. I had made 4 ugly wreaths and 0 good ones. Then, my brilliant husband suggested using hosta leaves. Genius!
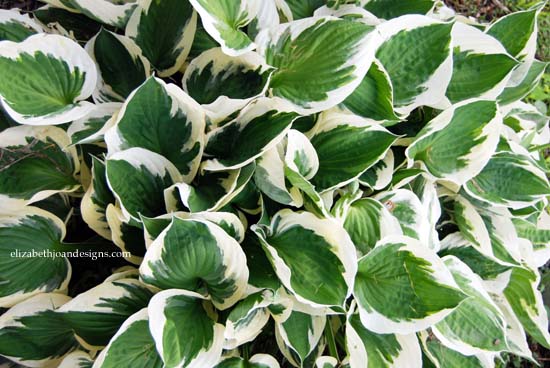
Hosta plants aren’t exactly scarce around our home, so this was going to be as easy as pie.
To assemble this wreath, I took my grapevine form (you know, the same one I used for my lavender wreath and spring moss wreath) and started sticking the hosta leaves into it.
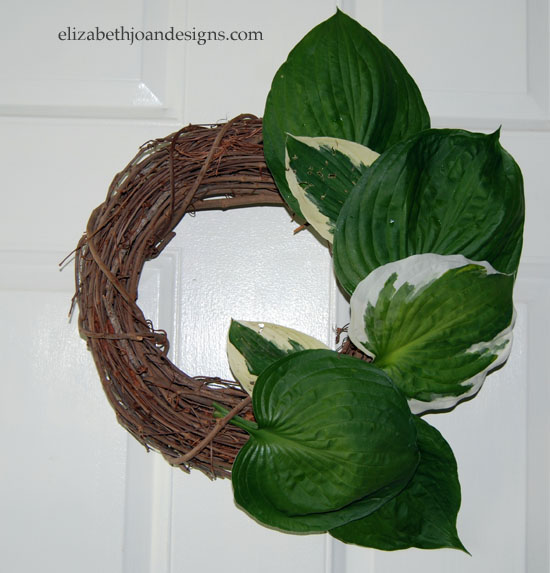
I figured out pretty quickly, that using the smaller leaves gave a better result. I went around the circle layering different color leaves on top one another to give some dimension.
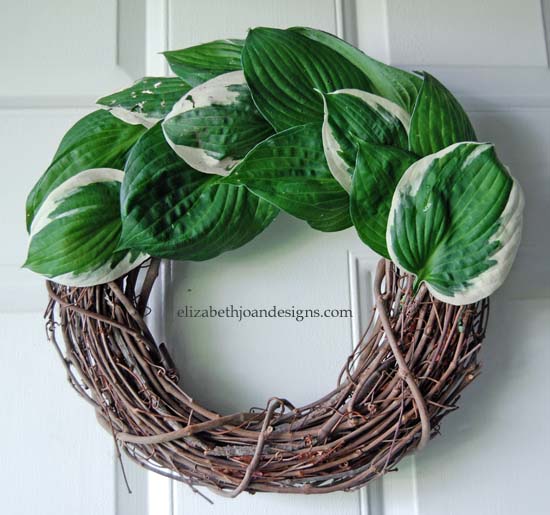
I continued to do this until the entire form was covered.
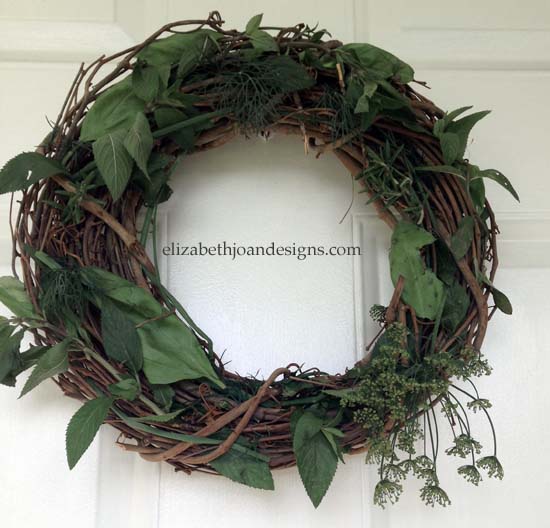
Here you have it folks, my super duper awesome
herbhosta wreath. Simple yet beautiful.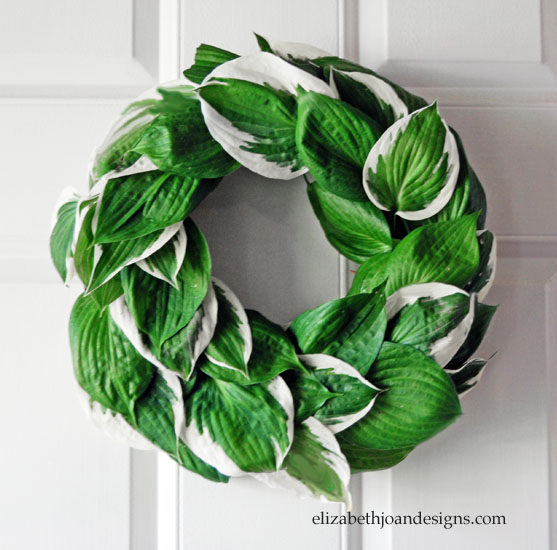
Even though it doesn’t have that terrific scent I hoped for, I still think it looks pretty good.
What type of wreaths do you use to decorate your home?
___________________________________________________
You may also like:
Lavender Wreath 
Book Page Wreath 
Dollar Store Scarf Wreath 
Spring Moss Wreath -
10 Amazing Chalkboard Projects
10 Amazing Chalkboard Projects 
Chalk Cloth Map 
Ikea Trofast Makeover 
Dry Erase To Chalkboard 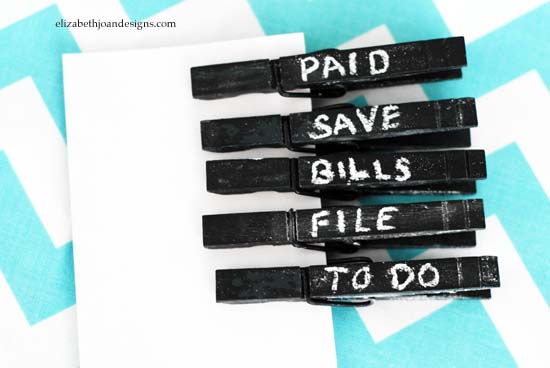
Chalkboard Clothes Pins 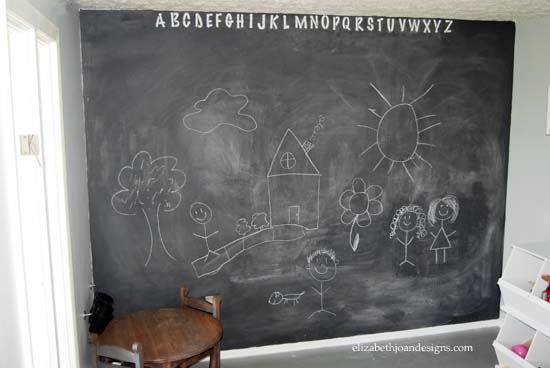
Chalkboard Paint Accent Wall 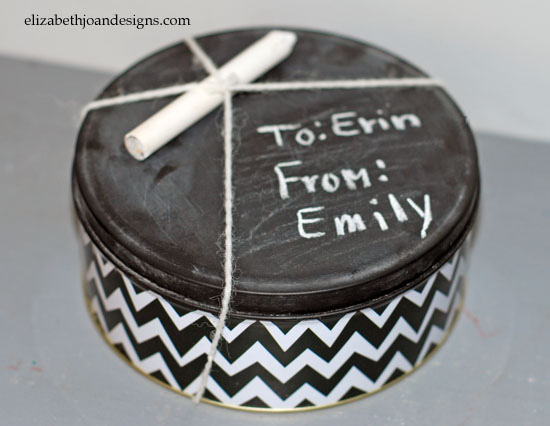
Chalkboard Tins 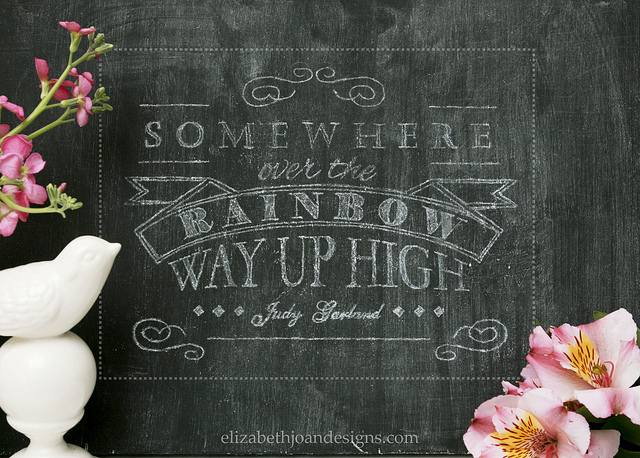
Chalkboard Lettering 
Chalkboard Gift Box 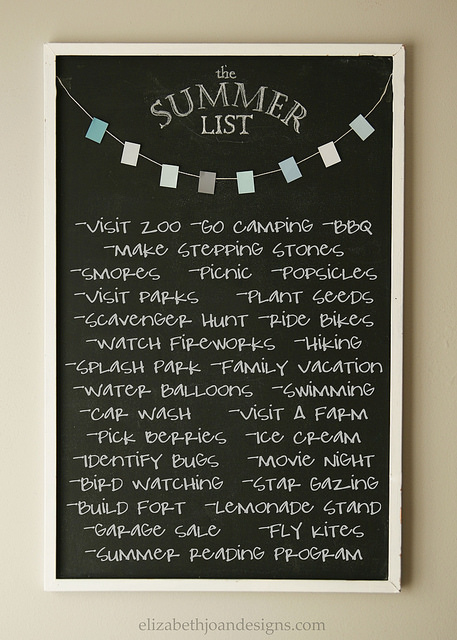
Summer List 
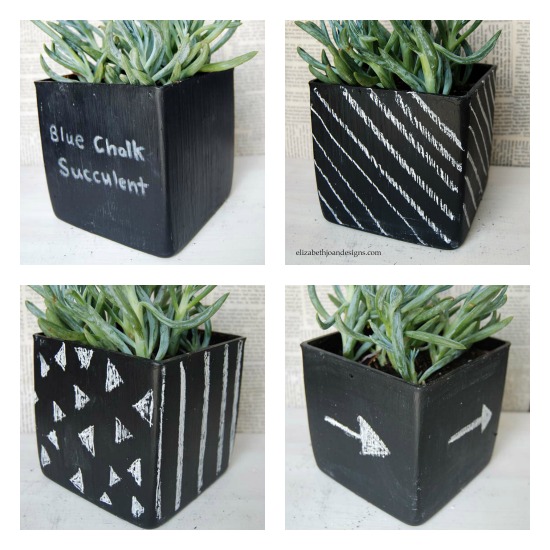
Chalkboard Succulent Planter -
Chalkboard Succulent Planter
In April when Erin was visiting we went garbage picking together. That particular time, I got caught up in the moment and grabbed several large garbage bags full of cheap ugly baskets and vases. Erin made fun of me for taking these. Rightfully so. It really was just junk. But me being me, I decided to use this as motivation. I was determined to find at least one treasure in these sacks of rubbish. What can I say, I love a challenge!
First, I sifted through the rummage and found this wonderful gem and decided to paint it.
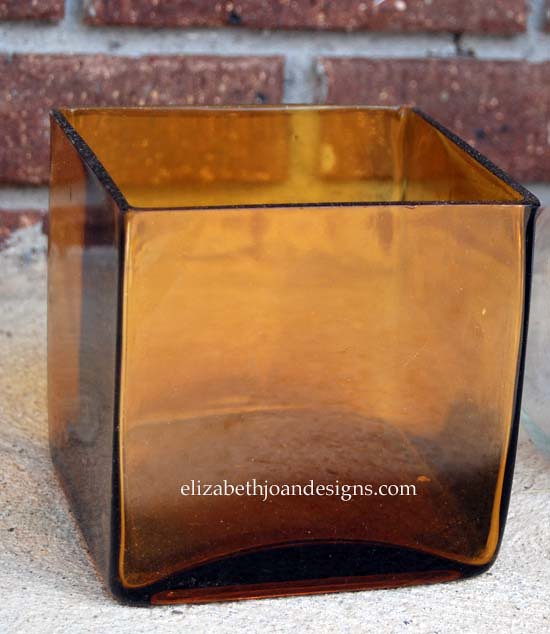
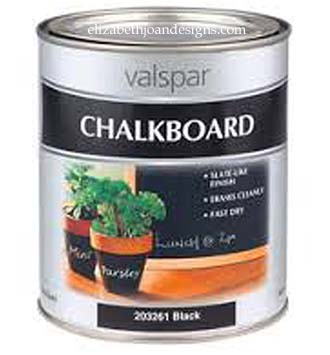
Next, it was time to choose the color. My love for chalkboards helped determined the fate of this little guy. As far as methods go spray painting this vase was the obvious choice here, but my can was too clogged to use. Instead, I used a paint brush to slap on a few coats of other chalkboard paint I already had. I am really diggin’ the texture left from the brush strokes.
Then, I primed the newly painted and dried surface with a piece of white chalk by rubbing it all over the vase. This was to prevent my first scribbles from being permanent art.
Finally, I planted a blue chalk succulent in the container to complete the look.
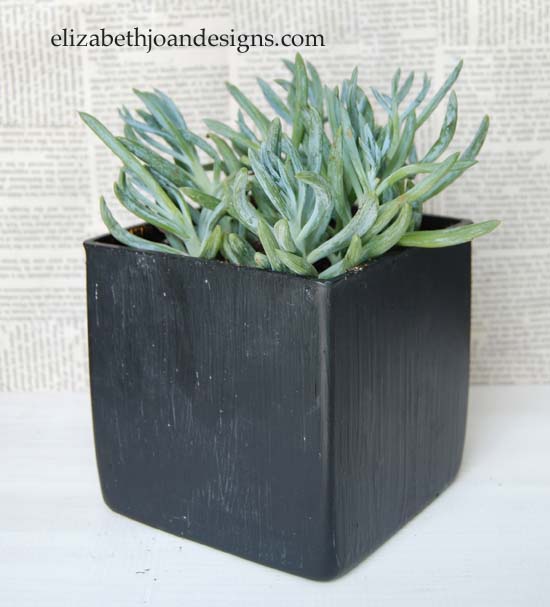
Too cute! I think this project was a success. (As you can see, I really enjoyed doodling on it with chalk. Maybe a bit too much.)
We’d love to hear how you challenge yourself. Leave us a comment, and let us know!