-
The Home Depot Challenge – Chain
Sometimes good things must come to an end and that includes The Home Depot Challenge that I’ve been participating in for the past year. The ladies in this group have been so awesome to work with and I will definitely miss doing this with them. The last item chosen was a chain and I actually had finished the chain project in December, but the challenge was postponed, so I’m re-sharing my Holiday Card Display. I know it is a little out of place, since it is clearly for the Christmas season, but I’m sure this project could be modified to suit other holidays or as even a fun way to display photos or school work!
Click on over to the Holiday Card Display post to find out all how it is made.There have been a lot of other amazing projects shared including a Wine Bottle Bird Feeder, Rope Curtain Ties, 2×4 Artwork, Pegboard Luminary, Wood Box Caddy, Industrial Book Rack, and a Furniture Leg Snowman.
If you haven’t already, head on over to view the other amazing chain projects shared this month by clicking on the images below. We had a few guests join us and their projects totally rocked, along with all of the other creative ideas!

-
Playroom Storage Makeover
I don’t think I’ve ever shared photos of our playroom before. It is a finished space in our basement that serves as a multi-purpose room (playroom/family room/office/guest room.) The major work horse in the playroom is a huge shelving unit (Expedit from Ikea) which holds all of our games and our son’s small toys in the black bins (Drona). For quite awhile, I’ve wanted to change things up. So, I decided to do a playroom storage makeover, focusing on what we currently have.

There are so many amazing storage solutions for toys available these days. I love these charcoal and ivory rugby bins from the Container store, but at almost $100 for 8 of them, it seemed that I could come up with something similar for our current black bins and save myself some dough.

I thought of several different ideas, from covering the bins in fabric to painting stripes, but I just couldn’t commit to any one idea. Then, while perusing Ikea’s website I found black and white stripe place mats (Ljuda) for 1.49 each and decided they would be perfect for the job.
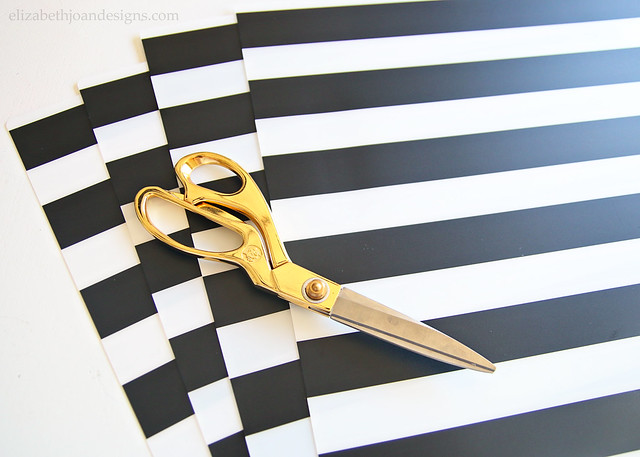
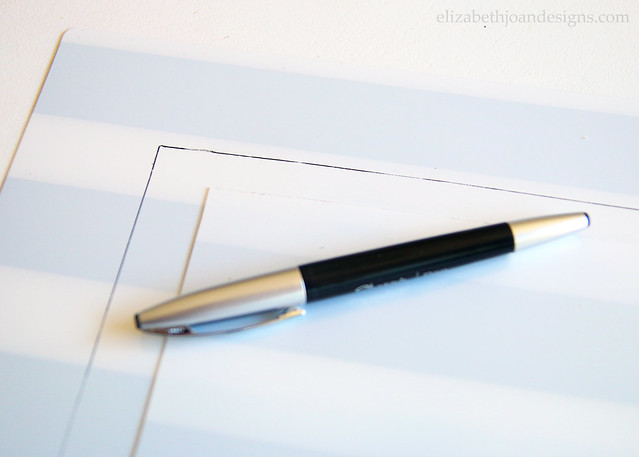
After taking the measurements of the bins, I cut one of the place mats to size and used it as a template for the rest of the pieces.
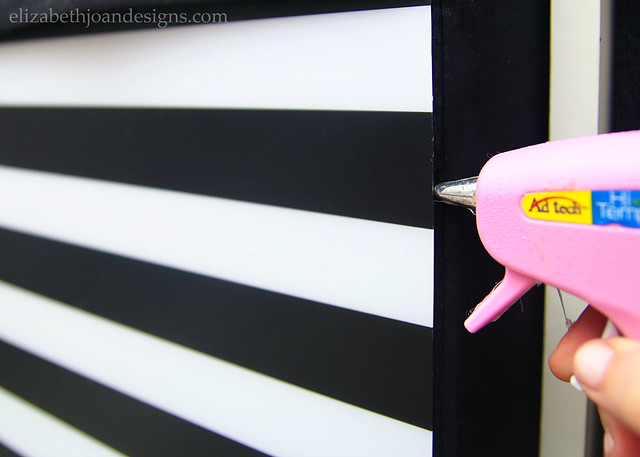
Then, I inserted the cut place mats under the fabric fold at the top of the bins and used hot glue to secure them to the fronts. Super easy.
I love how the stripes add some playfulness to the plain boxes and if for some reason we tire of the contrast, we can just flip the boxes around and they will look just like they used to.

So, what do you think of this simple playroom storage makeover? Do you like all of the stripes or the simplicity of the plain black bins? I would love for you to leave a comment and let me know!
________________________________________________________________________ You may also like:

Ikea Apa Storage Makeover 
Open Shelving in the Kitchen 
Boxes Into Baskets 
Paint Dipped Box Baskets -
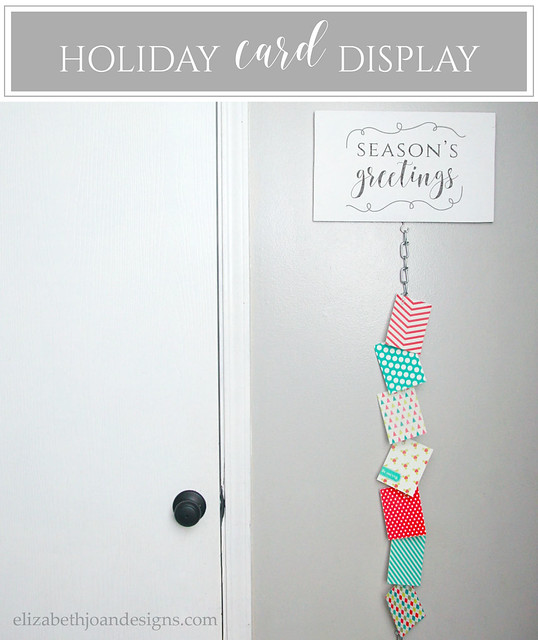
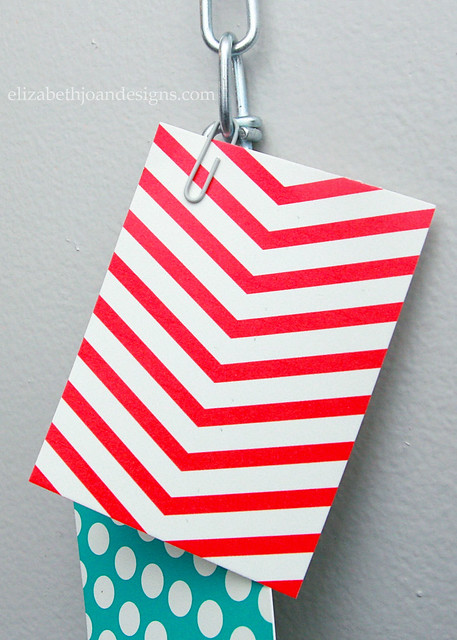
Holiday Card Display
Each month, we typically take part in a challenge where we have to create a gift for someone from a randomly selected item to be used in the project. This month, the group opted out because of holiday commitments, but I still wanted to share this Holiday Card Display that I came up with. Everyone needs a place to display their holiday cards, right?
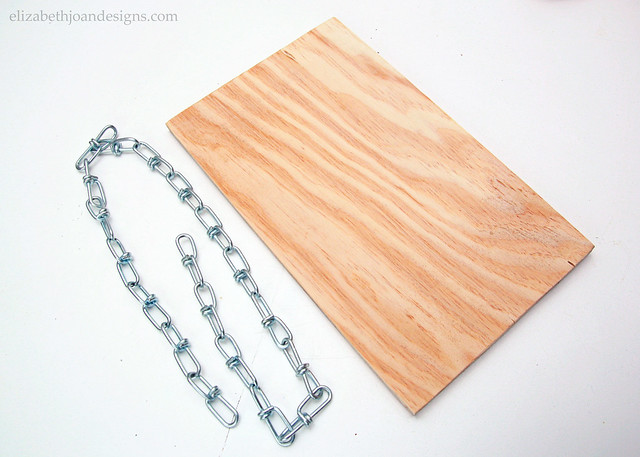
To make the holiday card display, I used:
- Plywood (approximately 8.5″ x 13.5″ piece)
- Chain (3 ft.)
- Cup Hook
- Saw Tooth Hanger
- Paint
- Paint Brush
- Freezer Paper
- Printer
- Spoon
- Paper Clips
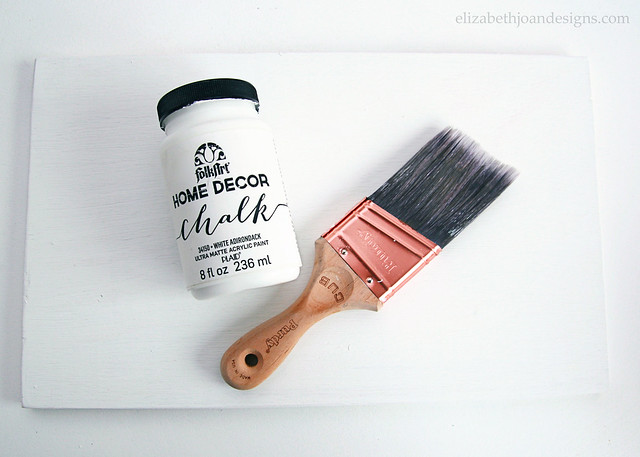
I started by painting the plywood (a scrap piece my hubby had cut down for me) with white chalk paint. I love the matte finish of chalk paint and it seems to cover with only 1 or 2 coats. Plus, it dries fast. “You can never have too many things which save you precious time” I always say. OK, I don’t really say that, but it sounded good. *wink*
While that dried, I grabbed some freezer paper (possibly the best kept craft secret ever!) and followed this tutorial for an image transfer from Little Bit Funky. The Season’s Greetings design is my own which I whipped up just for this project.
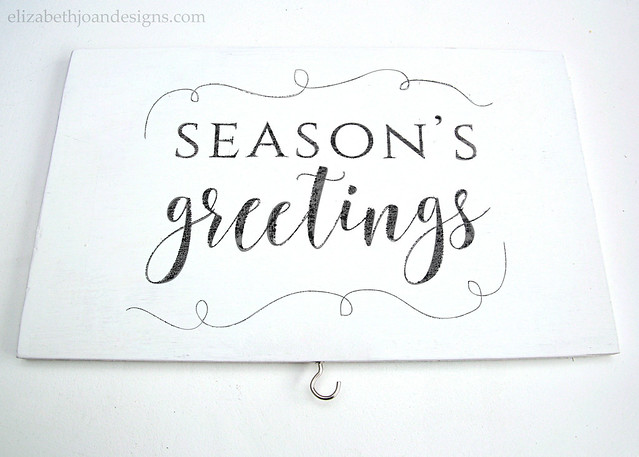
Next, I added the cup hook to the bottom side, as well as a saw tooth hanger to the back so I could easily attach it to the wall. I placed the chain on the cup hook then hung the whole thing up on the wall. Ta-da!
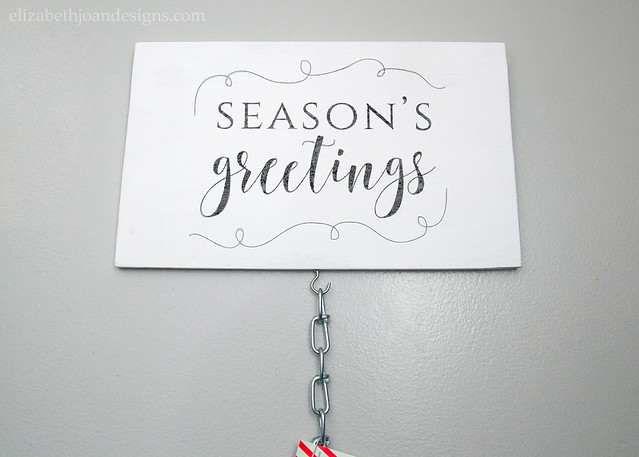
Finally, it was time to add some cards. We’ve only received a couple this year (please send cards), so I opted for some colorful printable cards from Miu Creation to adorn the card holder. Each was easily attached with a paper clip.
Not too shabby, huh?
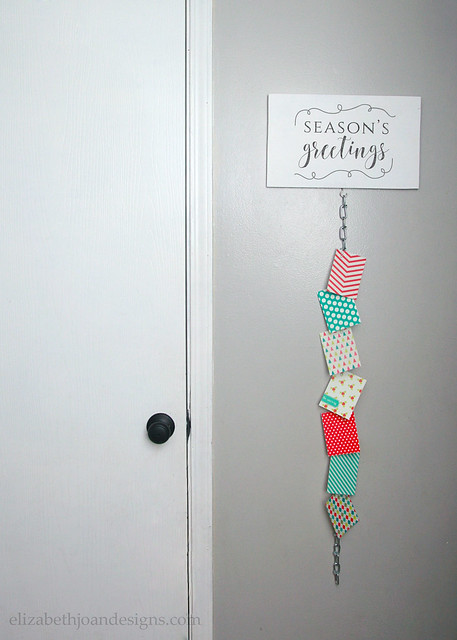
This is going to be such a fun way to corral all of our Christmas and holiday cards! I can’t wait to see all of those pretty smiling faces staring back at me when I walk past!
_____________________________________________________________________You may also like: 
Dollar Store Scarf Wreath 
Fun Holiday Tags 
Stocking Hanger 
Advent Calendar from Shoe Organizer -
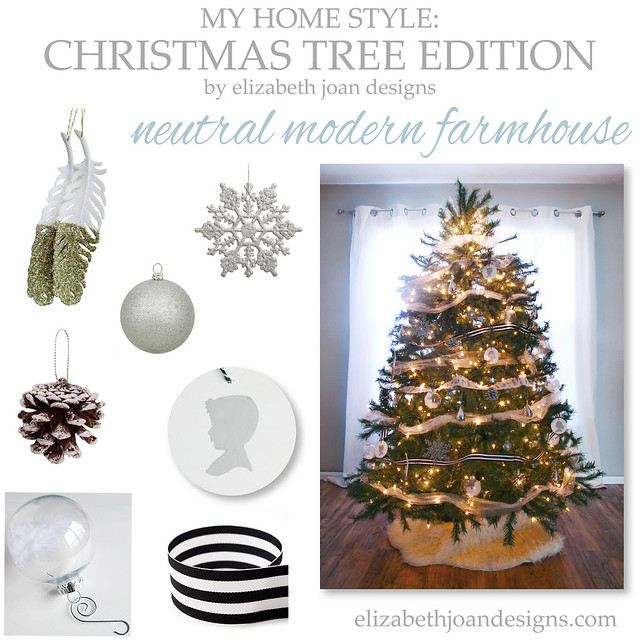
My Home Style Blog Hop: Christmas Tree Edition
Welcome to the My Home Style Blog Hop: Christmas Tree Edition hosted by Casa Watkins. I’m so excited to share my Christmas tree style with you. If you are heading over Domicile 37, welcome! Isn’t her style so fun?! If you are new to Elizabeth Joan Designs, welcome to you too. My name is Erin and I blog here with my sister, Emily, where we share all things DIY, decor, crafts, etc.
This post contains affiliate links.
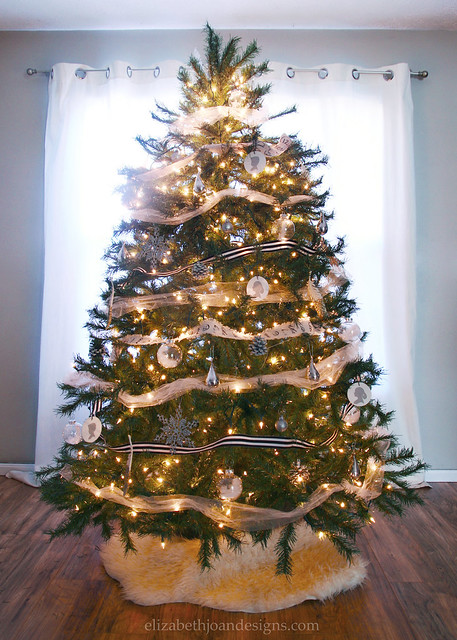
I describe our home style as Neutral Modern Farmhouse and our Christmas tree definitely falls into the same category. I love to keep things simple with clean lines (like in this neutral black and white striped ribbon), but also have a comfortable and collected look. Kind of classic meets contemporary.
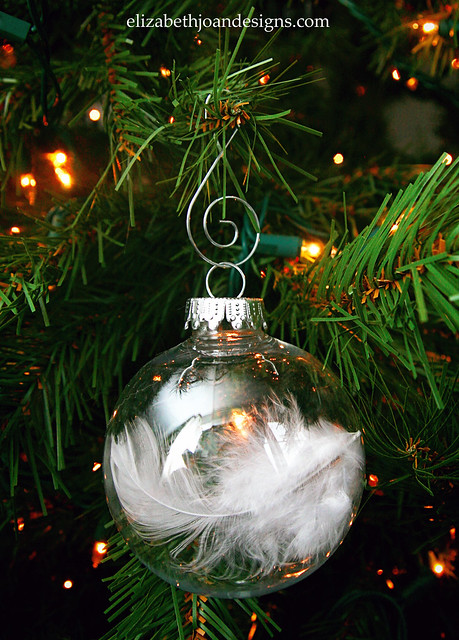
Quite a few of the pieces on our tree are handmade, like our Feather Christmas Ornaments…
And the Silhouette Ornaments with our kids on them.

I also used some pine cones from our parents house, which were spray painted and hung on the tree. If you don’t feel like taking the time to make your own, you can always snag some of these white painted pine cone embellishments/ornaments.

Several of our ornaments were purchased to add pop of silver and gold sparkle.
Silver Ball Ornament | Gold Feather Ornament | Glitter Snowflake
To finish off the tree, I added some mercury glass rain drop ornaments from West Elm (no longer available) and tulle/ribbon. The faux white sheepskin on the floor helps make everything feel more cozy. We are still looking for the perfect tree topper, so if you know of something that would work well with our Christmas tree style, let me know!
Thanks so much for stopping by to check out My Home Style Blog Hop: Christmas Tree Edition today! To see more, browse our project gallery or follow us on Instagram (Erin’s Instagram/Emily’s Instagram). Tomorrow starts another day of our hop, so make sure to start out by checking in with Roots North and South!
Eager for more Christmas Tree styles?Check out the other Christmas Tree stylings by these amazing bloggers. Monday:Tuesday:Wednesday:Thursday:Friday:
_______________________________________________________________
You may also like:
Upcycled Dollar Store Placemats
Stocking Hanger
Advent Calendar from Shoe Organizer
