-
Easy DIY Apothecary Jars
As I continue to work on the finishing touches to my {Half Bathroom Remodel}, I developed a NEED for two apothecary jars for storing Q-tips and Cotton balls. My budget for such a specific storage option was right around $0.00, so I had to get creative.
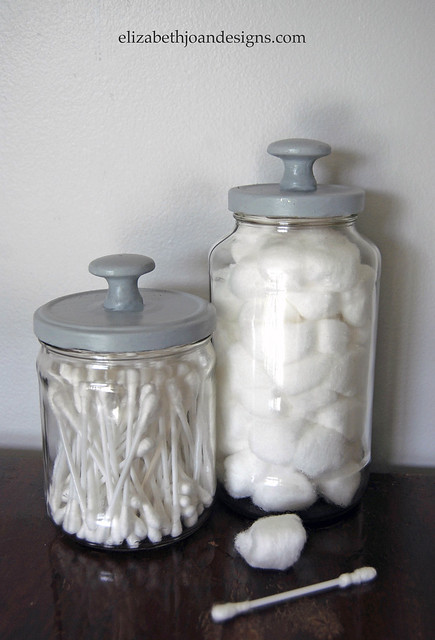
Looking around my house, I didn’t find much. I remembered my sister had given me some different glass containers last Halloween to use as decorative specimen jars. After digging around my basement, through the bin of Halloween costumes and decor, I came across a gorilla costume. I put it on and scared my kids, just a little. Then, I was back to looking for those glass pieces.Well, I only found one and it wasn’t going to work for this, which made that a giant waste of my time and this story a giant waste of yours. I am sorry for that. Then I went in the garage, looked in the recycling and under a lot of other recyclable materials and found glass a salsa jar and a pasta sauce jar. I felt like a pirate finding buried treasure. I knew these were going to be perfect.

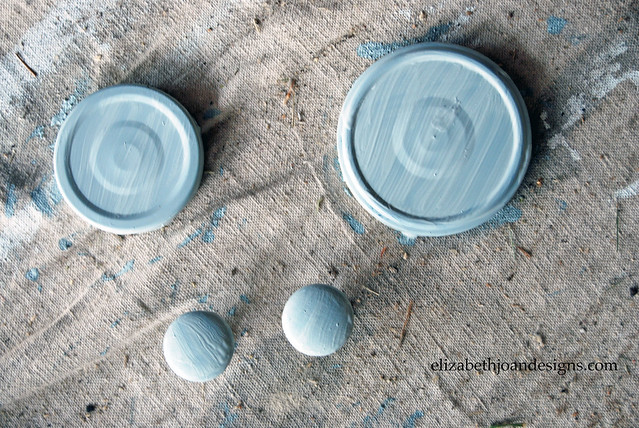
First, I gave them a bubbly bath to help eliminate the odors they were sharing with me. Next, after they were dry, I painted the lids and two knobs I had left over from another project. Using paint I had on hand, multiple coats were added to eliminate the streaks.
Then, my three year old and I screwed the knobs on tight to the top, center of the lids.
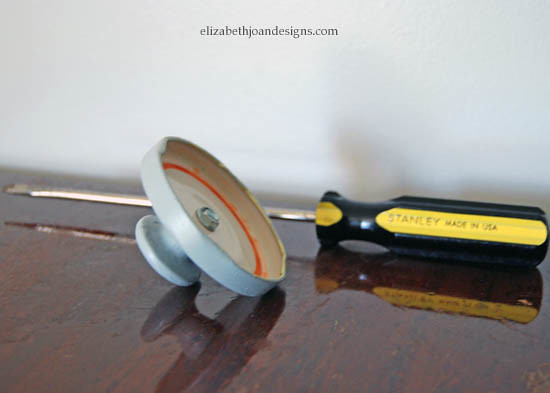
After that, he thought it would be fun to use the screwdriver to scrape the paint off my freshly painted lids, and it was. My apologies, for not taking a photo of this.
Finally, I re-painted the lids and knobs to cover all of our scratch marks.
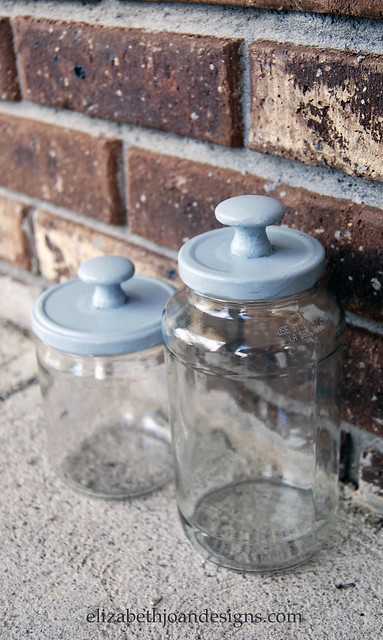
There you have it folks, diy apothecary jars that cost nuttin’. These simple jars make a great storage addition to any room.
-
Wall Decal Coasters
This project was a complete accident.
In our home and garage, there are typically 3 gazillion things going on at once. I was making a serving tray out of a Rubbermaid platter and it was not going as planned. I had a brilliant idea to add wall decals to it, to give it some pizazz. As I was talking to my sister on the phone, kids screaming in the background, I went to place a decal on the plate. I guess I wasn’t paying enough attention to what I was doing and placed it on a white ceramic tile from another project instead. I loved how it looked and decided to turn it, and a couple more, into beverage coasters.

To make these water mark preventers, I used three white ceramic tiles purchased at Lowes for $0.16 a piece, some cute bird wall decals I found on clearance a few years ago for $2.50, one package of cork squares I picked up for $1.20 with a coupon, and Krylon UV Resistant Clear Gloss Spray bought with a coupon from JoAnn Fabrics for $4.00.

After placing the decals on the tiles, I pressed the birds, from the centers out to the edges, with a craft stick to release any bubbles underneath.

To give the drink coasters a moister resistant finish, I sprayed them with a clear gloss. Yes, my drop cloth is very well loved.

Once dry, they were flipped over. Using my grubby
hot glue gun, I attached the cork squares to the back of the tiles to prevent scratching the surface the coasters are used on.
These little babies protect your wood surfaces from evil beads of condensation and would make excellent gifts.

-
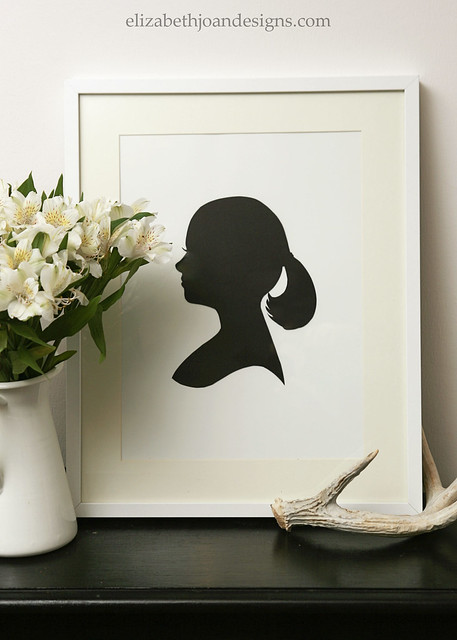
Simple Silhouette
Warning: Extremely easy tutorial ahead. I know that some people enjoy working really hard for long periods of time with little to no progress (yeah, right), but I’m not one of them.
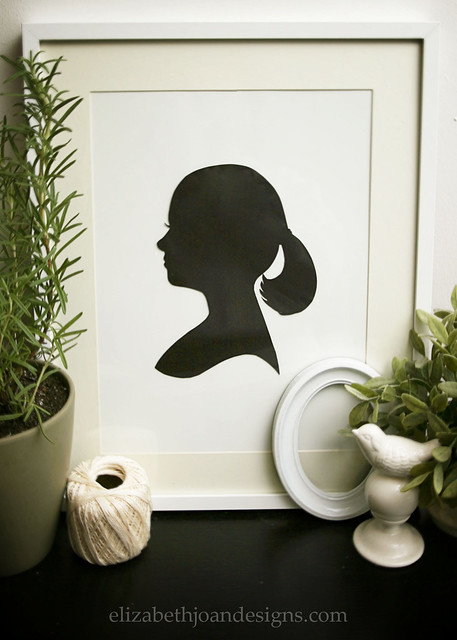
I love the classic and timeless look of silhouettes. They are so fun to decorate with and also make great gifts. And the only supplies you need to make one are a camera, a printer, white card stock to print on, scissors, a pencil, colored card stock (I chose black card stock to keep to the with the traditional look, but I think using other colors would also work great), and a few extra minutes.
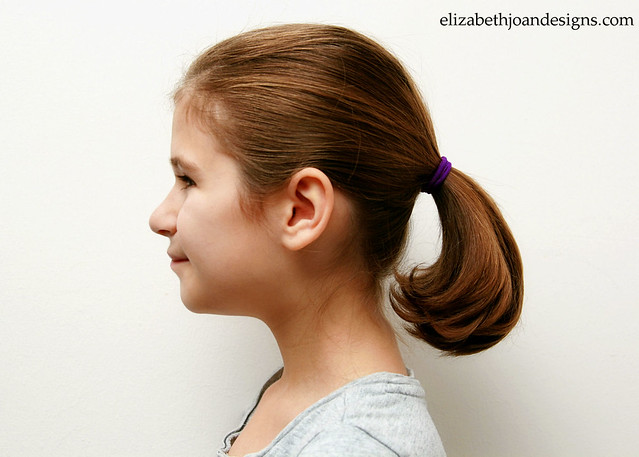
First, take a side view photo of your subject, preferably in front of a solid background. It doesn’t need to be good quality; any image will work, as long as you can make out the perimeter of your image. I used my daughter, Pinky, who likes to intentionally make funky faces when I take her picture. Goofball.
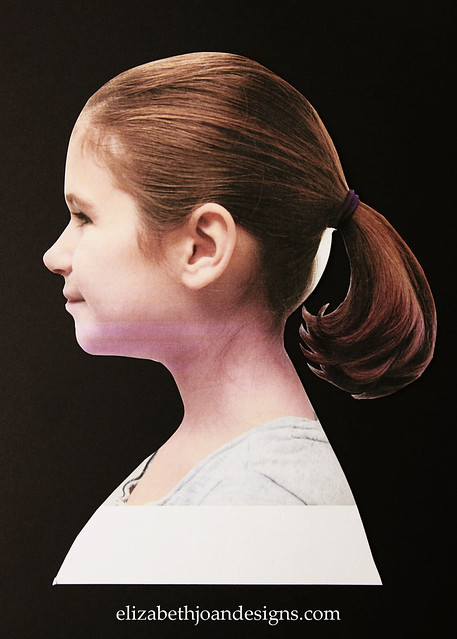
Next, print out the photo on to white card stock (this was an 8″X10″ print) and cut around the outside of your subject. I left some extra white space on the bottom and added a little extra roundness on the lower back of her head to balance out the poof above her pony tail. Excuse my freaky looking print out. My printer is super low on colored ink.
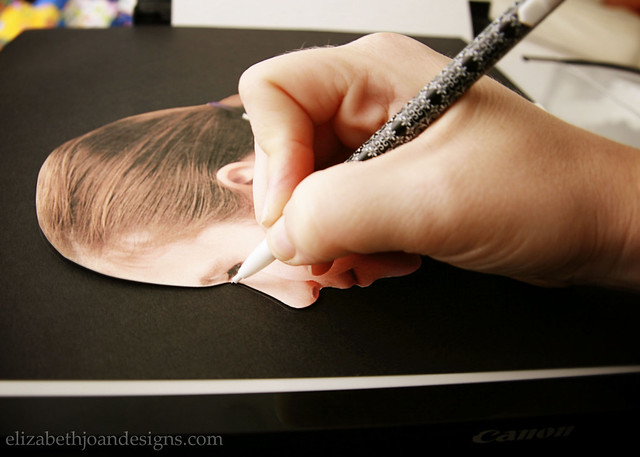
Then, trace the template on to the colored card stock, add embellishments, like longer eyelashes and a curved bottom if you like, and cut out your silhouette.
And there you have it!

I framed my silhouette by centering and taping it to a piece of white poster board, which was cut to fit the size of my frame.

-
Kid’s Tool Belt
My 3 year old son has recently been playing a lot with his toy tools. Apparently, carrying them in his tool box was too difficult so he started just stuffing them down his shorts and letting the elastic hold them up. He would take two steps, and the tools would hit the floor with a loud bang. I decided to remedy this situation by making him his very own kid’s tool belt.
To make for a special child in your life, cut one 13″ x 4 1/4″ piece of canvas (or any fabric you choose) for the base, one 7 3/4″ x 3 1/4″ piece for the pocket, two 14″ x 1 1/2 ” pieces for the ties, and two 3 1/2″ x 1 1/2″ pieces for the tool loops.

Then, fold and sew the tie and loop pieces to make straps.
1. Using a clothes iron, press in half.
2. Unfold. Then, fold and iron edges to the center crease line.
3. Fold and press in half again.
4. Sew along the edges.

Take your base section, fold and pin sides under to hide raw edges. Tuck your tie pieces in and sew around the rectangle.

To hide rough edges, fold and sew around your pocket portion.

Place the pocket on top of the base and attach leaving the top side open.

Sew a straight line down the pocket piece to make separate sections.

To attach the tool loops sew one edge down. Then loop it around to make a circle.


Repeat for the second loop, add some tools and you are finished!
