-
Lazy Upholstering
A few years ago, I inherited this small bench from my parents and had big plans to make it over.

However, having a baby, making a cross country move and project procrastination led me to cram this little guy into storage
and it was never seen again. A few weeks ago, while trying to come up with some seating options for my daughter’s upcoming birthday party, I resurrected him and decided it was finally his time to get a transformation.After a little searching online, I found {this bench from West Elm} which was inspiration for the leg color and fabric. Since I already had some gray and white chevron fabric, I just needed some paint. My husband was sent out to buy some black semi-gloss paint and this is what he returned with.

Yup, that is black satin paint. But I decided to roll with it and got to work.
First, I removed the 4 screws that attached the seat cushion to the base.

Next, the entire base got a few coats of the black satin paint. (I sanded everything in between each coat to give it a super smooth finish and help the paint adhere.)

While the paint was drying, I started working on the “upholstery.” I just used quotes there because I didn’t really do anything special, besides cover the current seat cushion, tan pleather-y fabric and all, with my chevron stuff. Is that technically upholstering it? Or just covering up something ugly? I don’t know and I was just too lazy to do anything more complex, hence the title of this post.
Using a manual staple gun, I secured the fabric to the underside of the bench seat. ({This tutorial on upholstering benches} was what I followed to figure out how to attach my fabric and attempt to make the corners look presentable.)

Then I placed the seat cushion back on top of the base and screwed it all together. Done and done. Not too shabby, right?

My favorite part of this project was that it was so easy to work on and finish. Plus, besides just being a bench, it is also a great place for unicorns and whale sharks to frolic. Or so I hear. Oh yeah, pants are optional too.

(Did you see the chevron and unicorn sneak peek photo we posted on Instagram and Facebook earlier today? If not, you can follow on Instagram {erinejd} or {click here} to find us on Facebook.)
-
Trick-Or-Treat, Smell My Feet
Trick-Or-Treat, Smell My Feet. That phrase is so weird, right? Who the heck even thought of it? Feet totally creep me out, but I absolutely love Halloween and trick-or-treating. So, let’s not talk about my fears and focus on the things that I adore.
It is so much fun to embellish everything with creepy décor and pumpkins in the fall. And I love to come up with costumes for Trick-or-Treating each year and watch as my kids go from door to door collecting goodies. Instead of going with the whole plastic pumpkin buckets and/or plastic bags this year, I decided to take the classic pillow case candy bag and vamp it up a bit for a cool candy carrier that any kid would be proud to sport.

I love that these treat bags can be so versatile and hold a ton of loot for my kids (which I will kindly raid of all chocolate and caramel items post October 31st.)
These are the supplies I used for this project:
– 1 king sized pillowcase (a standard size will work as well)
– Printed Template
– Freezer Paper
– Acrylic Paint
– Fabric Medium
– Sponge or Spouncer
– Pencil
– Scissors/Craft Knife
– Iron
– Ribbon
– Sewing Machine (Optional)
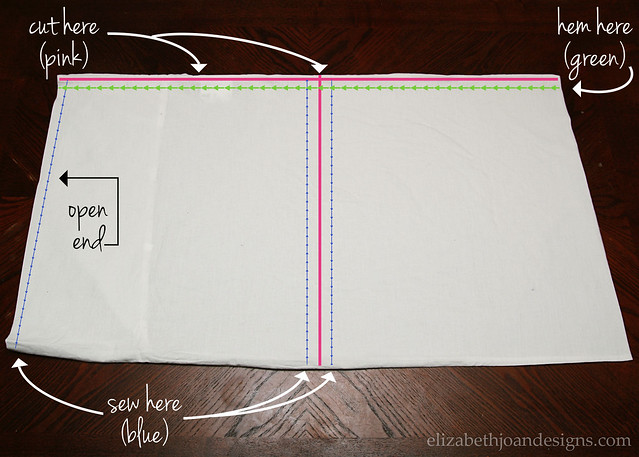
Since I had an extra unused king sized pillowcase in storage, I opted to use that, although any size will work. My huge pillowcase would have been too big for either of my kids to lug around by itself, so I decided to cut it into two pieces, sewed up the sides and hemmed the tops, which created 2 separate bags. You could also do this with a standard pillowcase, but the bags will end up being just a bit smaller than mine. Or you can skip all of the cutting, if you prefer a bigger sack, and proceed onto the part with the freezer paper. Below is a photo with all of my cutting, sewing and hemming lines. The left side of the pillowcase is the open end where the pillow would be inserted.
Does this make sense? Because Emily didn’t get it at first, but that isn’t all that uncommon. *wink*
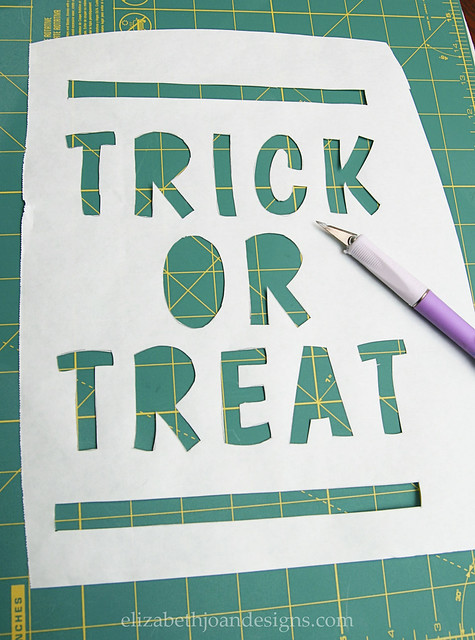
After my bags were ready, I tore off some freezer paper just a bit bigger than my prints. (I had two different simple prints which I made in Photoshop, but anyone could easily whip up the same thing in a Word document. I used the font Boogaloo, found {here} and my own bat design, which you can download {here}.) Each print was taped to the waxy side of the freezer paper (facing up) and then I traced the letters and image on the matte side with a pencil.

Once everything was traced, I used a craft knife to cut it all out.
Next, I centered and ironed the freezer paper, waxy side down, onto the bag. You can see here that the middles of the R’s, O and A were also cut out and ironed on to complete the letters.

Then, using a small cup, I mixed black acrylic paint and fabric medium in a 1:1 ratio and applied it on top of the freezer paper stencil using a spouncer.

After waiting eons for everything to dry, I peeled the freezer paper off of the pillowcase bags to reveal my finished stencils. This is where you hear the angels singing. Ahhhhhhhh.

Then, all that was left was to add a couple of ribbon shoulder straps to each bag. I attempted to use the sewing machine to attach them, but after a few hiccups with that whole process (my sewing machine hates me,) I opted to hand sew the rest of them on. Pain. In. The. Butt. However, totally doable for those of you without sewing machines.

Besides a few little leaks on the letter “K” of the word Trick, I think that they turned out pretty great. They are super sturdy and can easily hold 5 lbs. of Jolly Ranchers, so I think they will be good to go when my kids drag them around the neighborhood in a few weeks.

-
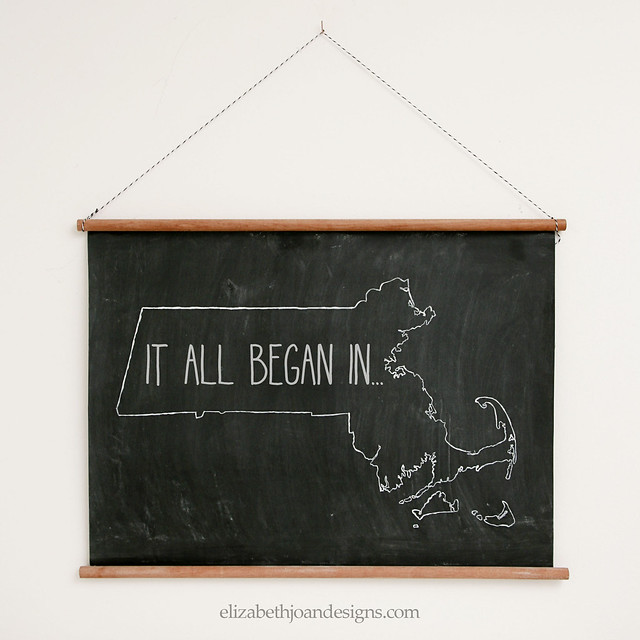
Vintage Inspired Chalk Cloth Map
Last week, while perusing the interwebs, I came across {DIRTSA STUDIO} on Etsy and fell in love with all of the chalkboard maps they had available for purchase. I absolutely love the vintage old school vibe that these portray and I knew I could probably whip something similar up for a few pennies less than theirs are selling for. Not that they aren’t totally worth it! They are, but I’m a DIYer and it only made sense for me to try this one out on my own.
So, I headed out to the craft store where I found chalk cloth and dowels for a steal with a 60% of coupon. Woot! I always love a good deal.
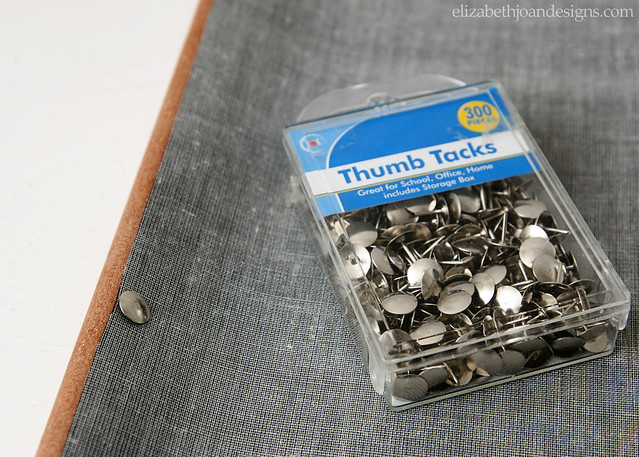
My supplies included chalk cloth, 2 wooden dowels, white acrylic paint, a paint brush, a pencil, a print out of MA, scissors, a craft knife, chalk, thumb tacks and baker’s twine. (Sorry. I totally forgot to take a supplies photo. Oops.)
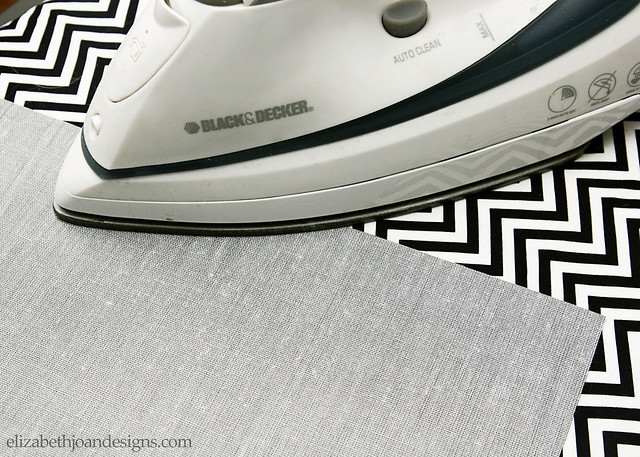
I started out by cutting my chalk cloth down to 24″ wide X 18″ high and sawing the dowels (my hubby actually did this) down to 25″ each for a little over hang. Using a hot iron on the back of the fabric, I carefully smoothed out the wavy spots.
Next, I printed out sections of the state of Massachusetts onto 4 pieces of paper. I went with MA because our son was born there and I thought that this project could end up hanging out in his room. Each piece was taped together in the appropriate place with the rest.
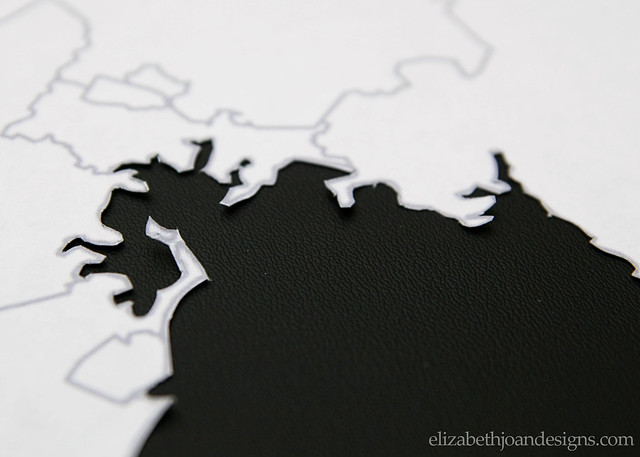
Then it was time for the tedious work of cutting everything out.

After about an hour and a half, I was wishing that I had chosen a state with straight line borders vs. the crazy ocean eroded coast of The Bay State. But I kept on cutting, alternating between my scissors and craft knife. A few small islands may have been lost in the process, but hey, you win some, you lose some. Right?
Look at all of those nooks and crannies.
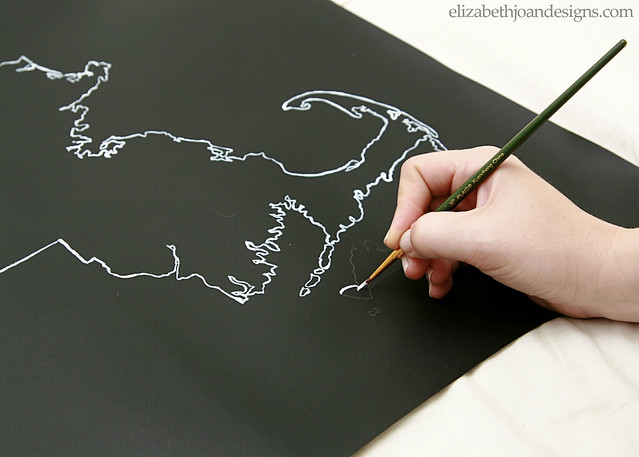
After that, the entire state was traced onto the chalk cloth with a pencil. This process went much faster than the cutting.

Using a fine tip paint brush, I outlined the image with white acrylic paint.
Once it was all dry, it was time to attach the wooden dowels. Again, my hubby came to the rescue and pushed 3 thumb tacks through the chalk cloth and into the rods, after I centered them up.
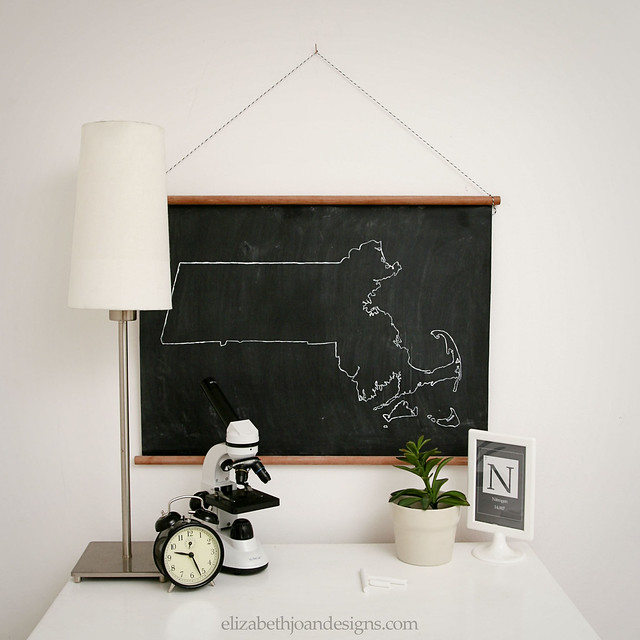
Finally, I tied some baker’s twine to each end of the top dowel, primed the chalk cloth, and my project was finito.
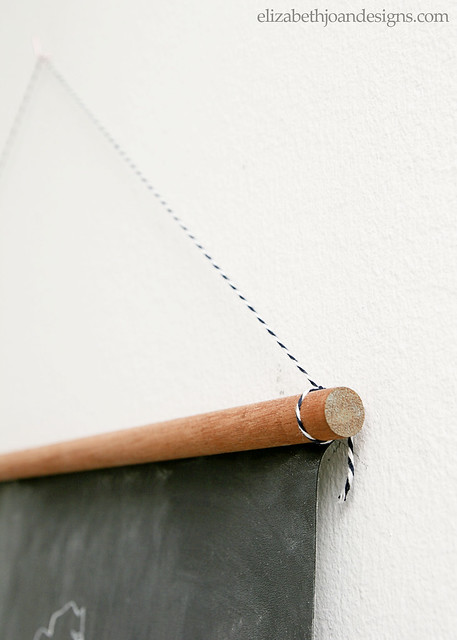
Tada! Here it is hanging in our son’s room. Doesn’t it look cool?
-
Painting Upholstery
Have you ever found a project and thought to yourself “I can do that?” And then you tried it out and it was a complete failure? No? Me neither.
Just kidding. The great thing is when you do a project and it turns out pretty awesome, even though somewhere along the way you may have wanted to set it on fire. What’s that you say? You haven’t wanted to do that either? Well, then you are lucky. Anyway, this is a story about awesome things that almost got set on fire. Enter the painted barcalounger…

This post contains affiliate links for your convenience.
Isn’t she purdy?I actually started out with two of these puppies. You may remember this photo from awhile back. (Don’t bother looking for the post. It disappeared into oblivion when we lost all of our blog posts {mentioned here}. That is a lesson on backing things up!)
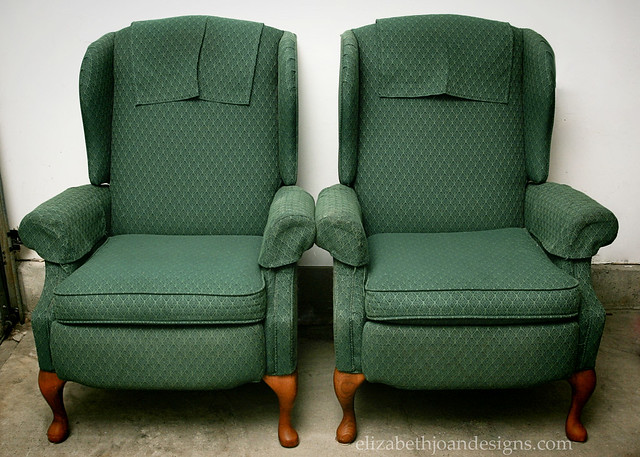
We scored both of the chairs on Craigslist for FREE. Yes, you read that right. And they were is great condition. No funky smell. No nasty stains. Only a small amount of dust and hair clung on for its life as I vacuumed them off.
A while ago, while perusing {Pinterest}, I found a photo of a beautiful upholstered wing-back chair {by Kristy Swain of Hyphen Interiors} that had been painted with latex and acrylic paints, of all things, and immediately knew I wanted to work that kind of magic on my own set of twins. Plus it is a much more inexpensive option than reupholstering.
I decided to see if anyone else had painted their upholstery and there were a ton of tutorials out there, so I figured that this was totally a project I could pull off. I gathered my supplies.
These included:
– One quart of Glidden Satin Latex Paint in Granite Gray
– {Ceramcoat Textile Medium}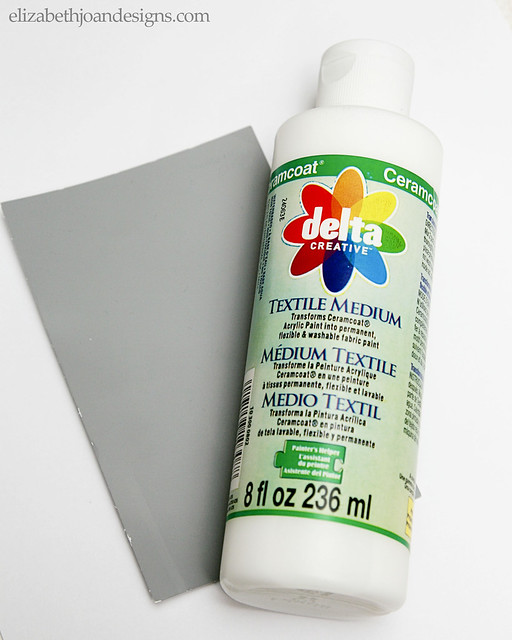
– a spray bottle filled with water
– a disposable cup to mix the paint in
– a paint brush
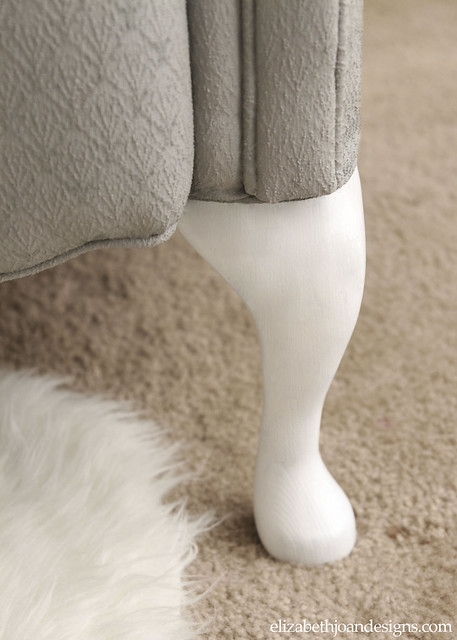
– white semi-gloss paint for the legs (already owned)These supplies were based mostly on Kristy’s process, minus the acrylic paint, after I read about several successes using only latex.
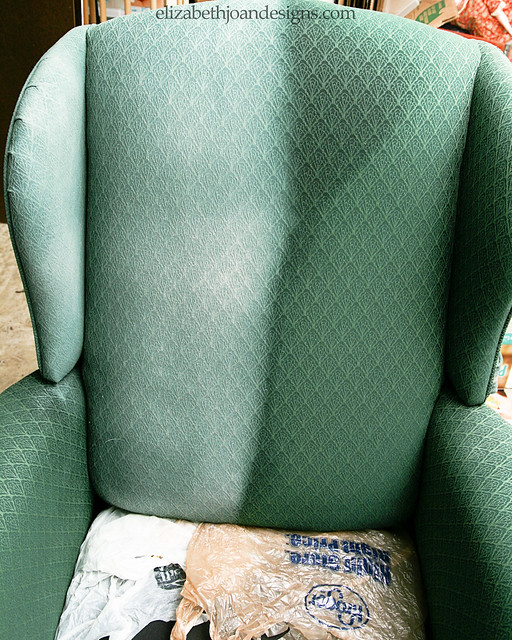
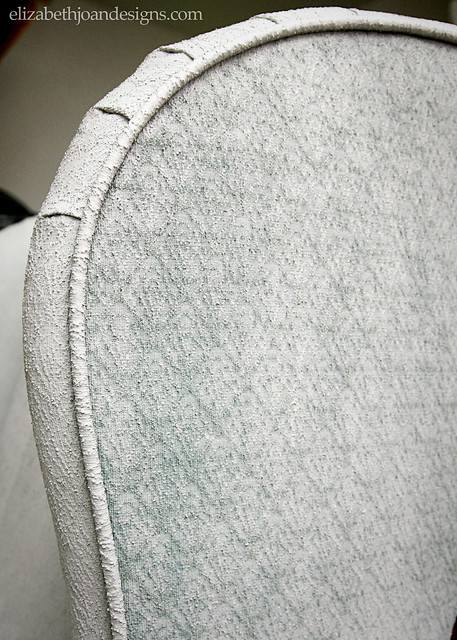
Then it was time to get to work. I started by removing the head and arm rest covers (do those things have a real name?) and pulled the seat cushion off as well so that I could paint it independently. Next, I mixed my paint with the textile medium and some water in a 1:1:1 ratio. With the spray bottle, I spritzed the water onto the fabric of the back rest and used my paint brush to spread the mixture onto the fabric. You can see below that the first coat looks like it is going on decently, considering I was painting a light color onto a darker fabric.
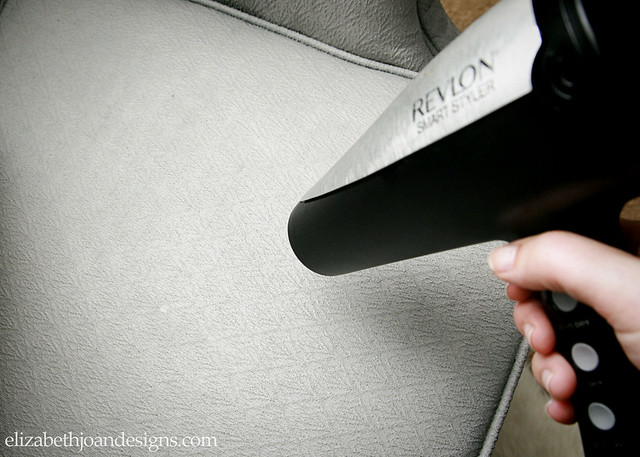
I spritzed and painted until the entire chair was covered, making sure to get in all of the nooks and crannies with my brush. Then it was time for a break so that everything could dry and I could make lunch.
One salad and five gluten free pretzels later, I headed back to check on the drying process and that’s when I started to freak out. It looked like there was the slightest bit of dust on the chair, but not any sort of noticeable difference in color. I didn’t even take a photo because there was nothing to photograph. The chair literally looked the same, like the right side of the photo above.
I mixed up some more paint, medium, and water, this time changing things up a bit and using a 1:1:1/2 ratio and hoping that this would allow for a bit more coverage. Spritz and paint and wait. Again, when I came back, it only looked as if someone had sprinkled a light dusting of baby powder on top of the chair. Grrrrrr. It was time for someone to light the fire, because this chair was going to burn. I could only imagine how many more coats I was going to have to do to make any sort of impact. 10? 20? 100? So I waited. And waited. A couple a of days actually.
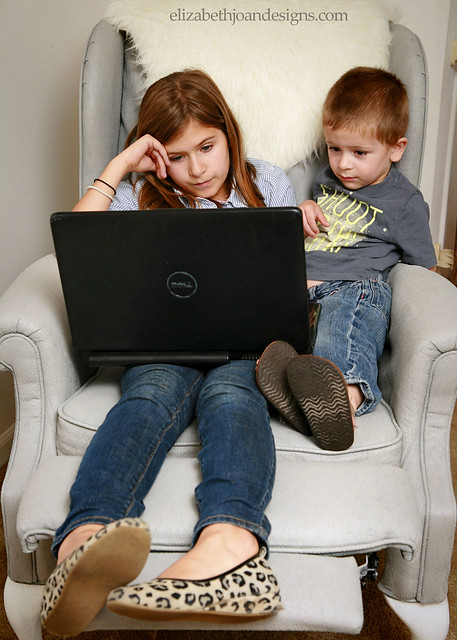
I knew I couldn’t give up on this chair, so after some whining to my husband and sister, I again mixed up my paint, medium and water, but opted not to use the spray bottle with water. That, my friends, was the secret to my success, because the next coat was definitely showing some decent coverage. Just a little green showing through.
This chair is so lucky that I had a little perseverance and with a little more, it’s twin sister will get the same treatment so that we will have two GRAY barcaloungers.

1. I would describe the texture of the chair as being similar to waterproofed outdoor fabric. It is a bit plastic-y, but still squishy and very comfortable to sit in.
2. My theory is that the final texture of the chair has a lot to do with the beginning texture. My fabric was fairly stiff and rough to start out with, so a more plush fabric may produce a softer finish. No guarantees on this though.
3. I used four 8 oz. bottles of fabric medium and one quart of latex paint, which equaled four grueling coats of paint. This amount would have been less had I done fewer coats with my newly figured out mixture. (1:1:1/2 ratio of paint, medium, and water with no spray water bottle added.)
4. Use a coupon. I could have spent around $12 less if I would have utilized coupons from my local craft store. Doh! You can even load a lot of them onto your phone with the right apps!
5. The kind of chair I chose to use may not have been the best candidate for this project. Barcaloungers move and lounge (duh!) and have foot rests, so a stationary chair may be a better choice because it will have less surface area to cover. This will definitely be something I take into consideration in my future upholstery painting projects.
Moral of the story: If at first you don’t succeed, try, try again. We would love for you to share your upholstery painting stories with us if you end up trying this out!