-
Paint Dipped Box Baskets
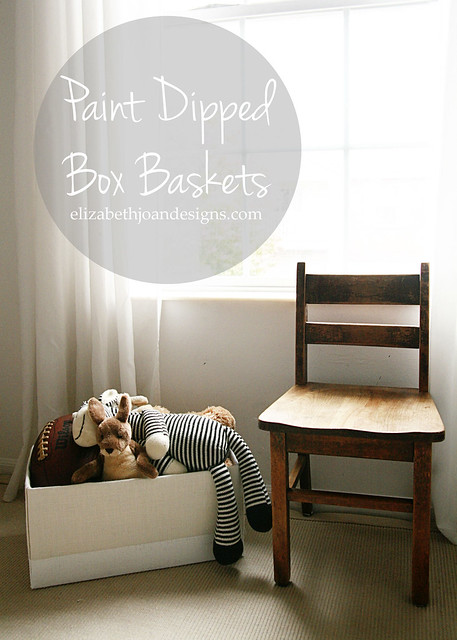
This project is not any sort of revolutionary new item. People have covered boxes with fabric before and the new rage of dipping baskets into paint is all over the web and in stores. But I may be 1/4 genius for combining the two together. Ok, maybe 1/16.We needed some sort of storage containers for our closet and I wanted them to have that cool dipped basket look. Since spending a ton of money on storage that will ultimately be shoved behind closed doors seemed a bit silly, I obviously chose the DIY route. (Is there any other way?!?) And these puppies needed to fit several criteria:
1. They had to be cheap. Duh.
2. They had to be easy.
3. They had to be neutral.I wanted the storage to blend in and not scream “Here I am. Look at me!” even though they were going to be locked up in the closet. Yes, for some reason, I still cared what they looked like.
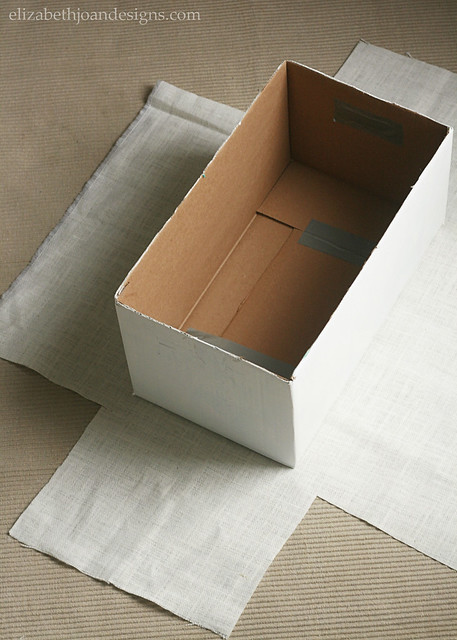
Since I had several diaper boxes in the recycling, they naturally became my storage containers of choice for the fabulous price of FREE. In addition, I gathered some ivory colored burlap (super cheap) and had white paint in the garage, which I would use later.

I started by cutting off the top flaps of my box and duct taping the holes where the handles were, as well as covering the hole in the bottom. This just made wrapping everything with fabric so much easier.
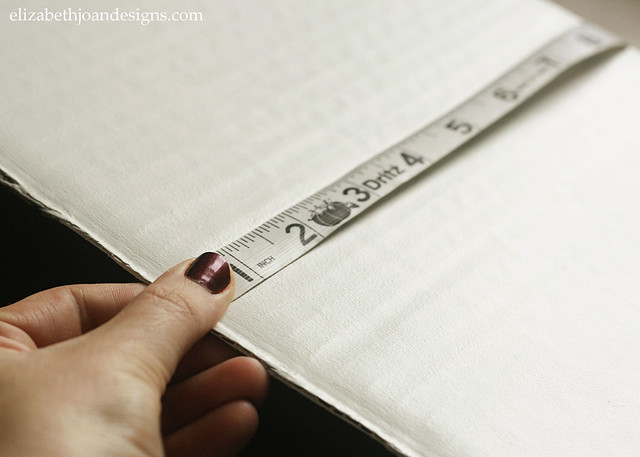
Next, I measured my box, starting on one side and going around the bottom to the other side, to figure out the width of my fabric. I also repeated this for the opposite sides. For a Pampers size 4 diaper box, my fabric measurements were 30″ x 38″ after I added 3 inches to both to allow for overlap on the top of the box.
(You can see here that my box is painted white. This is because the teal color of the box and the word Pampers could be seen through my fabric. If your fabric is darker or thicker you probably won’t have this problem. Or if you don’t care, you probably won’t have this problem either. *wink* )
Next, I placed my fabric on ground and centered my box on top of it. I used scissors to cut squares out of the corners with about an inch of allowance where the corners would meet.
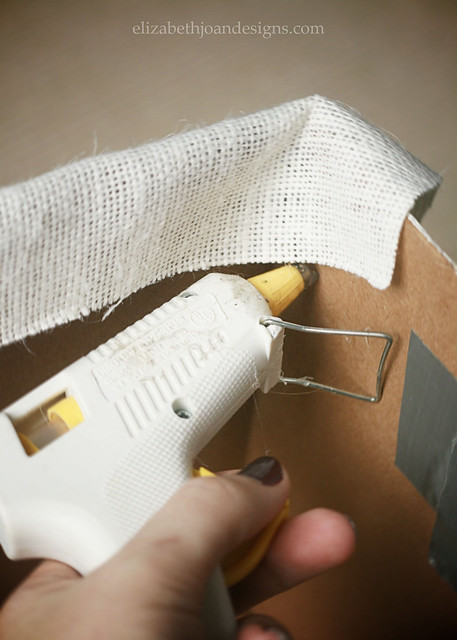
Then, I pulled the two longer sides up and hot glued them to the inside of the box along the edges.
This next part doesn’t have to be perfect by any means. Using scissors, I snipped in on an angle to the corner of the box, doing this for all four corners.
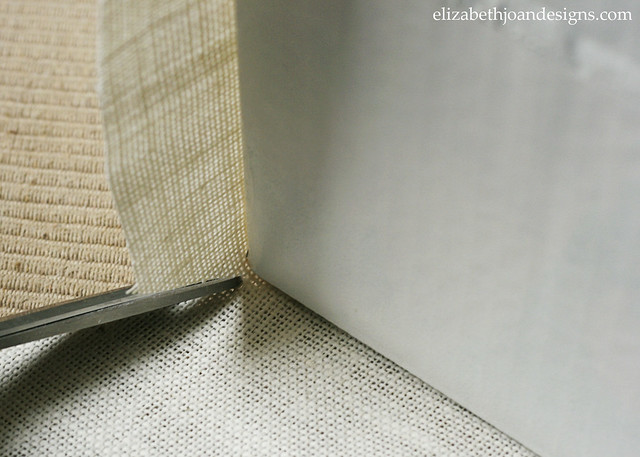
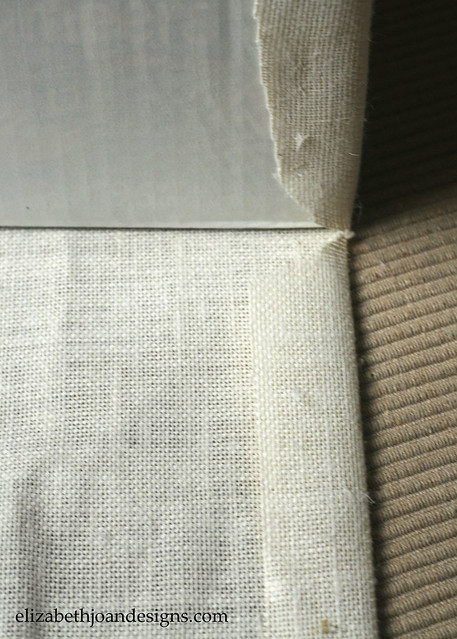
You can see here how wonky my angles are, but it worked out regardless. Each small edge was then folded in and glued to the ends of the box.
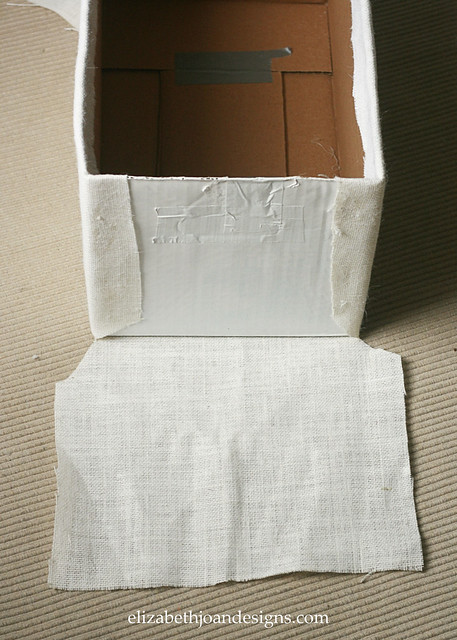
After that came more folding and gluing. I creased the edges of the end pieces in and lifted them up to make sure that they were lined up with the corners of the box. They were, so I glued along each folded seam and then pulled the top over and secured it to the inside of the box.
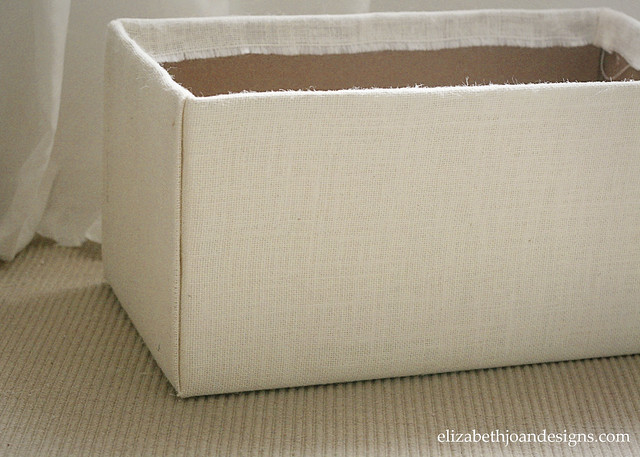
Here is the fabric box all finished.
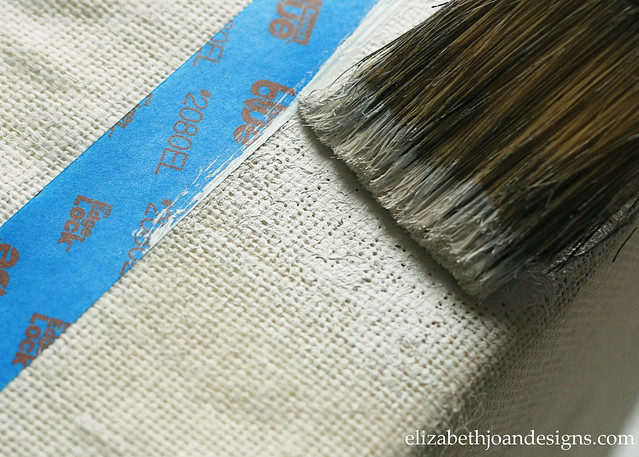
For the paint dipped effect, I taped all the way around the box, about 1/3 of the way up from the bottom.

Then, I just used a paint brush to apply paint on that lower portion. After letting it dry for about 20 minutes, it was ready to go.
This project probably took about an hour total, but that included initially painting the diaper box, cutting, folding, gluing, painting, drying and taking pictures of the process along the way. Not too bad if you ask me! And as far as cost goes, since I already had the box and paint, I think it ended up being less than $2.
I know that these still look boxy, but I like that the texture and color of the burlap help everything feel a little more like a basket. What do you think?
-
Come On Baby, Light My Fire
What do you do on a freezing cold night when you need to get your fire going to help keep your feeble children warm? You drive to the local store, of course, and pick up one of those pricey fire starter logs, right?!
Wrong. The correct answer is to grab one of your inexpensive DIY pinecone fire starters that you have stocked up in storage. Wait, you don’t have those either? Well, now is the time to learn how to make them and save yourself a couple of dollars in the process. Plus, these fire starters are so much prettier.

You need:
– Pinecones (I have a ton that our Dad collected and sent home with me the other day. Thanks, Dad!)
– Tea light candles (From the dollar store)
– Cupcake wrappers (Mine are from the Target dollar spot)To start, bake the pinecones in the oven @ 200 for about 40 minutes to kill off all of the creepy crawlies that are living in them. If you bought pinecones from the store, you can probably skip this step.

Keep the oven on. Take the tea lights out of the their little metal cups (if they have them) and put them in the middle of the cupcake wrappers, in a muffin tin. Place in the oven for a several minutes to melt the candles.

Once they are melted, take them out of the oven and move the wicks over to one side with tweezers, or pliers, or your fingers. Whatever works. This will make them easier to light.

Lastly, before the wax dries, plop a pinecone down on top of each melted candle. Let them harden for a bit and your fire starters are ready to use!

These would be a great and inexpensive gift to give this holiday season. Keep the wrapper on for a festive feel (and some extra fuel) or remove them for a simpler look. You could also add some essential oils to the melted tea lights to make them smell yummy. I think we are going to save some of ours for backpacking/camping season.

The best part is that I think I’ve converted Emily to using these, instead of her typical method of just lighting a piece of paper on fire and chucking it at a pile of wood, in the hopes that something magical will happen.
-
We Are Grateful
Where has the year gone? I can’t believe that it is already November, the month of gratitude, but I’m excited for all of the family time we will be getting in the upcoming month. Emily and I are both thankful for all of our amazing readers who’ve welcomed us on this blogging journey. Your support keeps us going and we thank you for that!
I’ve seen friends on Facebook posting things that they are thankful for each day and know that there are gazillion crafts out there in the blog-o-sphere relating to gratitude, so I figured that I would share how our family is expressing our thankfulness this year for all of the wonderful things in our lives.

Let’s call it the Grateful Frame. It’s basically just a cheap, white Ikea frame with the glass removed. I put in a piece of Kraft paper and then added the letters, which I printed on cardstock and then cut out. Also, some decorative washi tape makes the edges of the frame pop a little.

The concept is really pretty simple. When one of us thinks of something we are grateful for, we can write it on the paper, creating a fun, interactive family art piece. There is no time limit on when we need to write something. It can be every ten minutes or every other day, whenever we feel like it. I like that there aren’t any restrictions (besides maybe not writing on the frame itself) and even our two year old can add his grateful little doodles.
(Our daughter writing “family” below.)
Right now it is pretty bare, but I plan on sharing it all filled up once the month is over on Instagram. (Follow me @erinejd.)

How are you showing your gratitude this month??
-
Two Sisters. Bad Photos.
As Emily mentioned in her post last week, we got to see each other for the first time since we’ve started working on this blog back in June. (I believe it was actually on our family vacation to the Smoky Mountains in May, that we finalized our plans to give this dual blogging gig a go.) You may have noticed the photo of us over there on the side bar, and I must admit, it is a bit dated. Like several years ago. We live almost 400 miles apart, so grabbing a quick pic is not something we can do any ol’ afternoon. So, we made plans to take a better and updated version when we met up.
What we did not do, was plan on the days going so fast, my speed light breaking, or our children being needy. Because what child actually needs their parents? Certainly not mine. I usually like to just give them some matches and knives and let them have at it. Just kidding.
Anyway, by the time we were both free enough to pose for a pic, we were both slap happy, the lighting was horrible, the camera battery was dead and neither one of my children were sleeping. (Extra points to Em, whose children had passed out earlier.) So we had to resort to blurry selfies on the iPhone, which are totally not blog profile worthy. However, they are totally great for this post of “what not to do when you want a good photo for your blog.”
This pixel-y shot may possibly be the best and was taken by my daughter. We hate it. (That’s Emily on the left and me on the right, in case you didn’t know who was who already.)


We know that these photos are by no means professional or serious, but we figured they would help give a little bit of a view into our personalities and lives. And how we act when we’re way over tired. Plus, as an added bonus, they were totally DIYed. We wouldn’t want to stray from the norm too much. *Wink* Now back to our regularly scheduled programming.
