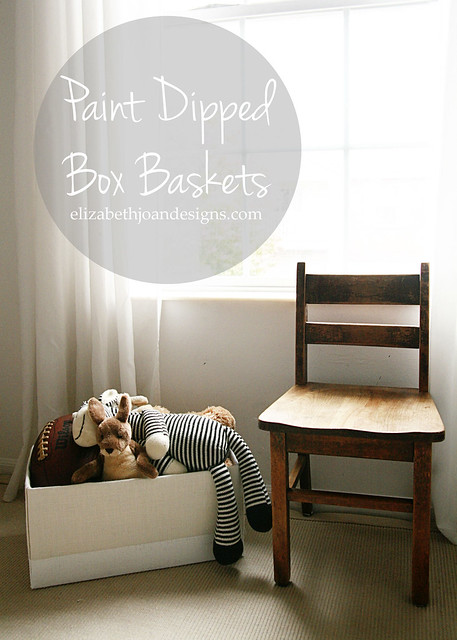
Paint Dipped Box Baskets
This project is not any sort of revolutionary new item. People have covered boxes with fabric before and the new rage of dipping baskets into paint is all over the web and in stores. But I may be 1/4 genius for combining the two together. Ok, maybe 1/16.
We needed some sort of storage containers for our closet and I wanted them to have that cool dipped basket look. Since spending a ton of money on storage that will ultimately be shoved behind closed doors seemed a bit silly, I obviously chose the DIY route. (Is there any other way?!?) And these puppies needed to fit several criteria:
1. They had to be cheap. Duh.
2. They had to be easy.
3. They had to be neutral.
I wanted the storage to blend in and not scream “Here I am. Look at me!” even though they were going to be locked up in the closet. Yes, for some reason, I still cared what they looked like.
Since I had several diaper boxes in the recycling, they naturally became my storage containers of choice for the fabulous price of FREE. In addition, I gathered some ivory colored burlap (super cheap) and had white paint in the garage, which I would use later.

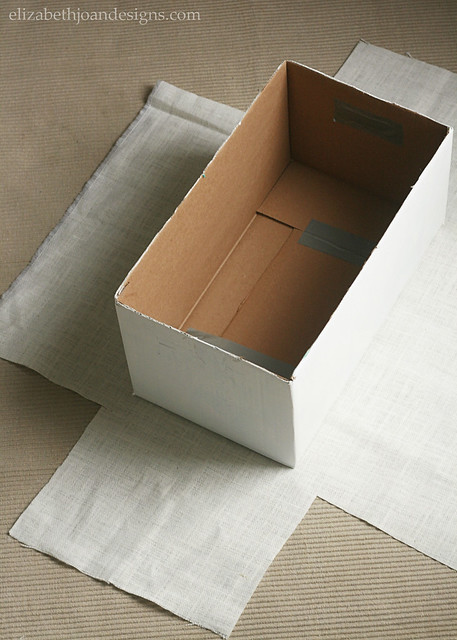
I started by cutting off the top flaps of my box and duct taping the holes where the handles were, as well as covering the hole in the bottom. This just made wrapping everything with fabric so much easier.
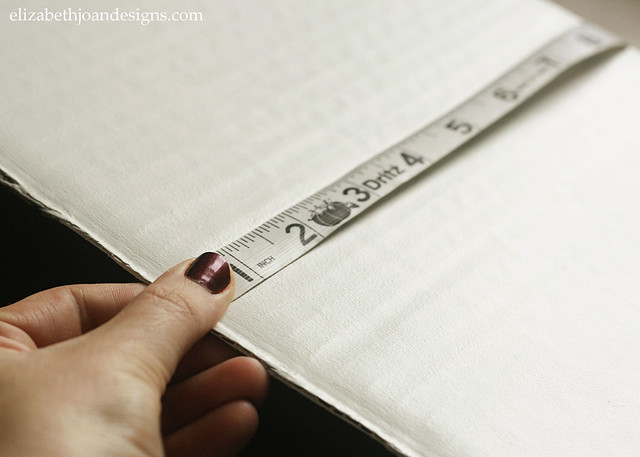
Next, I measured my box, starting on one side and going around the bottom to the other side, to figure out the width of my fabric. I also repeated this for the opposite sides. For a Pampers size 4 diaper box, my fabric measurements were 30″ x 38″ after I added 3 inches to both to allow for overlap on the top of the box.
(You can see here that my box is painted white. This is because the teal color of the box and the word Pampers could be seen through my fabric. If your fabric is darker or thicker you probably won’t have this problem. Or if you don’t care, you probably won’t have this problem either. *wink* )
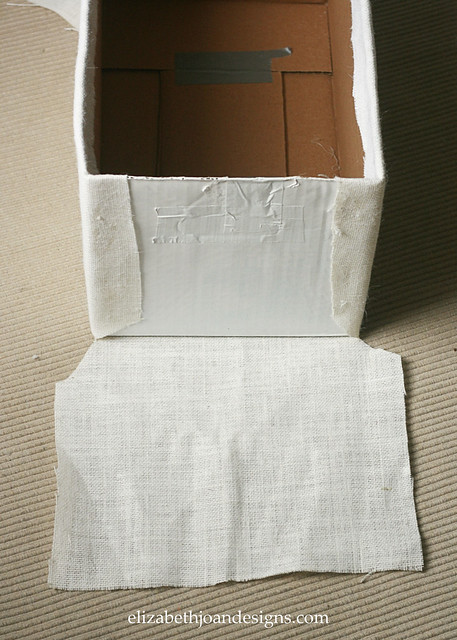
Next, I placed my fabric on ground and centered my box on top of it. I used scissors to cut squares out of the corners with about an inch of allowance where the corners would meet.
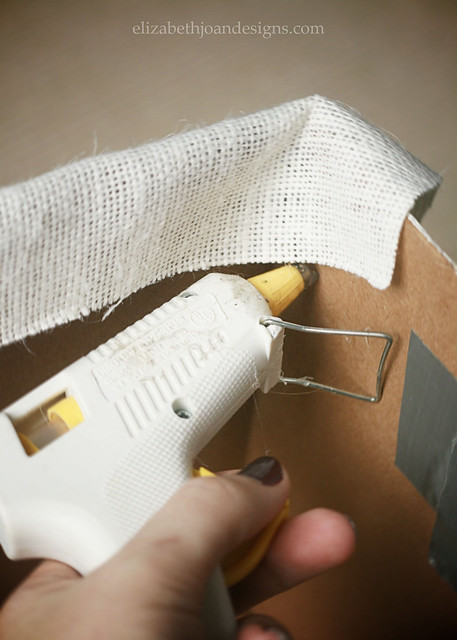
Then, I pulled the two longer sides up and hot glued them to the inside of the box along the edges.
This next part doesn’t have to be perfect by any means. Using scissors, I snipped in on an angle to the corner of the box, doing this for all four corners.
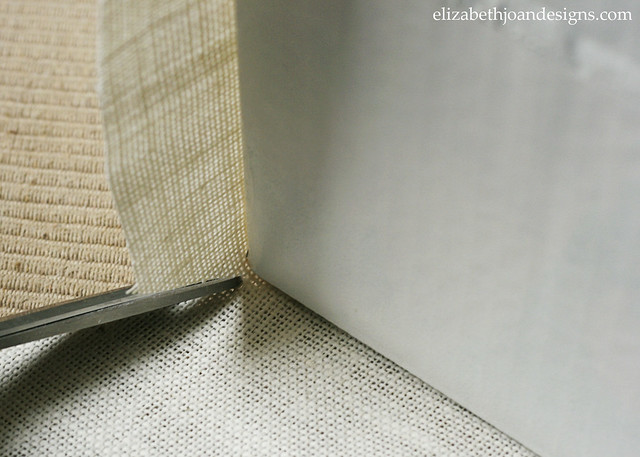
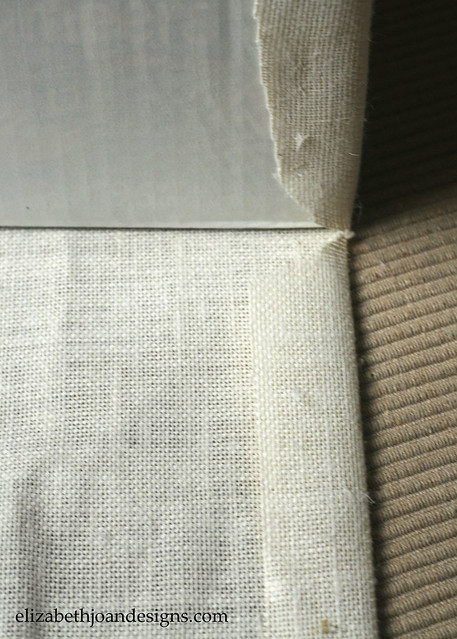
You can see here how wonky my angles are, but it worked out regardless. Each small edge was then folded in and glued to the ends of the box.
After that came more folding and gluing. I creased the edges of the end pieces in and lifted them up to make sure that they were lined up with the corners of the box. They were, so I glued along each folded seam and then pulled the top over and secured it to the inside of the box.
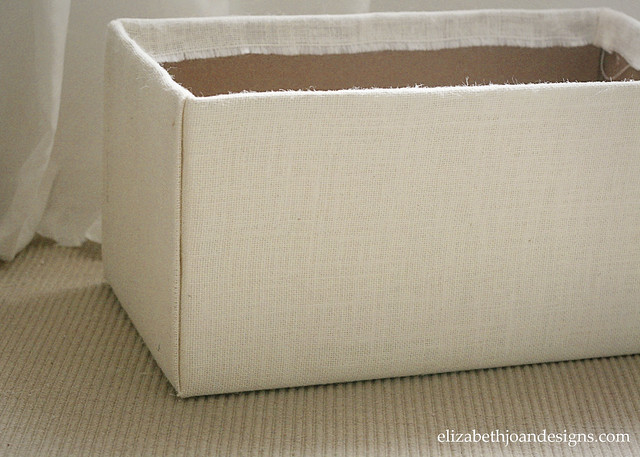
Here is the fabric box all finished.
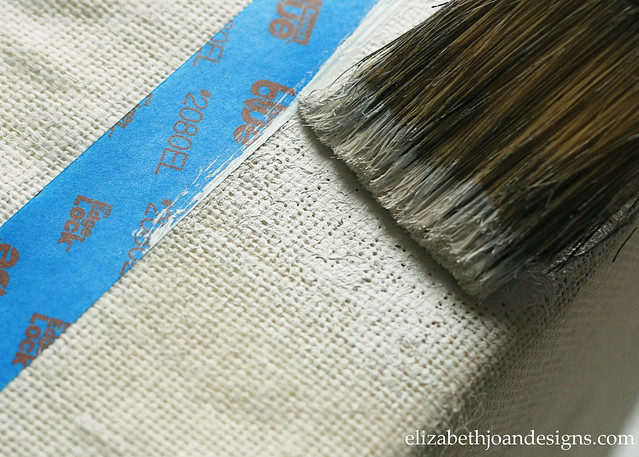
For the paint dipped effect, I taped all the way around the box, about 1/3 of the way up from the bottom.

Then, I just used a paint brush to apply paint on that lower portion. After letting it dry for about 20 minutes, it was ready to go.
This project probably took about an hour total, but that included initially painting the diaper box, cutting, folding, gluing, painting, drying and taking pictures of the process along the way. Not too bad if you ask me! And as far as cost goes, since I already had the box and paint, I think it ended up being less than $2.
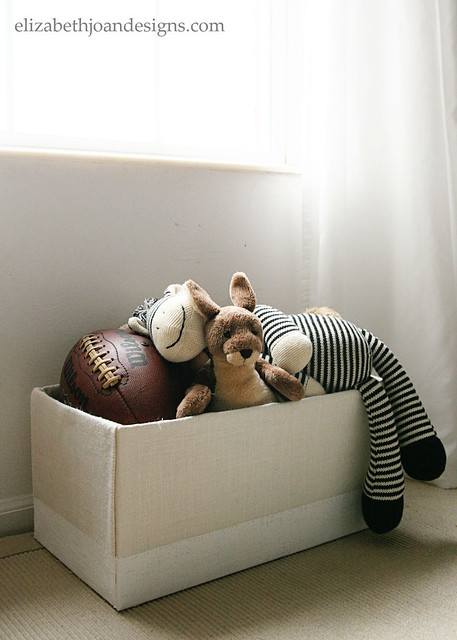
I know that these still look boxy, but I like that the texture and color of the burlap help everything feel a little more like a basket. What do you think?
4 Comments
Suzy
What a stylish way to recycle a diaper box! Would be super cute with some rope handles on the sides!
Beth
I love this post, and others!! I used clothes pins to help hold the burlap while I was gluing. Thus insured that the box wouldn’t move while I was pulling on the burlap. Thanks for all the great projects….keep them coming!!
Erin
Thanks, Suzy! I agree, rope handles would look great!
Rowena
Thank you for sharing this tutorial! Love it! Never too old to learn something new!