-
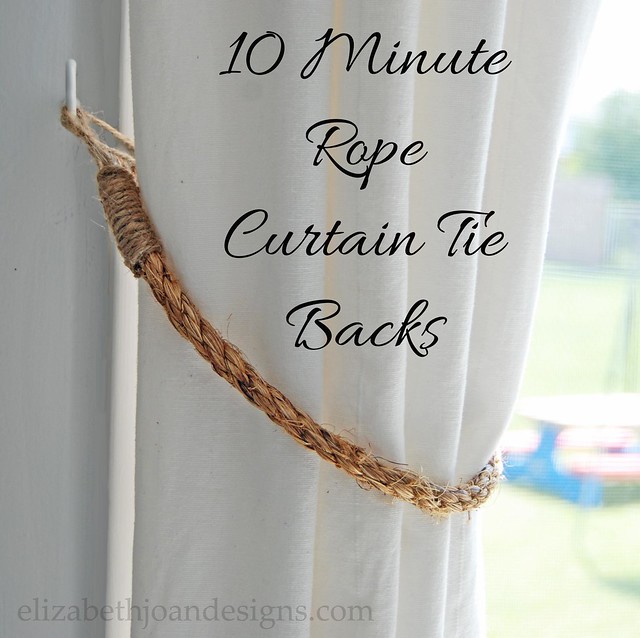
10 Minute Rope Curtain Ties
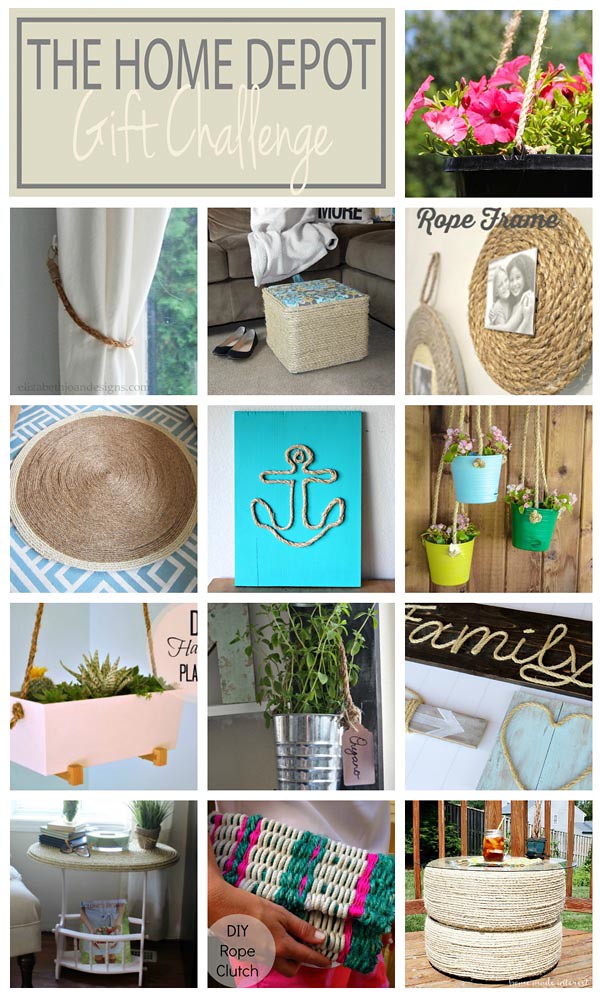
Rope is the item for The Home Depot Gift Challenge this month. (In previously months, our projects have been 2 x 4 Wall Art, an Industrial Book Rack, a Wood Box Caddy, and a Pegboard Luminary.) These 10 minute rope curtain ties are a prime example of being struck by an amazing idea and then you come to find out everyone and their brother was hit with the same one. Oh well. I decided to share it anyways, because it is that awesome. I guess it’s true great minds think alike, just ask Pinterest.

This challenge is in no way associated with The Home Depot. We just love their stuff!
Here’s how I made mine.
Supplies
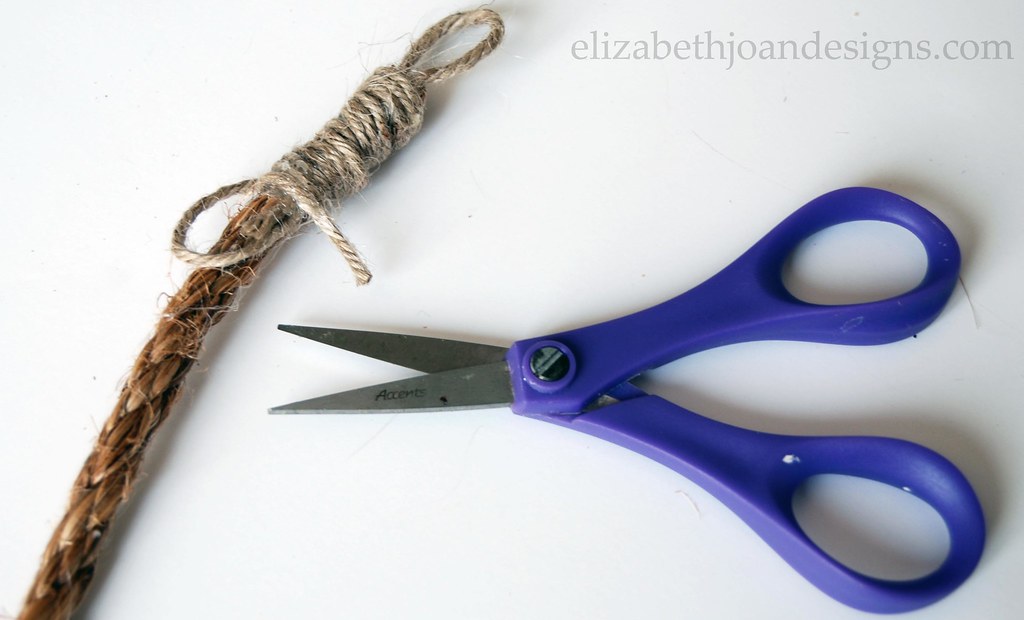
Rope
Twine
Scissors
Hot glue gun and glue sticks
Hooks- I used 1 1/4″ mug hooks
My hands (If only I had a couple more, this project would have been a lot easier.)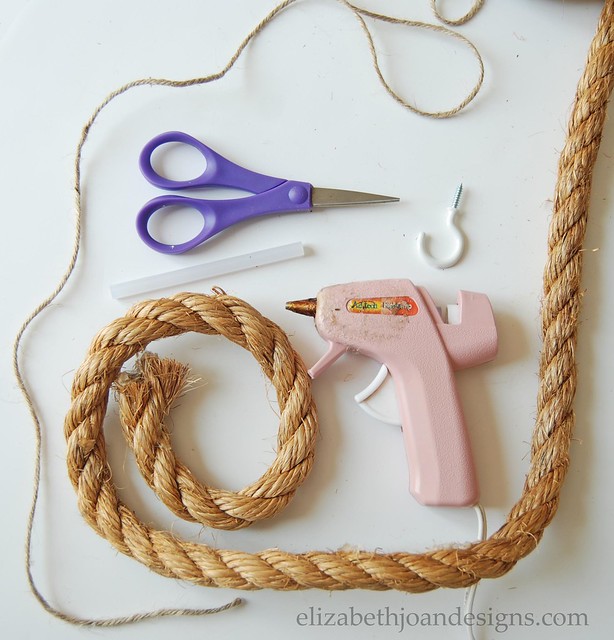
First, I unwound the rope into smaller sections. I thought the rope as a whole might be too thick for a tie.
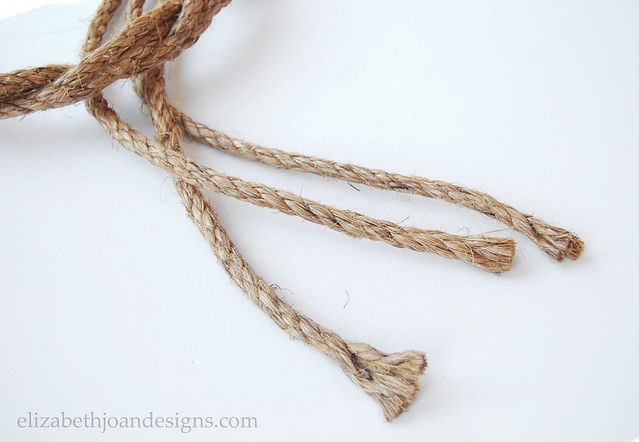
Next , I cut a section of the rope into an 18″ long strip.
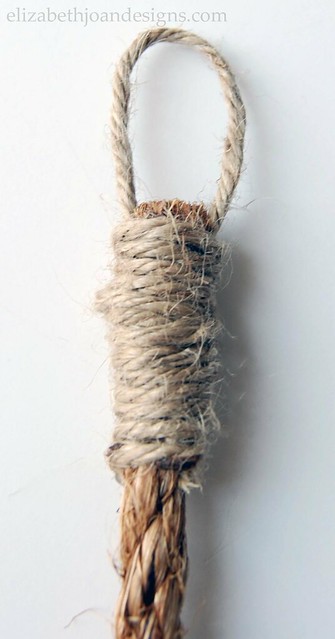
Then, with the twine I created a loop and hot glued it to the sides of the rope.
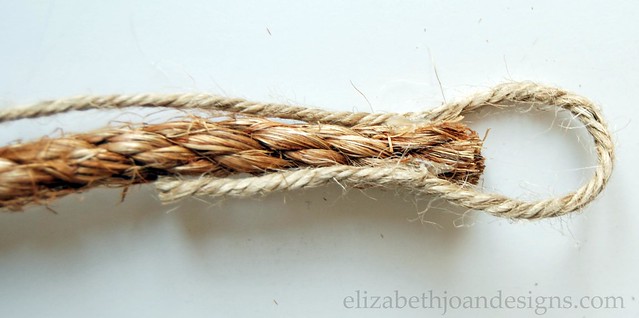
After that, I looped the twine again so the end of it was at the top of the rope. I wound the twin down the rope about 1 1/2″ gluing some along the way.

I cut off any excess string and smoothed the ends down with hot glue.
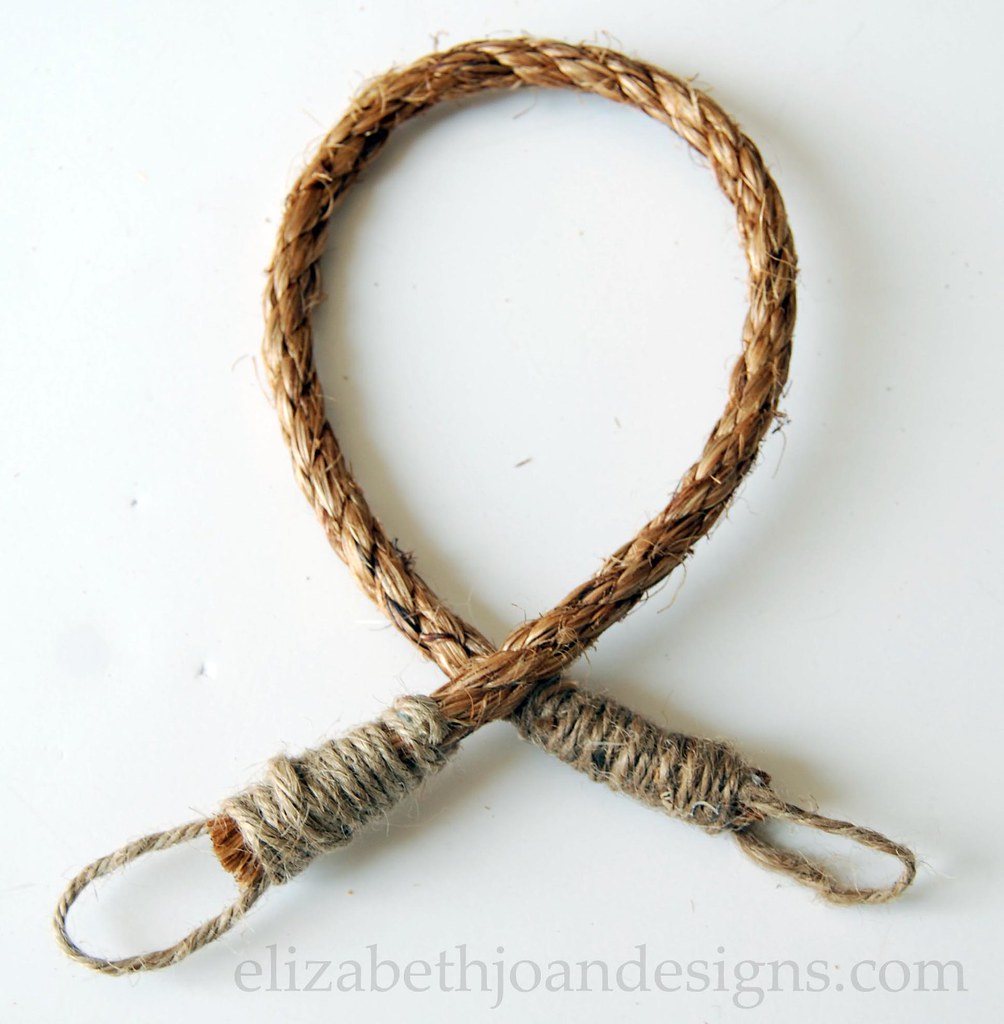
Then, I repeated each step until I had completed both ends of the curtain tie.
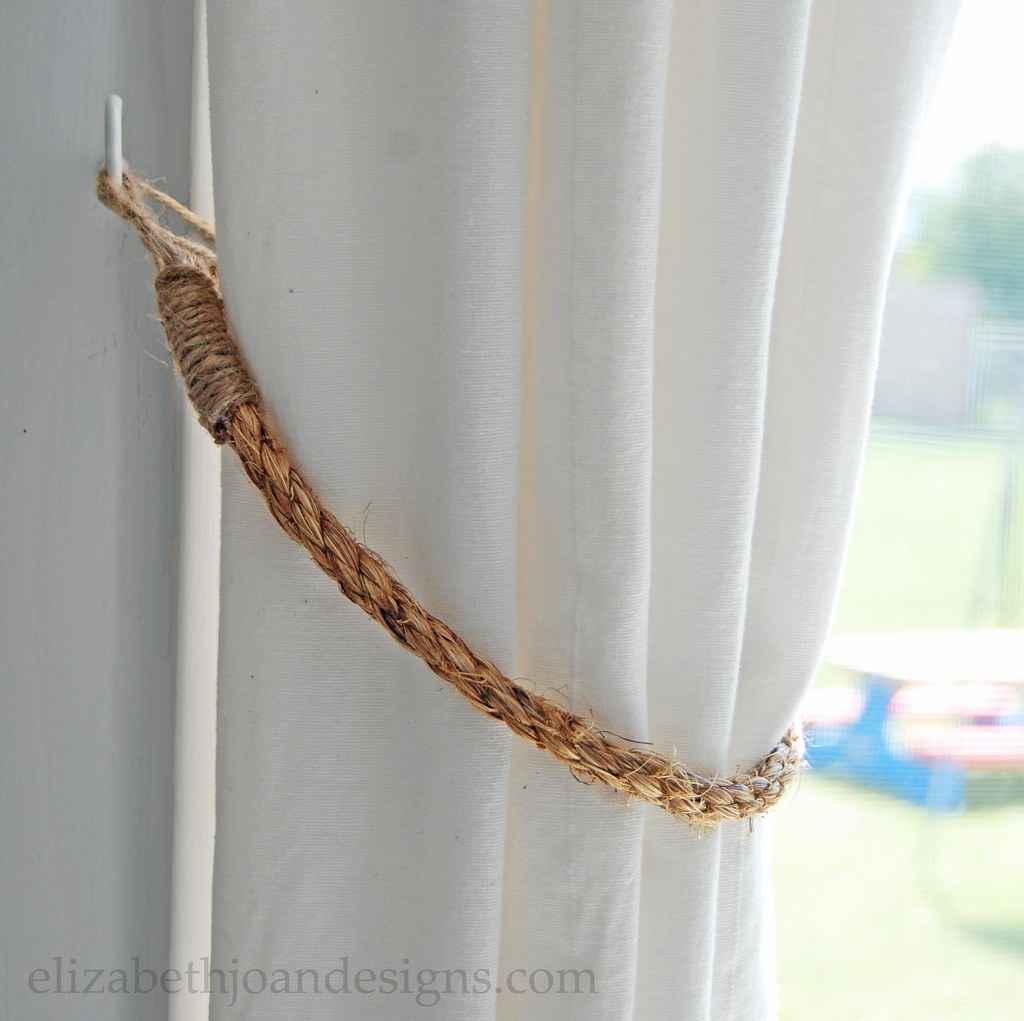
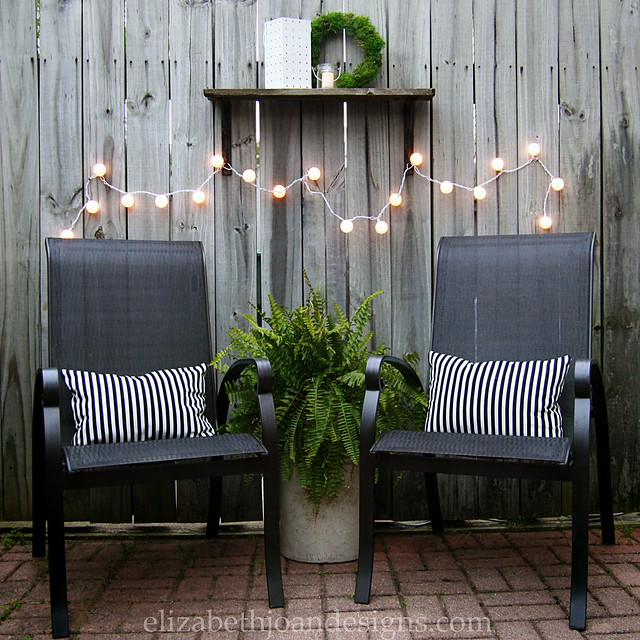
Finally, I attached the hook to the wall and tied up my curtain.
I really love how simple and budget friendly this project is. I spent less than $5 total for 2 curtain ties. Yay! I may just have to make more of these for other rooms in our home too.
Now it is time to check out these other amazing rope projects!
-
20 Summer Projects and Recipes

Patio Update on a Tiny Budget
Lavender Wreath

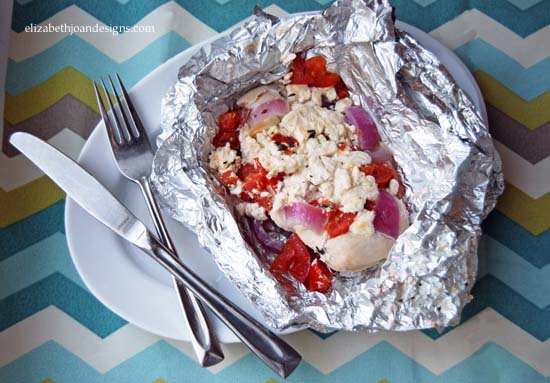
Mediterranean Chicken Foil Packets
Summer Party Printable Invitation

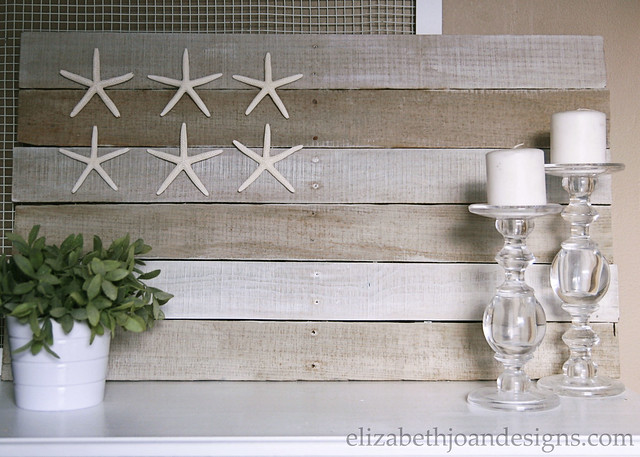
Neutral Coastal Pallet Flag
Grilled California Club Pizza

Numbered Mailbox

Packing A Carry On

Reusable Snack Bag

Bassinet Makeover
Grilled Bread Salad

The Cheapest Moss Letter You Will Ever Make

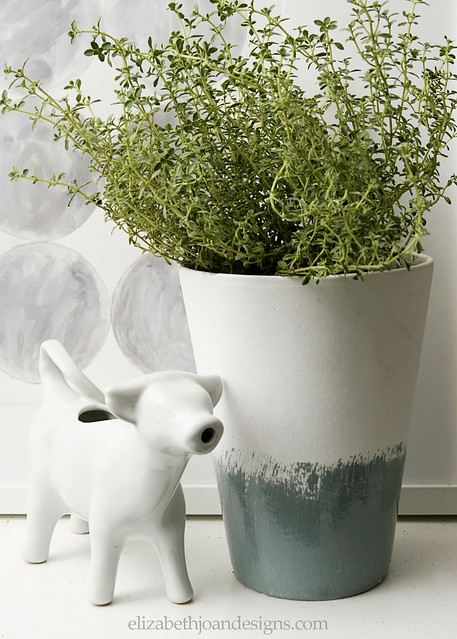
Glazed Herb Planter
Buffalo Chicken Meatballs

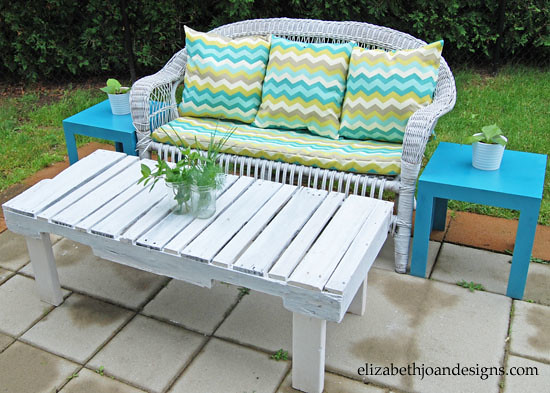
Patio Makeover
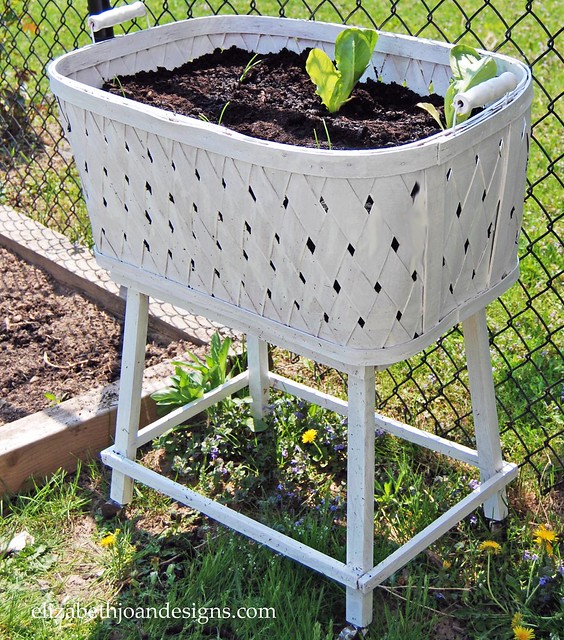
Laundry Basket Planter
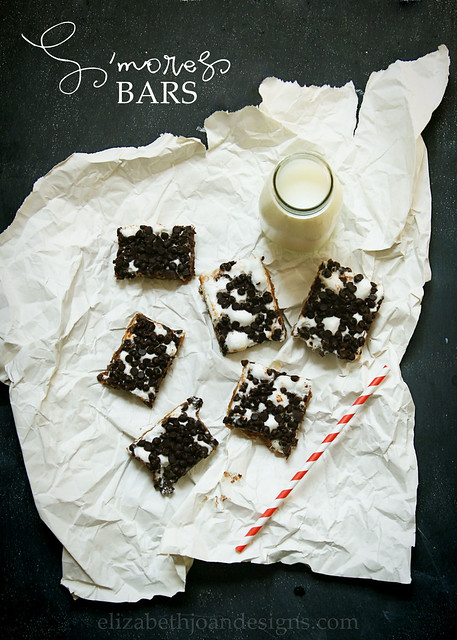
Ooey Gooey S’mores Bars
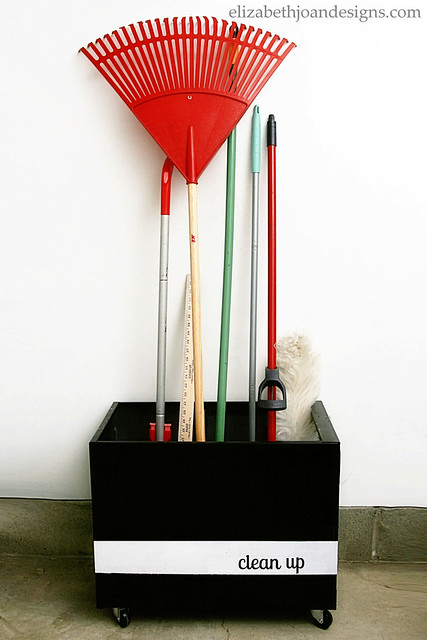
File Cabinet Garage Storage
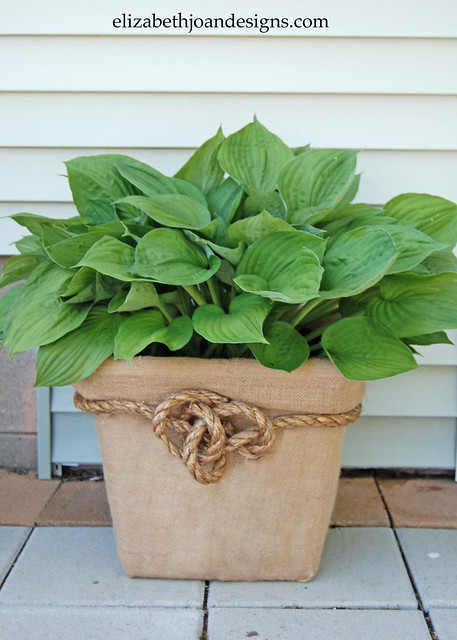
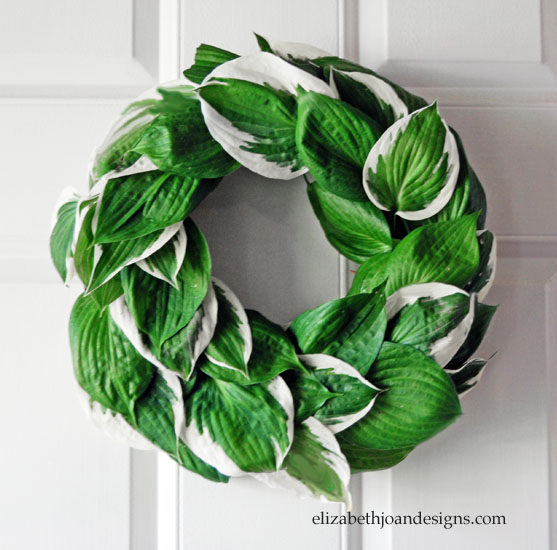
Hosta Wreath
Strawberry, lime, and Mint Infused Water

__________________________________________________________ You may also like:

15 Furniture Transformations 
30 Projects under $10 
Favorite Photography and EditingTools -
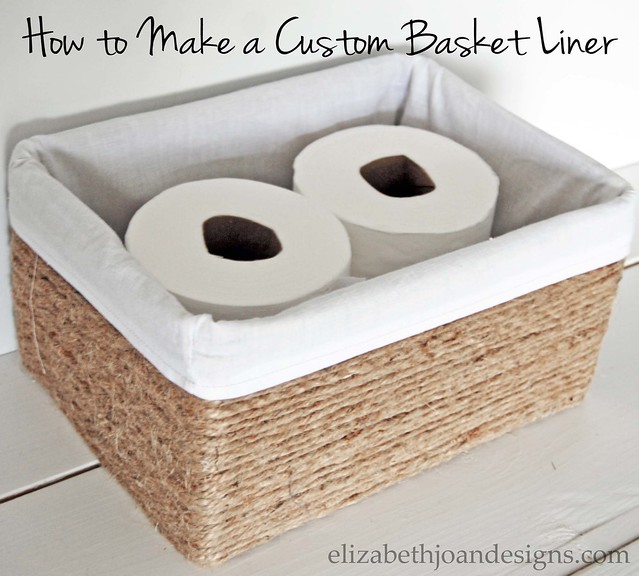
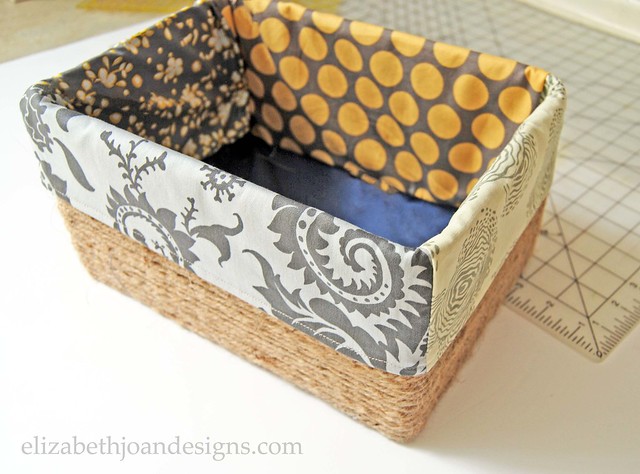
How to Make a Custom Basket Liner
Since re-sharing our Boxes into Baskets post, we have had many requests for a tutorial on how to make a custom basket liner. I have put together a step by step guide for you. (Yes there a lot of steps, but don’t be intimidated. It should only take about 30 minutes to make.) Without further ado, here are instructions and tips so you may create your own.
Disclosure: This post may contain affiliate links, which means we may receive a commission if you click the link and purchase. Please check out our disclosure policy for more details.
Supplies
Basket/Container – Anything you would like to line.
Tape Measure– I personally like a fabric one for projects like this.
Fabric– This can really be anything you want to make your liner made out of. I usually use inexpensive muslin to keep the cost down, but today I am using different colors of fabric to make it easier to follow along.
Rotary Cutter– Scissors work too!
Cutting Mat– This is optional. You may not need one if you are using scissors.
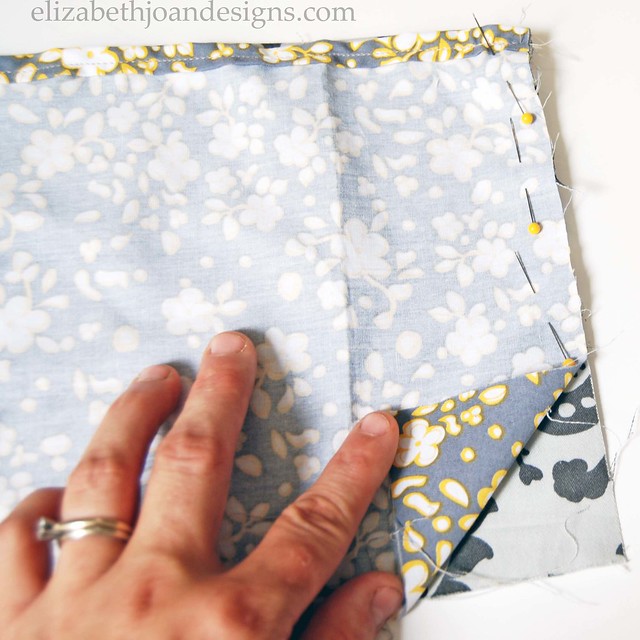
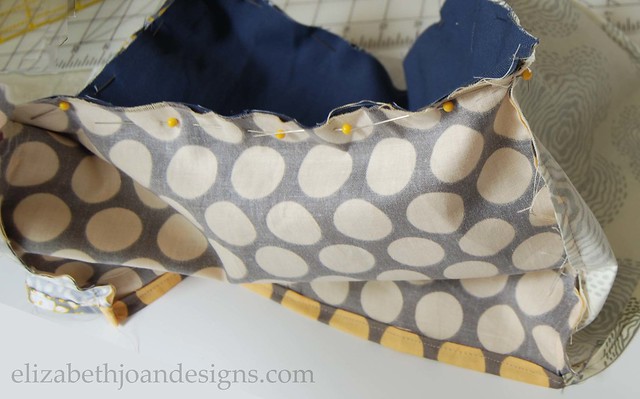
Straight Pins– In my opinion, an absolute must.
Sewing machine– Hand stitching is also acceptable, but may take a little longer.* If you don’t sew and still want to make a custom basket liner, exchange the sewing machine for Thermoweb Heat’n Bond Hem Iron-On Adhesive-3/8″X10 Yards
, a clothes iron, and ironing board. (Check the Thermoweb Heat’n Bond packaging to make sure your fabric choice is conducive to working with this product. Cotton is usually a safe bet.)
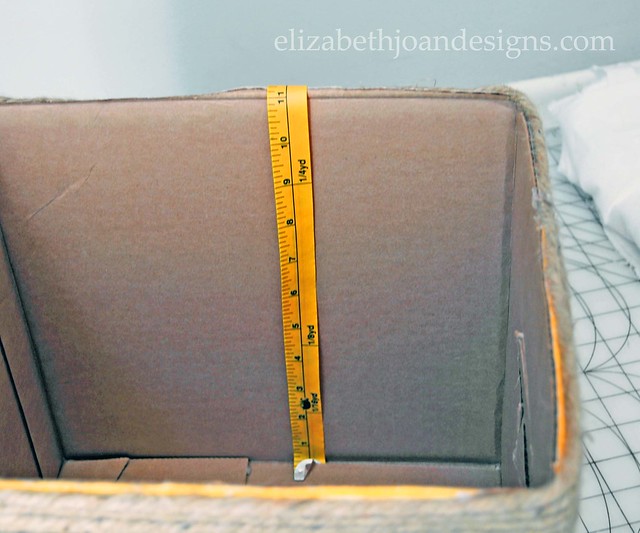
1. Use your tape measure
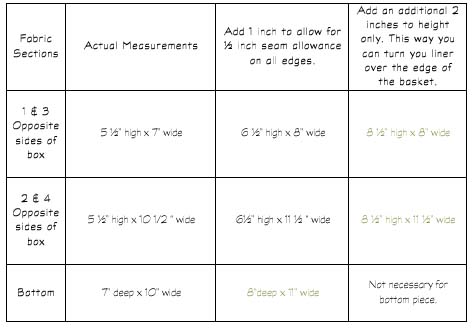
3. Use the rotary cutter
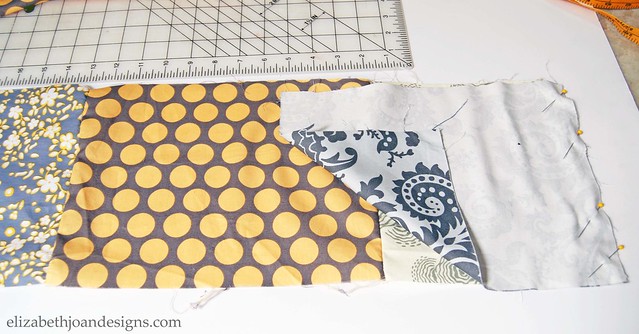
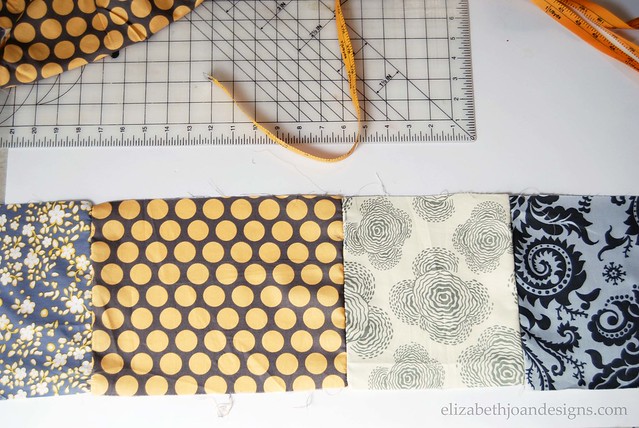
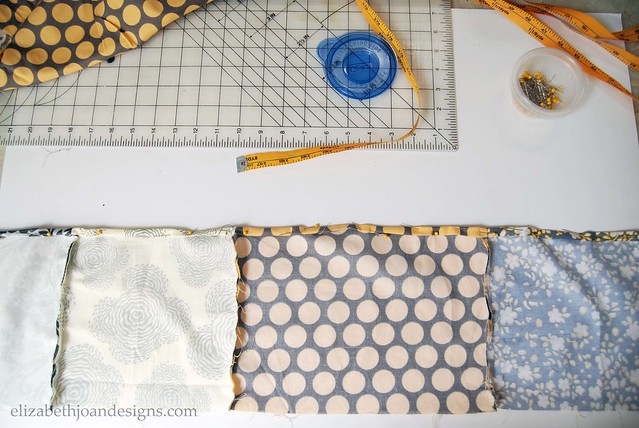
For tutorial purposes, these are the fabrics I used for each section. 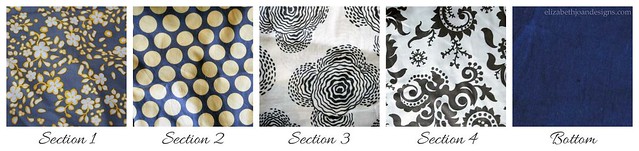
* For the non-sewers out there, every-time you see the word “sew” in this tutorial, place and pin the Thermoweb Heat’n Bond Hem Iron-On Adhesive-3/8″X10 Yards
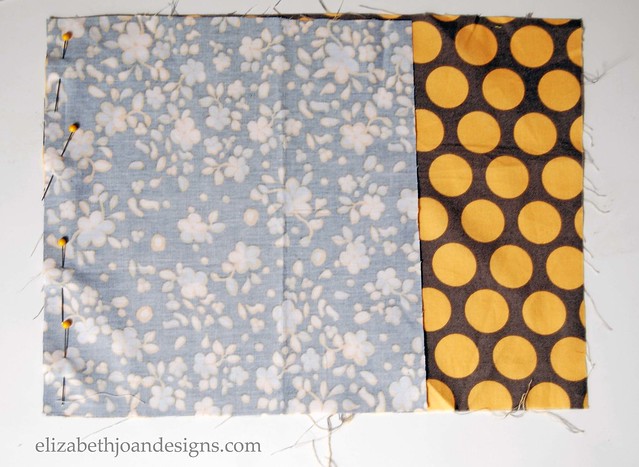

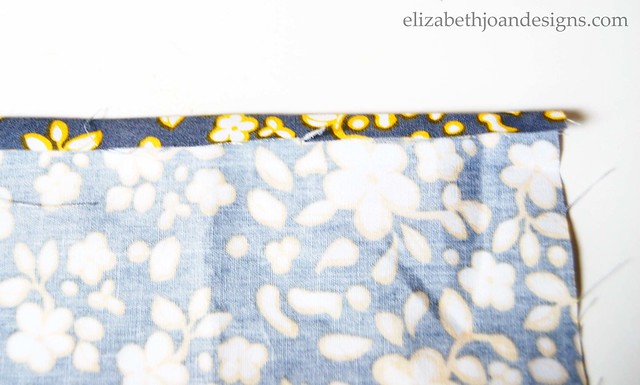
7. Fold top edge of fabric strip.

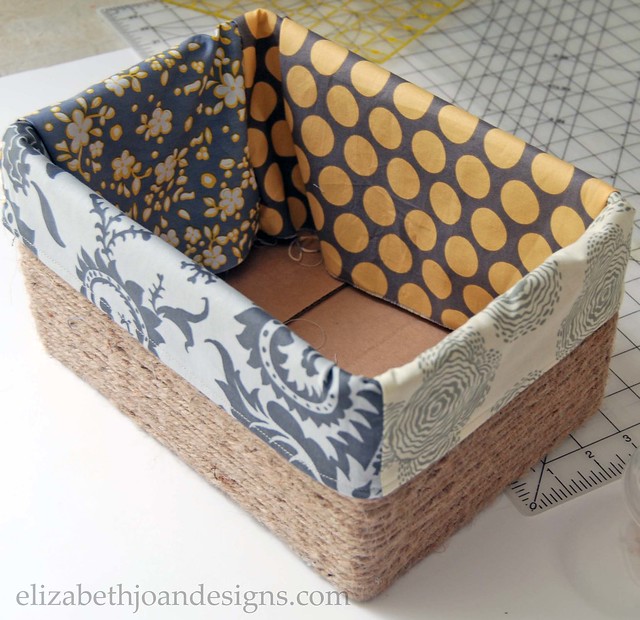
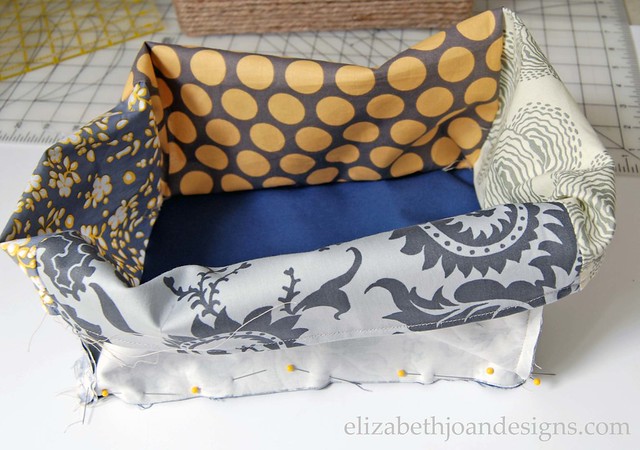
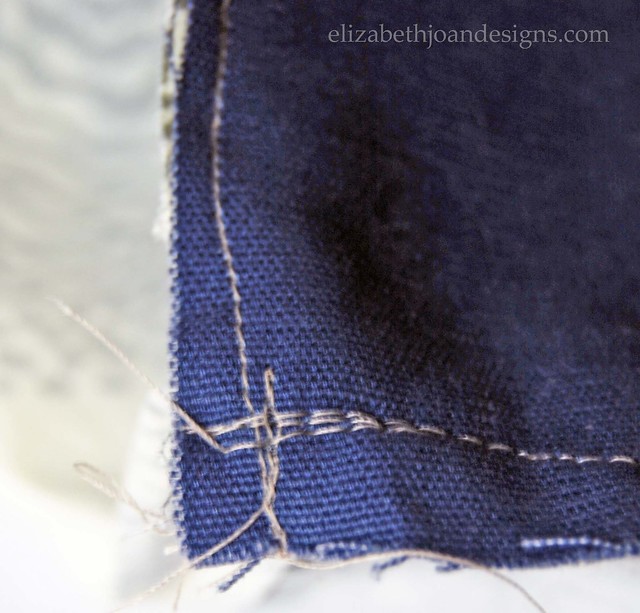
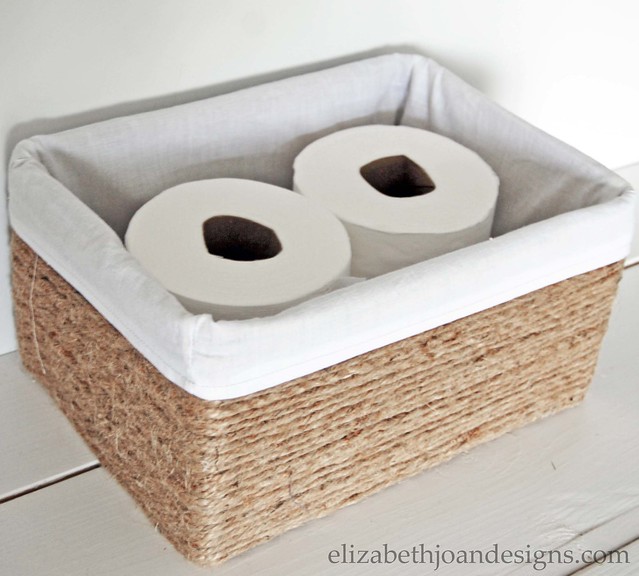
Here is how mine turned out using the muslin fabric.
__________________________________________________________ You may also like:
Boxes Into Baskets 
Half Bathroom Reveal 
No Sew Receiving Blanket 
Industrial Numbered Storage 
Paint Dipped Box Baskets -
Two Year Blogiversary Celebration – Day 3
It’s day 3 of our two year blogiversary celebration and so far we have shared two of our most popular post, Boxes into Baskets and Bed Risers. Today’s featured project is one of my favorites, Personalized Utensil Crock.

This project was super easy and I have treasured having our mom’s chocolate chip cookie recipe right on my counter top. At moments glance, I am filled with amazing memories of my childhood. Is there anything better than that?
If you haven’t yet, don’t forget to enter The Home Depot Challenge Giveaway for your chance to win a $100 gift card to The Home Depot. Check back each day this week to celebrate with us and see more awesome Elizabeth Joan Designs’ projects!