-
Two Year Blogiversary Celebration – Day 1

We are celebrating our two year blogiversary! Can you believe it? Two years! This week we are looking back as some of our favorite and most popular projects. Today, I am sharing one of our most popular with you. Boxes into Baskets.
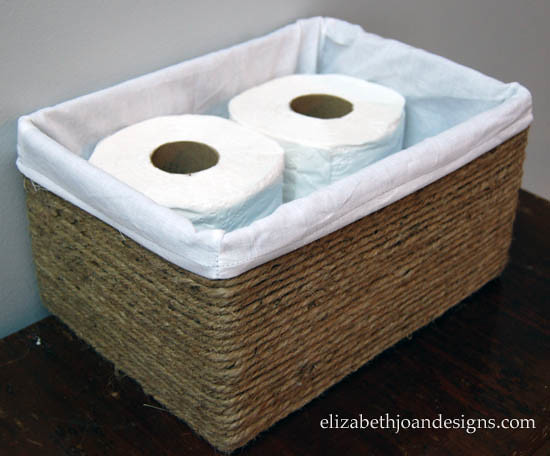
I am using these budget friendly storage solutions in our entryway and in our half bathroom. They have held up amazingly.


You can visit the boxes into baskets original post to see how we made them.
Don’t forget to enter The Home Depot Challenge Giveaway for your chance to win a $100 gift card to The Home Depot. Check back each day this week to celebrate with us and see more awesome Elizabeth Joan Designs’ projects!
-
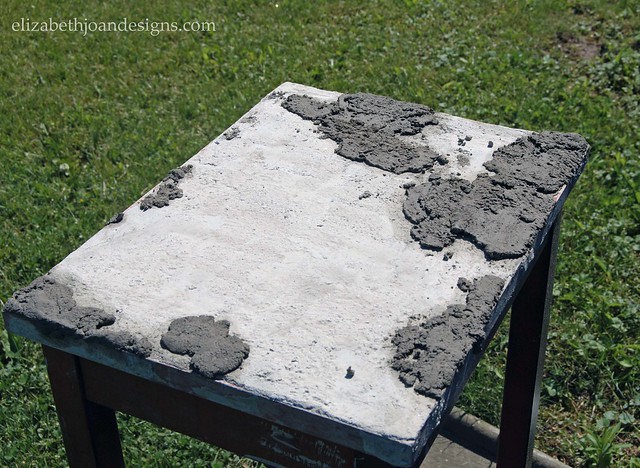
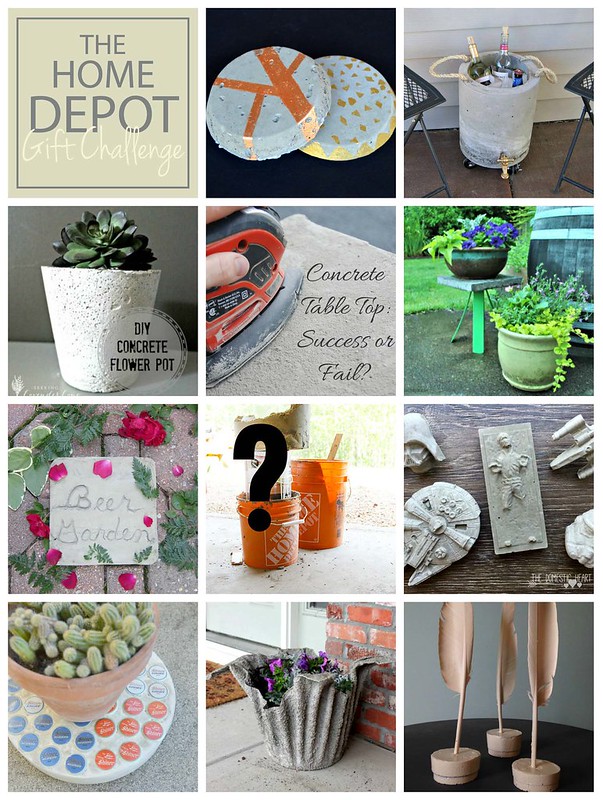
Concrete Table Top – The Home Depot Gift Challenge & Giveaway
It’s monthly challenge time again and boy was this month a challenge! (A few of our past projects were 2 x 4 Wall Art, an Industrial Book Rack, a Wood Box Caddy, and a Pegboard Luminary.) When I first heard that we would be doing projects using concrete for June, I thought “This is going to be easy.” Silly me, I have never even worked with this substance before. I could not have been more wrong about it! My attempt at concreting a table top turned out to be more of a failure rather than a success story.

This challenge is in no way associated with The Home Depot. We just love their stuff!
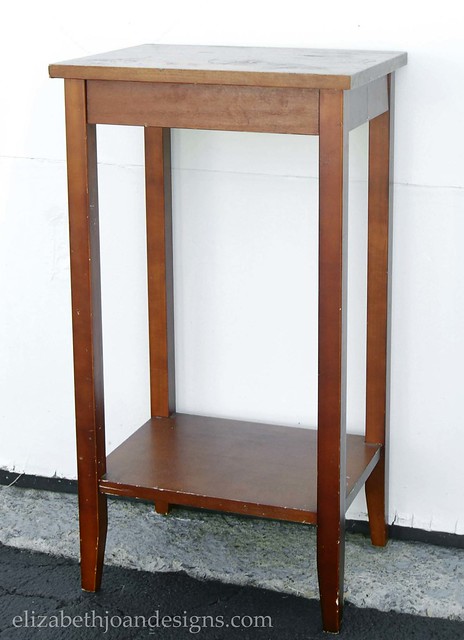
Before any DIY happenings, this is the original table in all of its pre-concrete glory.
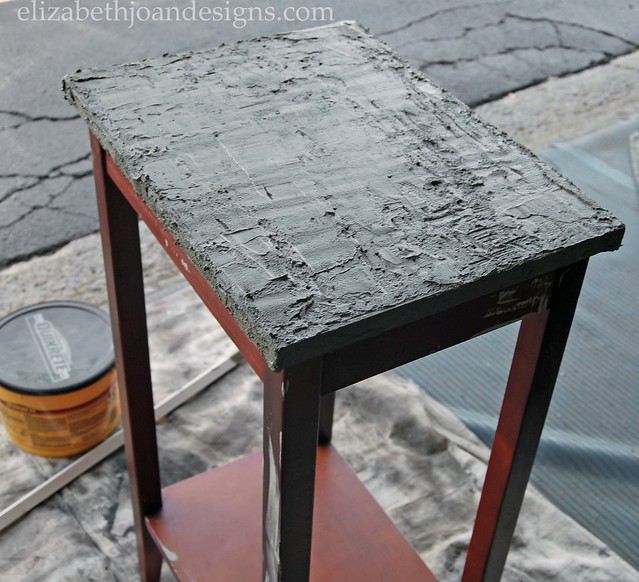
Starting off with full confidence, I mixed up a batch of Quikrete and applied it to the surface.

It went on pretty even. I let it dry a full 24 hours.
Next, I sanded it down to smooth out any bumps.
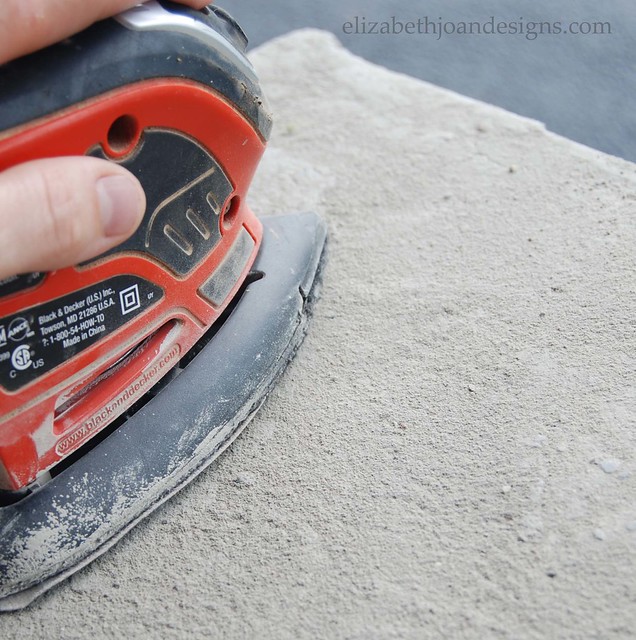
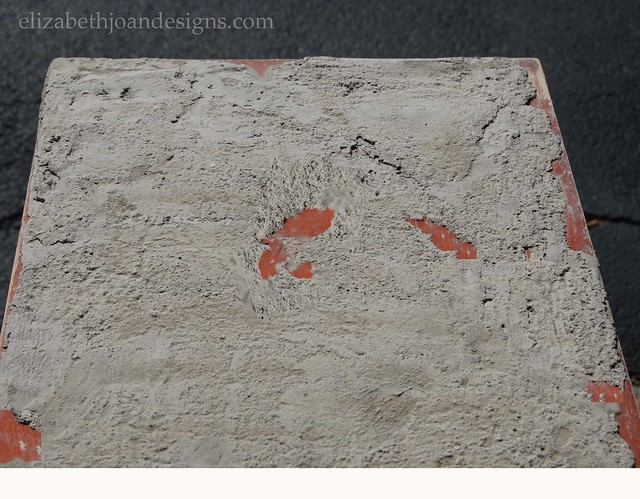
It was looking pretty good until I used the shop vac to suck up the dust. This revealed a few holes in my concrete surface and I noticed the edges were starting to crack too.

I thought, “No big deal. I’ll just patch it with more concrete.” If only is was that easy, the outcome of this project would have been much different.
After the patching, I sanded it down again and I had even more holes and cracking.
Well, clearly this wasn’t working! I had to come up with a new plan. So I took some of the concrete mix and stirred it together with some white latex paint. I wasn’t entirely sure what I would be accomplishing with this new concoction. But at this point, what did I have to lose? Also, at some point during this whole process, I had decided to paint the rest of the table white in an attempt to make it more appealing to the eye.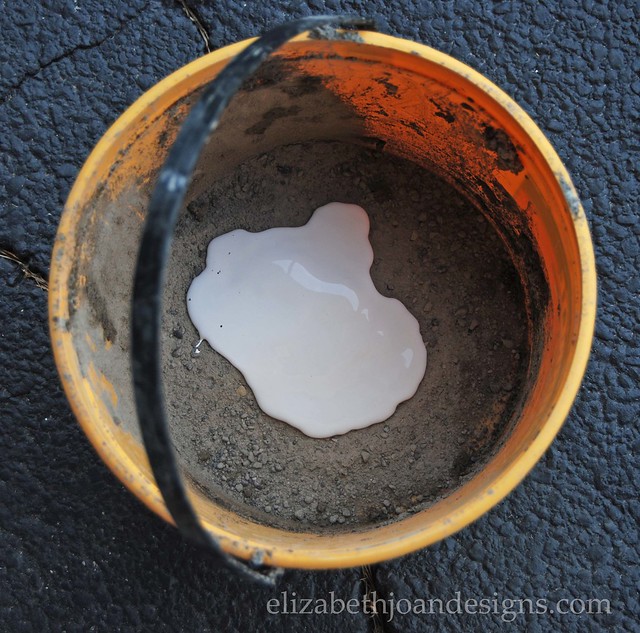
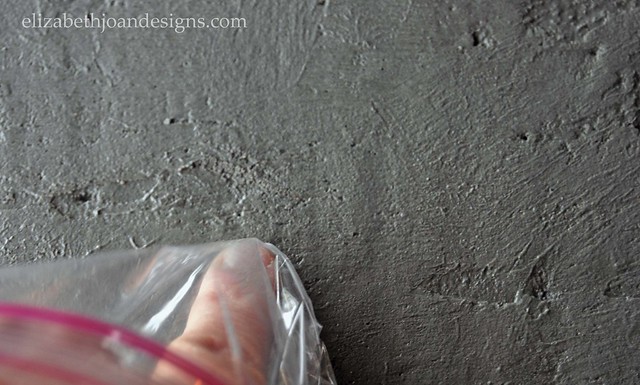
This new substance was pretty pliable. I covered my hand with a plastic bag to help me level it out on the surface.
Finally, when there was just no more time to dedicate to this project, this is what I was left with after it dried. A lumpy, uneven, partially painted table that was extremely top heavy. A Project Fail if I’ve ever seen one!
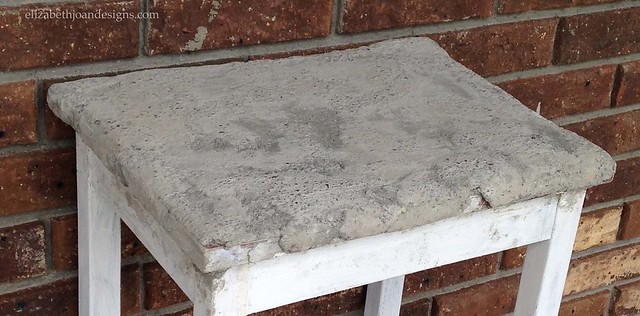
During this entire process, I have really learned so much about working with concrete. And this may sound a touch on the crazy side, but I really do think I could have made this project work. I am hopeful that someday I may find more time to give to this poor little table.
_______________________________ Giveaway Time!_____________________________ Along with this month’s challenge, we are giving away a $100 gift card to The Home Depot! To enter for a chance to win, follow the instructions on the Rafflecopter ballot below. Good Luck!
Now it is time to head on over and check out all of these fun concrete projects! I am betting they had better success this month than I did.
-
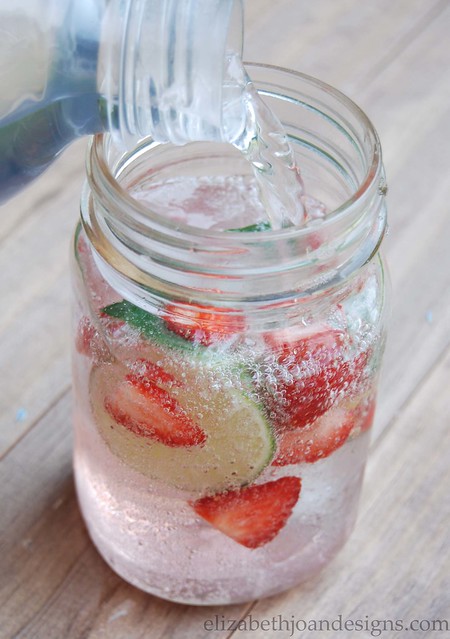
Strawberry, Lime, and Mint Infused Water
Over the past several summers, gardening has become one of my favorite hobbies. So far this year, we have an insane amount of peppermint and more strawberries than we know what to do with. I have been enjoying experimenting in the kitchen with our garden bounty. One of my favorite combinations is Strawberry, Lime and Mint Infused Water. Yum! The perfect thirst quencher for those hot summer days.
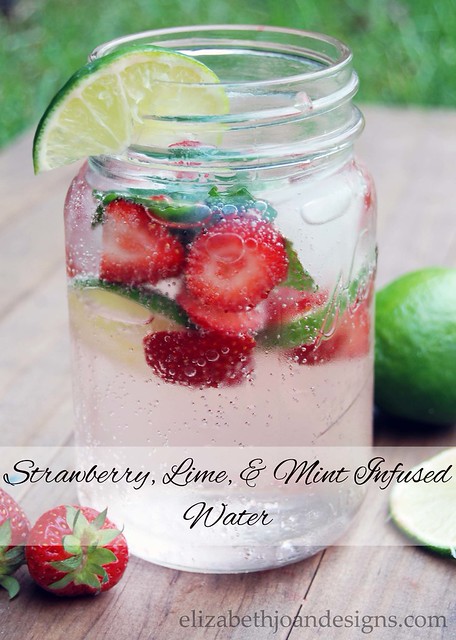
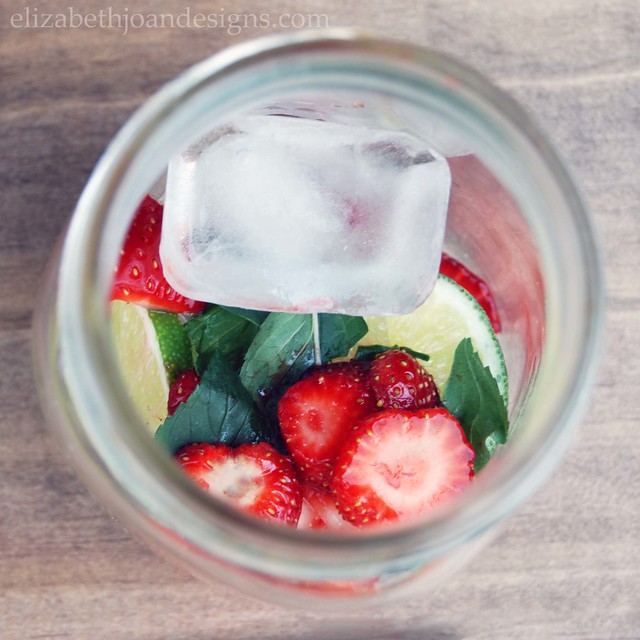
To make this tasty beverage, you will need 2 lime slices, 3 strawberries thinly sliced, 3 peppermint leaves, 2-3 large ice cubes, and water.

First, toss the fruit, leaves, and ice into a glass or mason jar. Add more or use less of the ingredients depending on what you like! If your desire is a more intense flavor, crush the mint leaves before adding them or push the strawberries against the side of your container when you stir.
Next, pour the water (sparkling or still) into the glass and let sit for at least 10 minutes before consuming. The longer you let it sit the more flavor your drink will possess.
Finally, sit back, relax and enjoy!
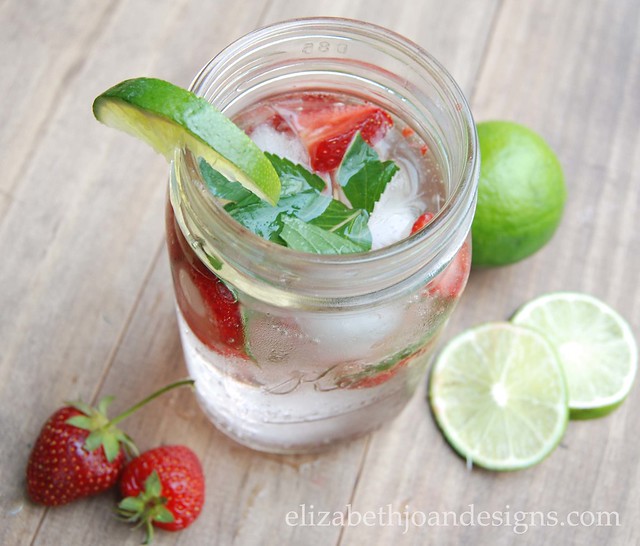
Strawberry, Lime, and Mint Infused Water from Elizabeth Joan Designs
Ingredients
2 Lime Slices
3 Medium Strawberries- thinly sliced
3 Mint Leaves
2-3 Large Ice Cubes
Water- sparkling or stillPeperation
Add slices and leaves to your glass/mason jar, whatever you’d like to keep your drink in. Then fill with water.__________________________________________________________ You may also like:

Grilled Bread Salad 
Mediterranean Chicken Packets 
California Club Pizza 
Yum Yum Shrimp Boil -
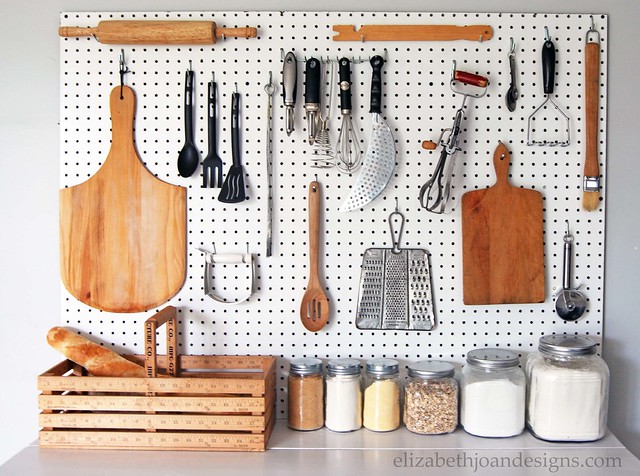
Kitchen Pegboard
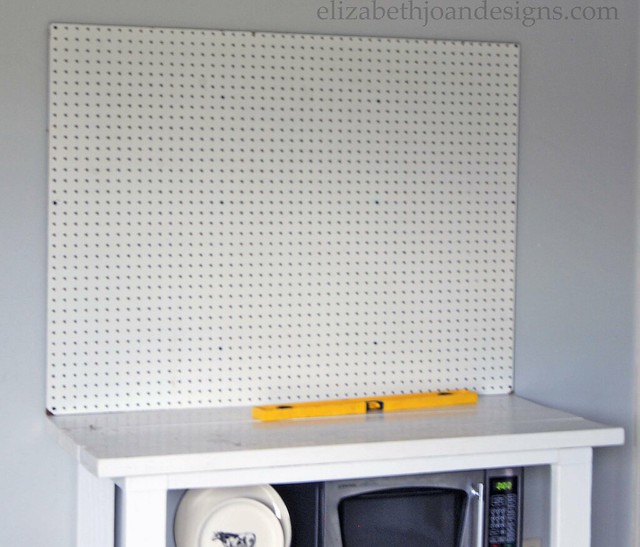
Do you ever attempt to open a drawer in your kitchen that it is so packed full of junk it gets stuck and you start screaming four letter words at it? Yeah, me either. Just Kidding. My utensil drawer has been know to be a bit troublesome from time to time. To minimize my usage of foul language, I turned to Pinterest for practical storage methods. I saw that other genius bloggers had used kitchen pegboards to keep everything neat and organized. Perfect! So, that’s what I did.
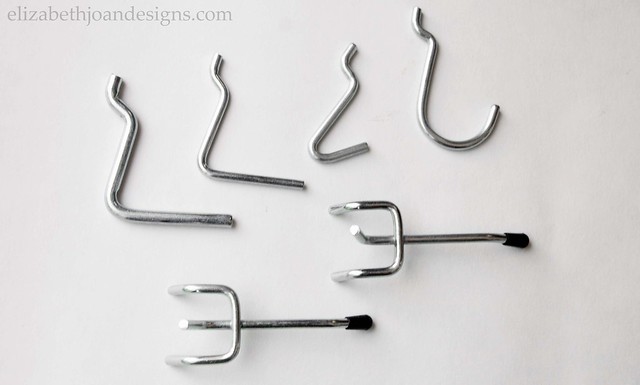
First, came the trip to the hardware store. I picked up a pegboard (obviously), and several multi-packs of pegboard accessories including wall spacers.
*Just a little piece of advice: Be sure to measure the size of your car’s trunk before you purchase the pegboard. This way you will be able to fit it in without having to go back into the store feeling like a fool and having to ask an angry employee to re-cut it for you.
Next, using some teamwork, my husband and I attached it to the wall above our buffet table. We used the spacers and screws that came in the accessory packs. They were a bit tricky to figure out. Hence, there are no photos of this process.
Finally, it was designing time. We used all kinds hooks to hang things up trying to create a balance between decorative and functional.
I LOVE it!
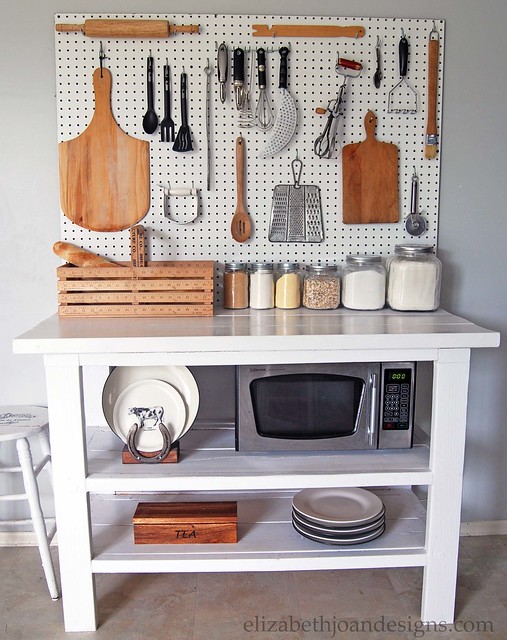
I am probably one of the most indecisive people when it comes to wall decor, so this kitchen pegboard is absolutely perfect for me. On the days I want to switch things up, I easily can in no time. And for the win, my drawer now opens and closes with no problems at all.
_______________________________________________________________ You may also like:

Horseshoe Plate Holder 
Range Hood Makeover 
Open Shelving in the Kitchen 
Magnetic Oven Mitt