-
Mason Jar Ring Pumpkin
As I am sure you have learned by now, I have become quit the collector of all things junk. I have a mountain of yarn, a garage full of interesting and some not so interesting curb finds and canning supplies coming out the wazoo. Pinterest is usually my source for new inspiration to utilize these materials. When I came across the Mason jar ring pumpkin, I thought it was so cute, I just had to give it a go.
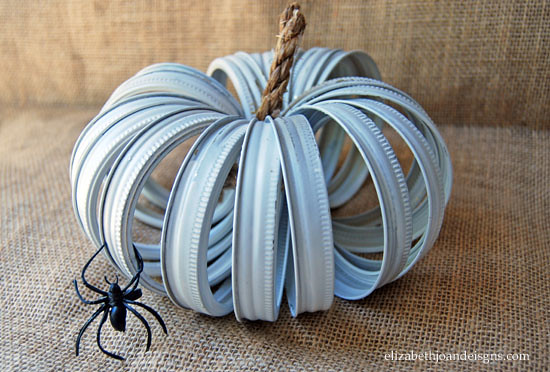
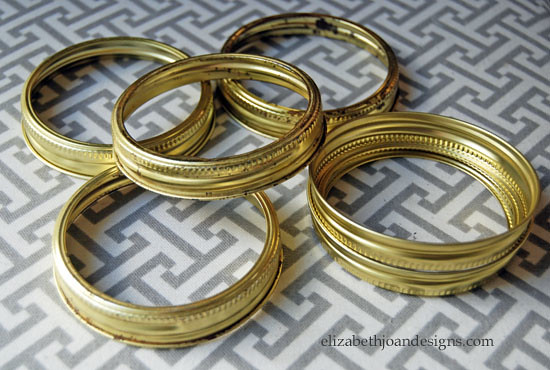
This project is made up of 18 canning rings, leftover white spray paint, jute and rope. Total cost to me, $0.00. The perfect price!
Here’s how I did it.
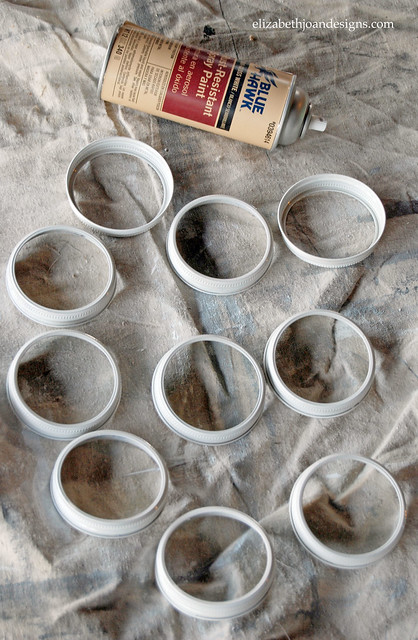
First, I gave the lids 2 coats of white spray paint on each side and let them dry.
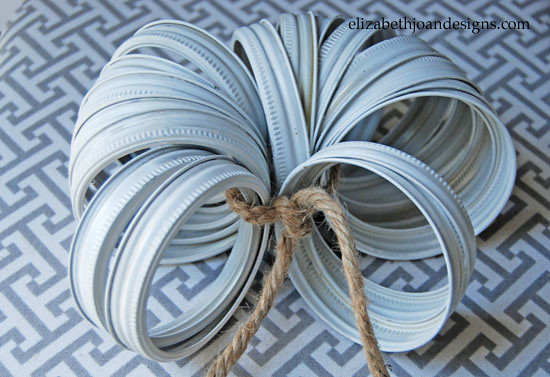
Next, I gathered up the bands and organized them to face the same direction and tied them together with the jute.
Then, I spread the lids apart, tucked in the rope stem and was finished.

If I were to make this again, I would probably use a few more rings but this is just what I had on hand and it still looks great. I knew I had made something pretty cool when even my 3 year old knew what it was. My husband is excited that I have made use for some of this clutter we have around here.
-
Tips for Hiring an Electrician
Shortly after moving into our home, we realized there were a few short cuts taken when our home was built in the 80’s. This is especially true with the electrical work. All of the little quirks were things that we could live with, but having them done makes our lives easier. We have been putting these things off now for 4 years and it was finally time to take care of them. As you know, I am a total DIY girl. But sometimes I realize there are things I can’t or shouldn’t do myself, like replace ceiling fans at the peak of a cathedral ceiling, troubleshooting the wiring of an outlet in our bathroom, and adding coach lights to both sides of our garage.
After a lot of time and a couple of headaches, I came across the perfect electrician for the job.

What is gray, crisp and hangs from the ceiling? A careless electrician. To avoid hiring this type of careless electrician, I have provided you with a few tips that will save you time and frustration.

Tips for Hiring an Electrician
1. Make a list of all the work you’re wanting accomplished. Is it a repair, renovation, or adding/changing out new/existing light fixtures? Analyze what you would like done, to find the right electrician experienced in the area your work is in. If you are having an electrical problem, be sure to hire someone with knowledge and experience in troubleshooting. Do a little research. Start looking for lighting fixtures, ceiling fans or anything else you may need. The more information you have the better your end result will be.
2. Read reviews online, talk to your family, friends and neighbors to see who they have hired for their electrical needs. Good customer service skills and a great personality can go a long way. When I was calling around , I spoke to a person that was extremely rude to me on the phone. Needless to say, I didn’t hire him. I have a rule; If you are rude to me on the phone, then I am not going to pay you to be rude to me in my home. Also, check reviews to see if the candidate is neat and tidy. Who wants to clean up someone else’s mess? Remember, you can always ask for a list of references too.
3. Call up any potential electricians. Make appointments for them to come out for an estimate. Be up front about the time frame you are expecting the work completed in. Also, define up front all the work that needs to be done. You will get a much more accurate estimate. Sharing only a portion what you want done will only lead to confusion later.
4. Before hiring, check that the electrician is insured and certified. This will save you a lot of problems in the long run.
There you have it, a little research will help you hire a professional and get the job done right. If are looking for a recommendation and you are living in the Rochester, New York area feel free to email me.
-
Halloween Mantel and Decor
Halloween is always a fun holiday to decorate for. Spooky skeletons, creepy spiders and black roses. What’s not to love?
For my mantel, I put down a layer of Spanish moss that I has snagged at the dollar store. I love the eerie look it gives the entire mantel. The skull, roses, spiders and ravens are also dollar store purchases.

I recently became the proud new owner of a mountain of yarn. Amongst the pile, was this black yarn that reminded me of spiders and I thought it would be perfect for Halloween decorating. Wrapping it around a white vase gave a look that resembles a parade of marching spiders.

My “Happy Halloween” sign was so easy to make. If you would like to duplicate my sign, here are the supplies you’ll need.
Burlap
Scissors
Twine
Stencils
Paint brush
Black acrylic paint
Pencil
Sewing machine/ Hot glue gun

First, cut 14 burlap rectangles 6″ wide x 12″ high.
Next, fold over the top 1″ and sew. Leave a pocket big enough to thread the twine through.

Then, paint one letter on each rectangle and let dry.

Jetspencil, thread the twine through each piece.
Now you have a cute greeting!

Holiday decor would be nothing without a little kitchen decorating. I found these fun little owls at the dollar store. Not sure if you can tell, but I love, love, love the dollar store! Awesome finds for a buck!
The bats were printed out, traced onto black card stock and cut out. You can find Erin’s bat design here, in this post. They are a great way to embellish a blank wall, a mirror or kitchen cabinets.

Well, there you have it. Simple, spooky, budget friendly decor. How do you decorate your home for Halloween?
-
Scoop Chair
I did it again! (As if there were any doubts.) I hunted down a fun piece of furniture on the side of the road to redo. This time my victim was a mid-century scoop chair. With only a few bumps and scratches, repainting this chair was easy peasy.

1. First, using a screw driver, I removed the legs.

2. Next, I applied two coats of Rust-oleum Specialty Plastic white spray paint on the seat.
I was a little hesitant to paint the seat because I kinda liked the original color, but the seat was so scuffed up it needed to be painted.

I chose white instead of blue because, well let’s just face it, everything in my house is pretty much black, white and gray.
As I was painting, the seat started to get this interesting cloud look to it, but I have no need for cloud chair, so I continued spraying.
3. Then, using Blue Hawk Rust Resistant spray paint in black, I coated the legs.
4. Finally, after a little drying time, I reassembled the chair.

Yay! I Love how it turned out! That was as easy as 1, 2, 3… 4.

Linked up with East Coast Creative #cwts2014