-
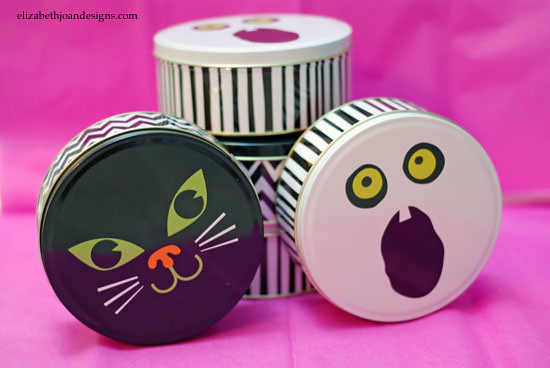
Chalkboard Tins
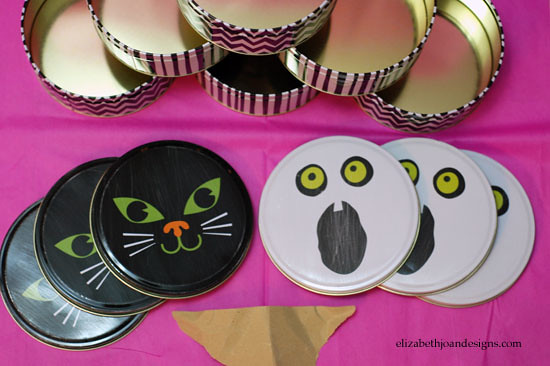
After almost every holiday, Target’s dollar spot goes on clearance. I always try to go to the store at this time to see what deals are to be had. On November 1st, I went early and found these adorable Halloween tins marked down 50% off. At only $0.50 each, I picked up 6 of them. I love the designs on the side and by painting the lids, I could have some cute little storage chalkboard tins that could be used year round.
First, I roughed up the surface with some sandpaper, to make the paint adhere better.
Then, they got a coat of chalkboard paint.
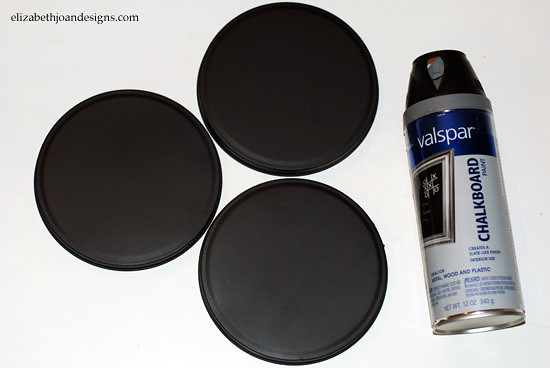
Finally, I rubbed a piece of chalk all over the tops to prime them.

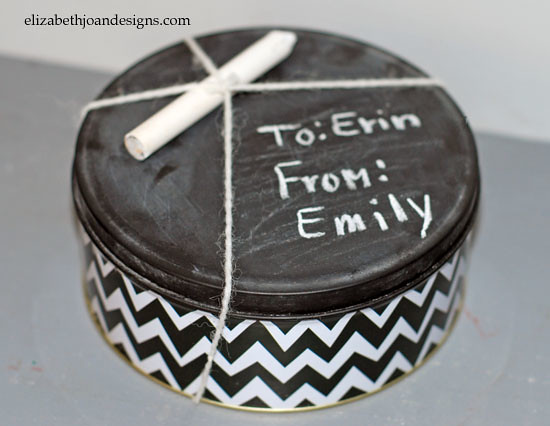
Isn’t it cute? The look of them remind me a bit of Erin’s Pet Food Canister. These will make some fun gift boxes for the up coming holidays.
What do you buy from the Target dollar section?
-
Numbered Mailbox
Do you have projects around the house that you keep putting off? Me too and this was one of them. Our mailbox was in desperate need of replacing.
About 3 months ago the flag fell off. With the use of duct tape, I was able to make it work for about another week. Then, the tape became useless and so did I. Instead of replacing it, I would just drive to the post office to drop off our out going mail. A couple times, I even wedged the old flag in the front of the mailbox hoping the mailman would get the hint. Yes people, this is laziness at it’s best.
Finally, it was time. I had put it off long enough. I just had to get a new one. So I headed off to Lowes and bought the cheapest one I could find. To jazz it up a bit, I decided to painted our house number on it.

First, I printed out the letters and number out on plain white copy paper. Then, they were traced onto freezer paper.

Next, using an x-acto knife, I cut out each piece to create a stencil.

With the help of these floating hands, I taped the stencils to the mailbox.

After testing some different types of paints on the bottom of the mailbox, I realized none of them were going to stick unless I sanded first. So using a pencil wrapped with sandpaper I roughed up each letter and number.

Because I don’t have one of those fancy spouncers, I use a regular old sponge brush to apply white exterior latex paint. This type of paint seemed to adhere the best.

Finally, I removed the stencils and voila. I have a numbered mail box.

I am really happy with the results. I think our mail man will be please to no longer be notified we have outgoing mail like this:

What projects on your to-do list do you keep putting off? -
Keeping Toddlers Occupied
I am not claiming to be the brilliant person who came up with the genius idea for using a cardboard box as a toy. Until recently, I had never seen or thought of the idea of giving my kid crayons for coloring inside of a box. Crayons and boxes are two of my son’s favorite things. So combining them together worked like magic. This is such a great way for keeping toddlers occupied.
Step one:
I let my toddler climb into a large, ordinary, cardboard box. (I am not sure why it looks like he doesn’t have feet in this picture, but he does. Two of them.)
Step two:
He was given a few crayons.
Step three:
I sat back, relaxed, and enjoyed my free time.As expected, he just had the best time playing in there.

To keep the fun alive, the sides were reinforcement with duct tape.
Crayons in a box is such a simple idea. I just wish I would have found this idea sooner.If you had a box large enough, do you think adults could have this much fun?
-
Octonauts Costumes and DIY Sailor’s Hat
The Disney Jr. show, Octonauts, is a favorite in our house. So it was no surprise to me that our little ones choose to be Kwazi the cat and the polar bear Captain Barnacles for Halloween. There are not commercial costumes for these characters, but lucky for my two, I love any DIY challenge.

An orange shirt and pants were the base of the Kwazi outfit. Felt triangles were attached to a headband for the ears. My little guy made sure I even cut a tiny chomp in one of the ears just like Kwazi’s.The eye patch was also felt. This worked great for a 3 year old because he was able to shift it slightly to see while still maintaining the pirate look. I used felt for the tummy and collar. The tail was a awesome find from the dollar store.

To make the hat, I drew the pattern for the main portion of it on the fold of a piece of paper. Next, I traced it on to felt and cut out four equal pieces. The rounded triangles are about 4 inches wide and 5 inches tall. Assume a 1/2 inch seam allowance.

Then, I pinned the pieces side by side together and sewed them to form this cone like shape.

To make the brim of the hat, I cut a strip of felt 15 inches long and 3 inches high. The dark blue piece was cut for the stripe around the hat. It measures 15 inches long and only 1/2 inch high.

With the cone still inside out, I attached the brim to the hat with pins.

Using a sewing machine, they were sewed together.


To hem the hat, I turned the whole thing right side out. I folded the edge up, pinned and sewed.

After that, I folded the brim up. That’s when it starting looking like a hat.

Finally, using my trusty hot glue gun, I attached the stripe and the Octonauts logo. (The Logo, I found here and printed it out on printable fabric.)

This hat could work for so many different costumes, without the Octonauts logo of course. With different fabric it could make a cute hat to accessorize a sailor’s costume.
A little blue sweat suite is what I snagged at Target for Captain Barnacles. His belt and collar I cut out of blue felt. His Octonauts hat was a much more complicated variation of the Kwazi hat. I’ll spare you the frustrating details of making that one. Using a white hat we already had, I attached two felt half circles with safety pins for the ears.

The boots for both costumes are their winter boots I covered with, you guessed it, more felt. I took two pieces of felt pinned them together along the outside and hot glued them. Once dry, I flipped them right side out and slid them back onto footwear.

Although it was a lot of work to get these costumes together for my boys, I am very pleased with how they turned out and more importantly, so are they.