-
Fun Neutral Holiday Front Porch
There are less than two weeks left until Christmas and we are keeping super busy over here! We’ve finally come up with a place in our small home to stick a little nursery, so we have some major moving and rearranging to do. But that update is for another time. Today it is all about our Fun Neutral Holiday Front Porch!
I just love participating in blog hops and am so thankful my sweet friend Kendra from Joy In Our Home invited me to join in for the Christmas Festival Blog Tour! There are so many great holiday ideas shared (mantels, vignettes, recipes, front porches, and tablescapes) and it is is exciting to meet new friends along the way.
If you are stopping by from Making It In The Mountains, I’m so glad you are here! Isn’t Kristi’s front porch just beautiful?

This post contains affiliate links. Click here to read my full disclosure.
Last week, I shared our Christmas living room decor. But I wanted to add a little more pizazz to the front porch than just a boxwood wreath, so I made things a bit contrasty out here, while still keeping with my neutral tendancies.
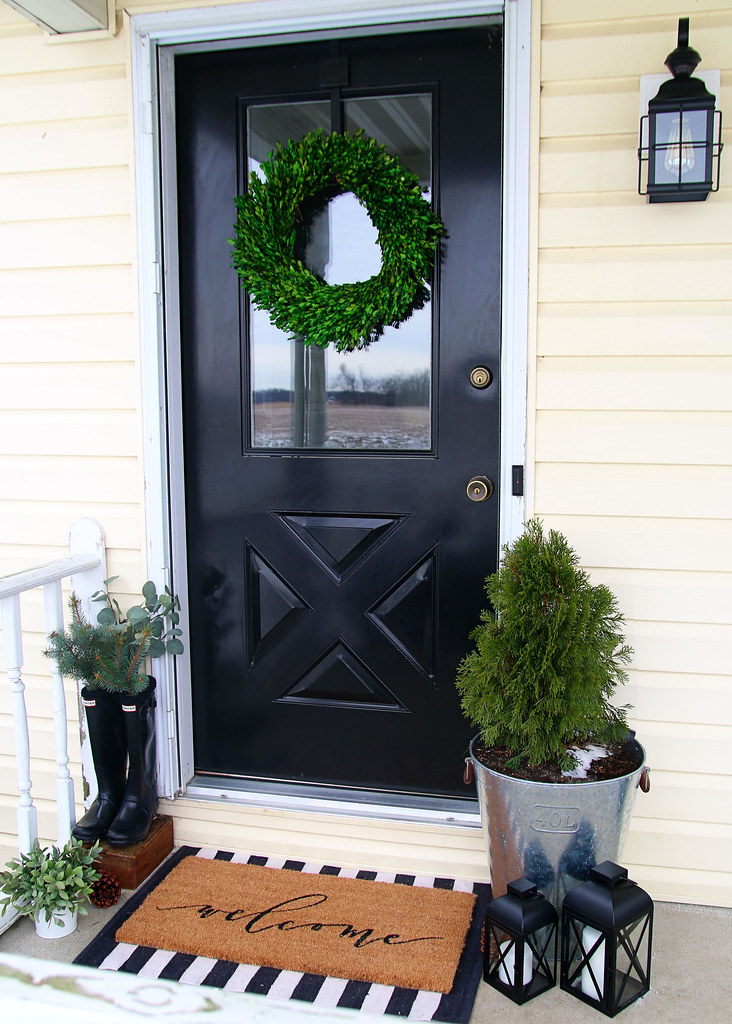
I like to incorporate a lot of greenery, so I gathered different kinds from around the inside and outside of our home. Aren’t these wellies looking festive with some blue spruce branches and eucalyptus?

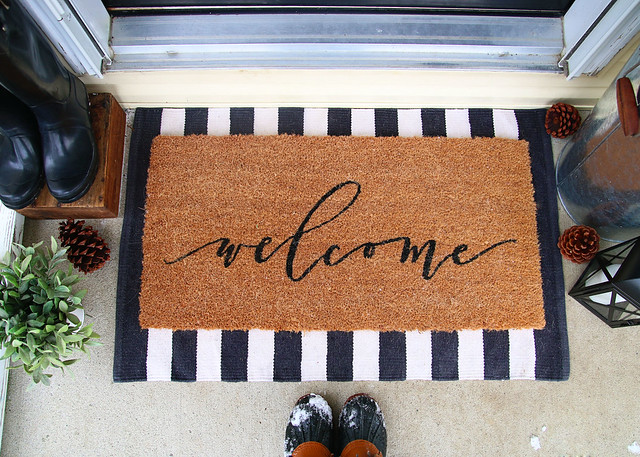
faux sage plant | boots | striped rug
This new “welcome” rug from Magnolia Market (an early Christmas present from my parents) steals the show when layered with this pretty black and white striped number.

See that bit of snow on the soil below? Winter weather is here!
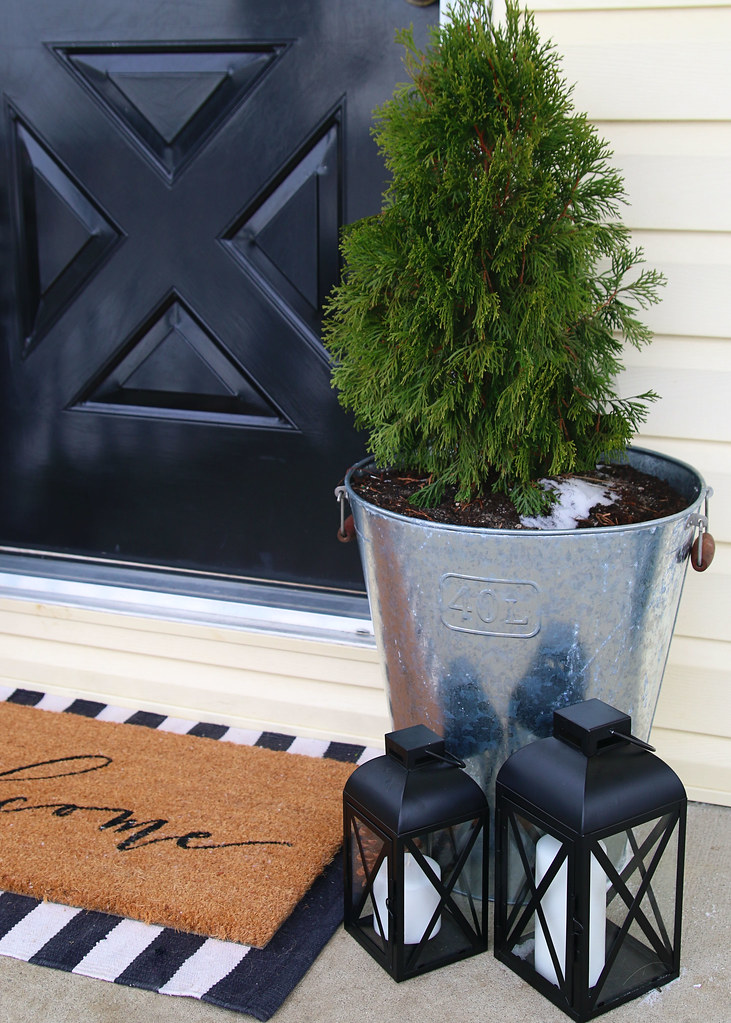
The cute lanterns were found for a steal at Walmart. (Buy a similar version here.) They look great next to the potted arbor vitae, which was moved to the porch to add some height and life to the scene.
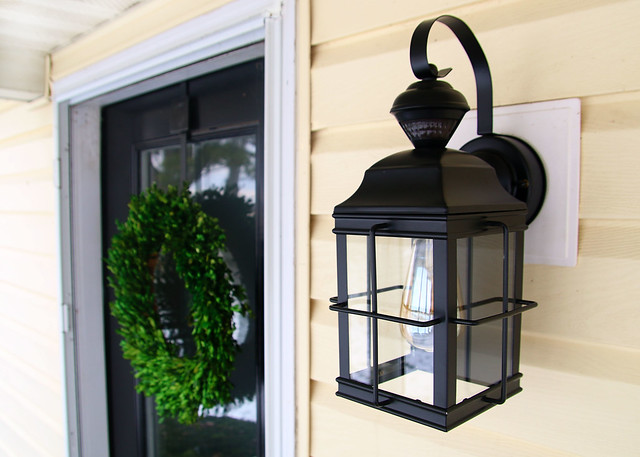
And those lanterns go oh so well with our new outdoor lighting! I love this light. It really helps dress up the front porch and is such a pretty upgrade from the previous one.
I’m really happy with how our Fun Neutral Holiday Front Porch turned out! What do you think?

Thank you for stopping by! Next up is the talented Lindsay from Country Girl Home. Hop on over and check out her festive front porch!!!
Mantels on Monday

White Arrows Home | Repurpose and Upcycle | Timeless Creations
Lemons to Lovely | Pennies From Heaven Home | One Happy HousewifeVignettes on Tuesday
 Joy In Our Home | anderson + grant | Kingsbury Brook Farm
My Creative Days | Poofing the Pillows | CityGirlMeetsFarmBoyRecipes on Wednesday
 Life Love Larson | Cali Girl In A Southern World | Crisp Collective
Love In My Oven | Countryside Cravings | Curly Crafty MomFront Porches on Thursday
 Making it in the Mountains | Elizabeth Joan Designs |Country Girl Home
Little Brags | The Homemaking Momma | Lemons, Lavender, & LaundryTablescapes on Friday
 Celebrate & Decorate | Noting Grace | 2 Bees in a Pod
The Crowned Goat | Dining Delight | The Neutral Nest Interiors -
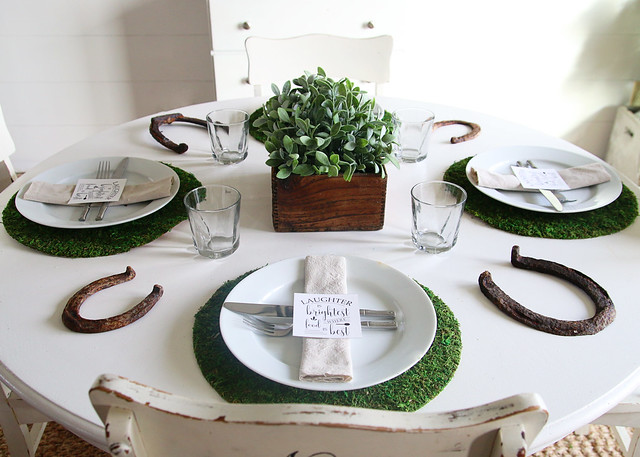
Simple St. Patrick’s Day Table Setting
Hello, Friends! Today, I’m sharing a simple St. Patrick’s Day table setting with you. If you love to celebrate the Irish holiday, then you will appreciate this post. If not, you can definitely take away a few of these ideas for general spring decorating!
-
Dining Room Progress
As promised earlier this week on Instagram, I’m back to share our dining room progress with you. This room is definitely looking a lot better than when we first moved in. However, there are still quite a few things that we would like to do in this room before we would consider it finished. Let’s check it out.

Here’s what our dining room looked like on move in day, before we filled it up with furniture.
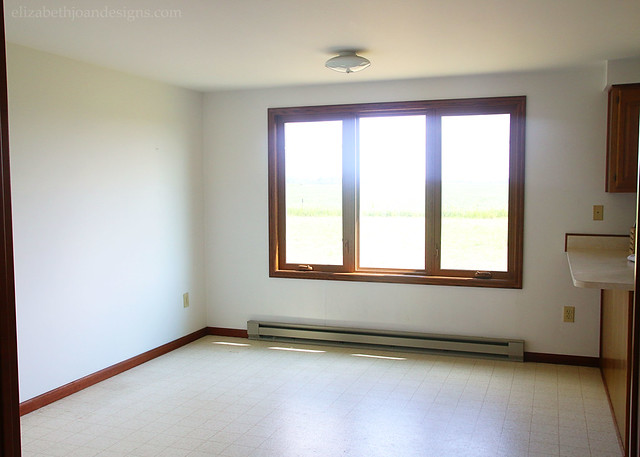
We’ve since installed a simple chandelier and added faux wood blinds (like the ones we put in our daughter’s room) on the windows. I’m not a huge fan of blinds, but they help provide a some shade during the bright parts of the day. I would really love some long drapey curtains. Unfortunately, those are not an option as of yet, but I’m brainstorming ideas on how I can make them work around our electric baseboard heaters

I also decided to draw some lines on the wall to mimic the shiplap-look. I’m a bit of a commitment-a-phobe when it comes to major home changes, so when I saw that my blogging friend, Lauren from Bless’er House, had done something similar, I thought I would give this a try. I know that some people are so over shiplap, but we still think it is pretty awesome. Plus, this wall treatment was FREE!
Our coffee bar was moved over to the longer wall underneath our stenciled wreath display I made for the holidays.

This space is slowly coming together, but there are still some projects and things to be done, like:
- Add shiplap to the wall
- Figure out some sort of new wall decor to replace the seasonal wreath display
- Paint the trim and walls
- Add curtains
- Finish making over a table that I found for a steal on Craigslist
- Build (or buy) a buffet
- Change out the flooring

What do you think of the current state of our dining room? We are pretty happy with where things are right now, but are looking forward to more changes!
-
$100 Room Challenge: Week 1 – Bathroom on a Budget
We’ve been slowly moving along on our progress at The Country House since fall. With all of the holidays, birthdays, etc., it has been hard to get a lot done, but we’ve made a little dent in the dining room, which I will be sharing soon. However, today I wanted to share our newest plans with you for our bathroom! I’m all about saving money, so this will be a bathroom on a budget!

This post contains affiliate links for your convenience. Click here to read my full disclosure.
And as you may have guessed from the title and graphic above, this bathroom makeover with also be part of the $100 Room Challenge. I’m so excited to be joining my friend Erin from Lemons, Lavender, and Laundry who is the brains behind this challenge. (Thanks, Erin for the invitation!) The gist of the challenge is pretty simple: makeover a room for only $100 in only 4 weeks. Click over to Erin’s blog for more detailed info.
Behold, THE bathroom!
That’s right. There is currently only ONE in our home.
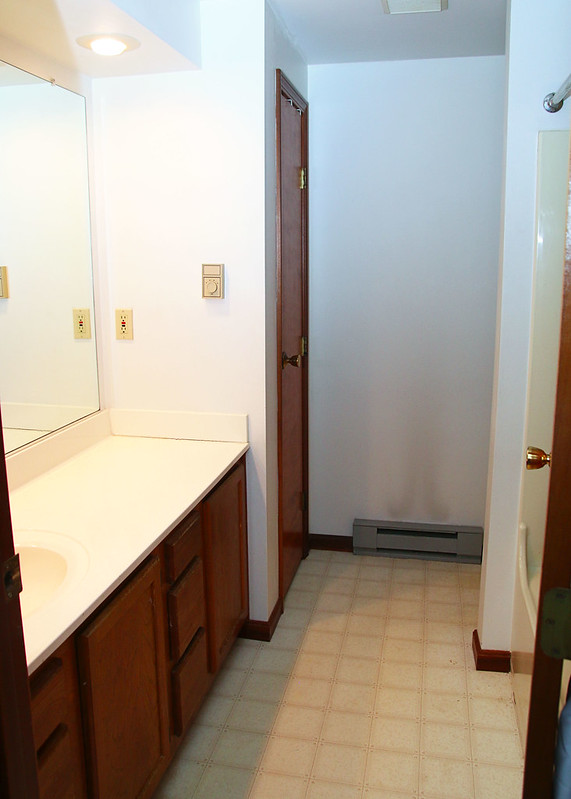
In its current state, our bathroom is blah and boring.
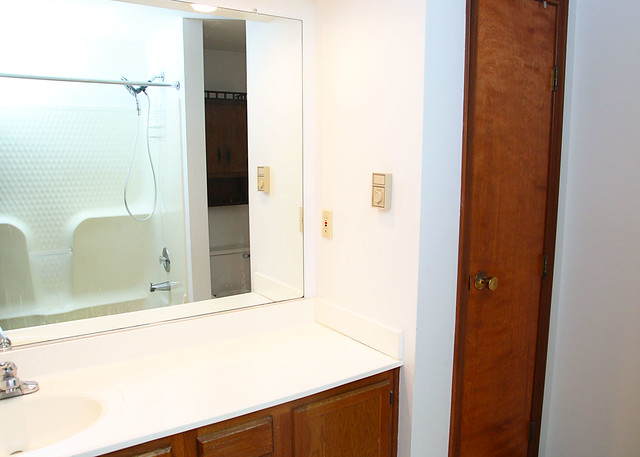
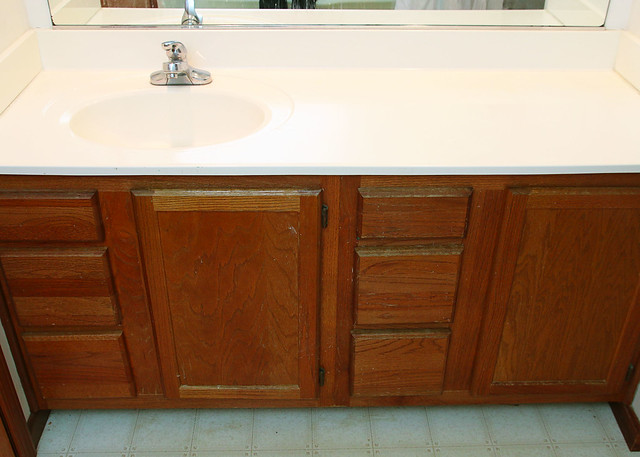
We are not huge fans of the cherry colored stain on the doors and vanity.
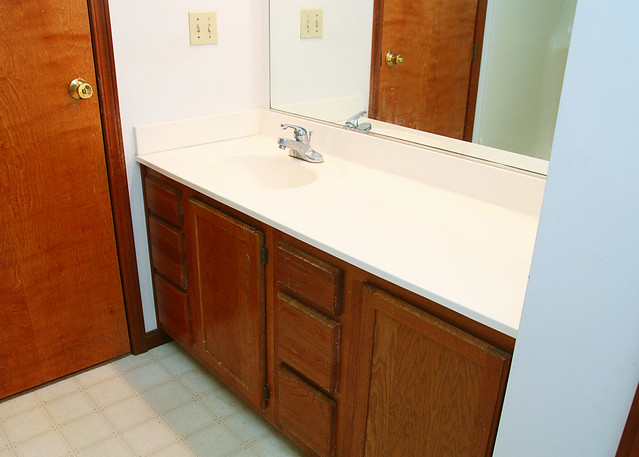
The flooring is pretty UGH too.
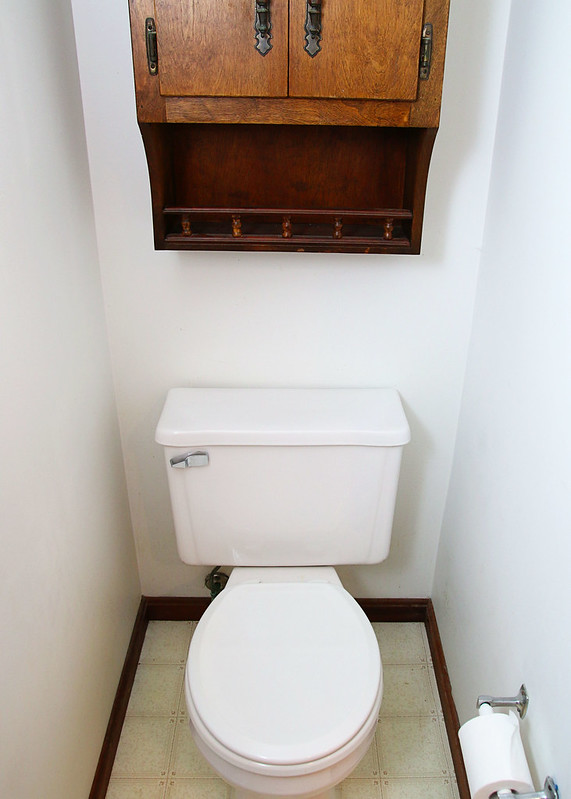
The thrown itself is tucked back behind the tub/shower and even though you can not tell from this photo, it is kind of a black hole back there. (The only lights in the room are above the sink.)
So, as you can see, we have a ton that we need to do in here to bring things up to date and to mesh with our personal style.
Below is the mood board that I whipped up for this challenge. If we were to buy all of these items, we would go way over our $100 budget! The paint alone will probably knock out 1/3 of that amount! However, we are a crafty/thrifty family and are going to get pretty creative with this makeover. Wish us luck!

Sources: Mirror | Robe Hook | Ladder | Hand Towel | Faux Plant
Over the next 4 weeks, I will be sharing our plans and progress with you. Think we can pull this off?
Week 1 | Week 2 | Week 3 | Week 4
Don’t forget to check out the other participants in this challenge and see all the amazing/budget friendly designs and ideas these bloggers are coming up with!