-
Baby Boy Farmhouse Nursery
Happy 2018, Friends! You may have missed the arrival of our little bundle earlier last month. (January 12th to be exact!) Our little guy came a few months early at only 29 weeks and is currently hanging out in the NICU while he grows and his lungs get a bit stronger. Since we weren’t quite expecting him to make his debut so soon, we hadn’t made any progress on what would be our baby boy farmhouse nursery!

This post contains affiliate links. Click here to read my full disclosure.
As you may know, the Country House isn’t a mansion. With only 3 bedrooms (all occupied) we were stumped as to where we would put the newest addition. Of course, he could share a room with one of his siblings, but since they are both a bit older and need to get a good nights sleep for school, we were hoping for a more private spot for the little guy. At least for the baby/toddler phase.
After some brainstorming, we decided to transform the walk-in closet in our bedroom into a tiny nursery. Fancy, huh?
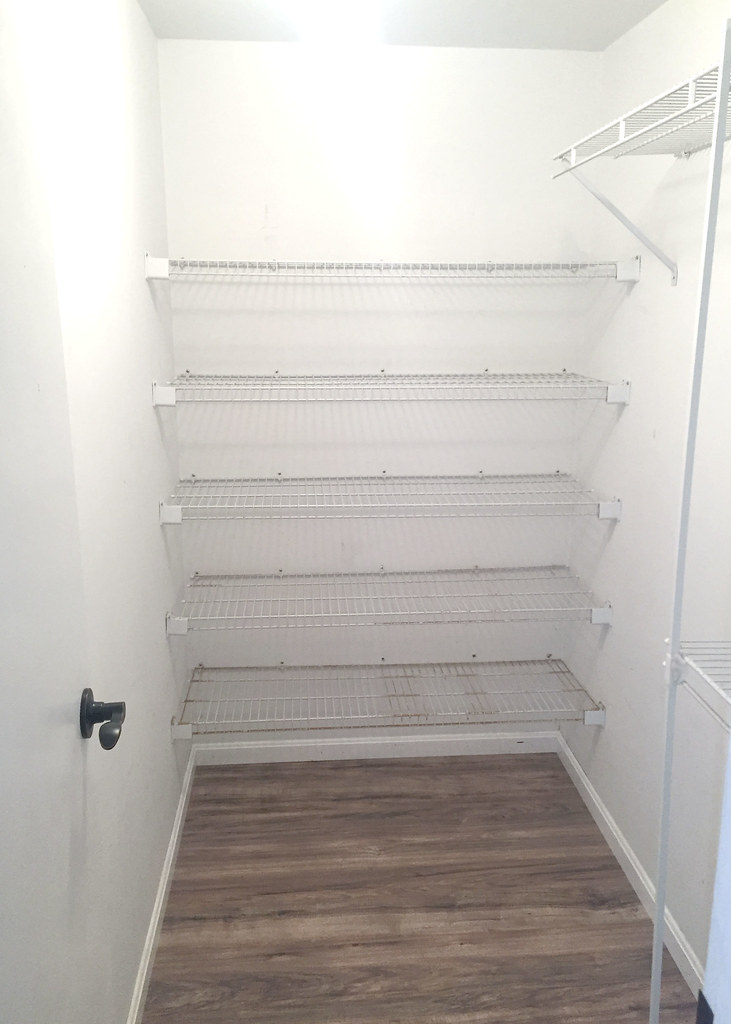
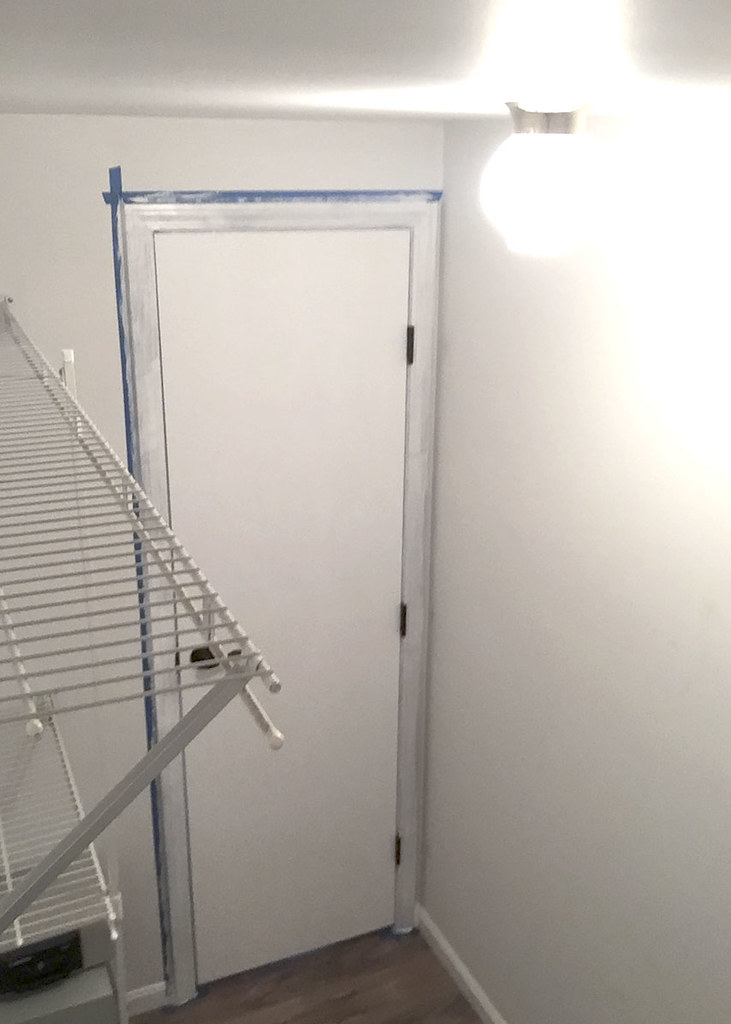
The
closetroom is pretty tiny, so there won’t be a ton of space, but we are working with what we’ve got. So far, we’ve been able to move things around and relocate our clothing/shoes/etc. to another closet just outside of our bedroom. It is now time to really get working on converting this into a livable bedroom for our little guy, hopefully before he comes home from the hospital!Here’s the mood board I whipped up for inspiration…

Light | Flooring | Animal Prints | Olive Topiary |Ruler – DIY | Mini Crib | Little Man Pillow | Rug
I’m excited to get working on this little room and if we are lucky, we will be able to get this pulled together sooner rather than later. Wish us luck!
Follow along with me on Instagram/Facebook to keep up with the latest!
-
Fun Neutral Holiday Front Porch
There are less than two weeks left until Christmas and we are keeping super busy over here! We’ve finally come up with a place in our small home to stick a little nursery, so we have some major moving and rearranging to do. But that update is for another time. Today it is all about our Fun Neutral Holiday Front Porch!
I just love participating in blog hops and am so thankful my sweet friend Kendra from Joy In Our Home invited me to join in for the Christmas Festival Blog Tour! There are so many great holiday ideas shared (mantels, vignettes, recipes, front porches, and tablescapes) and it is is exciting to meet new friends along the way.
If you are stopping by from Making It In The Mountains, I’m so glad you are here! Isn’t Kristi’s front porch just beautiful?

This post contains affiliate links. Click here to read my full disclosure.
Last week, I shared our Christmas living room decor. But I wanted to add a little more pizazz to the front porch than just a boxwood wreath, so I made things a bit contrasty out here, while still keeping with my neutral tendancies.
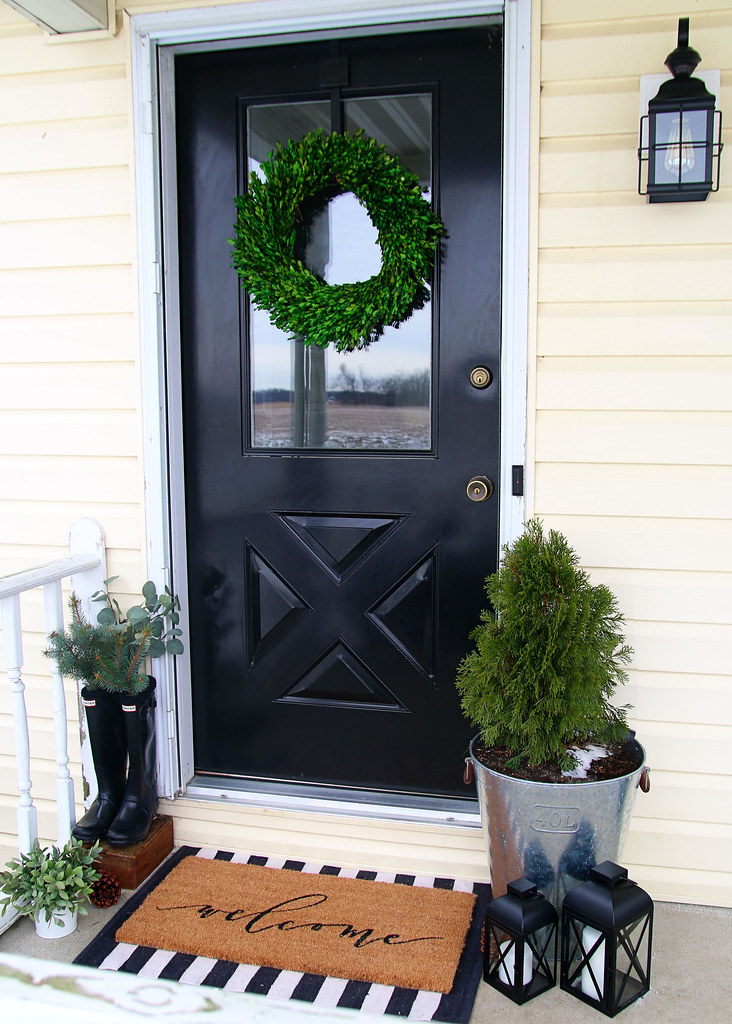
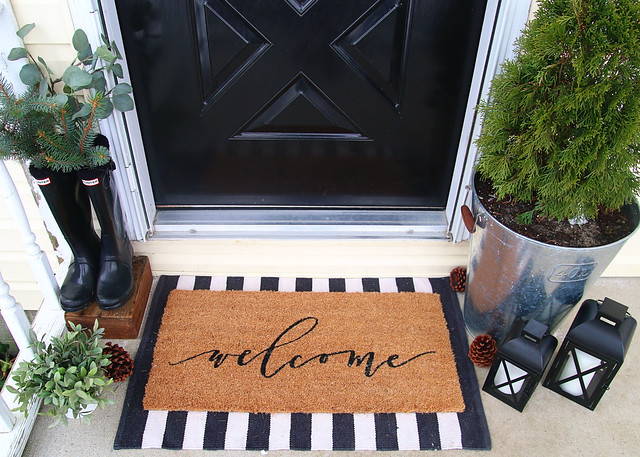
I like to incorporate a lot of greenery, so I gathered different kinds from around the inside and outside of our home. Aren’t these wellies looking festive with some blue spruce branches and eucalyptus?

faux sage plant | boots | striped rug
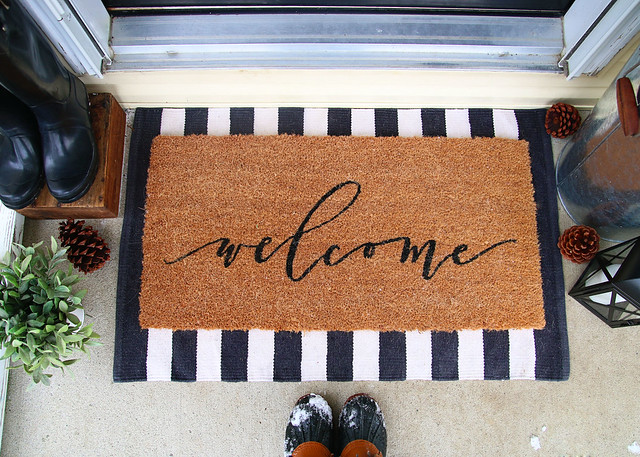
This new “welcome” rug from Magnolia Market (an early Christmas present from my parents) steals the show when layered with this pretty black and white striped number.

See that bit of snow on the soil below? Winter weather is here!
The cute lanterns were found for a steal at Walmart. (Buy a similar version here.) They look great next to the potted arbor vitae, which was moved to the porch to add some height and life to the scene.
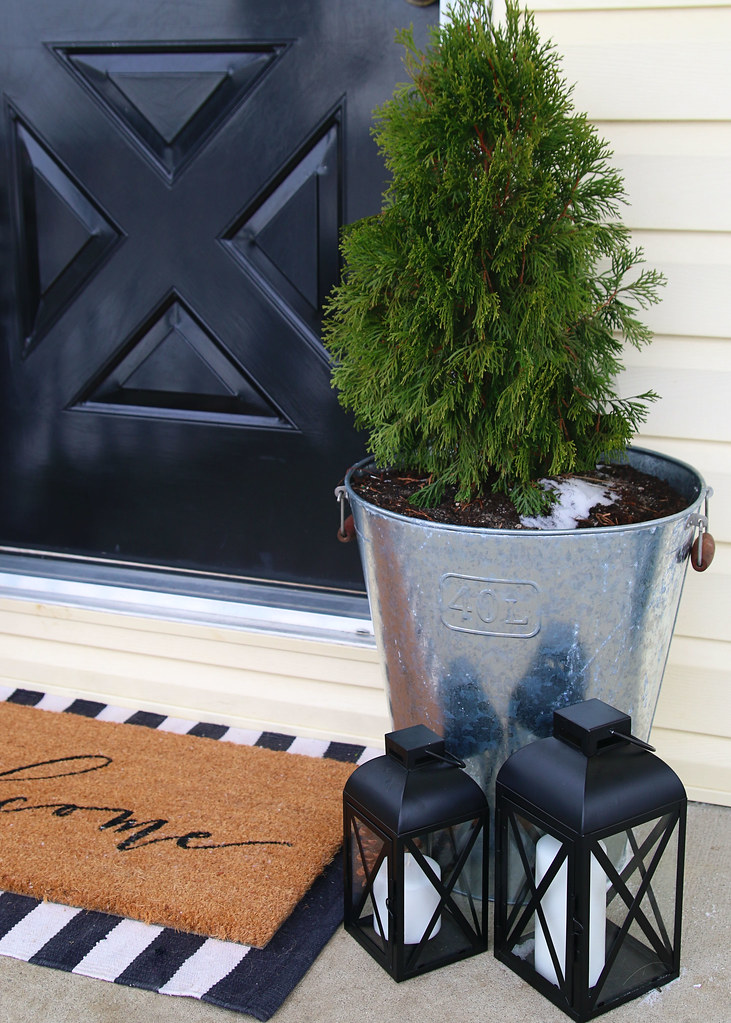
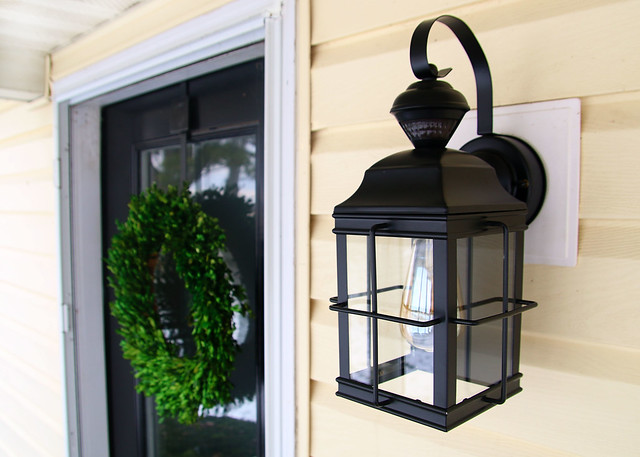
And those lanterns go oh so well with our new outdoor lighting! I love this light. It really helps dress up the front porch and is such a pretty upgrade from the previous one.
I’m really happy with how our Fun Neutral Holiday Front Porch turned out! What do you think?
Thank you for stopping by! Next up is the talented Lindsay from Country Girl Home. Hop on over and check out her festive front porch!!!
Mantels on Monday

White Arrows Home | Repurpose and Upcycle | Timeless Creations
Lemons to Lovely | Pennies From Heaven Home | One Happy HousewifeVignettes on Tuesday
 Joy In Our Home | anderson + grant | Kingsbury Brook Farm
My Creative Days | Poofing the Pillows | CityGirlMeetsFarmBoyRecipes on Wednesday
 Life Love Larson | Cali Girl In A Southern World | Crisp Collective
Love In My Oven | Countryside Cravings | Curly Crafty MomFront Porches on Thursday
 Making it in the Mountains | Elizabeth Joan Designs |Country Girl Home
Little Brags | The Homemaking Momma | Lemons, Lavender, & LaundryTablescapes on Friday
 Celebrate & Decorate | Noting Grace | 2 Bees in a Pod
The Crowned Goat | Dining Delight | The Neutral Nest Interiors -
White Farmhouse Christmas Living Room
It’s that time of year again! ‘Tis the season for holiday decorations, package wrapping, and cheer. Our house recently got a little lovin’ in the decor department and I can’t wait to share our White Farmhouse Christmas Living Room with you today.

I’m super excited to be participating in the Home For The Holidays Christmas Tour Hop (along with 33 other talented home decor bloggers) hosted by Jenna at Wife In Progress. If you are stopping by from Twelve on Main, Welcome! I’m so glad you are here!

This post contains affiliate links. Click here to read my full disclosure.
Let’s start working our way around the room!
This year, we are keeping things pretty & simple. Since we are expecting a new arrival in late winter/early spring, our minds have been busy with trying to figure out how we are going to get through the massive to-do list we have vs. decorating for Christmas. Our living room is looking pretty lovely though!

I’m always one for neutral decor and the holidays are no different. Bringing in more natural wood tones this year helped to compliment the greens of winter.
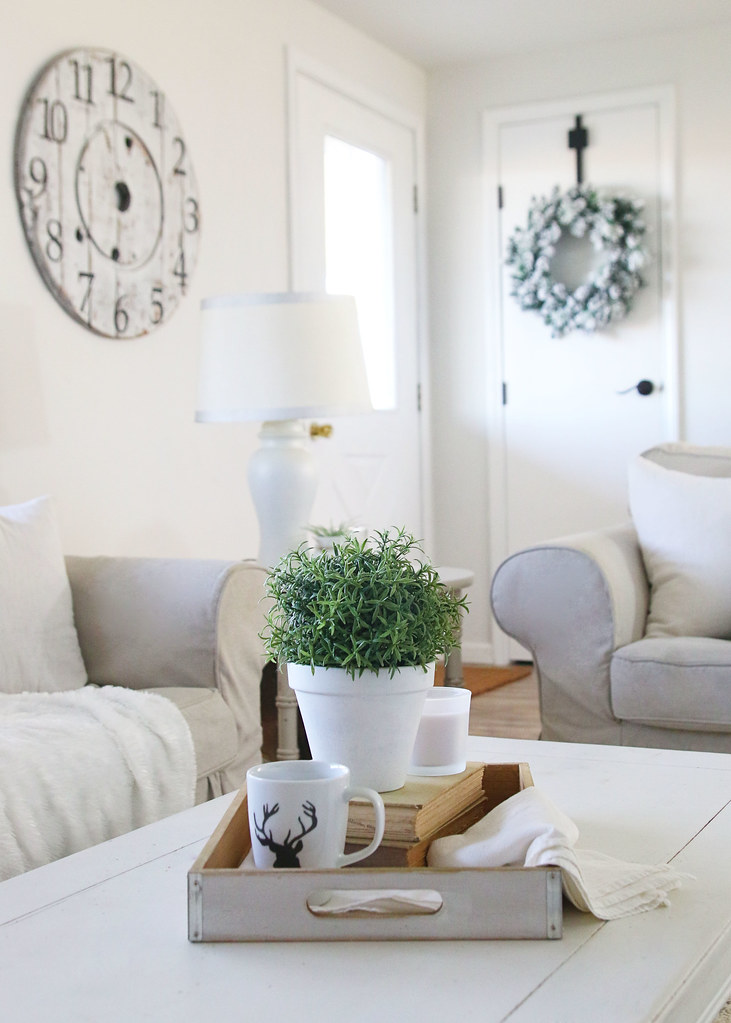
We also added some flocked pieces, like wreaths and garlands. I figured that they would go well with the new flocked Christmas tree we splurged on this year!
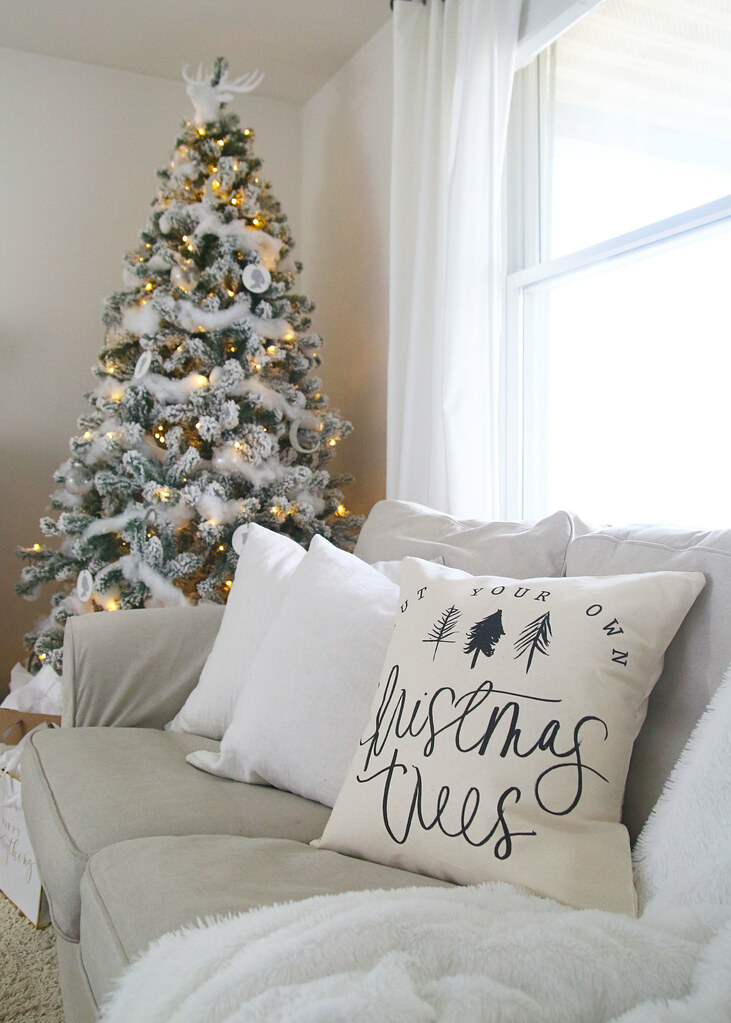
How fun is this pillow I snagged from PCBHome?! It goes perfectly with the neutral look we are rocking while still adding a little bit of whimsy.

Look at that beautiful Christmas tree below!!!
The tree is a little smaller than our previous one, so it’s been fun trying to figure out exactly where we want to put it. (It fits in so many more places!) At first, it was on the other side of the room by the t.v., but I think it works better over here next to the sofa.
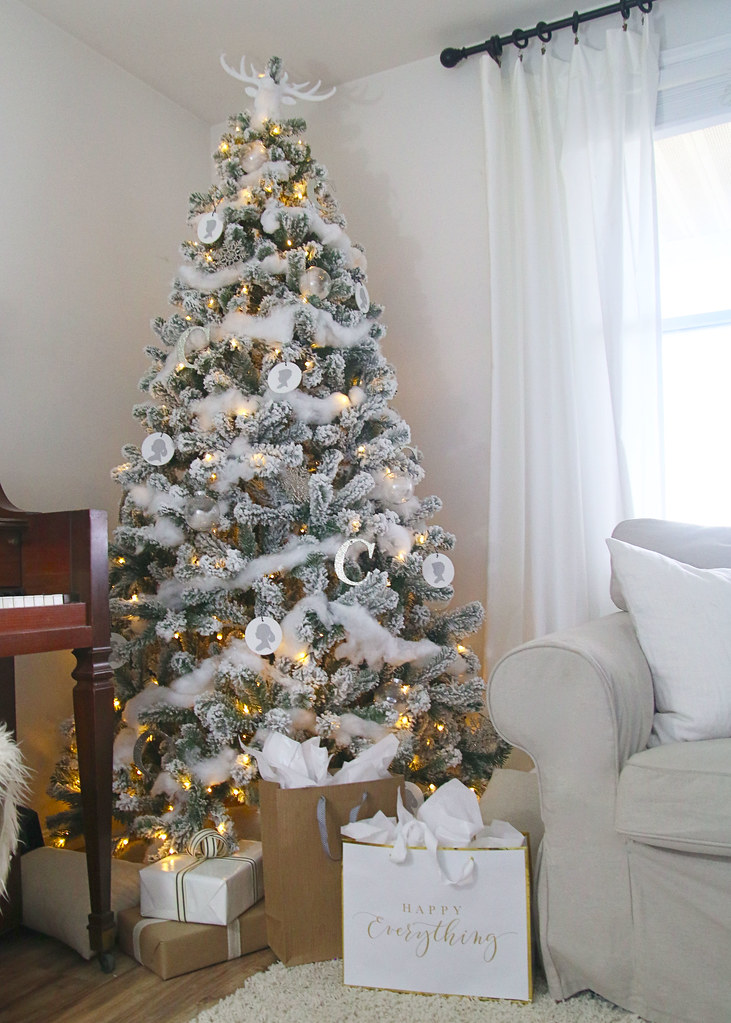
There is still a lot of wrapping to get accomplished before December 25th, but I’m happy to report that we have almost all of the presents purchased. That is a real accomplishment in this household. Usually, we are pushing up until Christmas Eve!

Since we purchased a new tree this year, I kept the ornaments the same as last year. Between that and the pre-lit tree, decorating was a breeze.

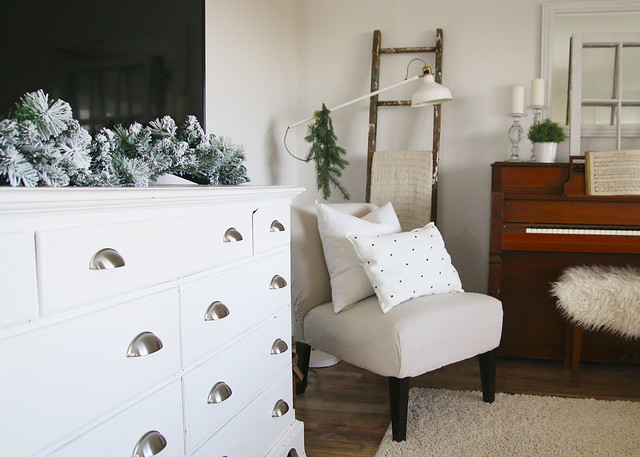
We don’t have a mantel in our home, so I always let the top of our piano pretend like it is one and decorate as such. Just a few pieces pulled from around the home create a collected and cohesive look.

This little corner is all dressed up with a cozy blanket, greenery, and comfy throw pillows. (Get the look for less: Hearth & Hand X Pattern Throw Pillow.)
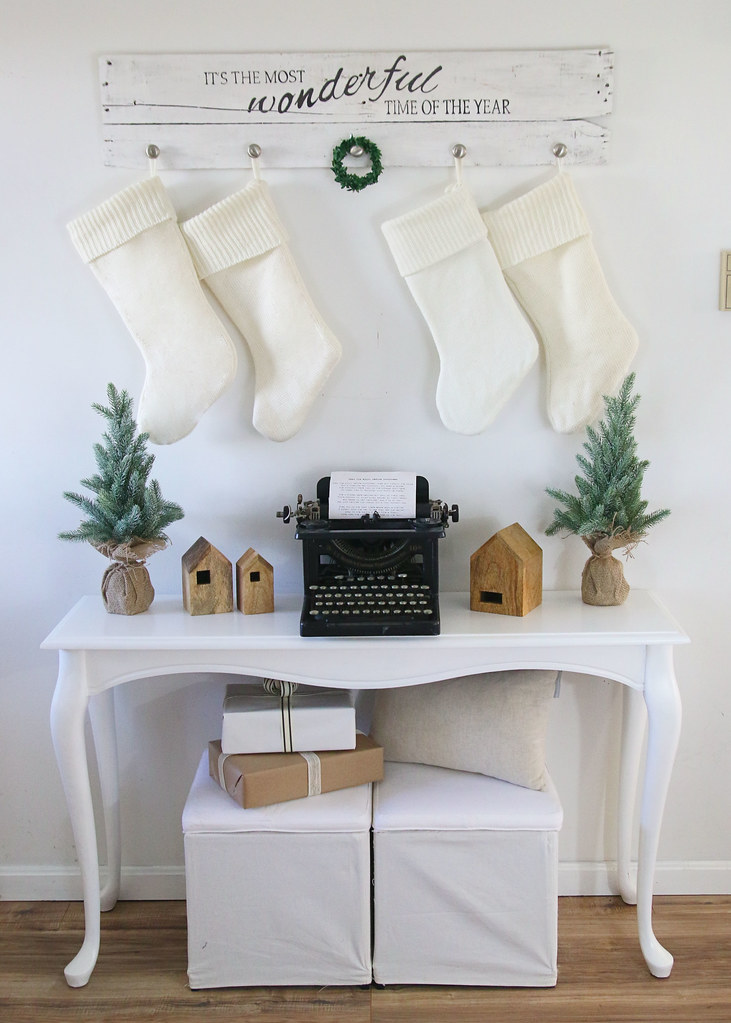
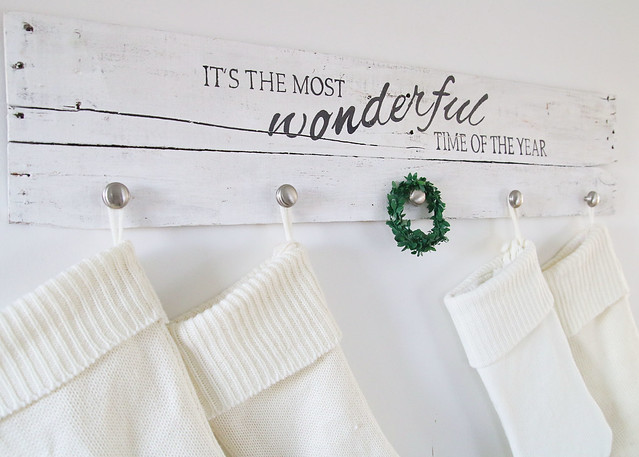
And that brings us back to the entryway. I love how light and bright this area is looking. It has definitely come a long way since last year!
SHOP THIS SPACE
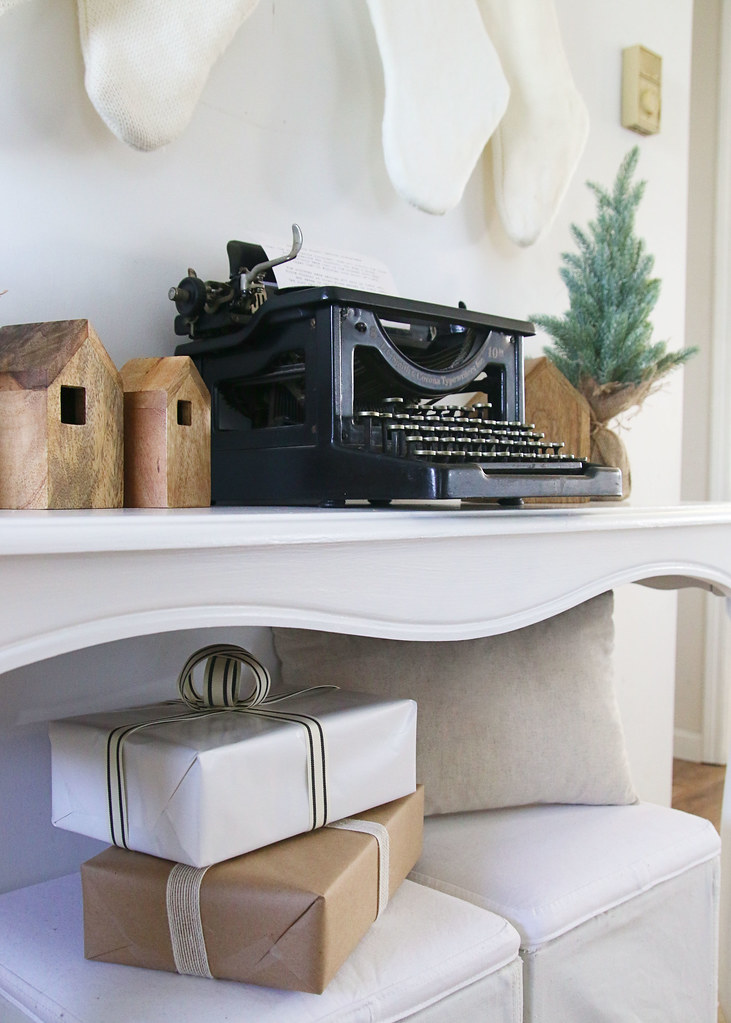
Stocking Hanger | Stockings | Mini Trees – Similar |Nesting Houses | Mini Ottomans
Lucky for us, we already have 5 knobs for stockings so we won’t need to make a new stocking hanger next year when we add another one to the lineup. *wink*
My favorite part of this space is still this antique typewriter that belonged to my grandmother. We love having sentimental pieces in our home!
I hope you enjoyed seeing our White Farmhouse Christmas Living Room! Your next stop on this blog hop is Ashley from Little Glass Jar who is sharing a beautiful home tour. You won’t be disappointed!
Monday

Wife in Progress // Inspiration for Moms // Sand Dollar Lane
Saw Nail and Paint // The Tattered Pew // The Fat Hydrangea // Worthing CourtTuesday

A Blue Nest // Sincerely, Marie Designs // Town and Country Living
Farmhouse on Boone // Postcards From The Ridge // The Frugal HomemakerWednesday

Little Glass Jar // North Country Nest // Bluesky at Home
Aratari at Home // Little House of Four // Twelve on Main // Elizabeth Joan DesignsThursday

AKA Design // The Everyday Home // On Sutton Place
Joy in Our Home // Noting Grace // Making It In The Mountains //ShabbyfufuFriday

Seeking Lavender Lane // My Creative Days // Thistledown Domestic Creations
The Honeycomb Home // Flatcreek Farmhouse // Green With Decor // Atta Girl Says -
The Look for Less: Embroidered X Pattern Throw Pillow
Have you guys seen the new Hearth & Hand home decor collection by Magnolia at Target? Woah. It is pretty amazing!!! There are so many cute pieces and the prices are pretty reasonable. I especially love this cute, little, embroidered x pattern throw pillow!

This post contains affiliate links. Click here to read my full disclosure.
If you haven’t checked out the collection yet, you have to see it. I think I need one (or two) of everything. Like this doormat, these striped napkins, this wreath, etc. It is like Joanna Gaines crawled into my brain and stole all of my neutral lovin’ home decor ideas. And then made a home decor line with them. *wink*

Check out how I turned a Hearth & Hand placemat into a cute embroidered x pattern throw pillow.
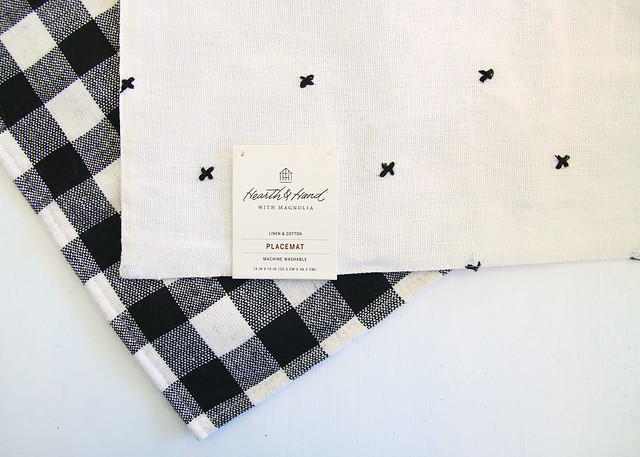
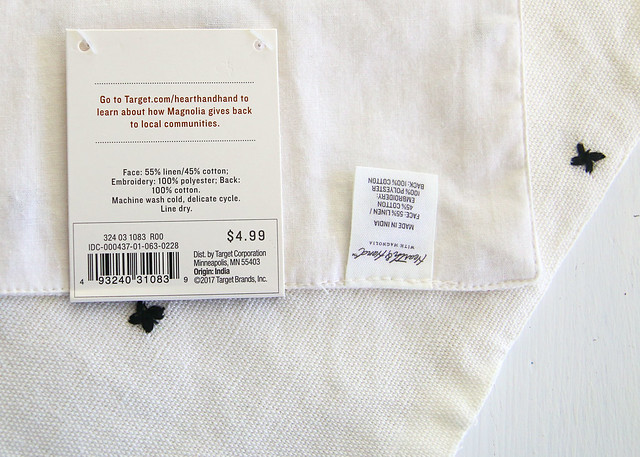
I’m always on the lookout for a good deal. So, when I found a placemat from the same line that was the exact pattern of the pillow for only a quarter of the price, I scooped up the opportunity to get the look for less.
If you come across a cute fabric placemat that you love, chances are you can make it into a throw pillow. (I’ve done this before and it is one of the easiest and cheapest ways to get a stylish pillow for your space.)
Here’s what you’ll need to make your own:
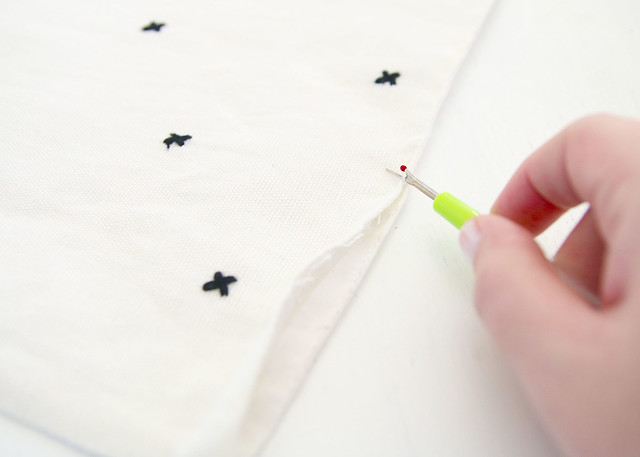
double sided fabric placemat | seam ripper | cotton batting | needle & thread
To start, take a seam ripper and pull out the stitching on one side of the placemat, about 4 inches long. (Or just big enough to slip your hand into.)
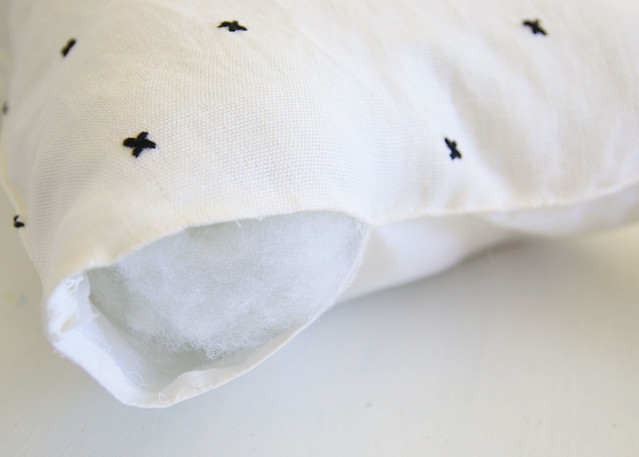
Next, stuff the pillow! (I decided to go the cheap route and just pulled apart an old bed pillow to use as stuffing.) Fill that puppy up until it is sufficient to your liking.
Finally, it is time for a little sewing. Using a needle and thread matching the pillow color, hand stitch the opening closed.
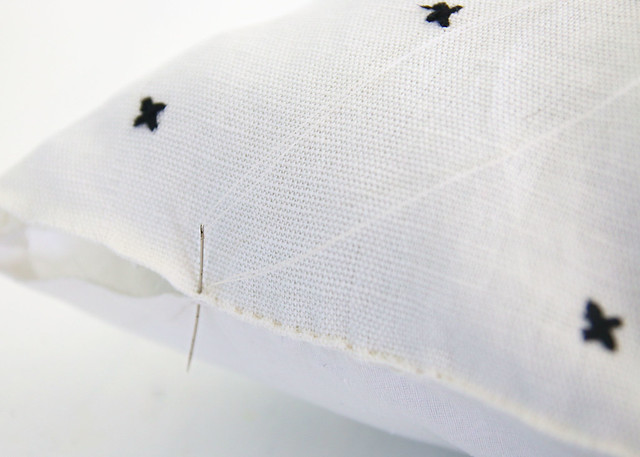
Voila! That’s it!

These placemat pillows are so easy to make and you can whip up several of them in no time.
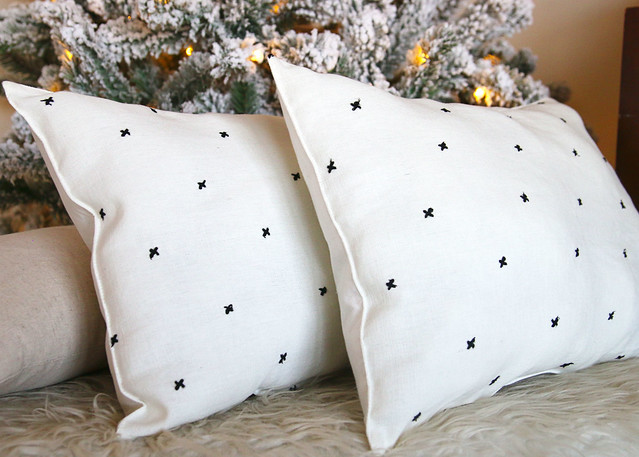
I just love the neutral style of these embroidered x pattern throw pillows. They are the exact look of the Hearth and Hand version for only a fraction of the cost!

Although, I probably didn’t need any more pillows, I’m so happy that I found this little inexpensive hack. My husband may not be quite as thrilled, since he considers me a pillow hoarder, but I’m sure he appreciates the fact that I saved some money in the pillow acquiring process!
Not feeling crafty?
Buy the original embroidered x pattern throw pillow here!