-
Baby Farmhouse Nursery Reveal
How can our sweet littlest guy be almost 6 months old already??? Time in the NICU seemed so long, but since he has been home things have just flown by. Especially, since summer vacation for the bigger kids is here. I’m happy to announce though, that we have finally finished up the nursery! Today I’m sharing all of the details and sources in our Baby Farmhouse Nursery Reveal!

This post contains affiliate links. Click here to view my full disclosure.
This space has come a long way from the walk-in closet that it used to be. Coming in at only 4’3″ x 7’6″, designing in such a small room was definitely a challenge, but one that we were excited to tackle!

We knew that we would need a few basics, like a crib and small dresser to hold clothes and accessories. We were also able to work in a little bit of hidden storage. But my favorite part of this nursery is the farmhouse decor!

If shiplap doesn’t scream modern farmhouse, then I don’t know what does.
After we removed all of the old wire shelving, the walls got a simple shiplap treatment thanks to my hubby. Then, we painted them with Sherwin Williams paint in Alabaster. I also added these adorable baby farm animal prints in some Ikea frames.
The vintage looking farmhouse light above the prints is a fun addition too! After seeing the “Magic Light Trick” that Brooke from Nesting with Grace does, I knew that this hack would be great for the nursery. (I purchased the puck lights with remotes I used here.) And since there wasn’t any electrical wiring to be done, I was able to install the light by myself in just a few minutes!
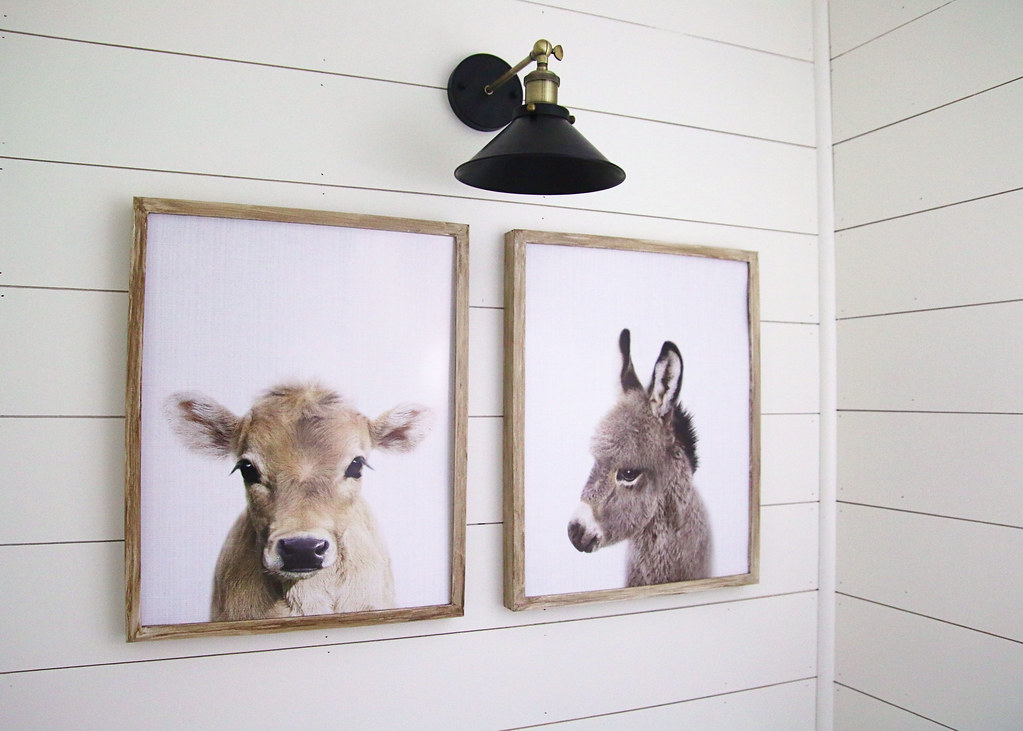
cow print | donkey print | wall mount light
We are hoping that the tiny, mini crib will be able to hold our little guy for awhile. The mattress height is adjustable and the crib can also convert to a toddler bed and twin bed with or without the foot board option.

The neutral, vintage-look rug is the perfect soft spot for our little man to stretch out and kick right now. It will also be a great place for him to play as he gets bigger!

I love that all of our kids have been able to use this small dresser.
It was one that my parents passed on to us and it is perfect for holding baby clothes, burp cloths, accessories, and a few baby toys. The oval chalkboard was a Christmas gift and we have been using it for the little Snuggler’s monthly photos.
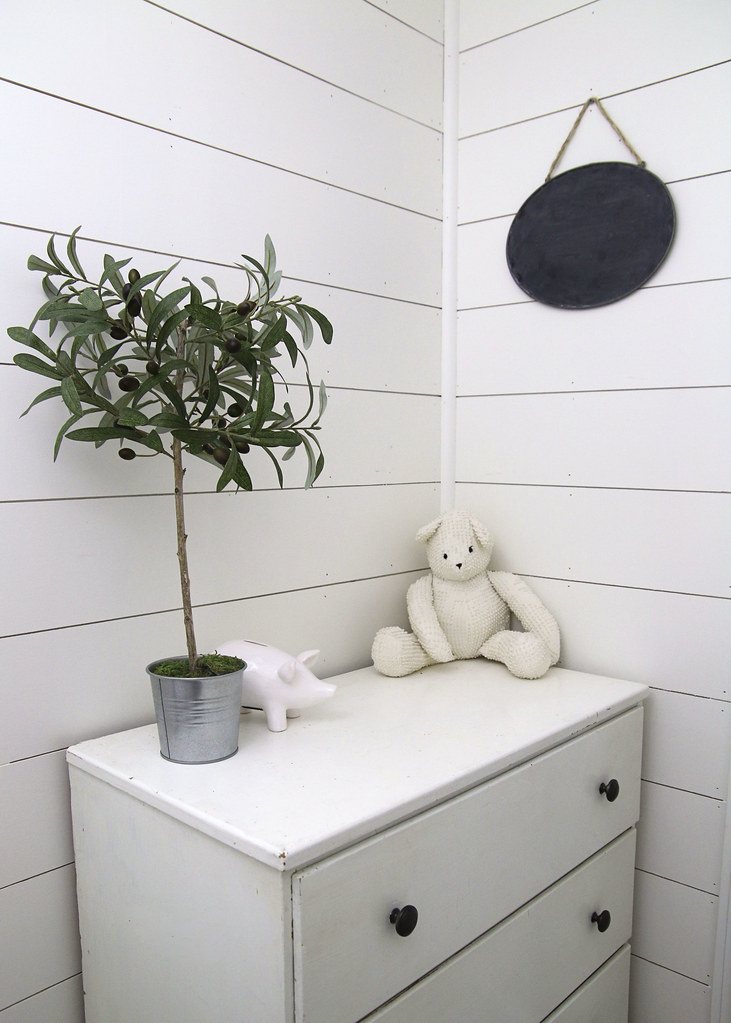 Olive Tree Topiary | Piggy Bank | Teddy Bear (handmade gift)
I found this gray hanging storage at Babies R Us right before they went out of business and I’m so glad I did. (Here is a similar option.) I use it to corral extra diapers, wipes, etc. that don’t fit in our diaper bag or the diaper caddy we move from room to room.

See that ruffle-y crib skirt below? I made it out of an old sheet! It helps to hide an under-bed storage bin that keeps all of the receiving blankets and extra crib sheets tucked away. There is also a little space on each side of the crib that we use to store a boppy and play mat when they aren’t in use.
It’s all about being creative with your storage space, folks!

We just love how this room has turned out and that our baby boy has a room to call his own. It’s an added bonus that it’s attached right to our bedroom so that we are just a few steps away if he needs us at night! What do you think of this Baby Farmhouse Nursery Reveal?
-
Faux Olive Tree Topiary
I’m so excited that our tiny, little nursery is almost done! There are just a few small things that need to be finished for photos, but it is a fully functional space for our littlest man. Since I need to get my booty in gear on a couple of things, I thought in the meantime that I would share how I made this faux olive tree topiary for the room!

This post contains affiliate links. Click here to read my full disclosure.
When planning out what we wanted for this room, we knew that things would be light and bright. But I also was adamant about adding a little greenery of some sort. I just think that plants, whether faux or real, make spaces feel more alive. Yes, I know that may seem like an oxymoron with faux plants. But if you find (or make) some that look real, then it really does liven things up!
For this project, you will need a few supplies (listed below).
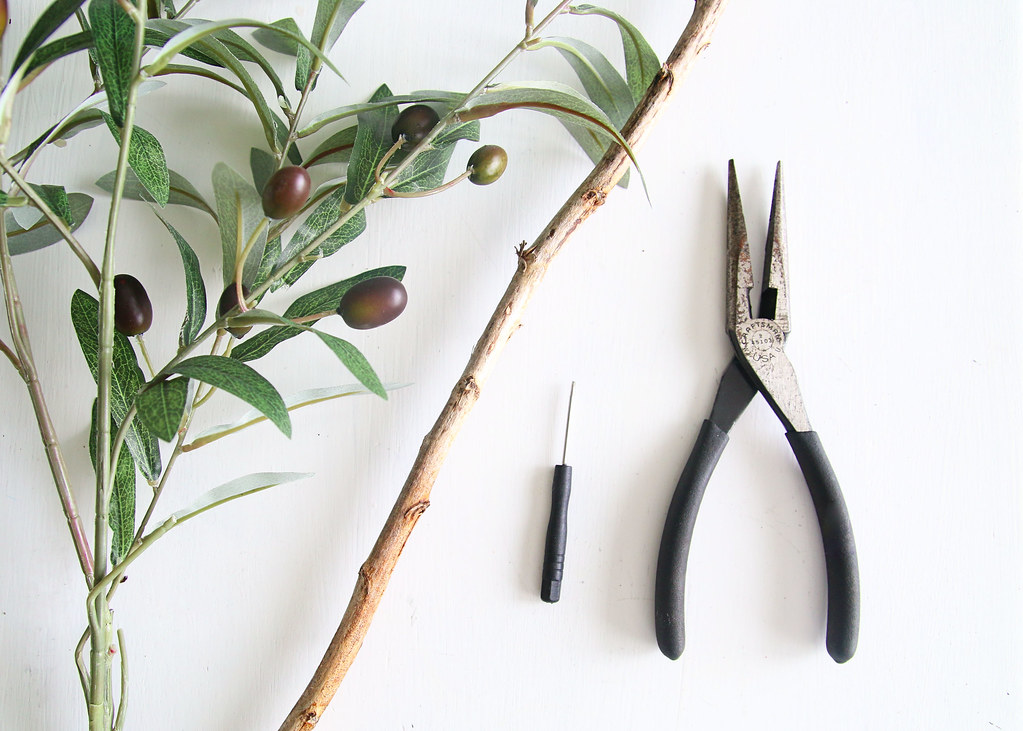
faux olive bush | small stick, approx. 16 – 20 inches | wire cutters | awl
planter/pot | floral foam | moss |hot glue gun (optional)
To start, cut all of the little branches off of the faux olive bush. Next, use an awl or small screwdriver to create random holes around on end of the stick. (You can use a drill with a small bit if you are fancy. *wink*)

Place the ends of the branches into each hole and add more pieces until the topiary reaches desired fullness. There isn’t a real science to this. I just kept adding pieces in until it looked fairly balanced. Note: If the branches aren’t staying in, use hot glue to secure them.

To “plant” the faux olive tree topiary, cut the floral foam to fit snuggly in the planter/pot. Push the bottom of the stick into the foam (glue if necessary) and cover the top with moss.

And that’s it! What do you think? I’ve kind of gone back and forth on which planter I want to use, but I think this small one works best. Which means that I may have to make a larger topiary for the bigger olive bucket!

This topiary was really inexpensive and easy to make. I think I paid less than $10 for the entire tree, thanks to a coupon from Hobby Lobby. However, if you aren’t up for a project, then I’ve rounded up a few budget-friendly options for you here, here, and here.
Stay tuned for the nursery reveal coming soon!
-
Finding the Fuel to Keep Up With 3 Kids
This post is part of a social shopper marketing insight campaign with Pollinate Media Group® and The J.M. Smucker Company, but all my opinions are my own. #pmedia #1850Coffee #1850CoffeeatMeijer http://my-disclosur.es/OBsstV
When the first kid came along, it was pretty easy to get most everything on the to-do list accomplished. However, by the time you get to your third, you’re lucky if you even remember to finish anything that you’ve started. (Ummm… hello, laundry!) I rely on a good cup of coffee in the morning and naps to help me keep up with 3 kids and power through my day. But mostly coffee, because naps seem to be few and far between!
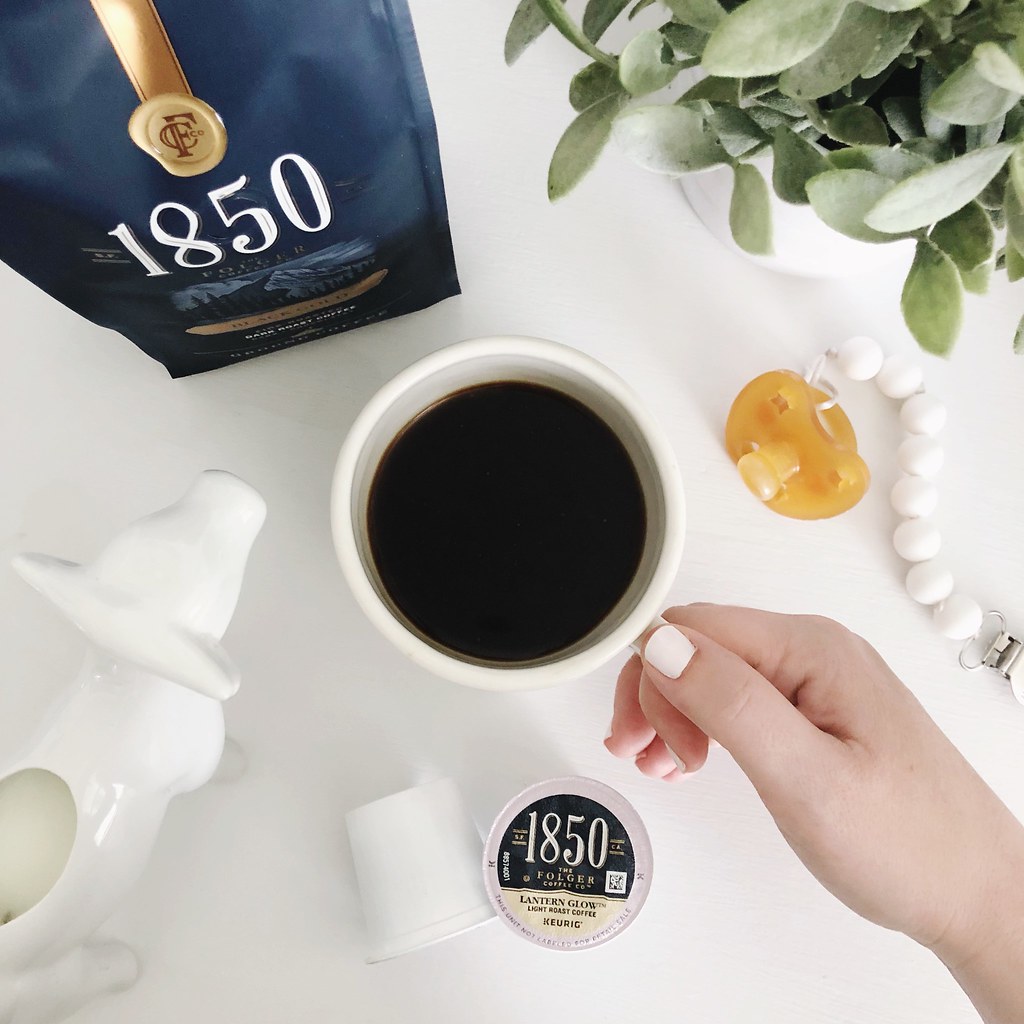
I’m currently loving 1850 Brand Coffee. It is the new premium coffee from the makers of Folgers and it seriously hits the spot, with its bold, yet smooth taste. And with all that life/kids throw at me, I need something bold to get through the day. There are so many things to keep on top of and coffee is my fuel!
Coffee Trivia
Did you know that back in 1850 J.A .Folger actually started his journey in the coffee business to help prospectors?

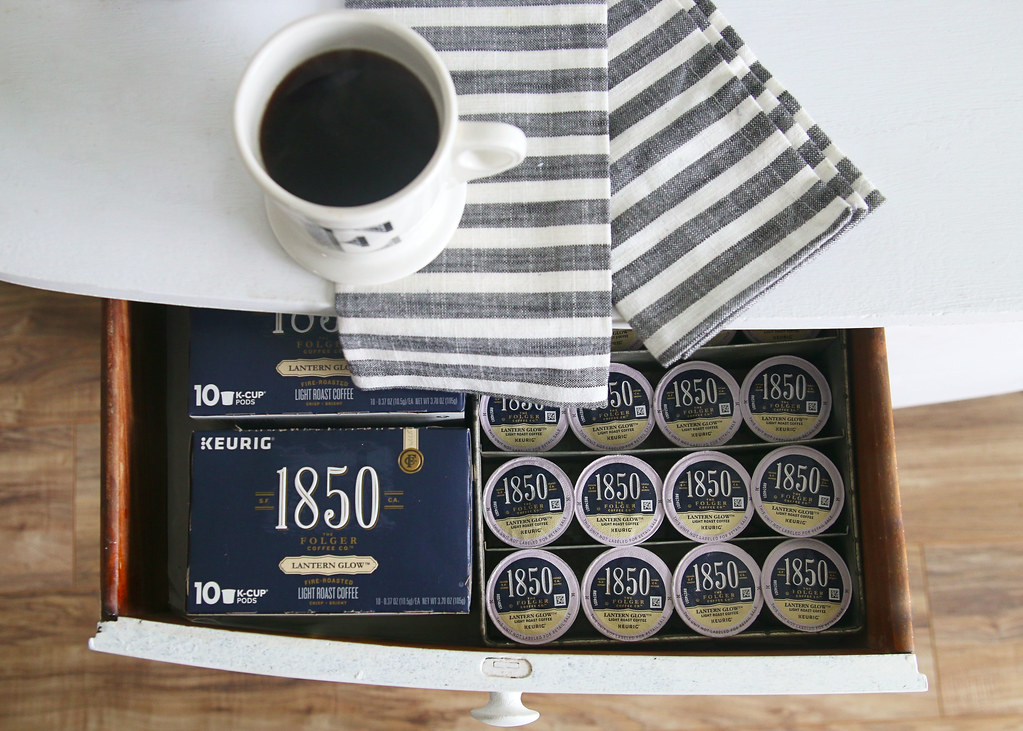
Since I’m a K-Cup kinda girl, I was happy to see that their four signature blends (Black Gold, Pioneer Blend, Trailblazer, & Lantern Glow™) come ready for my Keurig. You can also find this delicious coffee in traditional ground form, plus there are 3 yummy ready-to-drink flavors (Mocha, Sweet Cream, & Vanilla). My current fav is Lantern Glow and I keep it fully stocked in the drawer of our coffee bar.
Keeping up with three kids is no joke!
With a new baby at home and two busy bigger kids, I find that I’m always on the go. And that leaves little time for much else. Between extracurricular classes, practices, recitals, concerts, and all of the everyday stuff that comes with taking care of a family, I’m exhausted. If I don’t have my coffee, I’m pretty much a zombie. Luckily, 1850 Brand Coffee’s bottled iced coffee is easy enough to stuff inside the diaper bag as I head out the door. I love the Mocha flavor, but the Vanilla definitely comes in as a close second.

You can find 1850 Brand Coffee products at your local Meijer store. Visit Meijer from 5/6 – 6/2 and take $1 off any 1850 Brand Coffee Product with the (while supplies last). Trust me. You will want to try this one out! If you do, I’d love for you to stop back and let me know what you think.

Check out our small dresser turned coffee bar
and find out how we made it a functional space by clicking here.
-
Blog and Life Update
Hey, Friends! I’m so excited to finally be back to blogging. There have been so many things going on and I’m excited to share all of that new stuff with you! So, here is a little blog and life update.
Life Update
In my last post (way back in February), I shared that we welcomed a sweet baby boy into our family, but he was born super early, so he spent 66 long days in the NICU. He has been home for a little over a month and a half and we are getting into a routine with our little snuggler.

His tiny nursery is coming along too. I will be sharing all of the details and the final reveal of that soon!

Blog Updates
As you may have noticed, things look a bit different around here. Since our lives have gotten a little less crazy, I’ve had a bit of time to work on blog stuff. Elizabeth Joan Designs has gotten a complete makeover recently and I love how it is looking. Hopefully, you also find that it is easier to navigate your way around.
Looking for Free Printables?
There is a new tab up on the menu bar at the top called The Gallery. I’ve resurrected my printables and rounded up a bunch of my favorites there. You can get your exclusive pass and download as many of them as you want for FREE. Visit The Gallery link up top or click here.

Also in The Gallery are the 2018 Calendar & Planners. Yes, I know that 2018 is already 1/3 of the way over, but there is still plenty of time left to get your life organized. Download yours today!

I hope you are as excited as I am about all of the changes going on here. There are lots of ideas flowing around in my head, which means more decor, DIY, room makeovers, and free digital downloads coming your way soon!
Want to take a tour of The Country House or The City House?
Check out the updated Home Tour page!