-
Dining Room Progress
As promised earlier this week on Instagram, I’m back to share our dining room progress with you. This room is definitely looking a lot better than when we first moved in. However, there are still quite a few things that we would like to do in this room before we would consider it finished. Let’s check it out.

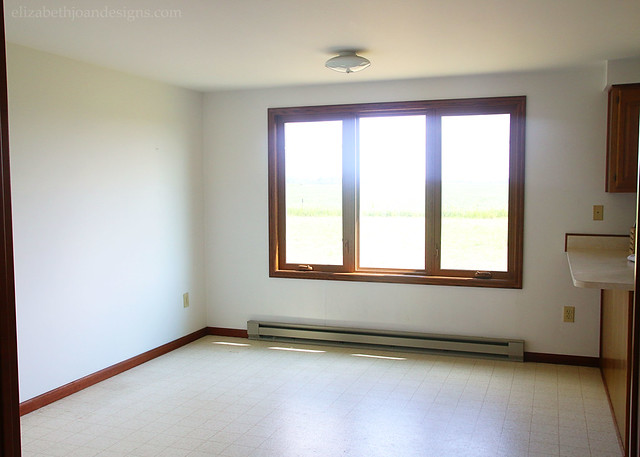
Here’s what our dining room looked like on move in day, before we filled it up with furniture.
We’ve since installed a simple chandelier and added faux wood blinds (like the ones we put in our daughter’s room) on the windows. I’m not a huge fan of blinds, but they help provide a some shade during the bright parts of the day. I would really love some long drapey curtains. Unfortunately, those are not an option as of yet, but I’m brainstorming ideas on how I can make them work around our electric baseboard heaters

I also decided to draw some lines on the wall to mimic the shiplap-look. I’m a bit of a commitment-a-phobe when it comes to major home changes, so when I saw that my blogging friend, Lauren from Bless’er House, had done something similar, I thought I would give this a try. I know that some people are so over shiplap, but we still think it is pretty awesome. Plus, this wall treatment was FREE!
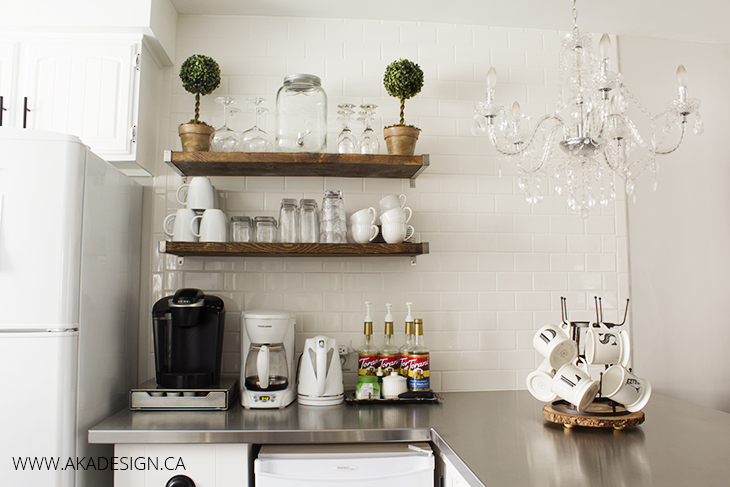
Our coffee bar was moved over to the longer wall underneath our stenciled wreath display I made for the holidays.

This space is slowly coming together, but there are still some projects and things to be done, like:
- Add shiplap to the wall
- Figure out some sort of new wall decor to replace the seasonal wreath display
- Paint the trim and walls
- Add curtains
- Finish making over a table that I found for a steal on Craigslist
- Build (or buy) a buffet
- Change out the flooring

What do you think of the current state of our dining room? We are pretty happy with where things are right now, but are looking forward to more changes!
-
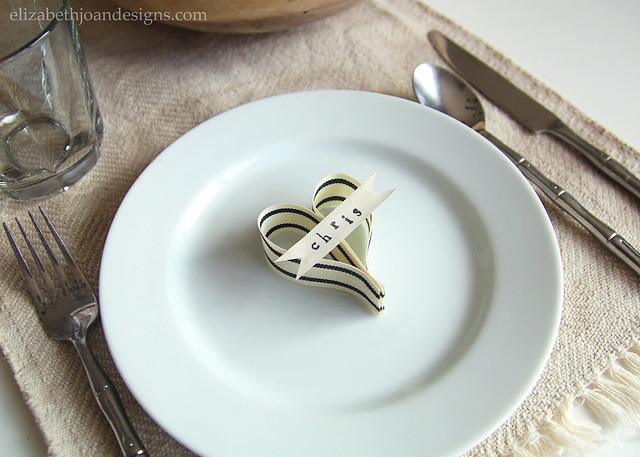
Simple Ribbon Heart Place Card
Originally published on Feb. 1, 2016. I’ve put a lot of projects on this blog over the past couple of years, many of which are pretty detailed and take quite a bit time. But I absolutely love an easy project and today’s is just that. This simple ribbon heart place card requires minimal supplies and is super quick to whip up.

This post contains affiliate links. Click here for my full disclosure policy.
Here’s what you need:
- Ribbon
- Scissors
- Hot Glue Gun
- Paper
- Alphabet Stamps
- Stamp Pad
(I found these pretty, neutral ribbons a few weeks ago at World Market and knew I had to have them in my stash.)

To start, cut two equally sized pieces of ribbon. Mine were about 5 1/2 inches each.


Then, run a small bead of glue along one side of one ribbon and attach the other ribbon to it to create a heart shape.

To make the name tag, cut a small banner shape from a piece of paper and use the alphabet stamps and stamp pad to write the name.

Finally, add a dab of glue to the middle of the heart and attach the paper banner. Aren’t these cute?
These would be perfect for a party or even for a Valentine’s Day dinner. And, you could always change the wording on the paper to fit whatever occasion you choose. So many possibilities!
_______________________________________________________________ You may also like:
Moss Letter 
10 Minute Curtain Tie Backs 
Picture Frame House Numbers 
Airplane Picture Clip -
$100 Room Challenge: Week 4 – Bathroom Makeover Reveal
Our bathroom makeover for the $100 Room Challenge is finally finished! Those 4 weeks went super fast and even though we were dragging our feet the entire time, it is so nice to be done. Behold, the bathroom makeover reveal!
Trying to do a complete bathroom overhaul on just $100 is a lot harder than it seems! As originally mentioned, the paint alone was going to cost a decent portion of that price. Luckily, we were able to use some leftover paint from previous projects.
Here’s the list of things we wanted to accomplish:
- Paint the walls
- Paint the doors/trim/vanity cabinet
- Spray paint door hardware
- Build a ladder to put around/above the toilet
- Get wire baskets for storage
- Add a recessed light above the toilet area
- Make a frame for the existing mirror
- Replace light switches/plates/GFCI outlet/thermostat
- Add hooks for towels
- Decorate with items already owned
Let’s take a trip back down memory lane to see where we started…
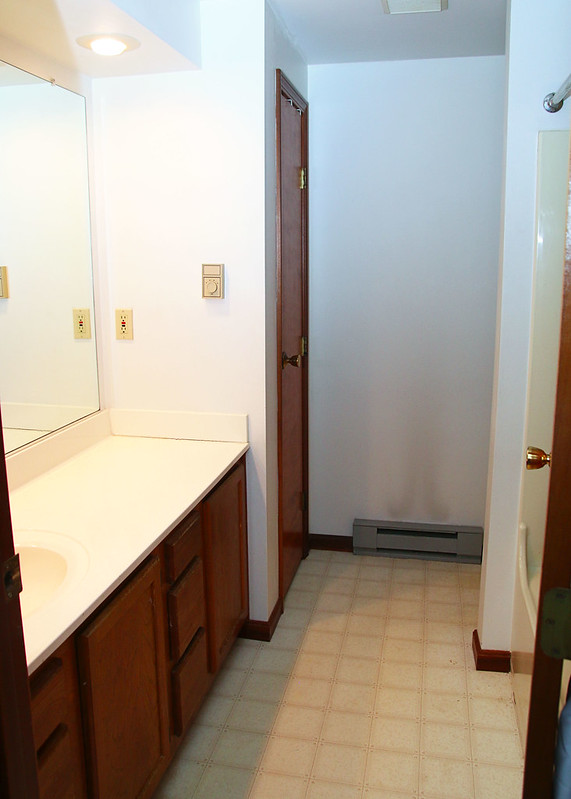
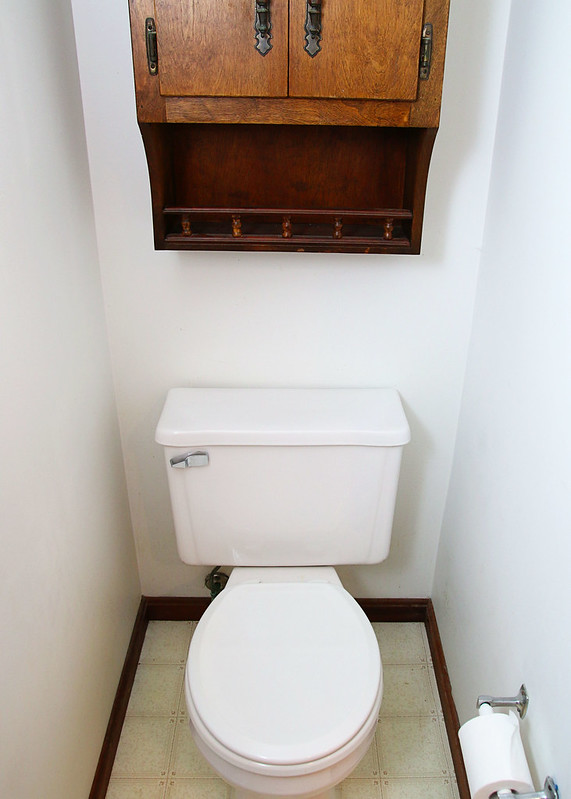
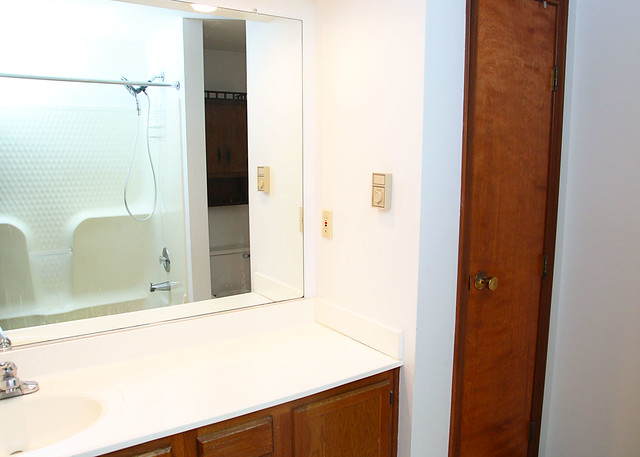
Kind of meh, right? Even though the walls were white, the color of the stain on the wood and the lack of lighting made the room feel dungeon-y. This room is also hard to photograph with so many angles and no natural light.
Lighten and Brighten
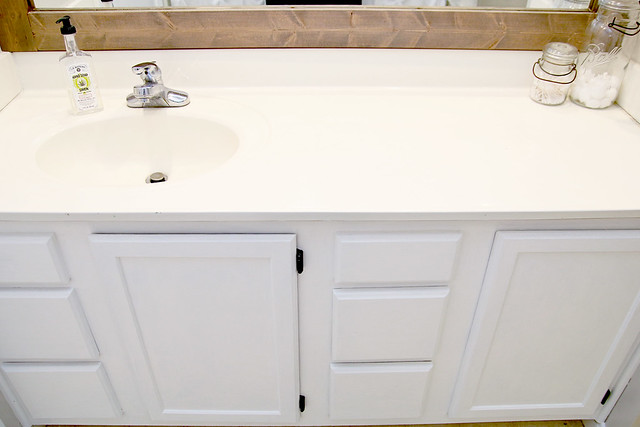
Brightening the room was an easy fix with some new paint for the walls, vanity, doors, and even the door handles. (See the paint colors we chose by clicking here.)

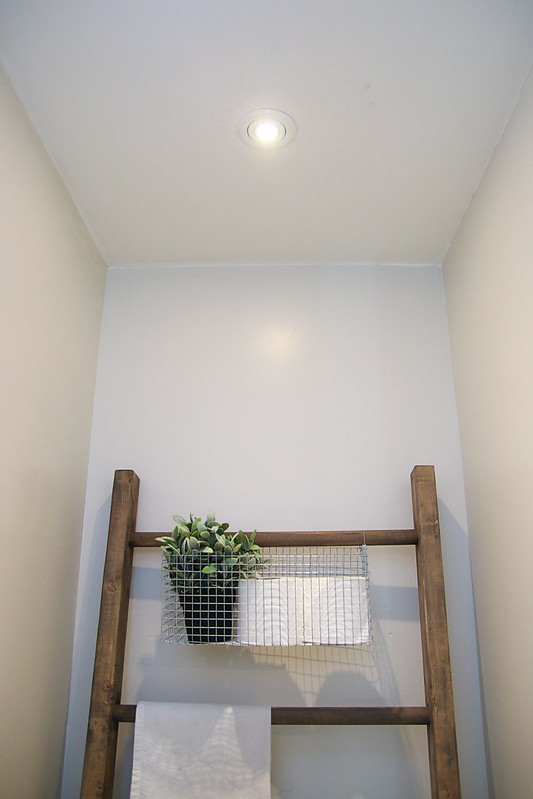
The addition of a recessed light in the ceiling over in the toilet nook also brightened things up. (My hubby did all of the electrical stuff, saving us some money.)
Decor & Storage
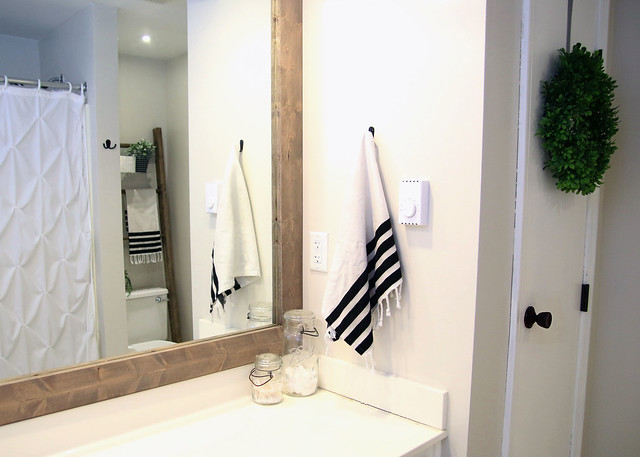
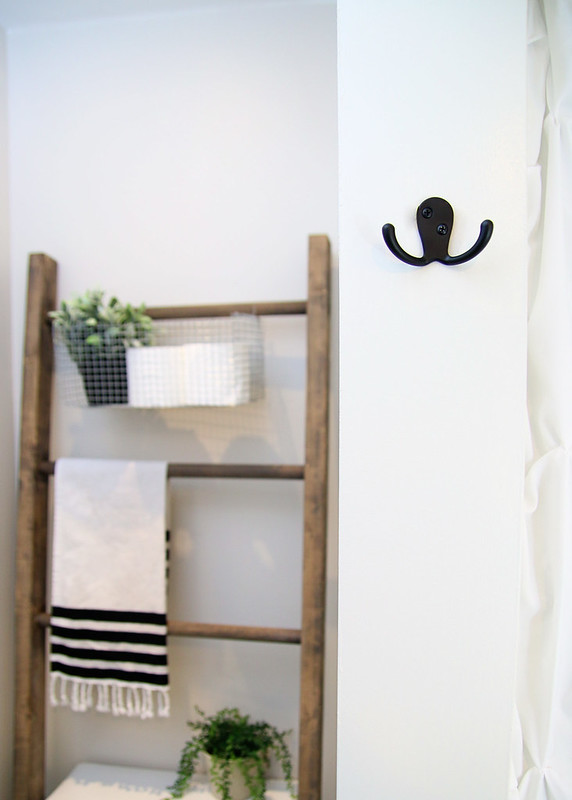
I’m loving how our ladder turned out. In my last update, I shared how we made it. Since then, I’ve stained it using Minwax Jacobean Wood Stain and went over that with a white wash and orange wash of acrylic paint.
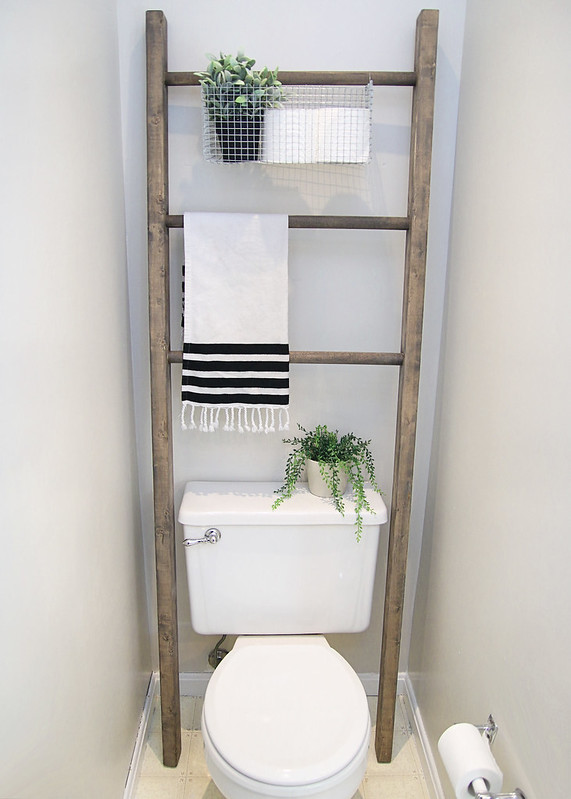
I really wanted this ladder to be decorative and also a place for some added storage. We can easily hang an extra hand towel over the rungs. As for the basket, I made it myself using wire mesh which only cost a dollar or two. I found an excellent tutorial for wire baskets from Four Corners Design.

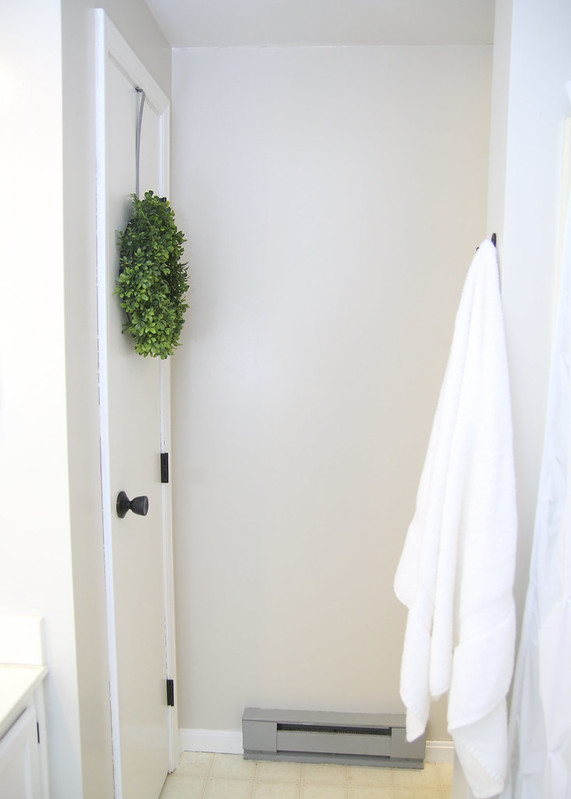
We also added a double robe hook on the wall next to the shower and a single hook for hand towels next to the sink. Previously, there was nowhere to hang a towel in the room and they would either pile up on the floor or be flung over the shower curtain rod. Neither of those was a good option, so I’m glad we now have a designated spot to put them.
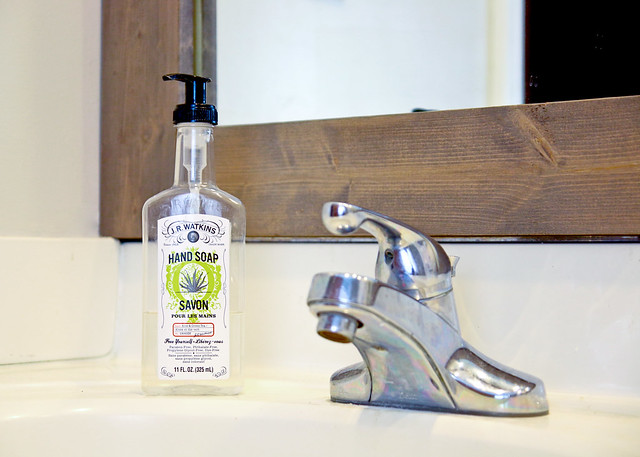
We brought in some more warmth to the room by framing out the builder grade mirror with wood. I used the same stain/acrylic paint combo for the frame so that it would mesh well with the ladder. This gives the room a more custom feel.
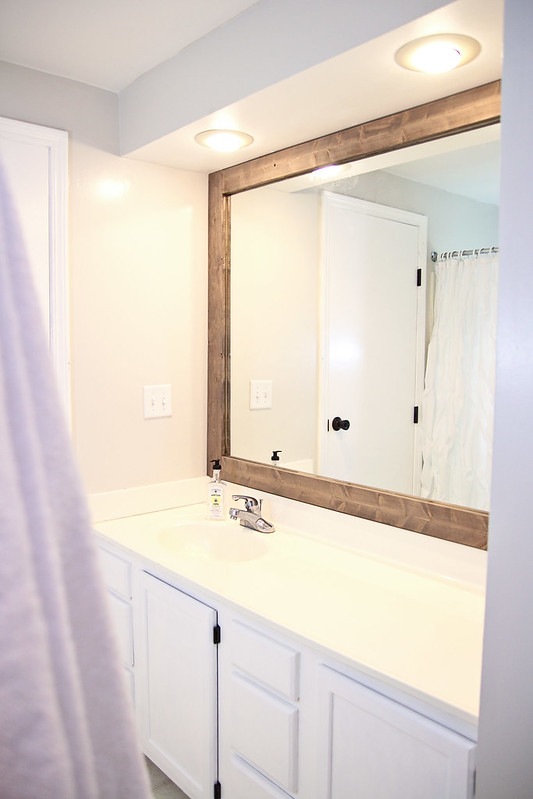
As you can see from the photo above, we also have a shower curtain in here now. This is the shower curtain that we’ve had since we moved to The Country House. I wasn’t sure if we would be able to squeeze a new one in the budget (we weren’t able to), so it wasn’t in the before photos.
In addition to the new recessed lighting, the hubs was also able to replace the light switches/plate, add a new thermostat, and update the GFCI outlet.
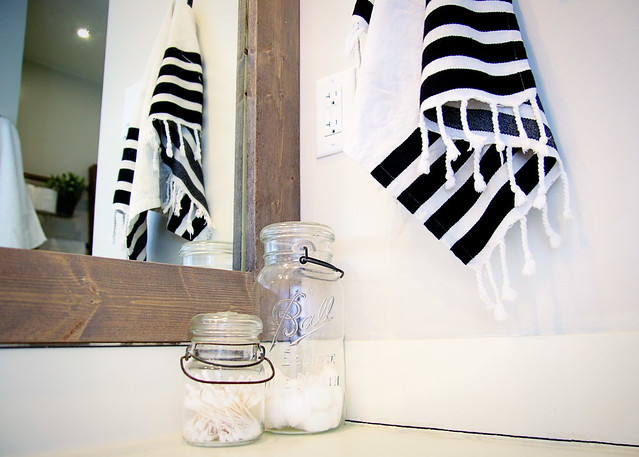
To add to the farmhouse feel, I used some old glass jars with lids to corral Q-tips and cotton balls. I also added my favorite JR Watkins hand soap.
That pretty much wraps up this room. For now. We still have plans to replace the flooring, find hardware for the cabinets, add another recessed light above the shower, and switch out the faucets on the sink and bathtub. Plus, I would like to add some kind of artwork/ wall decor. But that will have to wait because our $100 has been spent.
So, how much did we spend on this room makeover?
Good question. Let’s add things up!
Wall Paint (Benjamin Moore Pale Oak color matched to Glidden Duo) – $24.97
Door, Trim, and Cabinet Paint (extra leftover from our Daughter’s Bedroom Makeover) – $0
Rustoleum Oil Rubbed Bronze Spray Paint for Door Knobs (used leftovers) – $0
Wood for Ladder – $5.40
Wood for Mirror – $5.40
Minwax Stain (already owned, used on this project) – $0
White and Orange Acrylic paint (already owned) – $0
Part of a Roll of Wire Mesh – $2
Recessed Light Set – $10.98
Double Robe Hook – $3.25
Single Robe Hook – $3.25
Light Switches – $1.34
Switch Plate – $0.52
GFCI Outlet – $12.99
Thermostat – $14.64
Toilet Tank Handle – $18.08
Total – $102.82We were just a tiny bit over budget! These numbers are very close, if not exactly what the price was, not including tax. Did you see the last item I threw in there? Yeah. During the process of this makeover, our toilet tank handle broke, so we had to grab a new one.
I would also like to note that we already owned all of the tools to get this DIYing done (paint brushes, drop clothes, saws, a current indicator for the electrical work, etc.) so we didn’t have to spend extra money on that.
Let’s get one more look at the before and after.
We are truly loving the state of the bathroom now! It is welcoming and with the room lightened up, it is really a lot easier to keep clean (i.e. I can see the dirt.) What do you think? Not too shabby, right?
Did you miss a week of this makeover? Catch up below.
Week 1 | Week 2 | Week 3 | Week 4
And don’t forget to check out all of the amazing makeovers that my friends have done!
-
10 of the Best Coffee Bars
We’ve been working hard over here trying to get our bathroom makeover finished and will hopefully have the final reveal for you in the next day of two. However, since I’ve kind of been a blog slacker since the new year, I decided that I should post something fun and pretty for you guys in the meantime. Our coffee bar is one of the best things we’ve ever put together. It is so nice to have everything corralled together and has honestly saved us money, since we no longer make daily trips to the popular coffee shops! Check out 10 of the Best Coffee Bars I’ve found!
2. At the Picket Fence

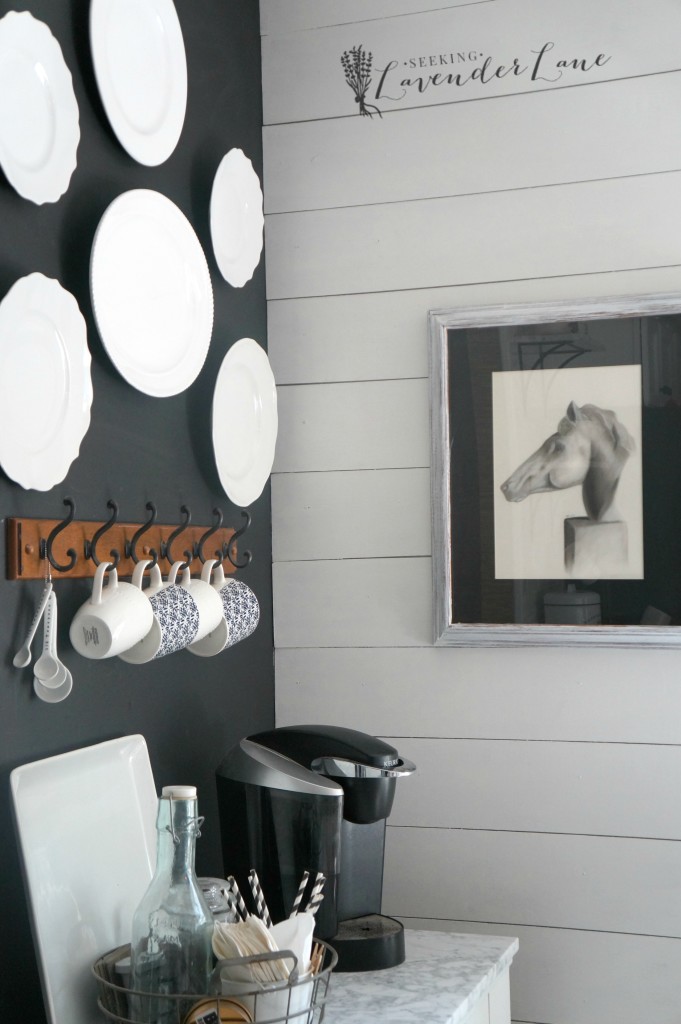
3. Seeking Lavender Lane
4. At Home With the Barkers

5. Refresh Restyle
6. Little Red Brick House

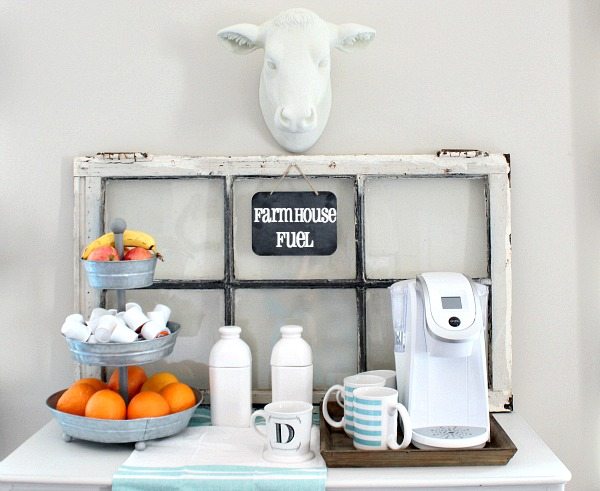
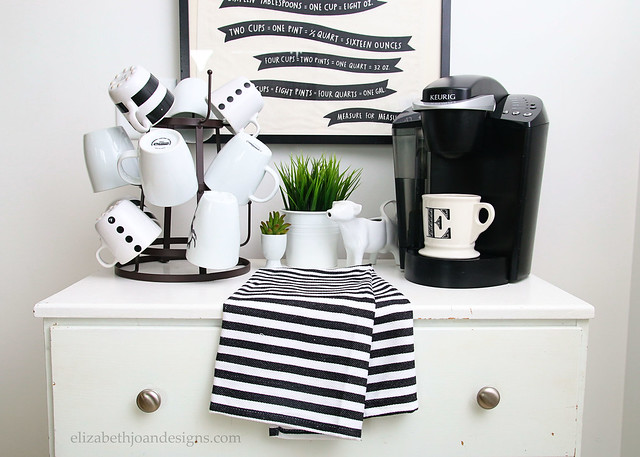
7. Elizabeth Joan Designs
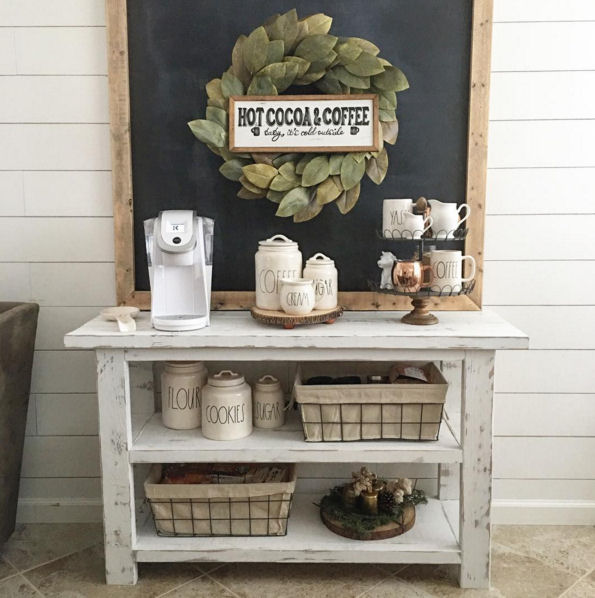
8. Liz Marie Blog

9. A Shade of Teal

10. Nelly Friedel
Which one is your favorite? Do you have your own coffee bar?