-
White Farmhouse Christmas Living Room
It’s that time of year again! ‘Tis the season for holiday decorations, package wrapping, and cheer. Our house recently got a little lovin’ in the decor department and I can’t wait to share our White Farmhouse Christmas Living Room with you today.

I’m super excited to be participating in the Home For The Holidays Christmas Tour Hop (along with 33 other talented home decor bloggers) hosted by Jenna at Wife In Progress. If you are stopping by from Twelve on Main, Welcome! I’m so glad you are here!

This post contains affiliate links. Click here to read my full disclosure.
Let’s start working our way around the room!
This year, we are keeping things pretty & simple. Since we are expecting a new arrival in late winter/early spring, our minds have been busy with trying to figure out how we are going to get through the massive to-do list we have vs. decorating for Christmas. Our living room is looking pretty lovely though!

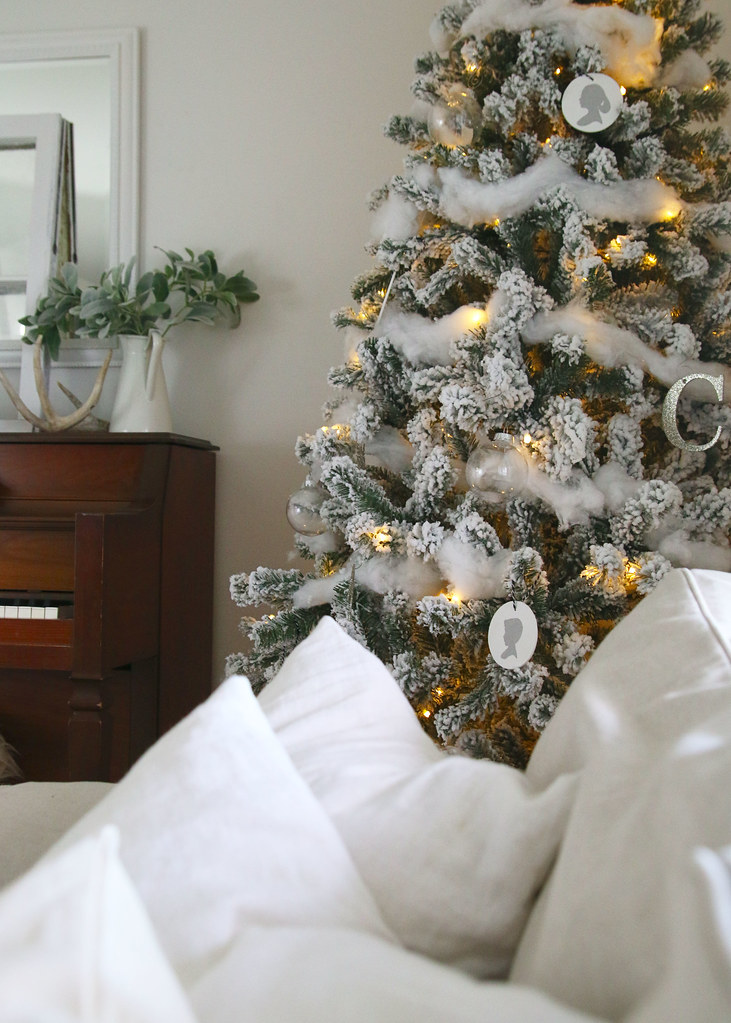
I’m always one for neutral decor and the holidays are no different. Bringing in more natural wood tones this year helped to compliment the greens of winter.
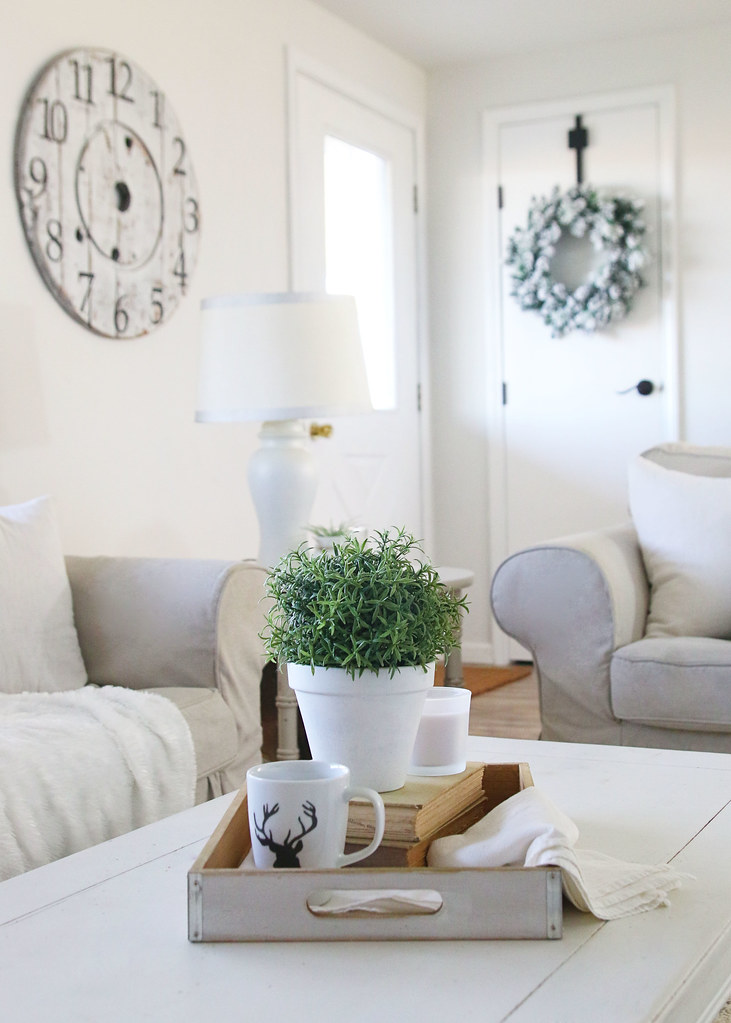
We also added some flocked pieces, like wreaths and garlands. I figured that they would go well with the new flocked Christmas tree we splurged on this year!
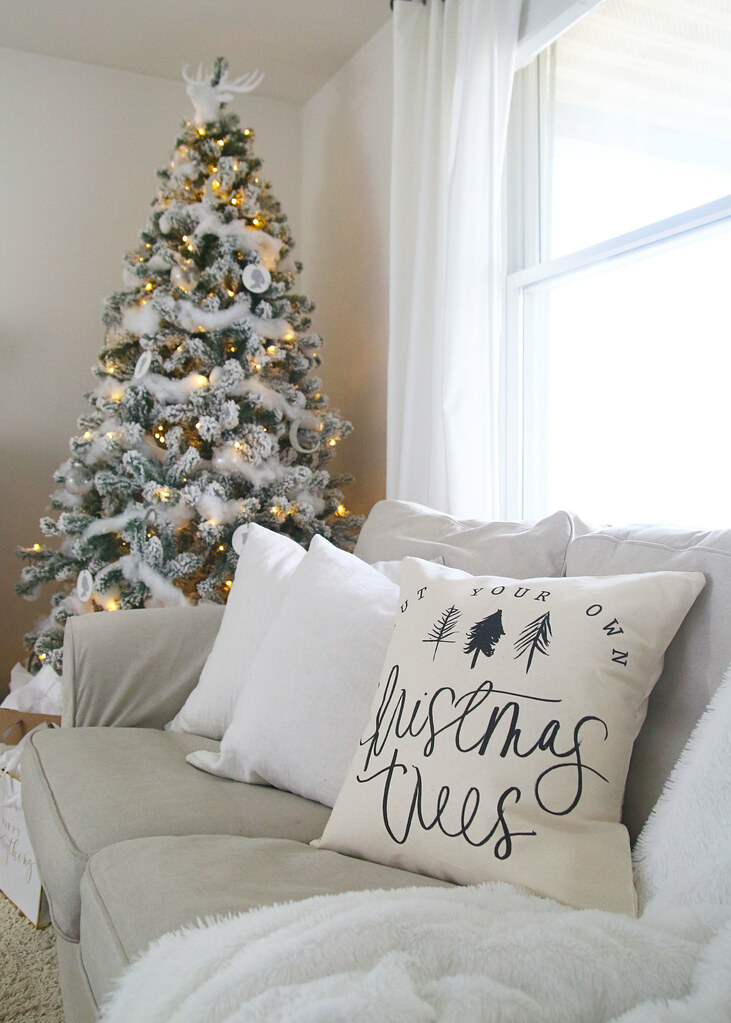
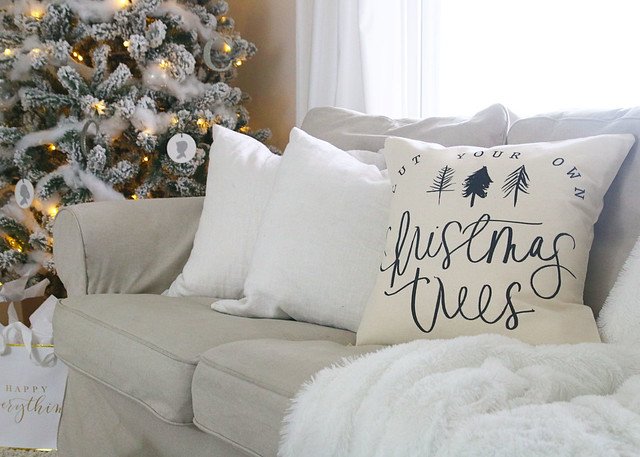
How fun is this pillow I snagged from PCBHome?! It goes perfectly with the neutral look we are rocking while still adding a little bit of whimsy.
Look at that beautiful Christmas tree below!!!
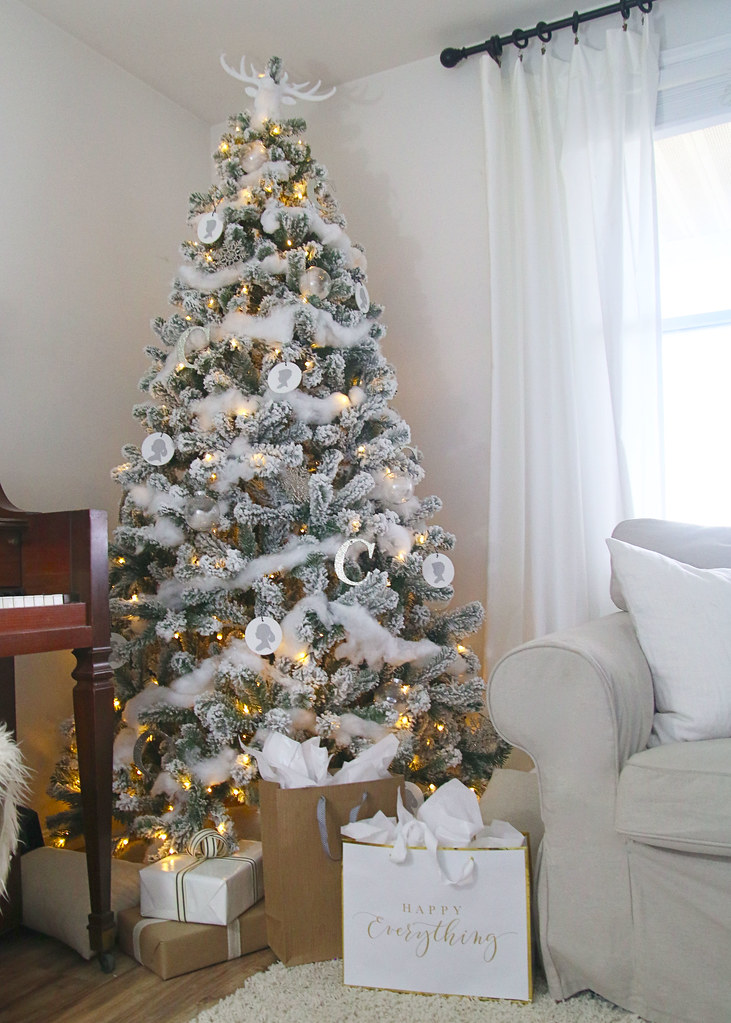
The tree is a little smaller than our previous one, so it’s been fun trying to figure out exactly where we want to put it. (It fits in so many more places!) At first, it was on the other side of the room by the t.v., but I think it works better over here next to the sofa.
There is still a lot of wrapping to get accomplished before December 25th, but I’m happy to report that we have almost all of the presents purchased. That is a real accomplishment in this household. Usually, we are pushing up until Christmas Eve!

Since we purchased a new tree this year, I kept the ornaments the same as last year. Between that and the pre-lit tree, decorating was a breeze.
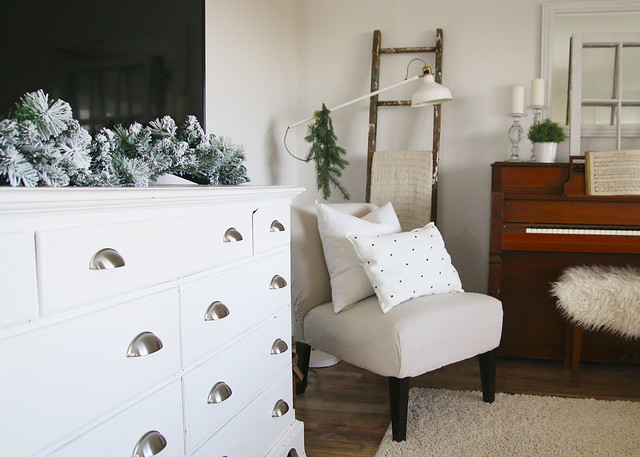
We don’t have a mantel in our home, so I always let the top of our piano pretend like it is one and decorate as such. Just a few pieces pulled from around the home create a collected and cohesive look.

This little corner is all dressed up with a cozy blanket, greenery, and comfy throw pillows. (Get the look for less: Hearth & Hand X Pattern Throw Pillow.)
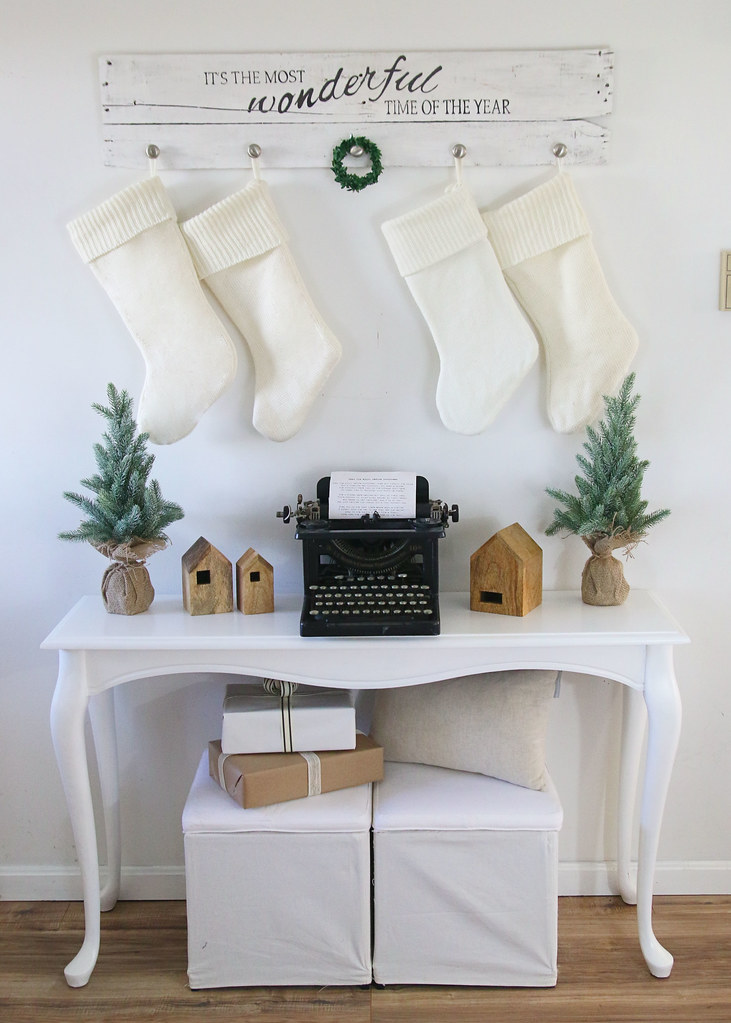
And that brings us back to the entryway. I love how light and bright this area is looking. It has definitely come a long way since last year!
SHOP THIS SPACE
Stocking Hanger | Stockings | Mini Trees – Similar |Nesting Houses | Mini Ottomans
Lucky for us, we already have 5 knobs for stockings so we won’t need to make a new stocking hanger next year when we add another one to the lineup. *wink*

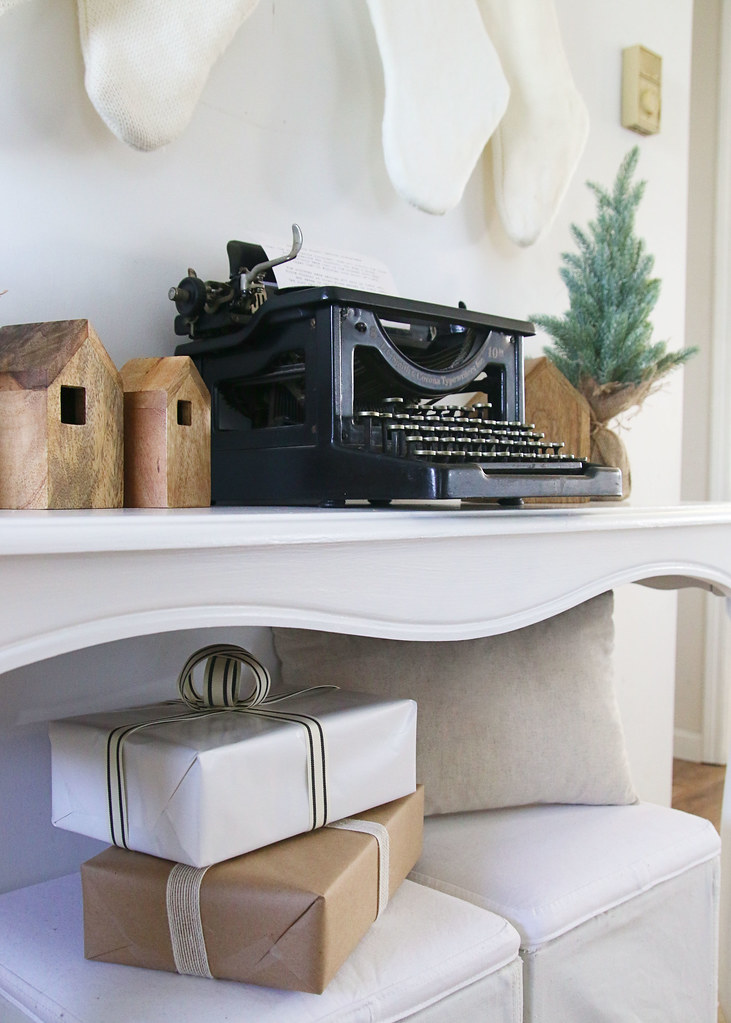
My favorite part of this space is still this antique typewriter that belonged to my grandmother. We love having sentimental pieces in our home!
I hope you enjoyed seeing our White Farmhouse Christmas Living Room! Your next stop on this blog hop is Ashley from Little Glass Jar who is sharing a beautiful home tour. You won’t be disappointed!
Monday

Wife in Progress // Inspiration for Moms // Sand Dollar Lane
Saw Nail and Paint // The Tattered Pew // The Fat Hydrangea // Worthing CourtTuesday

A Blue Nest // Sincerely, Marie Designs // Town and Country Living
Farmhouse on Boone // Postcards From The Ridge // The Frugal HomemakerWednesday

Little Glass Jar // North Country Nest // Bluesky at Home
Aratari at Home // Little House of Four // Twelve on Main // Elizabeth Joan DesignsThursday

AKA Design // The Everyday Home // On Sutton Place
Joy in Our Home // Noting Grace // Making It In The Mountains //ShabbyfufuFriday

Seeking Lavender Lane // My Creative Days // Thistledown Domestic Creations
The Honeycomb Home // Flatcreek Farmhouse // Green With Decor // Atta Girl Says -
$100 Room Challenge – Master Bedroom Final Reveal
A couple of months ago, I decided to take part in the $100 Room Challenge by redoing our master bedroom on a tight budget. To say that I dropped the ball on that is partially true. Yes, I took a super long blog/social media break (more on that in the next week), but we did actually finish the makeover back in August. Anyway, I’m here to share our Master Bedroom Final Reveal!

Some affiliate links are included below for convenience. Click here to read my full disclosure.
Doing a room makeover on a tight budget of just $100 can get pretty tricky.

We only made a couple of purchases for this space before all of our money was totally eaten up! So we had to come up with some creative ways to update this room using items we already owned!
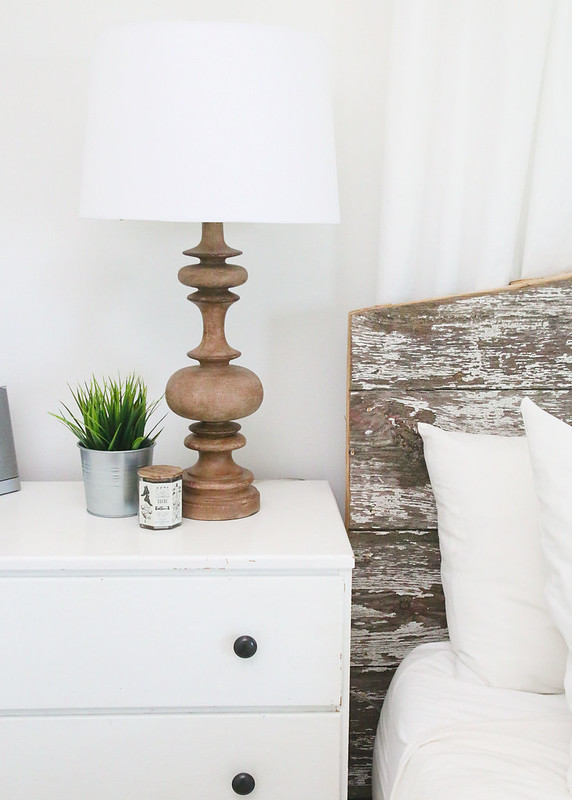
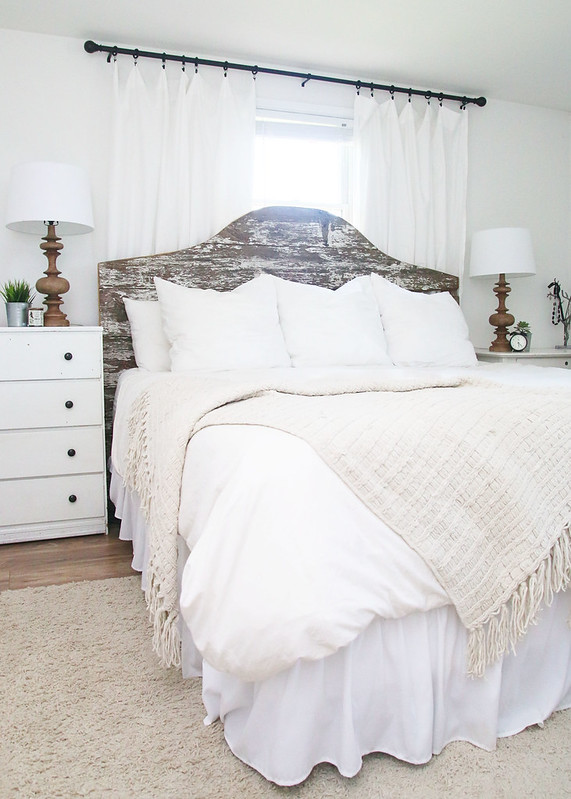
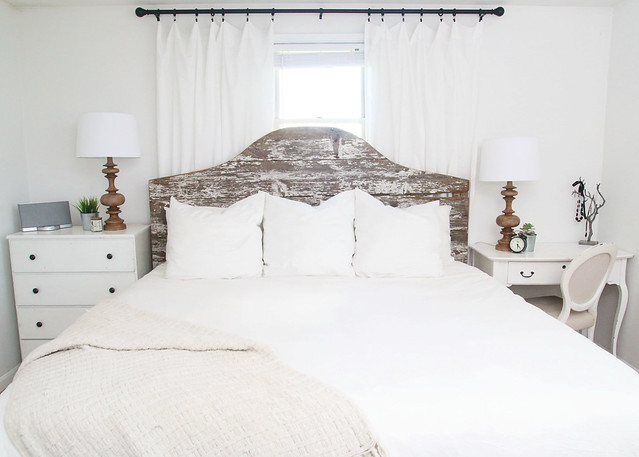
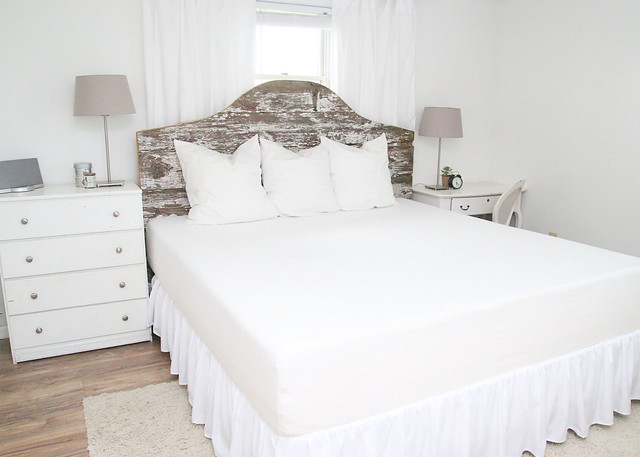
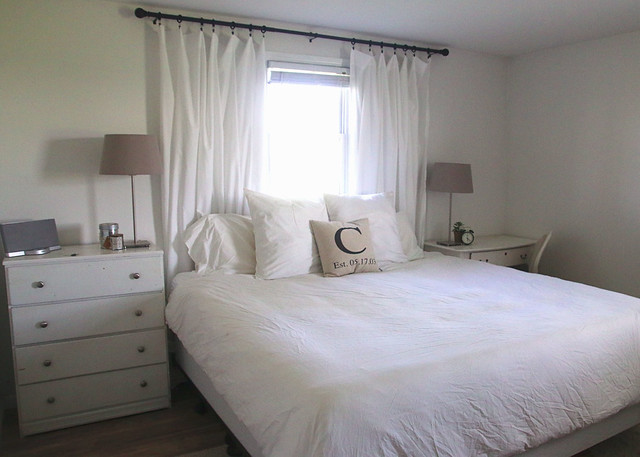
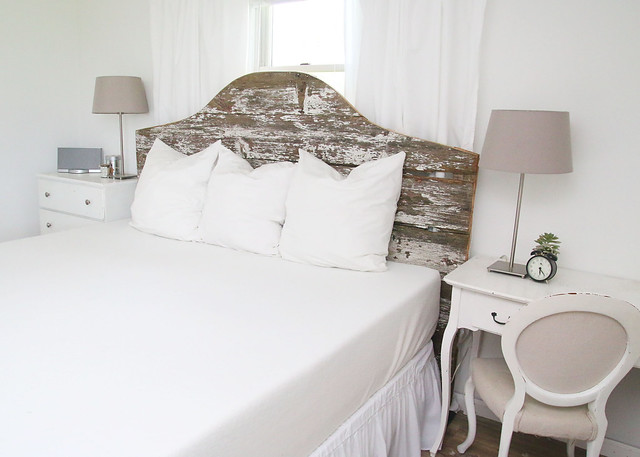
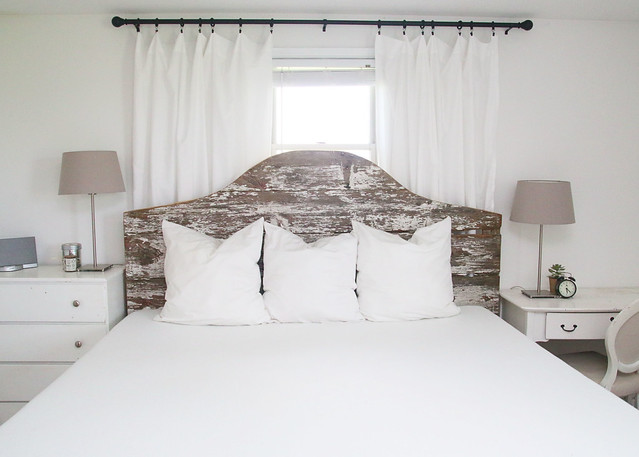
All of the money in our budget went towards these pretty turned wood lamp bases and shades, which we picked up from Target. Even though they were on sale (36.09 each for the bases and 18.99 each for the shades), we still went slightly over $100 when it all totaled up. However, I really like the look of the lamps and how they bring in some warmth to the stark white of the room, so it was definitely worth it!

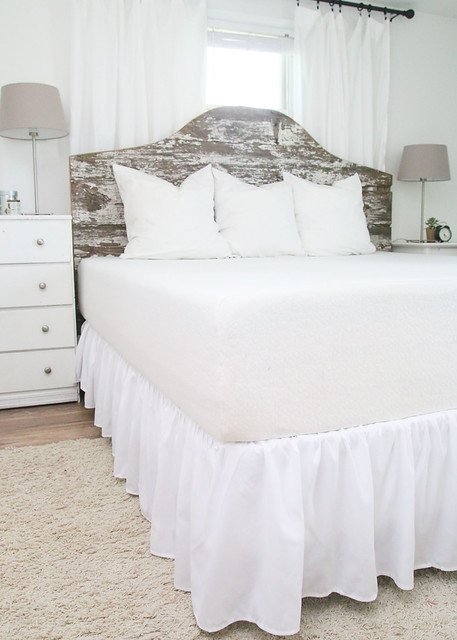
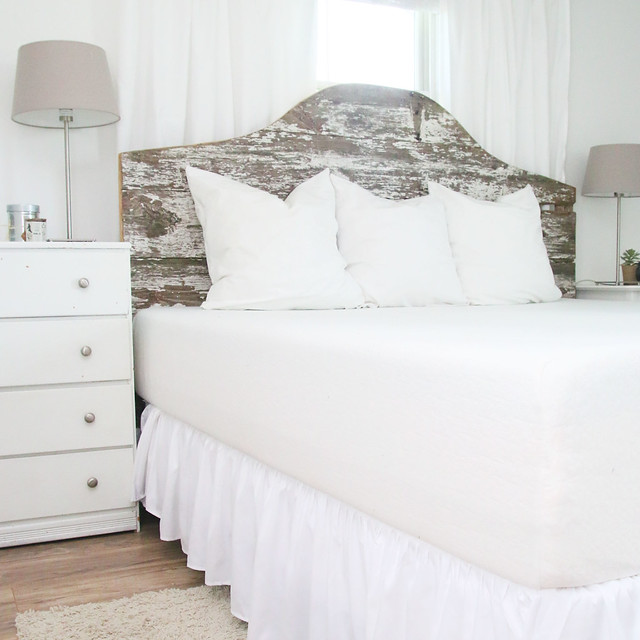
In my last post about this room, I shared how my hubby and I fashioned this DIY barn wood headboard. It is so cool to have such a sentimental piece (the wood is actually an old barn door from my grandparents’ house)!
Also, on this side of the room, we updated the knobs on the left dresser/nightstand with a little Oil Rubbed Bronze spray paint. A few accessories from other parts of the house were also pulled in to help the space look more finished. Oh, and I can’t forget the addition of a dust ruffle to hide all of the items stored under our bed.
On the other side of the room, we really made an impact with paint! Lucky for us, there was plenty of leftover white paint from previous projects, so that did not affect our budget at all.
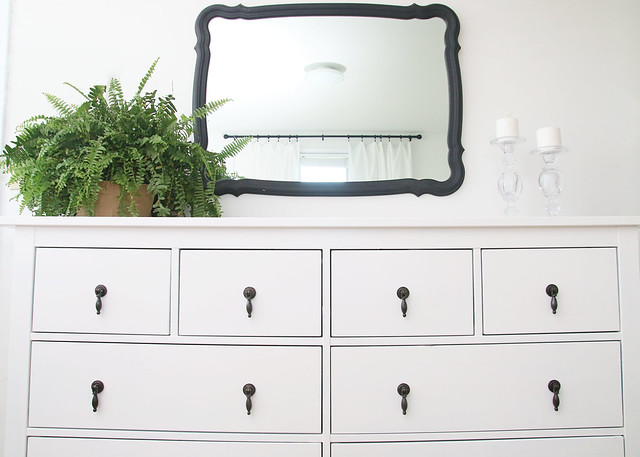
The white dresser fits this room so much better and those drop pull knobs now pop against the white backdrop.
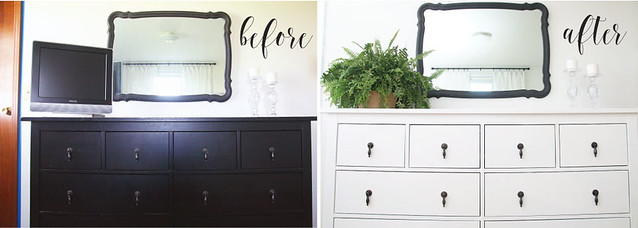
After removing the old tv and sending it to live in storage, it was time to bring in a few accessories to this space. To keep things simple and add a bit of color, I grabbed one of my ferns from the front porch. Yes, the scale is a bit off, but I didn’t want to clutter the dresser with knick-knacks. Plus, we already owned the fern, so it was a freebie addition to the bedroom.
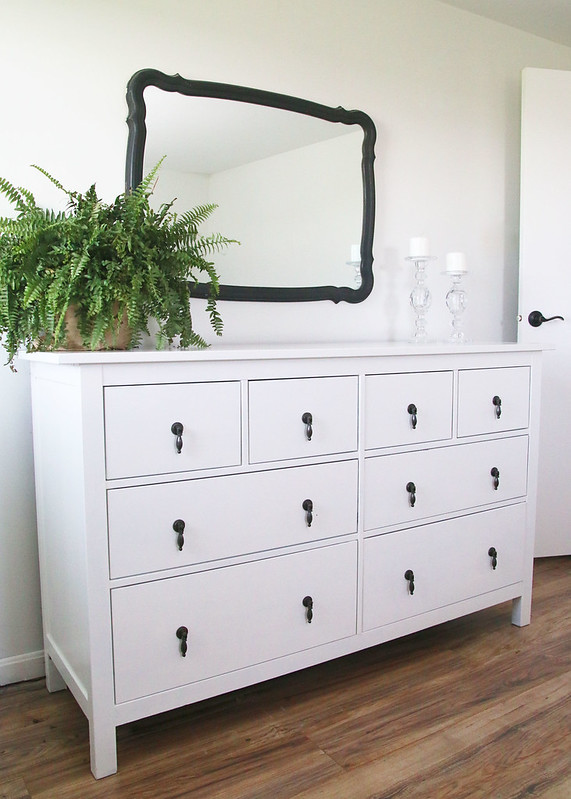
I also chose to keep the spindle glass candlesticks because I liked how they emulated the lamps at the opposite end of the room. This is a lesson in working with what you’ve got!

Let’s check back on the to-do list to see how we did!
Buy/Replace the lampsDIY a headboard for the bedAdd a few accessories to each side tablePut on the bed skirt that we’ve been too lazy/busy to addIron the duvet cover (also laziness)Paint the doors/frames (window frames are already painted)Relocate the TVAccessorize the dresserPaint the dresser
Yay! It looks like we were able to complete everything on the list and stayed pretty close to our $100 budget. (It came it at roughly $110 and change.)

How do you think we did? Would you have taken a chance and spent all of your budget on just a couple of lamps? Or would you put your money to use on something different to makeover this space? I would love to hear your thoughts!
-
Master Bedroom/Bedroom Progress: Room by Room Summer Series Week Five
I’m so glad you are here to take a look into our Master Bedroom Progress! It’s the 5th week of the Room by Room Summer Challenge and we are wanting to you get cozy with us in the in the “Owner’s Suite”. Ha! Who am I kidding? This is barely even a master bedroom since it is only a couple of feet bigger than the rest of the bedrooms.
We are currently working on giving this room a little bit of an update on a budget, but I wanted to share how our bedroom has changed since we’ve moved in.
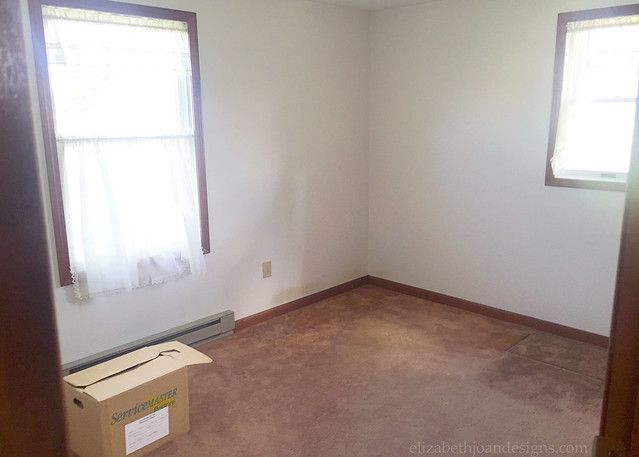
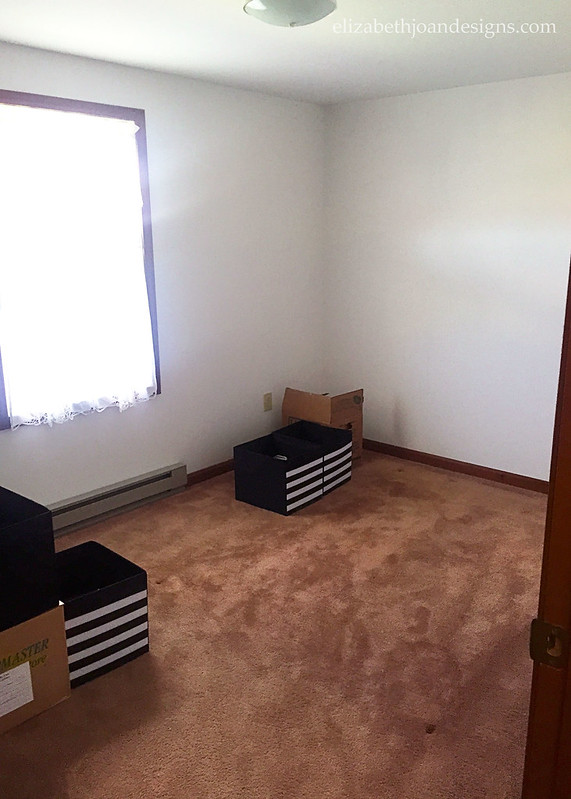
BEFORE
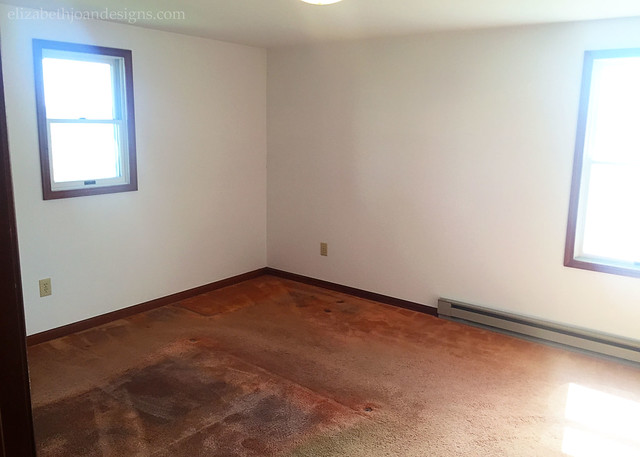
Yikes! That carpet was pretty rough! Like the rest of our house, our bedroom floors were all updated by my handy hubby. After a little bit of trim paint and new curtains, our bedroom was looking better, but it still needed some help.
DURING
We just added this new DIY barn wood headboard (below) and we love it! Since we are currently working on this room, I’m not going to go into detail about what we are planning to do in this post, but it is looking pretty good so far. (You can read all about the mini makeover here.)
So, I missed last week’s Bedrooms post for the Room by Room Summer Series. Since I’m not getting too deep into our master bedroom details, I thought I would share a little bit about our other bedrooms.
Tween Daughter’s Room
Our daughter’s room was the first room with fixed up when we moved in. Redoing this room was also our first experience with the One Room Challenge and it definitely went from drab to fab!
BEFORE
AFTER
Our daughter loves her room now! However, there may be a few small tweaks in this room’s future.
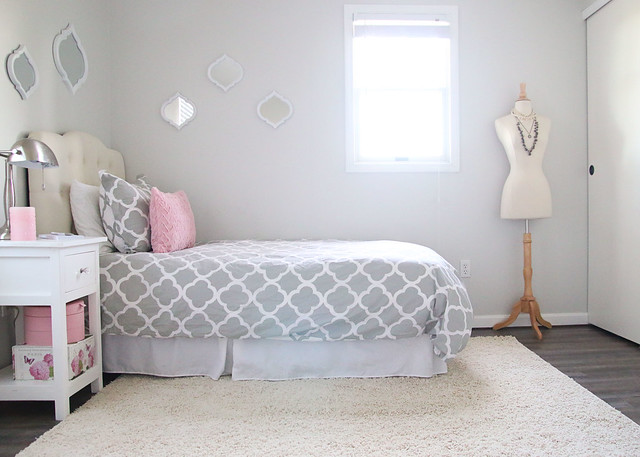
We want to add some shelving to the wall for a bit more storage. And maybe some sort of book page art for our avid reader!
Son’s Room
Once our Master Bedroom mini makeover is over, the next room on our to-do list is our son’s bedroom.
BEFORE
Thankfully, there won’t be a ton to do in here to get it finished. The little guy wants a shark themed room, so we will incorporate a few fun decor items and give it a bit of nautical feel. Hopefully, we can make that jive with the farmhouse look of the rest of the house. All of the furniture, except for a bookcase we purchase last year, is from his room in our previous house, as well as the bedding.
DURING
So that wraps up this week’s post about our bedrooms!
Did you miss a room in the series? Click below to check out each room.
Entry | Kitchen | Living Room | Bedrooms
I hope you will click on over to see what is going on with the master bedrooms below!
-
$100 Room Challenge Week 3 – DIY Barn Wood Headboard
About 1.5 months ago, we finally purchased the king sized bed that we had been wanting. Woohoo! Do you know how awesome it is to have so much space for sleeping? If you don’t, I will tell you that it is absolutely amazing!!! Anyway, since we already have the bed and we are working on our bedroom for the $100 Room Challenge, we decided to make a DIY Barn Wood Headboard for week 3.
See the before pics and our plan for the master bedroom.
This post contains affiliate links. Click here to read my full disclosure.
This piece of barn wood is actually a door from an old building that was at my grandparents’ house. After my grandparents passed away, my parents moved in and were nice enough to give it to us when they redid the building. It has just been sitting around waiting for the right time/use to come along.
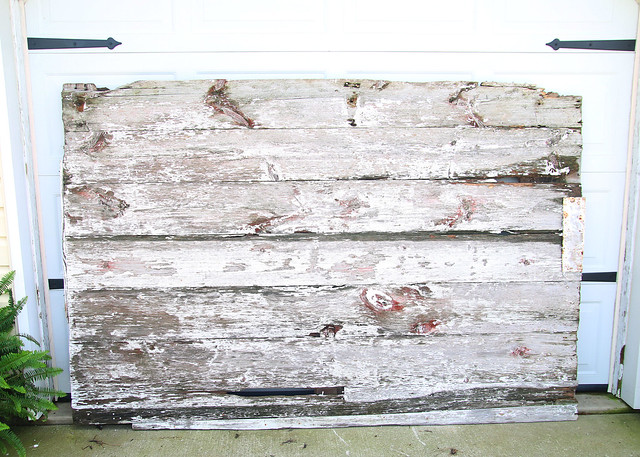
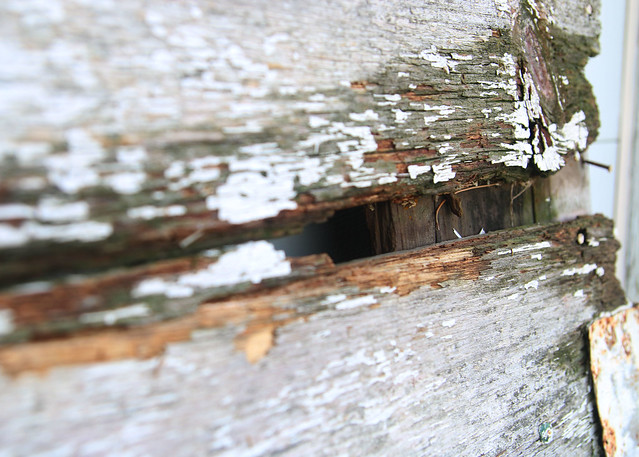
See how distressed it is, with the chippy paint and cracked wood? But that just gives it that much more character!
This project was a two person job. While my hubby, Chris, cleaned up the barn wood, I free handed a template for the top of the headboard. Then, I just taped it on and traced it with a sharpie. After that, Chris cut it out using a jigsaw and sanded while I made lunch. He also added a few coats of Polycrylic to seal everything in, just in case the existing paint had lead in it.

Finally, we lugged it inside and put it in place. Doesn’t it look good?

We noticed that after adding the Polycrylic, the wood actually darkened. I’m not sure if I will eventually add some white wash to the headboard to lighten it just a bit, but for now, we are sticking with it as is.
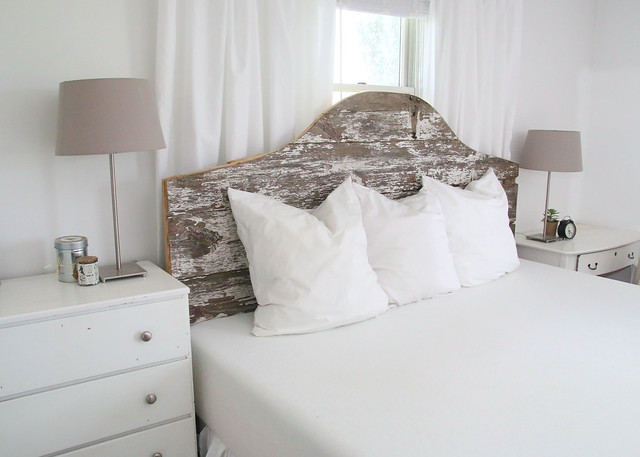
With just this one project, our master bedroom looks so much better! Not only are we sleeping better because of our new mattress and foundation, but this headboard really adds some farmhouse feels to the space. And that is just the look we are going for!
Oh, and I almost forgot! I finally put on the dust ruffle we purchased when we got the bed. #slacker
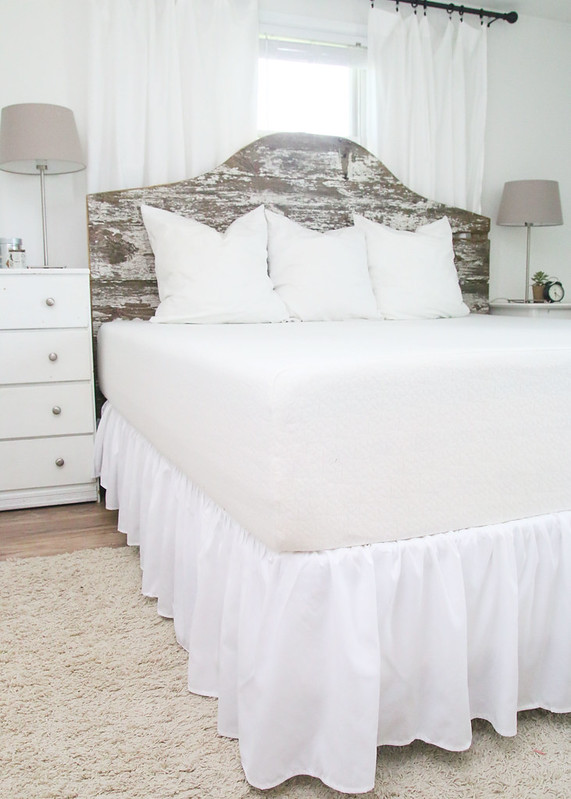
Don’t you think our DIY barn wood headboard turned out great?
This headboard adds the perfect amount of romance to the room with the soft curve but also keeps things from getting too girly with the rustic, chippy paint.
Did you miss a week of the $100 Room Challenge? Catch up now!
Week 1| Week 2 | Week 3 | Week 4 |See how the other participants are progressing by clicking the links below!