-
Build It Yourself, Family, Kids, Pets, Furniture Makeovers, Home Decor, One Room Challenge, Painting Projects, Room Makeovers, The Country House
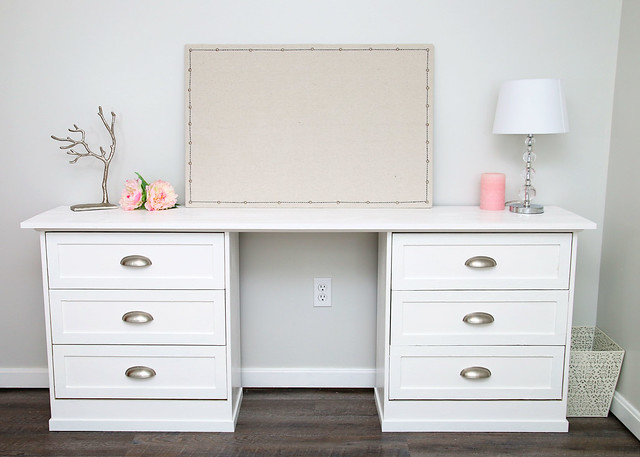
Ikea Rast Dresser Desk
Can you believe that it is week 5 of the One Room Challenge? That means that there is only one week left and oh my goodness, we have so much to finish up! Last week, I teased that we had an exciting build that I would be sharing this week and I’m happy to say that we’ve finished it! Check out our Ikea Rast Dresser Desk!
(Affiliate links included for your convenience. Click here to read my full disclosure.)
In the DIY blog world, completing a Rast hack is sort of a right of passage and there have been some really amazing variations done. So, when we started working on our tween daughter’s bedroom, we decided to use two unfinished ones that we had temporarily been using as nightstands.
Unfinished Ikea Rast 3-drawer chest

Even though she already has a small dresser, our daughter needed some more storage. She also needed a desk for homework and such. Since she doesn’t have a large room (10’x12′), finding a way to fit so many different types of furniture pieces in was a bit challenging. So, after some brainstorming, we decided to donate our nightstands to the cause and make what we lovingly refer to as a “Dresker”. That’s right. A dresser and a desk in one.
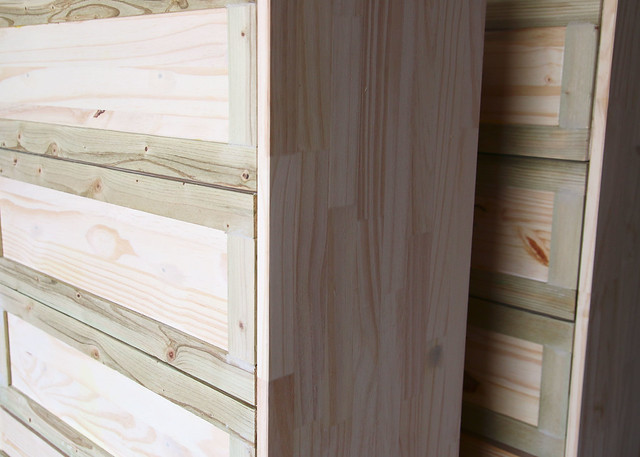
Since our little dressers were already put together, it was just a matter of spiffing them up. We started by adding lattice pieces to the front of the drawers, a 1×4 piece of wood to the bottom front, and more lattice as trim around the bottom.
Then they both got a few coats of white primer/paint.
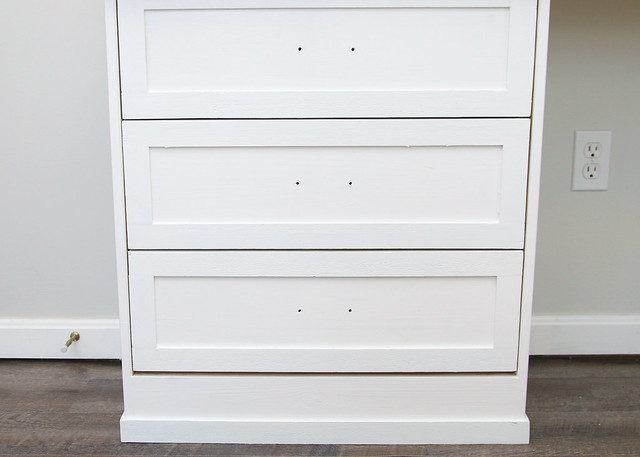
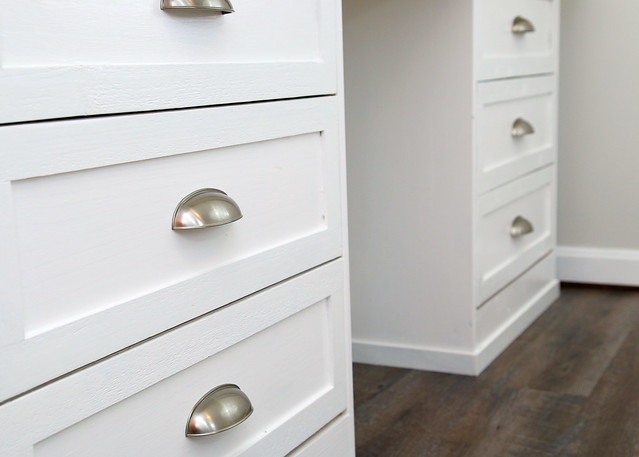
And some new, shiny cup pulls.
We brought them in from the garage after painting so that we could set them up in the room and attach the top pieces.

For the top, we used a 72″ x 15″ piece of poplar screwed in from inside the drawer and trimmed underneath with quarter round.

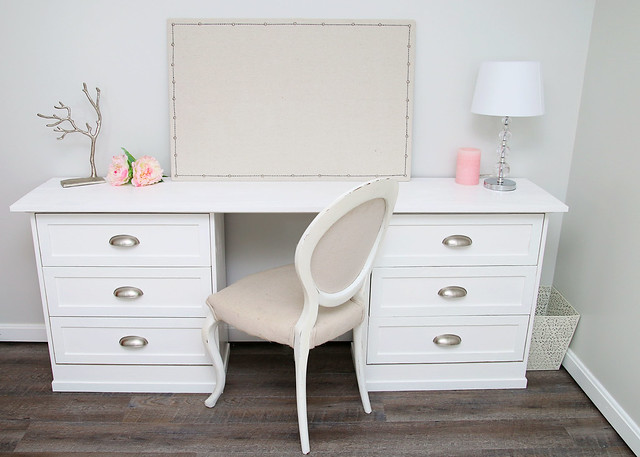
Finally, the top was painted to match and the dresker was finished!
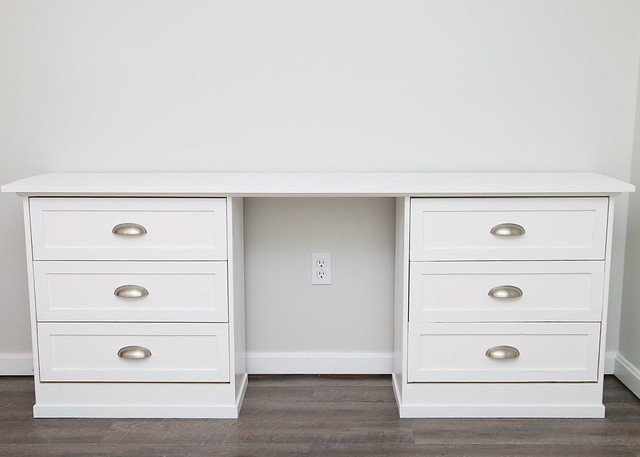
Isn’t it glorious? We are so happy with how it turned out and think that this piece will work great for the various needs of a growing tween.
With only one week left, I feel like we are going to be super busy over the next several days trying to finish up all that we have to do. Here’s what is still on the to-do list.
Remove old carpet and replace flooringPaint walls, trim, & doorsReplace old electrical plates, outlets, and switches- Add new lighting
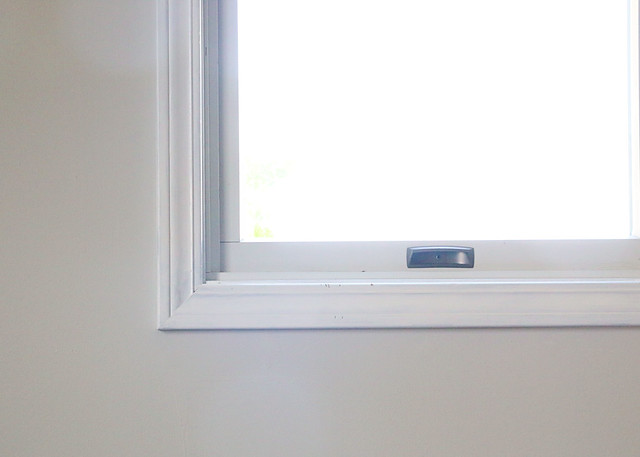
Install window coveringsCreate a workspace that can also double as clothes storage- Bring in color and textures with accessories
- Organize craft & art supplies, books, toys, and clothing
See what we’ve done in previous weeks!
Go to Week
1 || 2 || 3 || 4 || 5 || 6 -
New Flooring/Paint
Welcome to week three of the One Room Challenge! It has been so much fun to join in as a linking participant. I can’t believe how fast these three weeks have passed and how far we still have to go. However, I’m excited to report that we are finished the new flooring/paint.
If you are just joining in, let me get you caught up! During the first week, I shared the before photos of our daughter’s bedroom. And last week I gave you a glimpse into the design plans with a fun and girly mood board, plus a detailed project list for our tween bedroom makeover.
OK, back to the room…
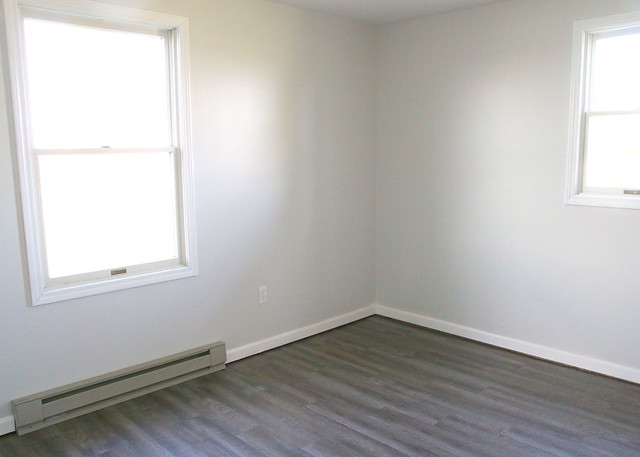
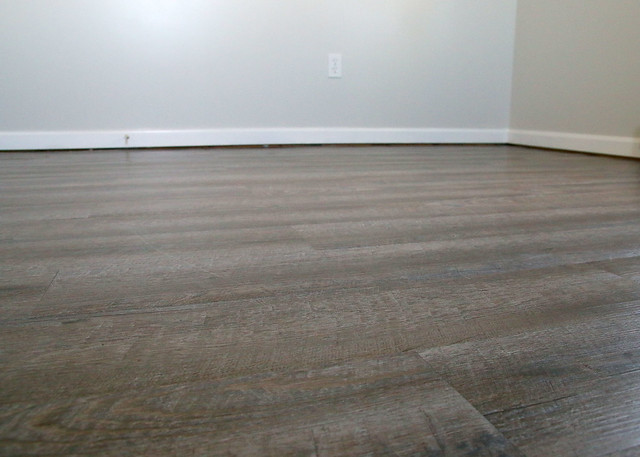
Originally, the walls in the bedroom were painted with a flat white paint and the floors were covered with stained, rusty/brown carpet. Not necessarily the look we were going for. So we decided to completely gut the room. Paint is always such a cheap and simple way to update a room, and since were are trying to stick to simple updates on our house, for now, we also went with an inexpensive flooring option.
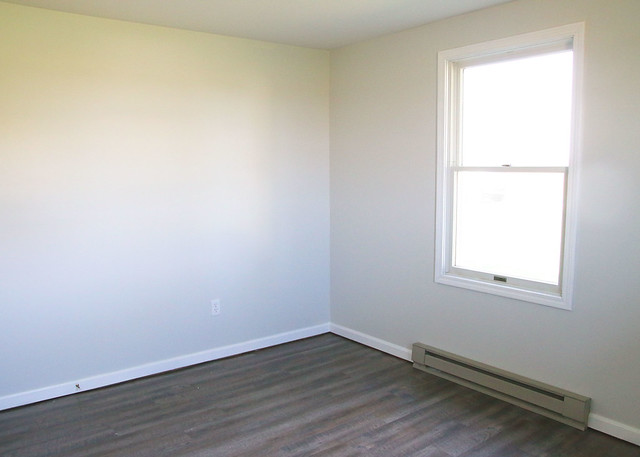
For the walls, we chose the color Gray Owl by Benjamin Moore lightened by 50%. We really liked the color in our powder room at The City House. The color is a warm gray with some yellow undertones, but not greige at all. It is the perfect light and airy color for this space.
I’ve mentioned before that we aren’t sure what the situation will be in a few years with this home since it is a bit smaller than we would like. Build on? Build new? Either way, for now, we opted for an inexpensive peel and stick wood look flooring. It was so easy to install! I loved it in the store, but when we put it in, I was no longer sure. I thought maybe it was too cool. However, after living with it for a week, I’ve changed my mind again. I’m in love!
It was so easy to install! I loved it in the store, but when we put it in, I was no longer sure. I thought maybe it was too cool. However, after living with it for a week, I’ve changed my mind again. I’m in love and I think the accessories and colors we are adding will warm it up.
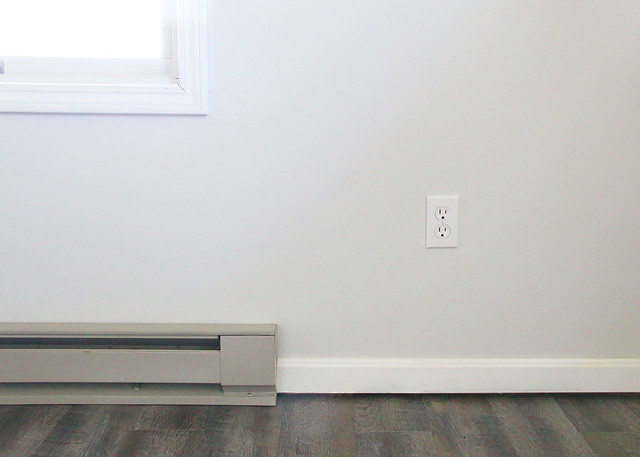
We also changed out all of the almond colored outlets/switches to match the white trim. However, I have yet to figure out what to do with that ugly electric baseboard heater. I’m not really sure if I can paint it with a high temp paint or not. It’s such a frustrating thing to try to decorate around (no curtains allowed). I would appreciate any advice or knowledge you may have for dealing with these eyesores!
So far, we are extremely happy with the results of this room! The paint color is perfect and the flooring makes the room feel clean. And since everyone loves a good before and after, here is how the room looked when we first moved in (left) and now (right). Huge difference, right? What do you think of our new flooring/paint?

We would love for you to continue following along!
-
Seasonal Character Door Hanger
This post is sponsored by The Home Depot. Click here for my full disclosure.
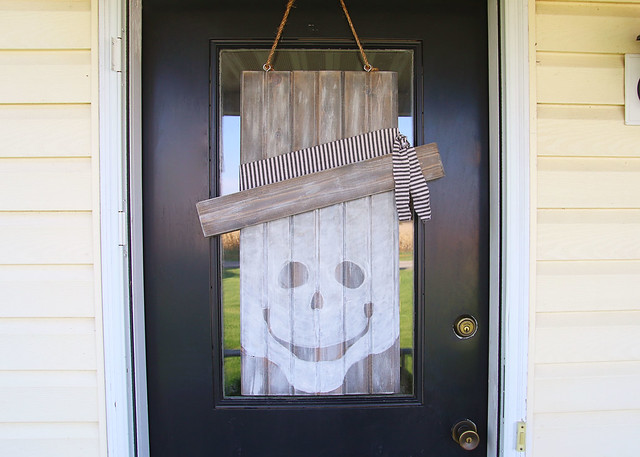
#sponsored #DIHWorkshopWoohoo! Today is the day that I get to show you my Halloween themed version of the Seasonal Character Door Hanger. It was so fun to actually get my hands on some power tools and build this project on my own!
You can build and style your own too!
If you enjoy creating projects, The Home Depot offers Workshops at all of their locations for do-it-yourselfers of all ages and experience levels. There are three types of Workshops offered:
- Do-It-Yourself (DIY)
- Do-It-Herself (DIH)
- Kids
As a memory refresher, here is the original image supplied by The Home Depot for this project. If you sign up for a workshop, customers can learn how to build décor projects, how to make easy home repairs and how to operate tools through demonstrations and step-by-step instructions. Visit http://workshops.homedepot.com to learn more.

OK. Here is mine.
I decided that I wanted to create a neutral skeleton look for my Seasonal Character Door Hanger to go with our light & neutral decor.
I’m not sure if this cute guy looks more like a skeleton, a ghost, or a jack-o-lantern, but he is sure is happy and welcoming. Maybe he needs some teeth?
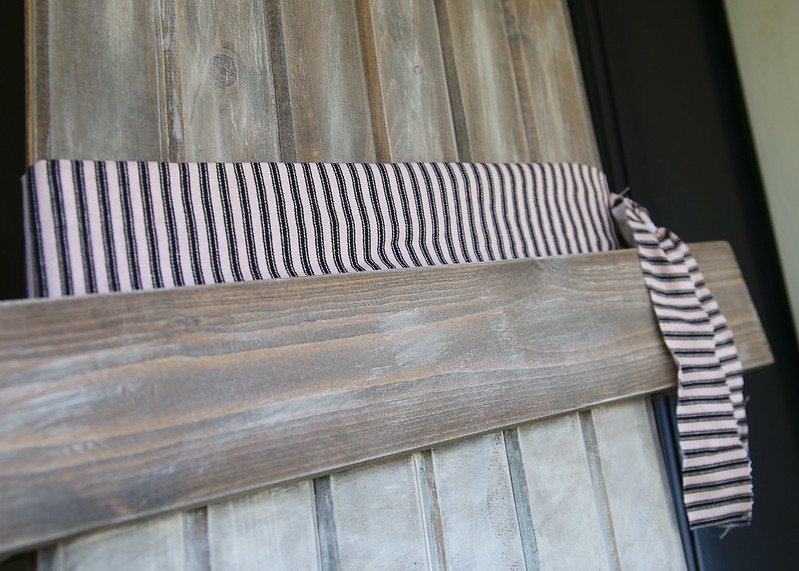
The building process was super easy. (Click here to sign up to make your own at your local Home Depot store.) After putting this together, I stained the wood with a combo of Minwax Jacobean and Classic Gray. Next, I dry brushed the entire thing with white chalk paint. Then, with a pencil, I freehand the face and filled it in with a thicker application of my dry brushing technique, which gave it an airy, ghosty feel.
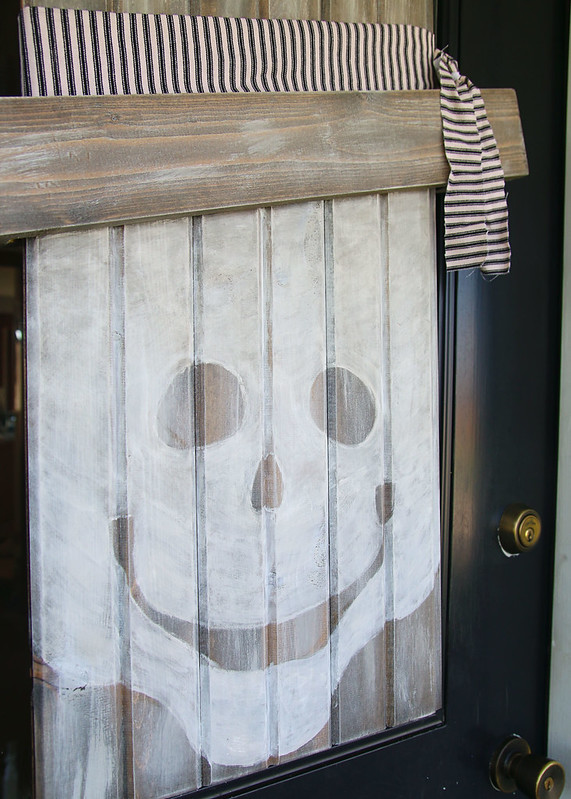
I added my favorite black and cream ticking fabric around the top of the hat brim to finish off the look.
Isn’t this guy a cutie? If I wouldn’t get crazy looks, I would consider leaving him up year round.

If you liked this project, you can register here to learn how to build your own in person at your local Home Depot Workshops. You should also definitely check out the other amazing and unique versions of the seasonal character door hanger from the participants in this Workshop Virtual Party!
Live Laugh Rowe
The Turquoise Home
Cherished Bliss
TIDBITS
Refresh Restyle
The Creative Mom
My Sister’s Suitcase
My Love 2 Create
Sweet Charli
Not Just A Housewife
Domestically Speaking
Lovely Etc
Redhead Can Decorate
Yesterday on Tuesday
Elizabeth Joan Design
The Rustic Life
One Artsy Mama
Tonality Designs
She Leaves A Little Sparkle
Our Vintage Nest
All Things Thrifty
Our Thrifty Ideas
Junque Cottage
The Crafted Sparrow
Sweet Rose Studio -
Curb Appeal Update
I can’t wait to share my simple curb appeal update with you guys today! I’m a huge believer that little changes, like painting, can make a big difference in how spaces look. It only takes a little bit of time to have a huge impact. Check it out!

This post contains affiliate links for your convenience. Click here for my full disclosure policy.
As I’ve mentioned before, our Country House is nothing amazingly special. It’s comfy and cozy and works for our general needs, but typically I would not have thought about purchasing a small yellow ranch home. (Read all about our decision to buy this house by clicking here.)
The Shutters

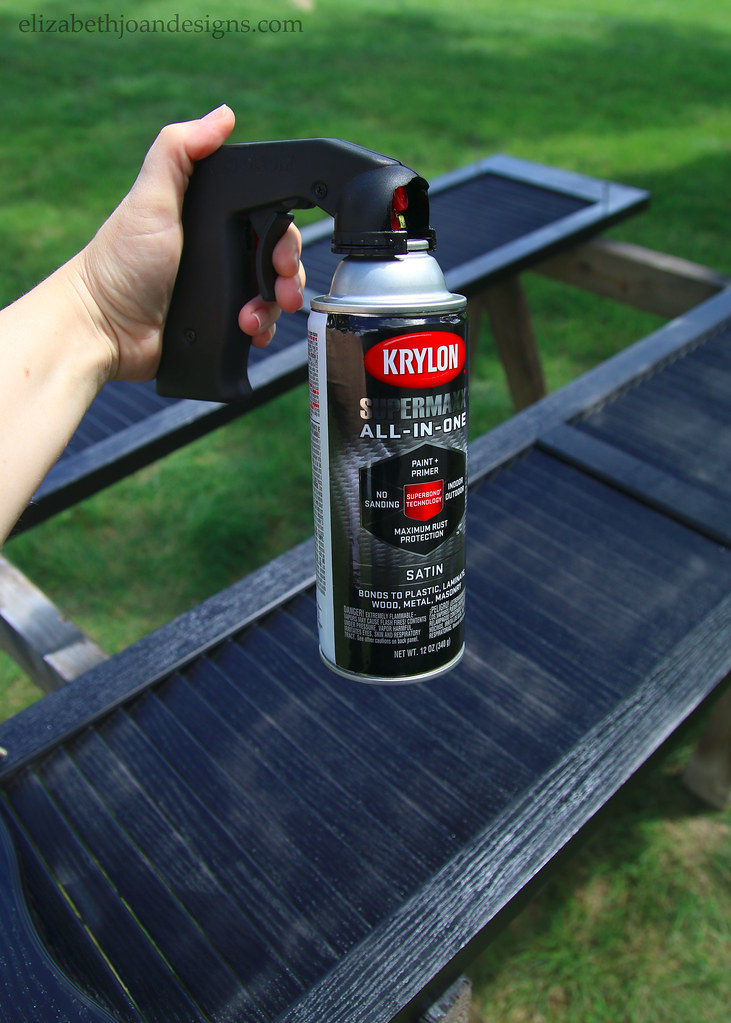
The outside of our home was very plain, with light yellow siding and chippy white shutters. (Nevermind the ugly bushes; those will be replaced in due time.) After we updated our garage doors to give them a little more pizazz, I knew that there were still a few simple changes that we could do with paint. So, we brainstormed for a bit and decided to paint our shutters. After removing all of the shutters, we gave them a couple of coats each of Krylon Black Satin paint.
Once they had dried, we power washed the siding and hung them back up.

Doesn’t the black just make them pop? We love it!

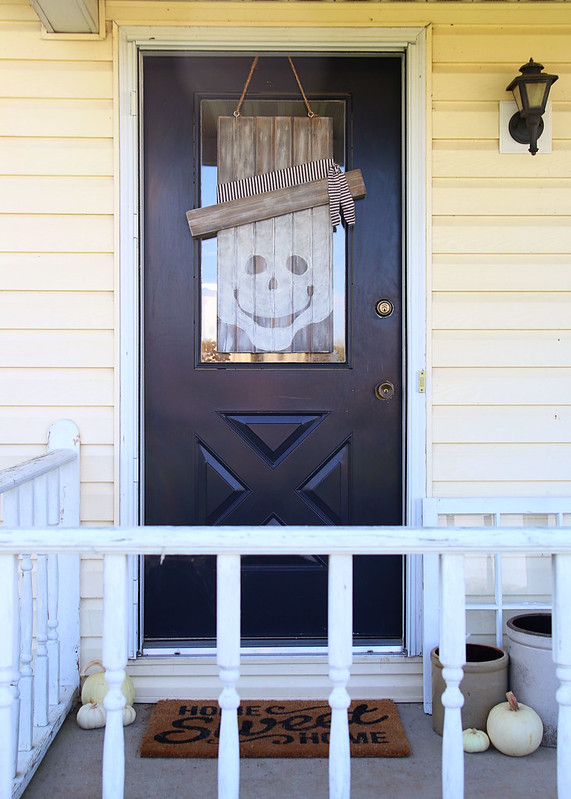
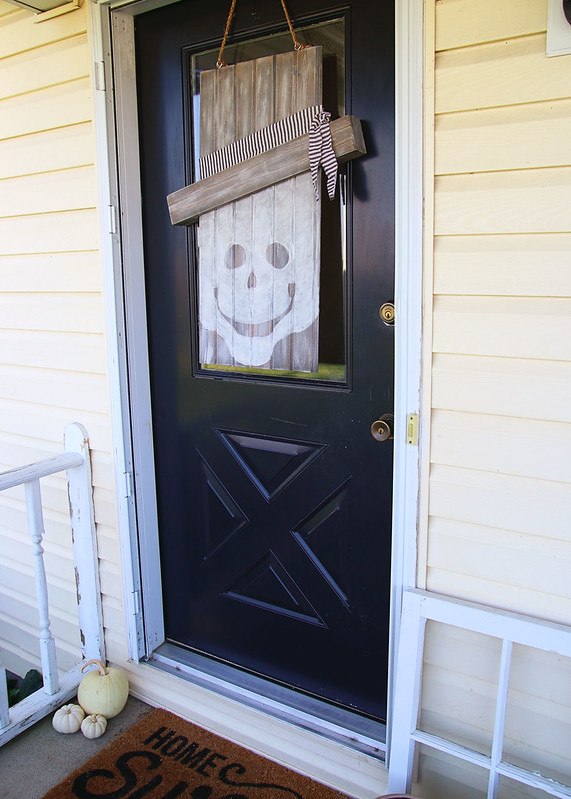
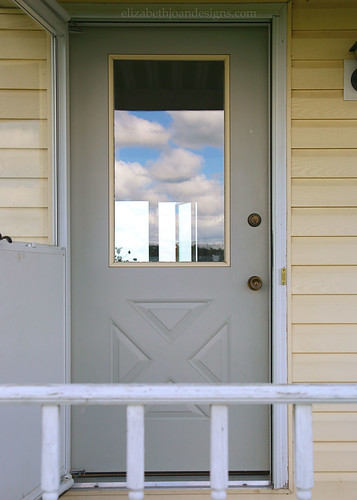
The Front Door
Since the shutters looked so much better after such an easy fix, we decided that our front door also needed a change.

First, we opted to permanently remove the storm door. Unfortunately, the old door was a dingy gray color and certainly didn’t look welcoming at all.
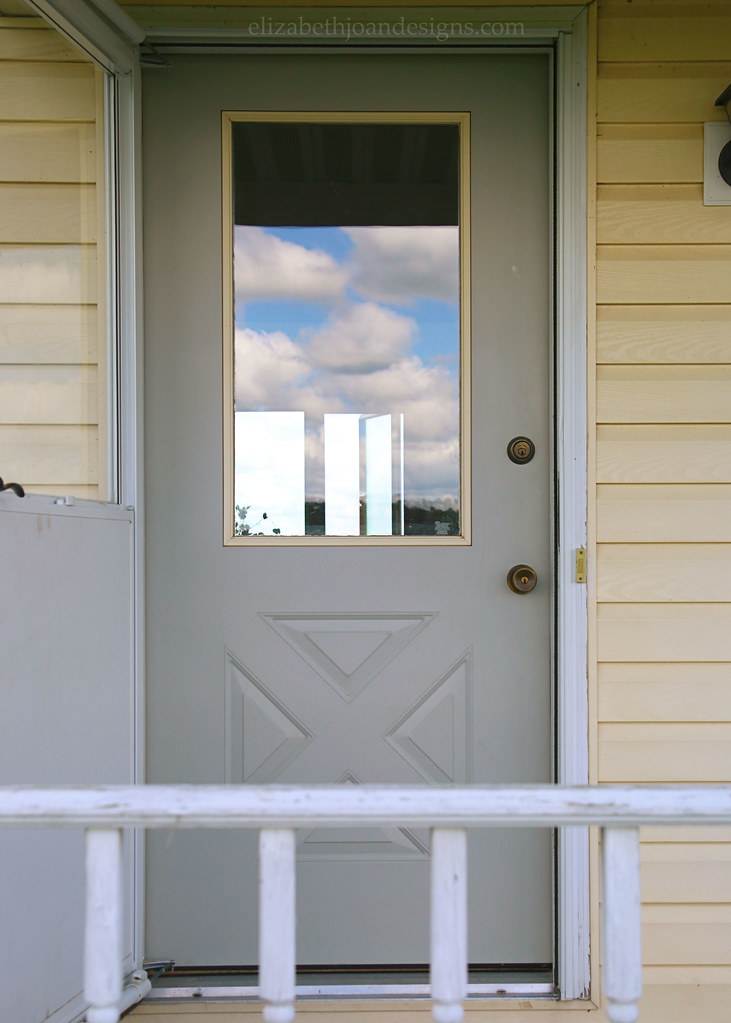
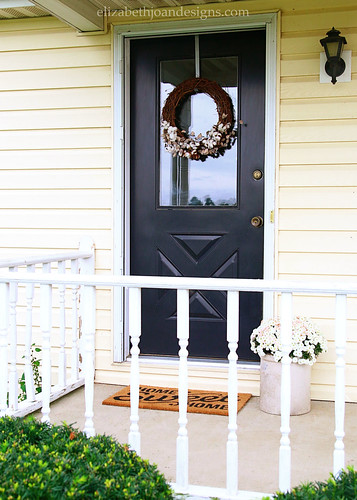
Next, we painted our front door with Valspar’s Kettle Black (semi-gloss). Just covering up the gray and cream made such a huge impact.
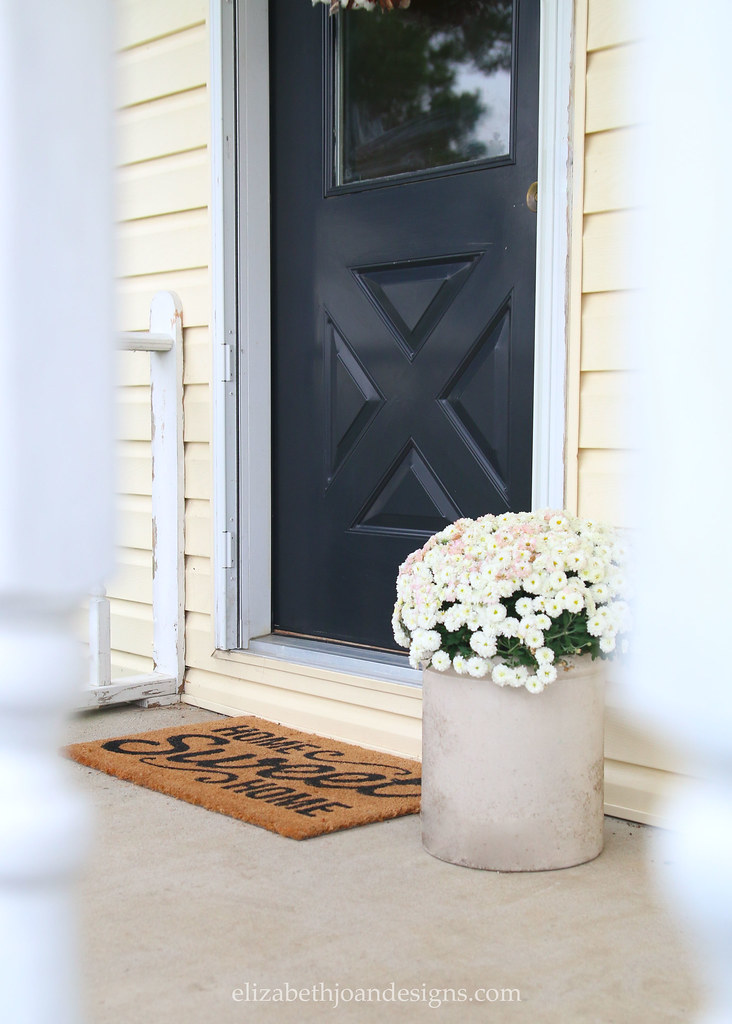
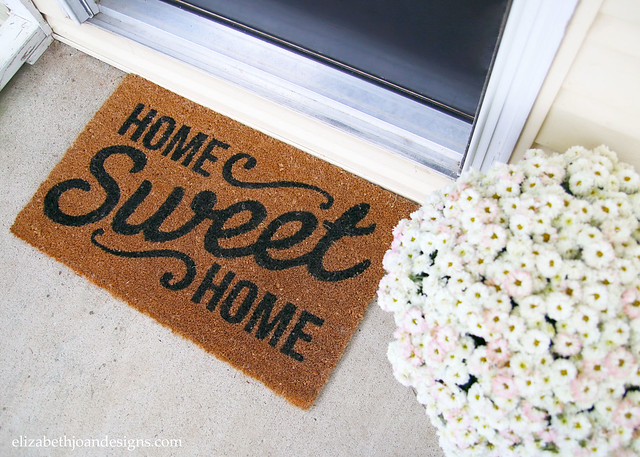
Of course, I had to add a few extra accessories, like the cute “Home Sweet Home” rug and some seasonal flowers in a vintage crock.
Just look at that before and after! Painting truly makes such a difference.
We can’t wait to do more updates to the curb appeal of our home, but for now, that will have to wait, since we are getting started on the inside this weekend. Yay! What do you think of our curb appeal update? We absolutely love the black, but would you have chosen a different color for the shutters or the door? We would love to hear from you! To see more updates and sneak peeks, follow me on Instagram!