-
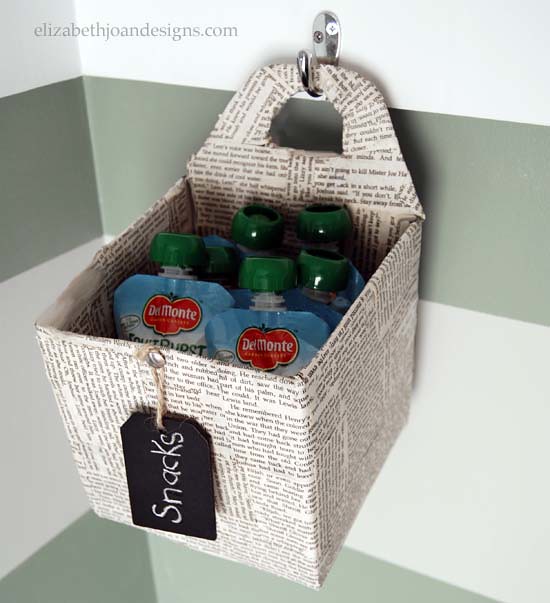
DIY Hanging Snack Basket
I shared earlier this week my thoughts and feelings on both of my little men attending preschool this year. In that post, I gave you a sneak peak of a DIY hanging snack basket I had created to make the transitions to and from school go a little smoother. This snack station will be kept near our front door to give myself easy access to snacks for the boys on the way out or in.
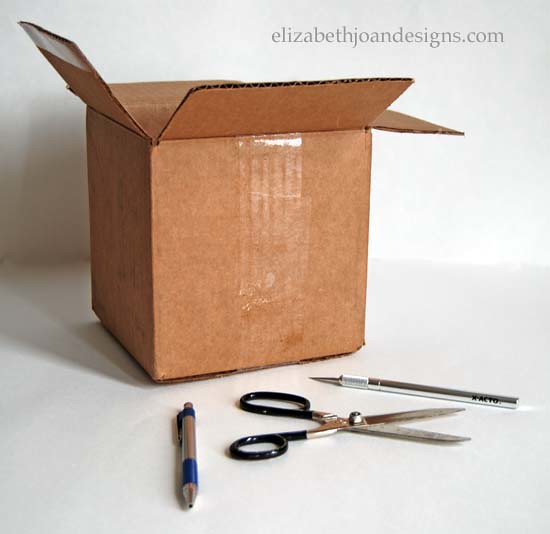
Here is how I made it. Supplies
1 Small cardboard box
Scissors
X-acto knife
Elmer’s glue
Paint brush
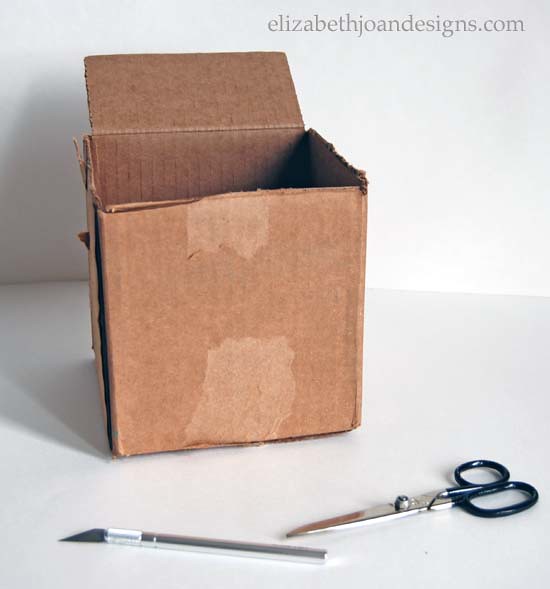
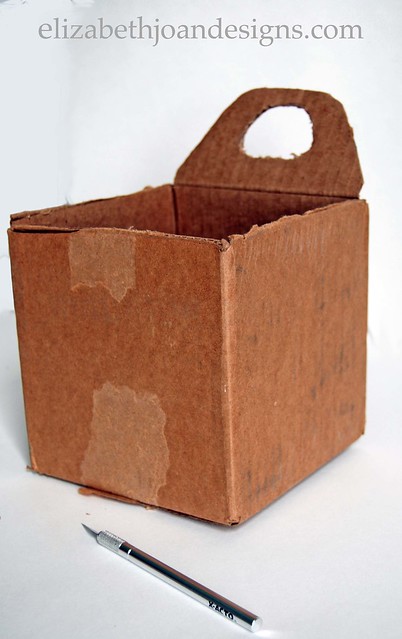
1 Old bookFirst, I cut three flaps off the top of the cardboard box. This left me with just one flap left to make the handle.
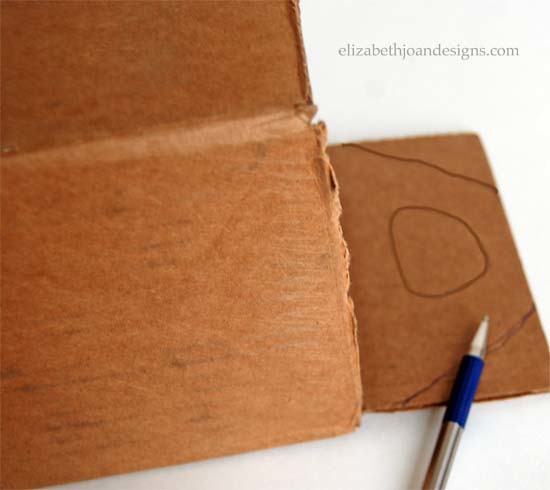
Next, I used a pen to sketch a handle on the remaining flap and cut it out with an X-Acto knife. I did this processes very carefully as X-Acto knives can be really sharp and I didn’t want to lose any fingers.
Okay, here is where the project went wacky.
I thought, hey it would be so awesome if I made this cardboard box look like it was made out of planks of wood, but not actually use wood for it. Well, once again, I was wrong. I used craft paper and used a tool to make wood grain on the paper and glued it to the box. It was an odd color, but I thought “hey I will move on with it anyways.” When I stained and polyurethaned the box, the paper started to bubble up and looked really bad and the color did not improve. Bummer!
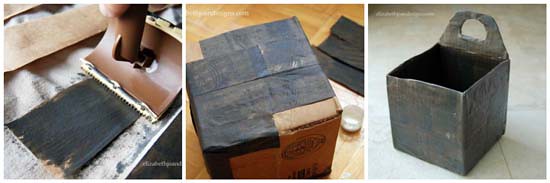
It was time to scratch that idea and move on. My first attempt was a fail, but I was able to salvage the box to push forward to make something really cute. Plus it made the final project more sturdy.
I decided that covering the box with just about anything would be an improvement. After giving it some thought, I chose book pages.
First, I ripped out pages from an old book. This book had been well read and had lived a great life. It was time to give it a new purpose.
Next, using a solution of Elmer’s glue and water I brushed the glue on the pages and attached them to the box. To give the design interest I rotated the pages to where some were facing right-side up, upside down and sideways.
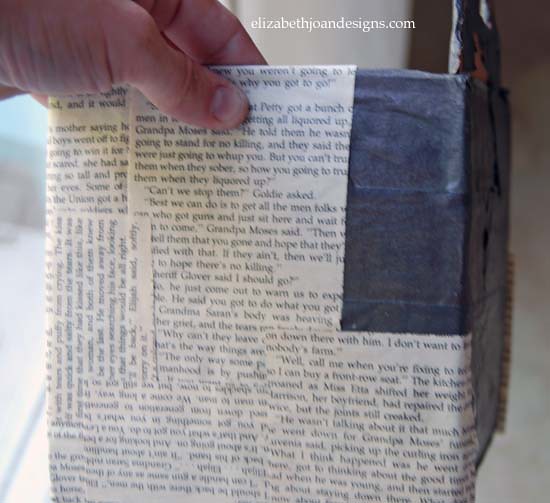
I continued applying book pages until the box was fully covered.
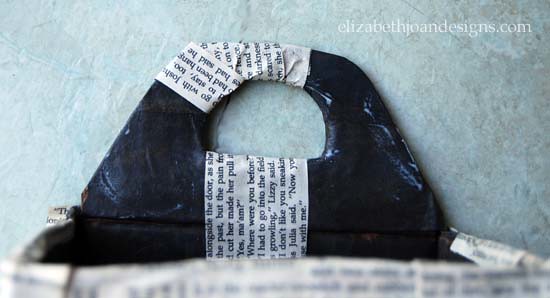
Finally, I added this really cute chalkboard tag I won in a giveaway from Little House Of Four. It was the perfect touch.
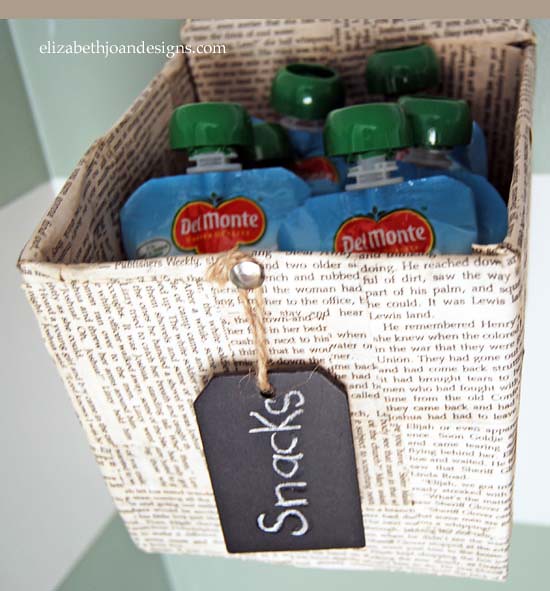
Leaving the house with my two preschoolers can sometimes be a fight, so this hanging snack basket will be extremely convenient to just grab a snack and go. Love how it turned out too!
We would love hear any tips and tricks you may have that make the school mornings go a little smoother.
_______________________________________________________________________________ You may also like:

Ruler Succulent Planter 
Tips for 1st Day of School 
Chalk Cloth Map 
Lunch Notes -
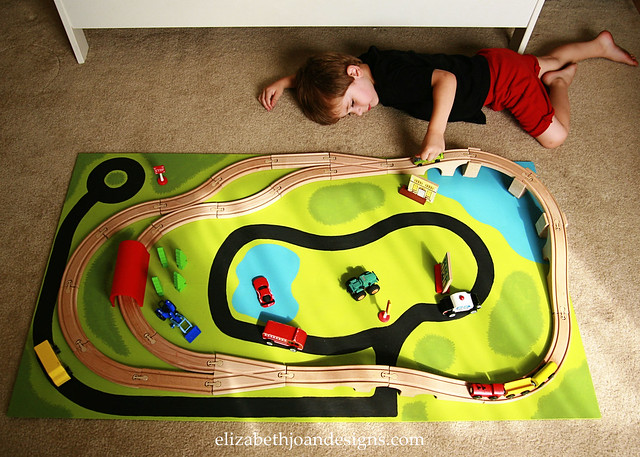
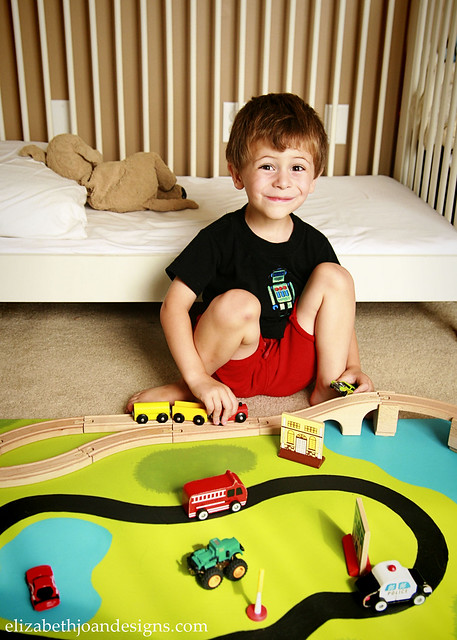
Train and Cars Board
Our 3 year old son loves to play with his cars and trains. He is OBSESSED. He is always toting one around in his hand throughout the house, stores and restaurants. So, I’m sure it is no surprise that he is infatuated with the train tables at Barnes and Noble and at various toy stores.
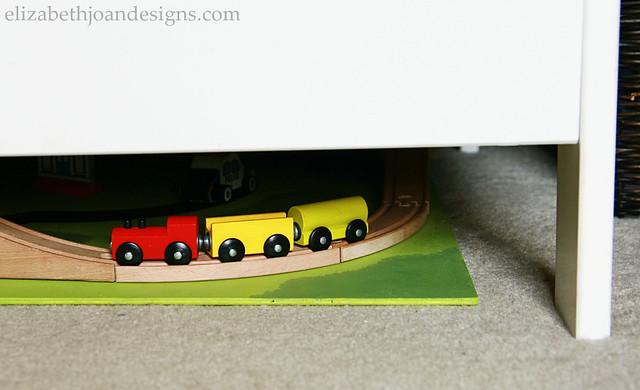
Unfortunately, we just don’t have room for another large piece of furniture in our home, without getting rid of something else. So a train table is out of the question. However, I did find some unused real estate under the little guy’s toddler bed (aka, crib minus the front side,) which meant if we measured everything correctly, we could make a train and cars board that could neatly slide underneath the bed and out of the way. Yay for extra storage!
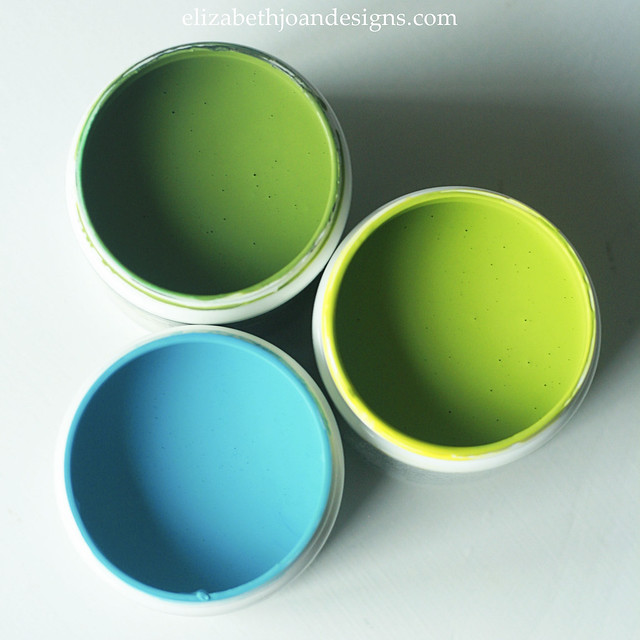
Making the board was super easy and can be completely customized to your own tastes. We knew we needed something big enough to encompass the wooden train and space for roads too. We started with some thin hardboard, a few Behr test paint pots, and chalkboard paint for the roads. (Colors clockwise from top are Green Energy, Intoxication, and Placid Sea.)
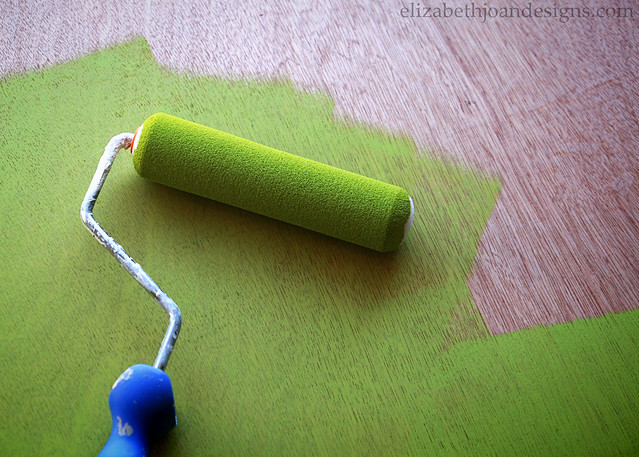
After a light sanding, I used a foam roller to paint the grass color on the board.
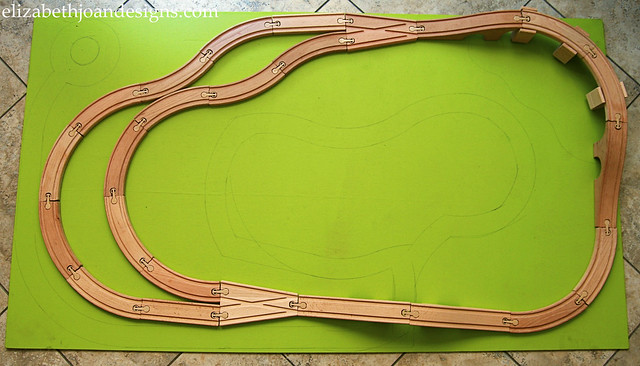
Next, we set up the train tracks, using a couple of train sets from Ikea. Once the configuration was how we wanted it, I used a pencil to draw in some roads and water. You may be able to see that there were a few oopsies with my drawing, but it wasn’t anything that couldn’t be fixed with a little extra paint.
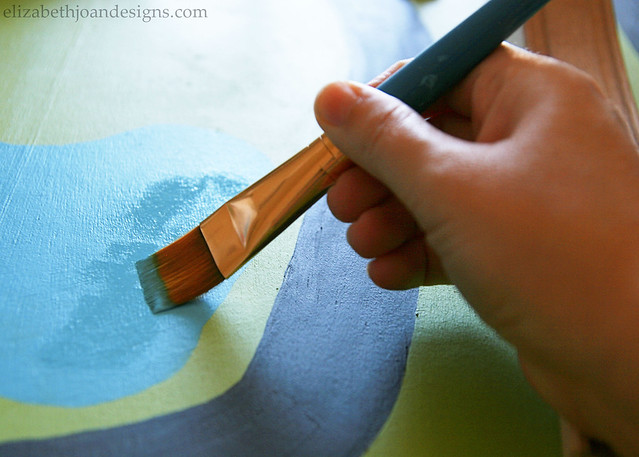
Then, I used a small paint brush to fill in the water, roads and several bushes/tree areas.
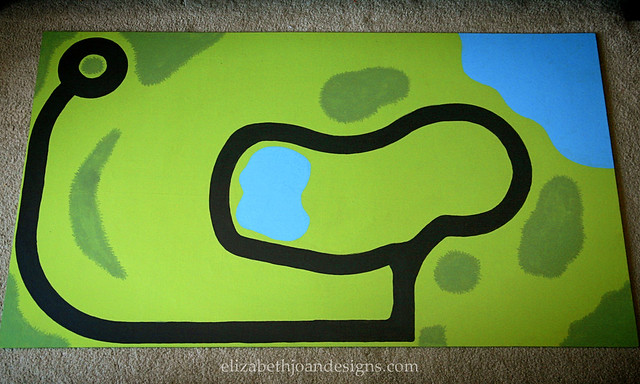
Here is how it looked after it was all painted.
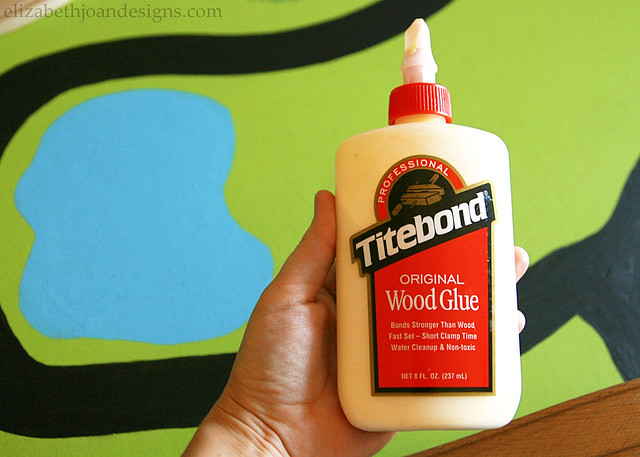
After that, it was time to attach the tracks with some wood glue. I looked at one of the photos I had previously taken of the setup and used that as a guideline to piece everything together. Then just pulled up each piece individually to glue them to the board.
This train and cars board is so fun!
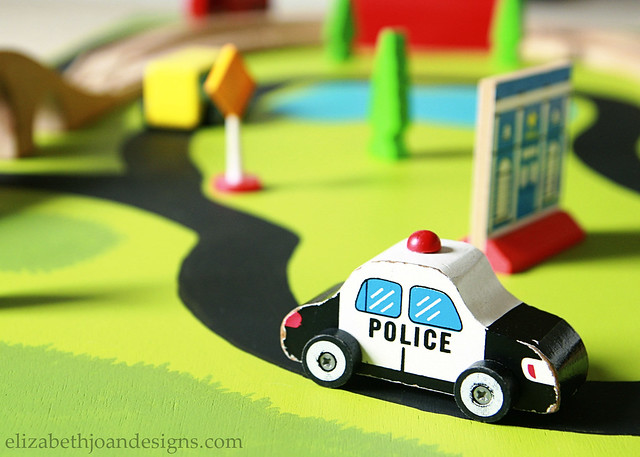
And it fits perfectly under the bed, which saves us a ton of space.
This little guy could not be happier and we love that he now has a fun place to play with his vehicles!
___________________________________________________
You may also like:
Faux Metal Letter 
Ikea Apa Storage Makeover 
Toy Rotation 
Toy Organization -
12 Ways To Use Numbers, Letters & Words
Today, we thought we would share 10 of our favorite ways to use numbers, letters and words in decor. What are your favorite ways to incorporate these elements into your home? (Click the photos to view each project.)
File Cabinet Garage Storage 
French Lettered Milking Stool 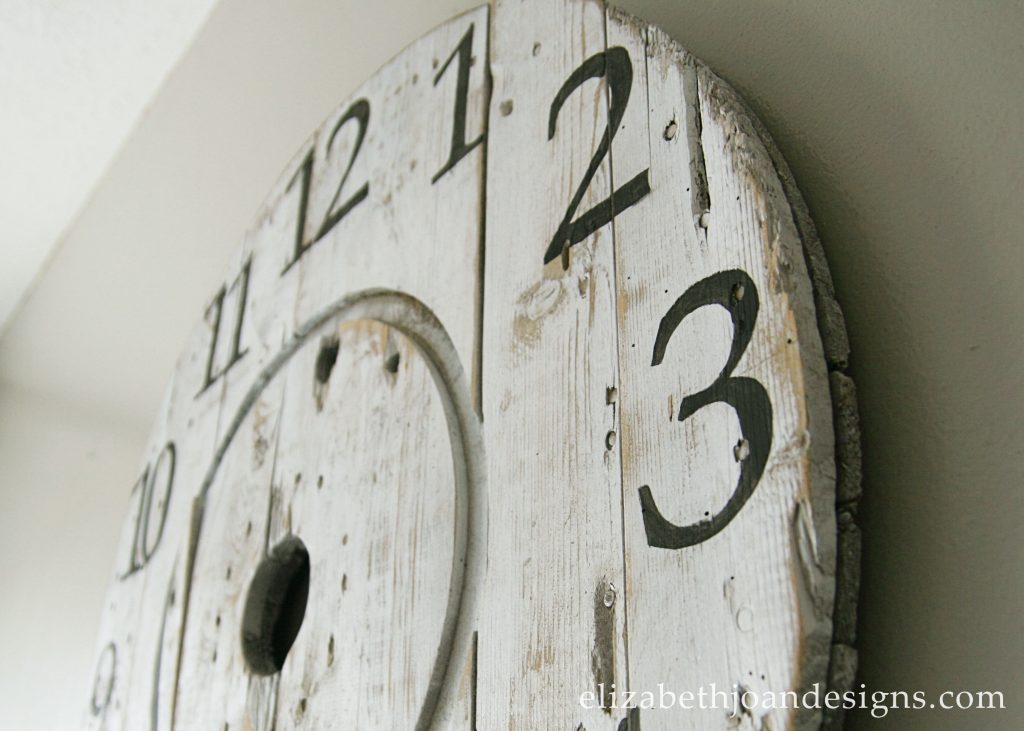
Cable Spool Clock 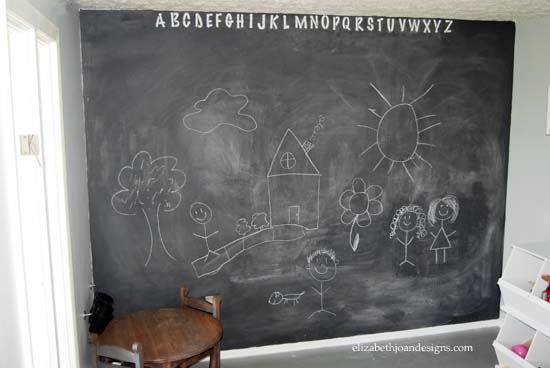
Chalkboard Paint Accent Wall 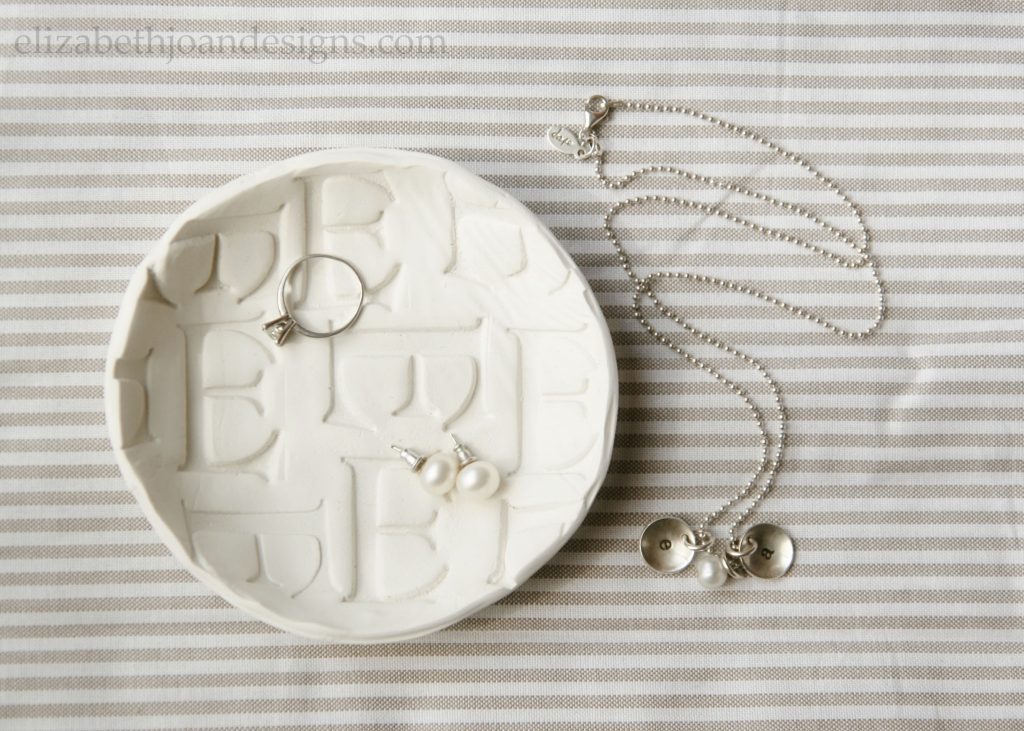
Monogrammed Stamped Clay 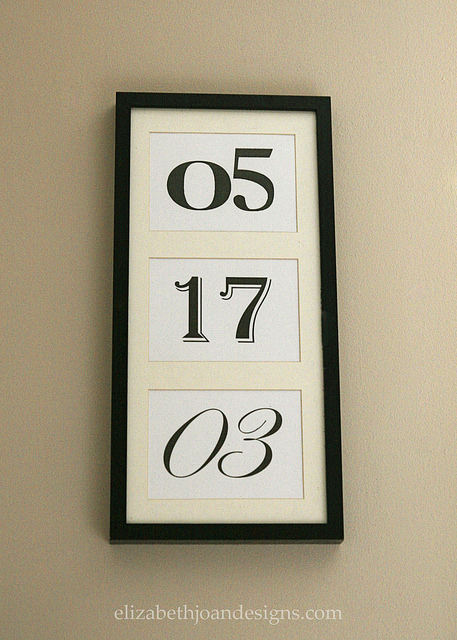
Anniversary Art 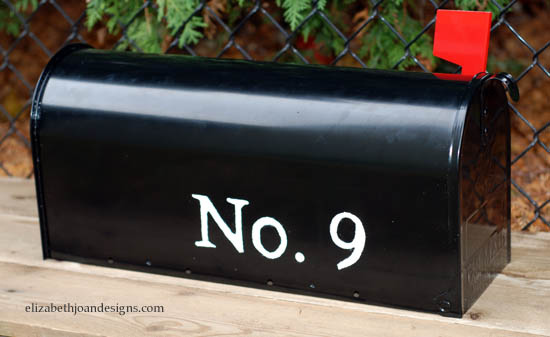
Numbered Mailbox 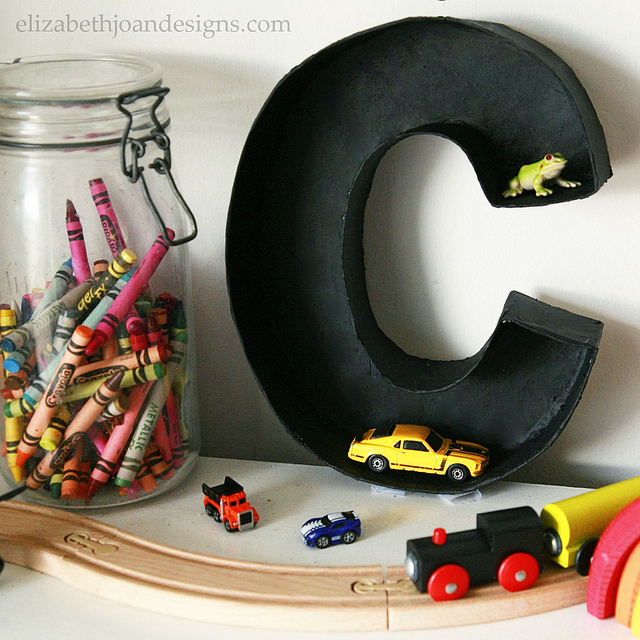
Faux Metal Letter 
Freezer Paper Stenciled Treat Bag 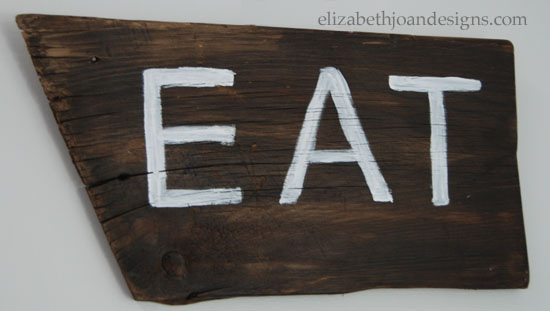
Barn Wood Sign 
Numbered Counter Stools 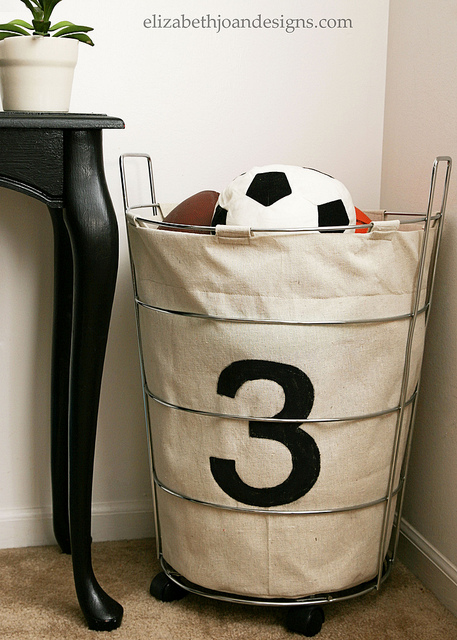
Industrial Numbered Storage _____________________________________________________________________ You may also like: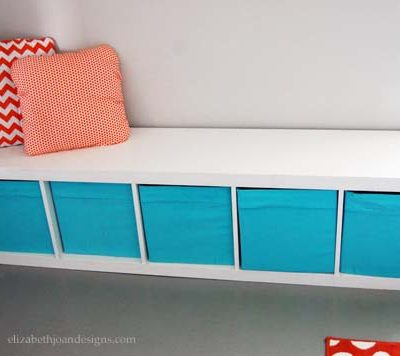
The Key to Painting Laminate Furniture 
Hardware Change-A-Roo 
Closet To Office Part 3 
Placemat Pillow -
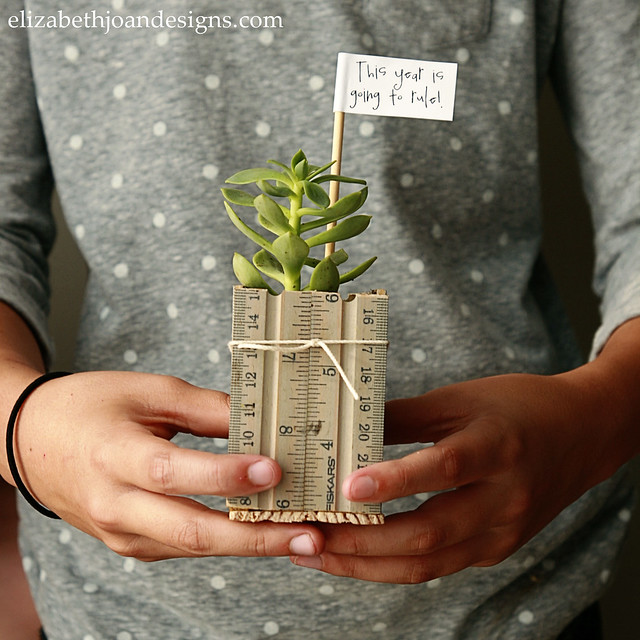
Ruler Succulent Planter & Back to School Blog Hop
It’s almost time for school to start and that means everyone with kids is scrambling to buy school supplies, get some new clothes, and figure out who this year’s teacher will be. To make things easier, we’ve come up with a fun idea for an easy teacher gift to kick the year off on a good note.
But, since this is a Back to School Blog Hop, we’ve joined up with a great group of bloggers to share even more projects and printables to help the start of the school year be more organized and go off without a hitch. Check out all of the awesome ideas at the bottom of this post.
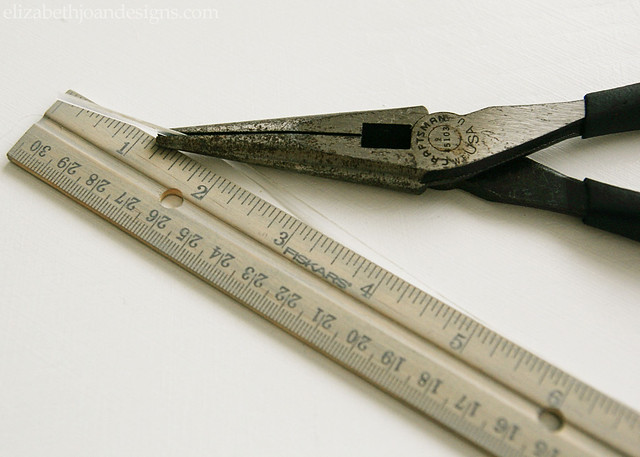
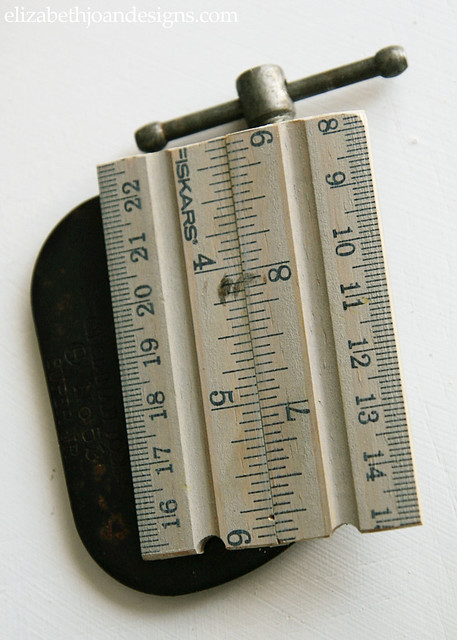
So, for this project, we hacked into our stash of extra wooden rulers (left over from our Ruler Drum Shade.) What? You don’t have a superfluous supply of rulers? No worries. You can get them for relatively cheap at pretty much any store that offer school supplies. Here’s what we used to make our Ruler Succulent Planter:
– Three 12 inch wooden rulers
– Needle nose pliers
– Hack saw
– Wood glue
– Large C clamp
– Scissors
– Sand paper
– One gallon freezer bag
– Small succulent
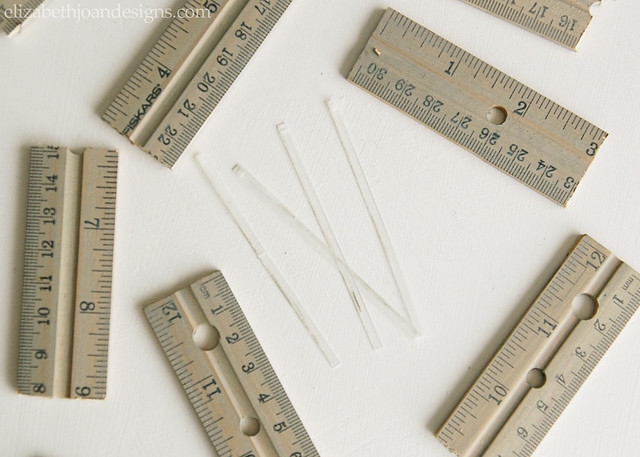
– Potting soilUse the pliers to remove the plastic or metal straight edge piece from one side of the rulers. (You can try to pull them out with your fingers/nails, but I was having no such luck.) Cut each edging piece into approximately 3 inch sections with scissors.
With the hack saw, cut each ruler into quarters (also in 3 inch sections.)
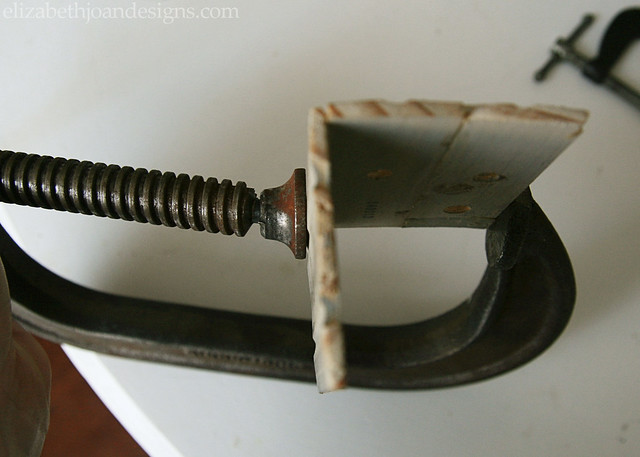
Next, we attached two pieces of ruler together. To do this, evenly divide the ruler sections into two groups. We will call them group A and group B. Re-insert the cut edging pieces into group A. Add a line of wood glue along the side where the plastic or metal edging piece was on group B and then push A and B together. The straight edge piece will then be in the middle of the two ruler pieces, which will help make everything a bit sturdier.
Add some more of the wood glue to the side of one of the sections and then use the C clamp to hold a second piece on to create a 90 degree angle. (If this is getting too confusing, just refer to the photos.) Do this for all 4 sides and the bottom piece of the planter to make an open top box.
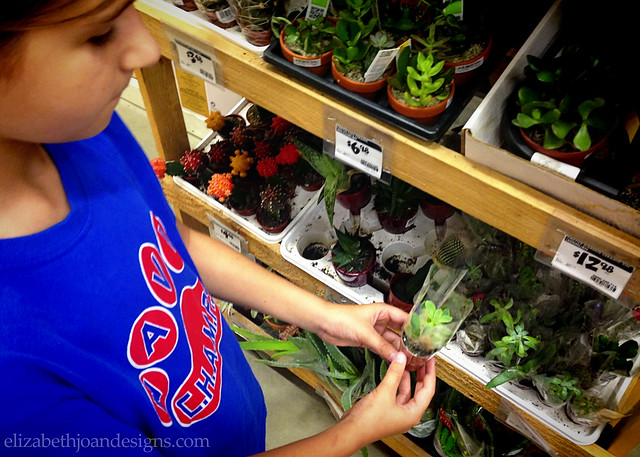
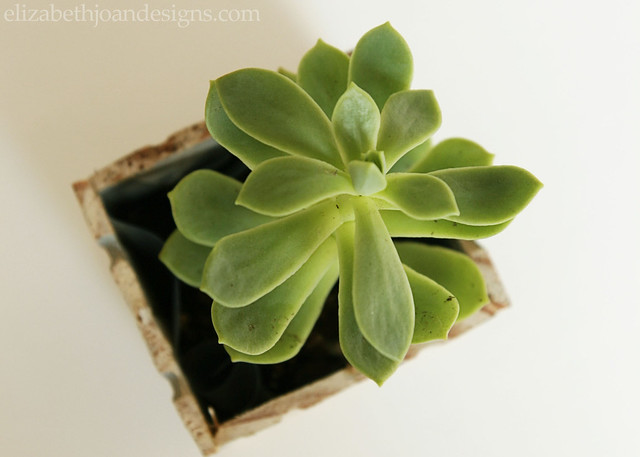
While we were waiting for the glue to dry, my daughter and I ran to the store to grab a little succulent. Here she is picking out her favorite.
Ok, back to the project.
Once the planter is all put together and dry, cut a large square out of the corner of the freezer bag with scissors and insert this new “bag” into the planter. Trim any excess off, so that the top of the bag is just below the edge of the box.
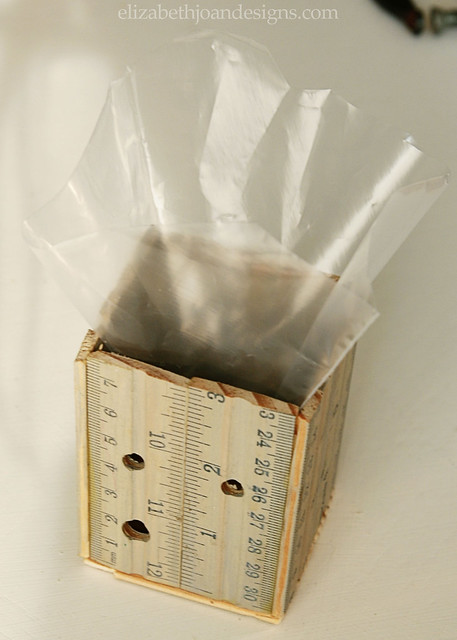
Then all that is left is to add some potting soil and plant your cute little succulent.
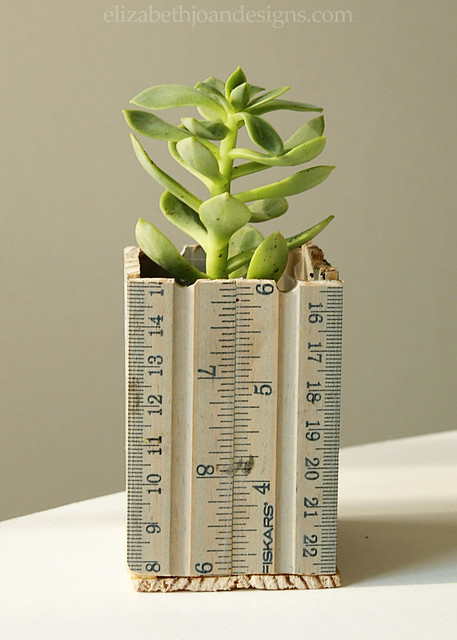
I know this process sounds pretty wordy, but the planter was really easy to make.
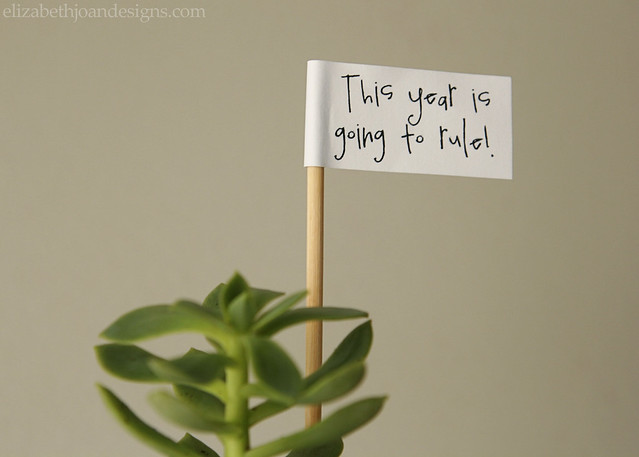
And it will make the cutest little back to school teacher gift, especially since we threw in this witty little flag.
We love that this succulent will be easy for my daughter’s teacher take care of and add a little life to her desk or window in the process. What are your favorite gifts for teachers, besides the obvious, but delicious, apple?

Want more? Check out these 15 great back to school ideas! 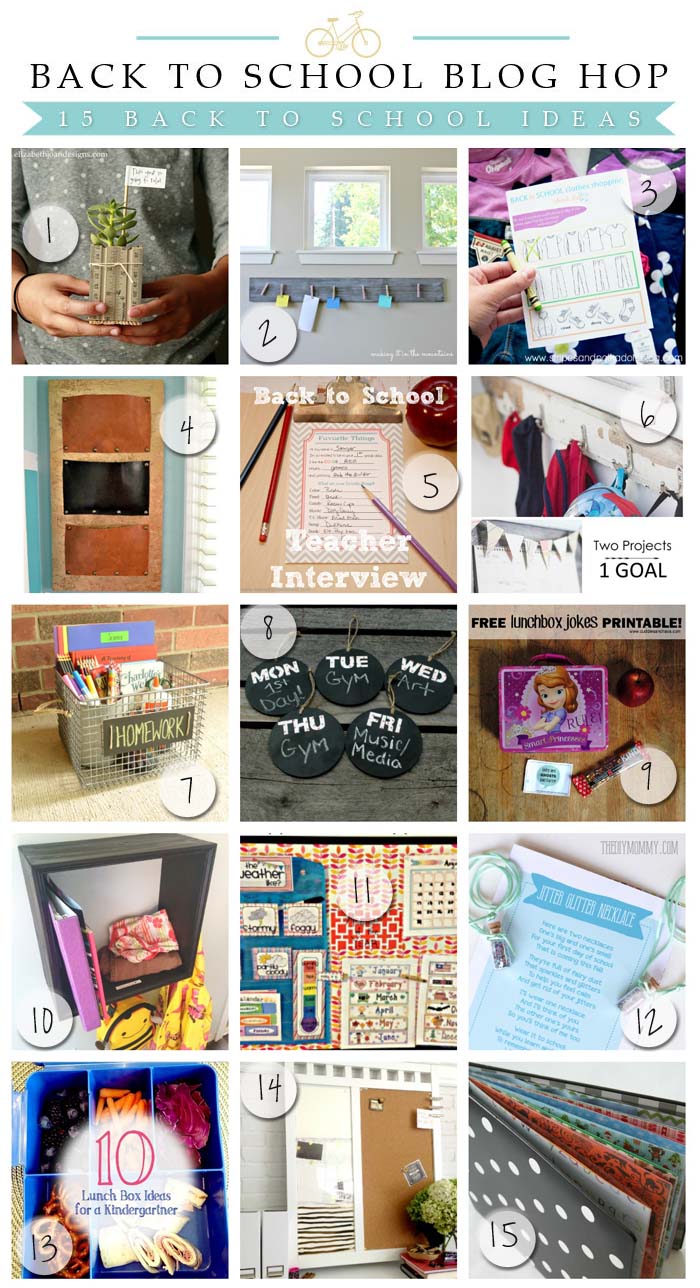
1. Elizabeth Joan Designs 2. Making It In The Mountains 3. Stripes and Polka Dots
4. For My Love Of 5. Home. Made. Interest. 6. Restless Arrow
7. Little Red Brick House 8. Little House Of Four 9. Cuddles and Chaos
10. Our House Now A Home 11. Kent Heartstrings 12. The DIY Mommy
13. Curly Crafty Mom 14. Houseologie 15. Canary Street Crafts_____________________________________________________________________ You may also like:
Summer Hosta Wreath 
Ruler Drum Shade 
Chalkboard Succulent Planter 
Glazed Herb Planter