-
Hardware Change-A-Roo
Fun title, right?
I’m a hardware nut. I love looking at hardware, whether it be furniture pulls or knobs, and I can always imagine how changing things up with new pieces, or even paint, can make a huge impact. Especially, when it comes to outdated or uber popular pieces that everyone has. Take for example our Ikea Hemnes dresser.
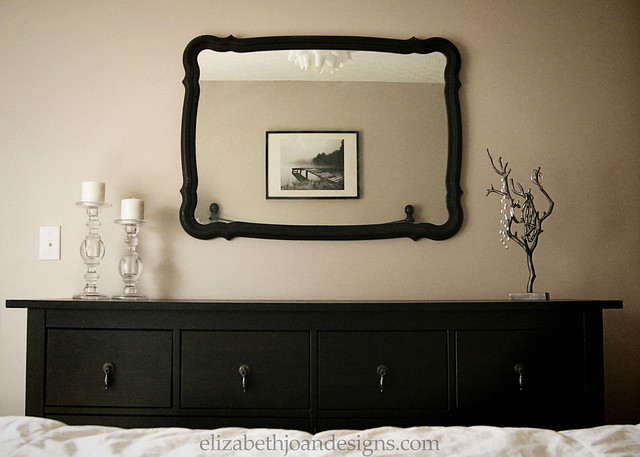
We bought this in 2009 and it has traveled with us around the country through 3 moves. Yeah, it has some dings and nicks, but honestly, it has held up exceptionally, and possibly better than a few of our more expensive pieces. Here is what it looks like straight from the store…

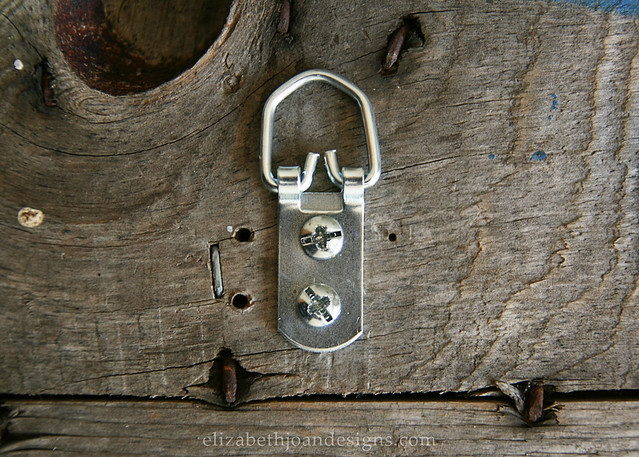
We knew when we bought it that we wanted to add a bit more interest and make it have it’s own look. After a some searching through stores and the internet, we came across some beautiful drop pulls from Van Dykes Restorers and we were sold. (Some of our favorite places to find hardware include Van Dykes Restorers, Anthropologie, Hobby Lobby, Restoration Hardware, and House of Antique Hardware.) We ordered them right away, installed them the day they arrived and haven’t looked back since. Aren’t they lovely?
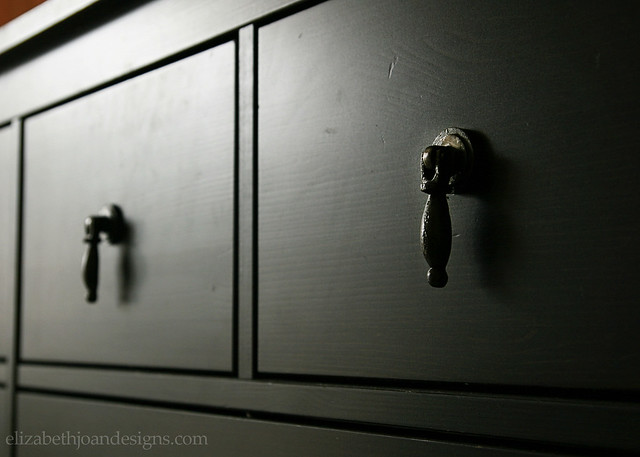
It’s like a facelift for furniture. I love how such a simple project made a common dresser look a little bit different than what everyone else may have. It just seems to kick things up a notch, a la Emeril Lagasse.
And just to keep things real, I thought I would include a photo of what happens while I’m trying to do blog stuff. All I wanted to do was take a picture. Here, you can see me in the mirror, standing on my bed amidst a pile of junk I pulled off the top of my dresser. Those are my kids in the bottom left hand corner
fightingplaying with each other like kids typically do. Good times, I tell ya!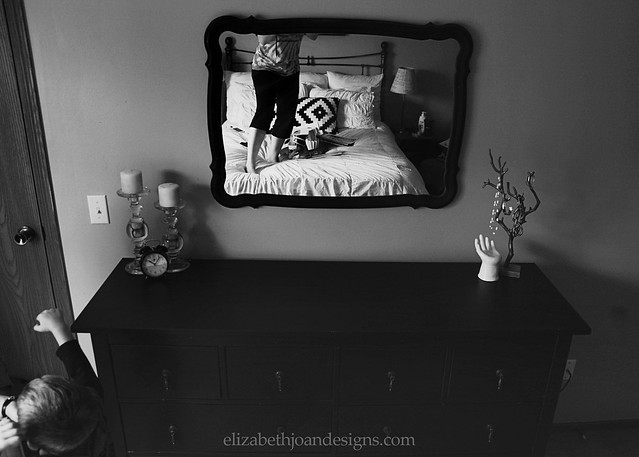
In the meantime, who else is obsessed with hardware?
_____________________________________________________________________ You may also like:
Range Hood Makeover 
Wire Mesh Pin Board 
Easy Apothecary Jars 
Vanity Makeover -
10 Minute Wood Cutting Board
Every once in awhile, I come across some extra wood from a project. You know, those random pieces that are left over after everything is cut. And since I’m not really a big fan of just throwing them away, I went in search of something to do with them. After perusing the interwebs, I found a great tutorial from Centsational Girl for DIY Wood Cutting Boards.
This post is by no means some sort of amazingly new way to make a cutting board. I just used Centsational Girl’s guide and thought I would reiterate just how simple and quick this awesome project is. After you find the wood you want to use, there are only 4 steps.

1. Trace a handle onto the wood piece. I made a template by cutting a piece of cardstock to the width of the wood (8 inches) and folding it in half. Next, I free-handed the shape of a handle on it and cut it out. Then, I opened it back up and traced around the edges.
2. Cut out the handle. I grabbed my handy hubs and had him help me cut with a jig saw, so I could take pics and not chop off my hand in the process. Thanks, Honey!
3. Sand everything smooth and wipe clean.
4. Condition the wood with mineral oil.
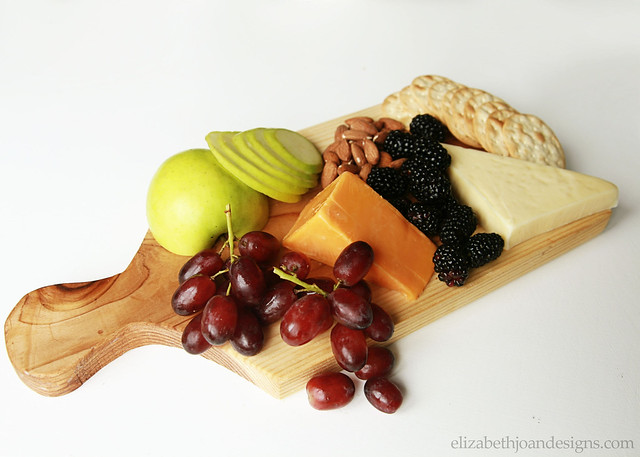
And that is it. The cutting board is then ready to use.

This project literally took only 10 minutes from start to finish. I think it honestly took longer to gather and style all the food on top.

So, if you find yourself with some extra lumber, this is a great project to tackle that won’t take up a lot of time, but yields quick and fulfilling results.
_____________________________________________________________________ You may also like:

DIY Dining Table 
Ruler Drum Shade 
Kid’s Table Makeover 
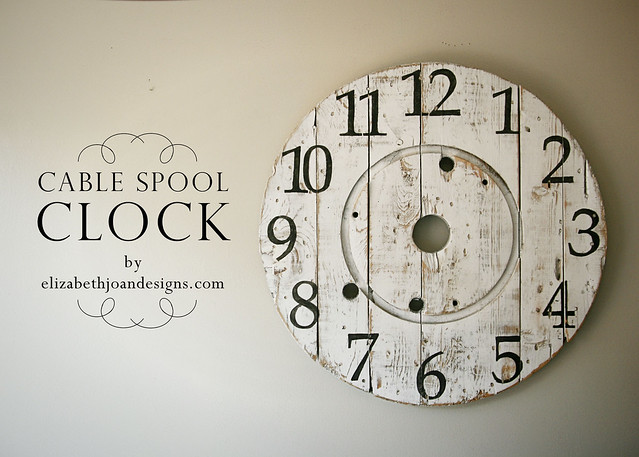
Cable Spool Clock -
Cable Spool Clock
Do you ever have an amazingly original idea only to find out that it really isn’t that original at all? This post is about just that.
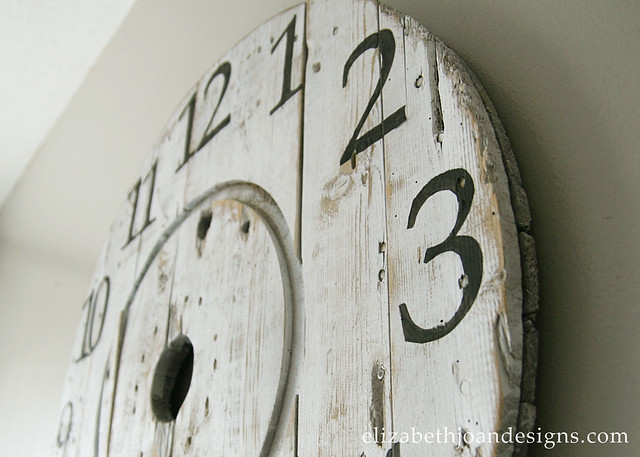
Then my sister told me about a big wooden cable spool she purchased from a garage sale. I thought that if I could find one of those, I could totally pull it apart and use the round end for the clock, instead of spending time putting together and cutting out pallets. Lucky for me, our parents had an old wooden cable spool hanging out at their house, not being used. (Thanks, Parents!)
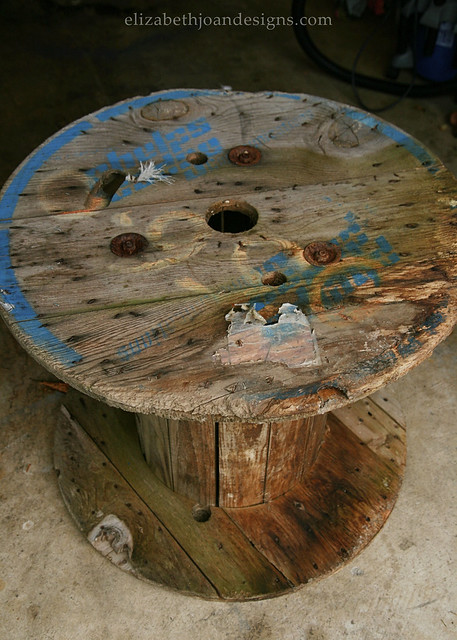
It was a bit rough looking, but totally usable!
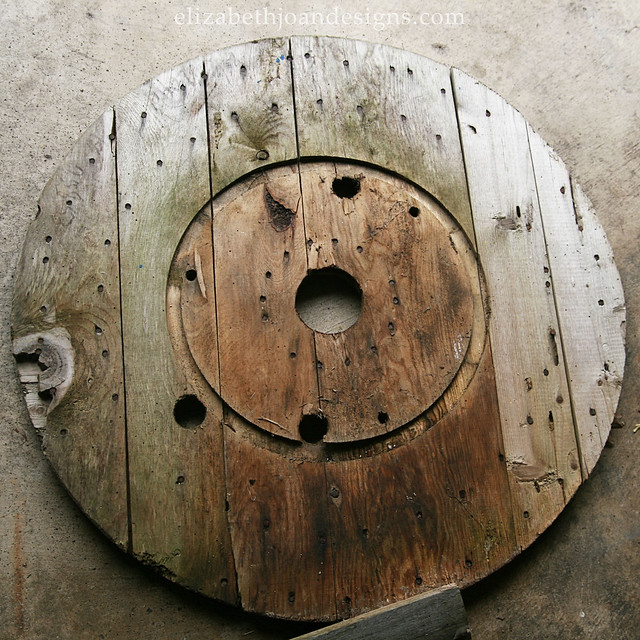
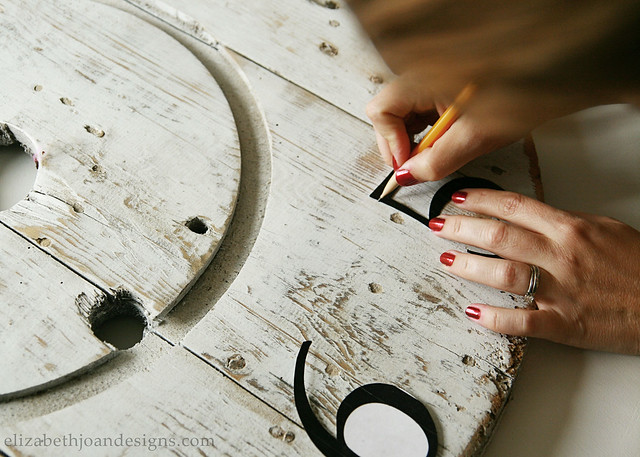
I brought it home and took apart all of the fittings, thanks to a little elbow grease from the Hubs. Sadly, the poor thing sat in my garage for a few weeks. During that time, I happened to come across a photo on Pinterest, of all places, with virtually the same idea. So, I did another search on the picture pinning website for “cable spool clock” and, of course, there were 730,000 different ones. Ugh. So much for trying to be original. Oh, well. I knew I still loved my idea, so I continued on with the project without looking back.


_____________________________________________________________________ You may also like:
Chalkboard Lettering 
Numbered Counter Stools 
Office/Workspace Reveal 
Industrial Numbered Storage -
Vanity/Workspace Reveal
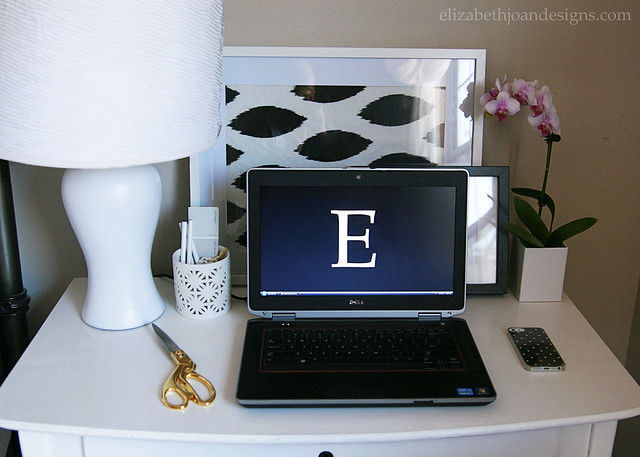
Back in March, I shared my old vanity that we re-purposed into a nightstand/desk. Since, the original post, we’ve refinished a lovely chair, painted the lamp base, and added some hidden storage to help the area function as more of a workspace.

I love this quiet little corner of our bedroom. It is just perfect for writing blog posts, designing graphics and printables, and also a great place to set a glass of water and a book at night when I go to bed.
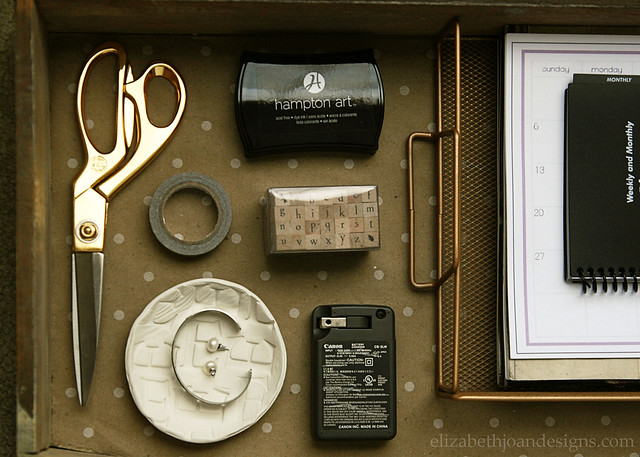
The drawer is usually kept fairly clean, thanks to the paper tray and clay dish that help corral loose items. I keep things in here I use often, like the alphabet stamp set, planner and EJD calendars, camera charger and wicked awesome gold scissors. Some people may not keep weapons in their nightstand, but you’d better believe I will cut someone if they break into my house. Just kidding. Kind of.

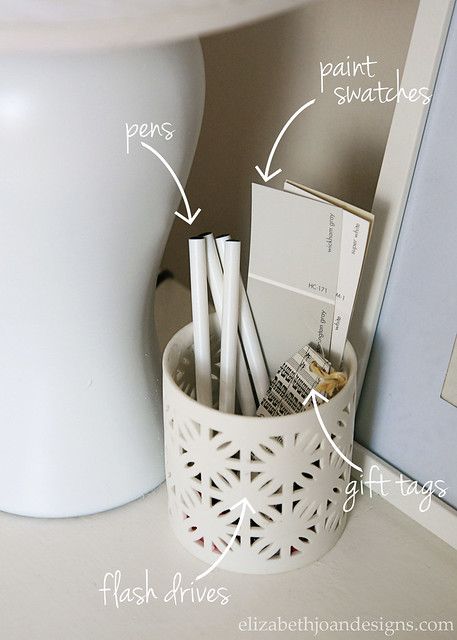
On the top of the desk, I use this cute candle holder to catch paint swatches, extra pens, tags and a cluster of flash drives. (Am I the only one who has way too many of these?)
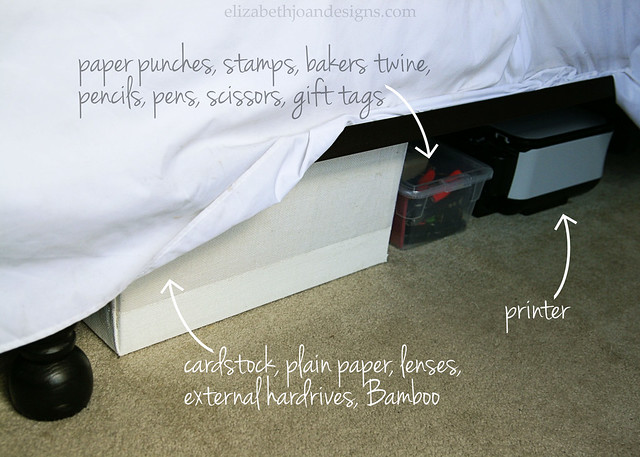
You may also remember when we raised our bed up several inches by adding deck post finials to the frame. This has been a huge help, since we can now store a ton of stuff underneath that would not have fit there before. Plus, it is nice that the printer can be hidden from plain view, but is still easily accessible.
Since we obviously can’t store every office-type supply and craft item in this area of the bedroom, we do have an armoire downstairs allocated for all of those items that aren’t used quite as often.

I’m so happy with how this space turned out. It’s OK to be a little jealous of it. I know I would be.
___________________________________________________
You may also like:
Vanity Makeover 
Monogrammed Stamped Clay 
Paint Dipped Box Baskets 
Adventures In Upholstery