-
30 DIY Projects Under $10

Monogrammed Stamped Clay 
Placemat Pillow 
DIY Note Cards 
Spring Moss Wreath 
Chalkboard Clothes Pins 
Anniversary Art 
Closet To Office Part 2 
Heart Candle Holder 
Heart Stamps 
Laundry Basket Planter 
Pocket Hand Warmers 
Ten Minute Infinity Scarf 
Book Page Wreath 
Mercury Glass Ball Jars 
Wire Mesh Pin Board 
Mason Jar Paint Storage 
Toilet Paper Roll Plant Starters 
Pinecone Fire Starters 
Dollar Store Scarf Wreath 
Knit Vases 
Paint Dipped Box Baskets 
Numbered Mailbox 
Chalkboard Tins 
Faux Metal Letter 
Mason Jar Ring Pumpkin 
Fringed Streamers 
Freezer Paper Stenciled Treat Bag 
Barn Wood Sign 
Budget Friendly Glass Hurricanes 
DIY Roman Shade -
Adventures in Upholstery
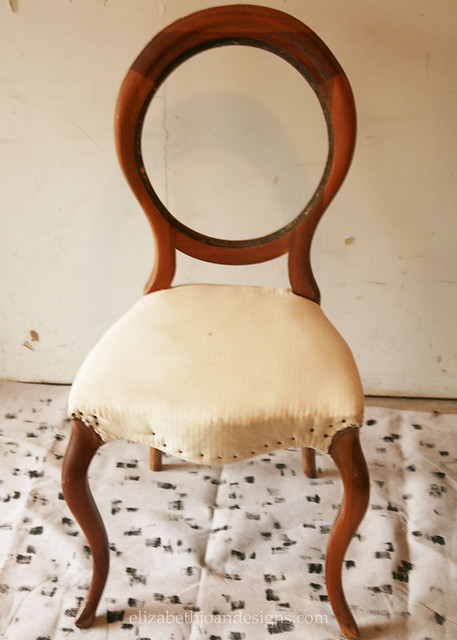
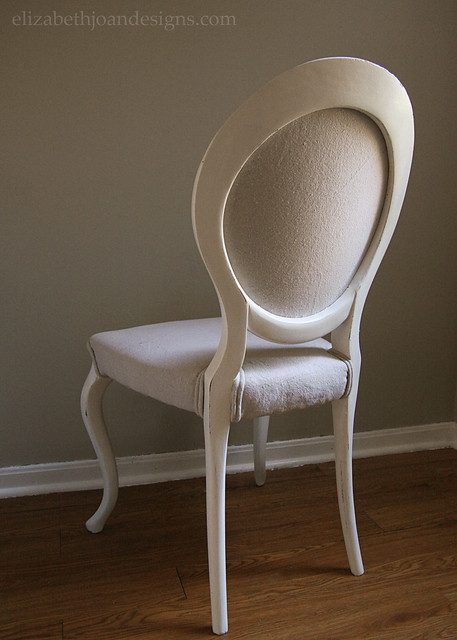
When I posted about my vanity/nightstand/desk, we were considering a chair to go with it from Ikea. This is not that chair.
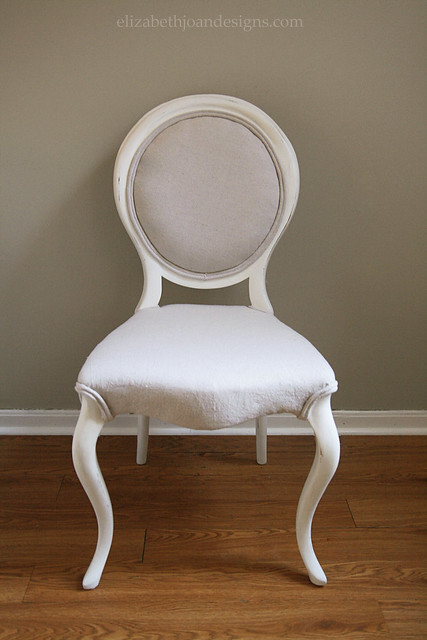
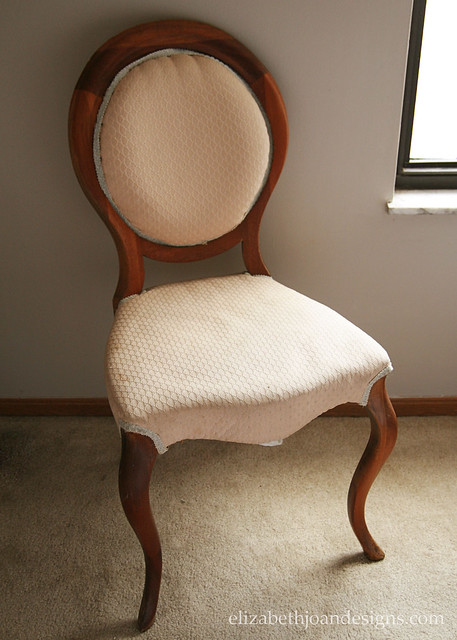
Back in April, while visiting Emily, I mentioned that I was still needing a chair for our “office.” Lucky for me, Emily keeps a hoard of curbside treasures in her basement and among them was a beautiful old chair that needed a little love. And since she didn’t have room on her plate to take on another project at the time, she graciously helped me squish this chair, along with about 700 other items from her house into my car. 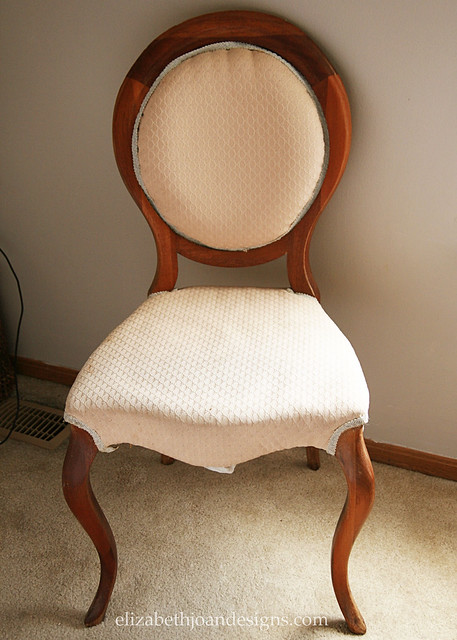
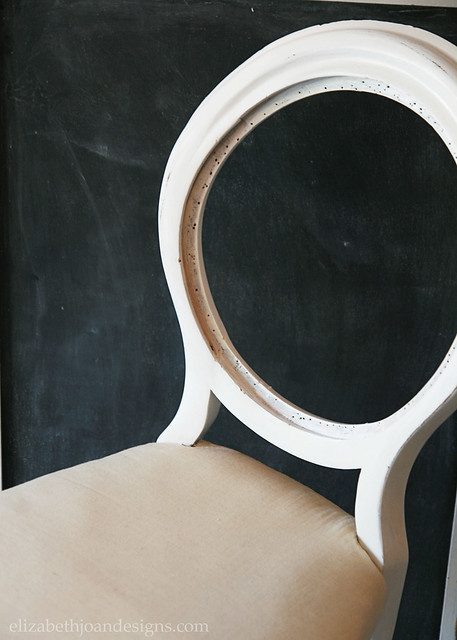
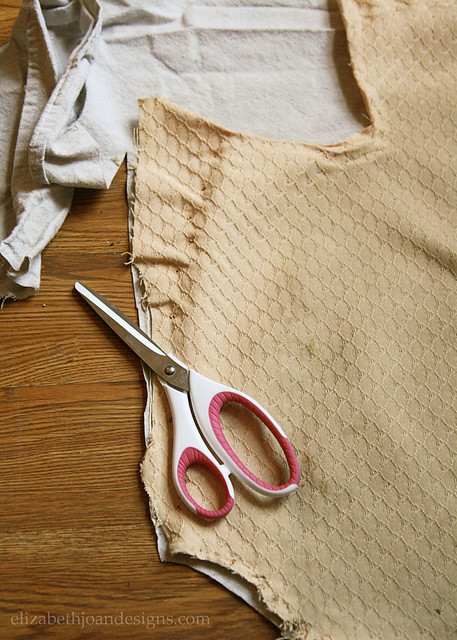
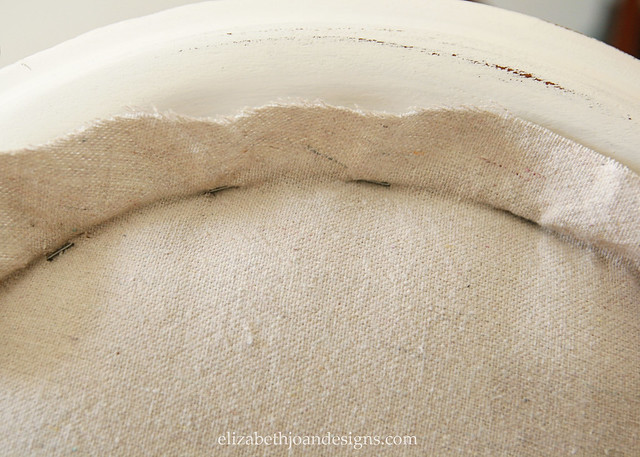
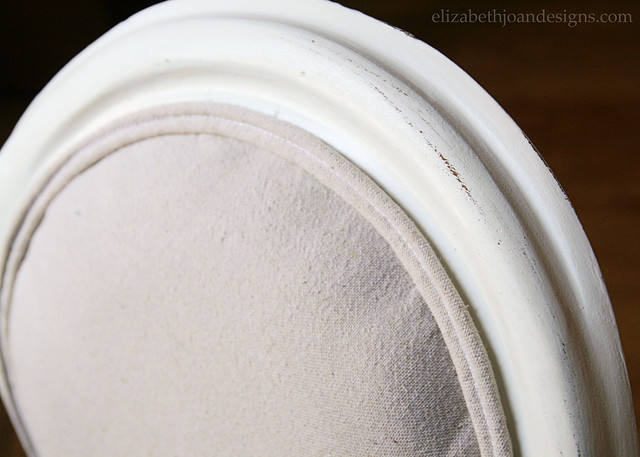
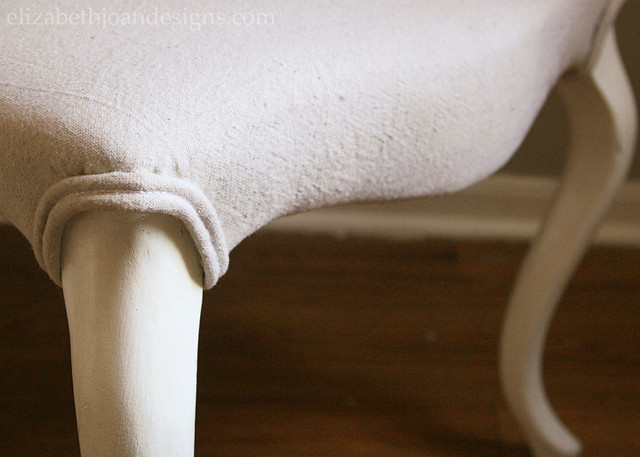
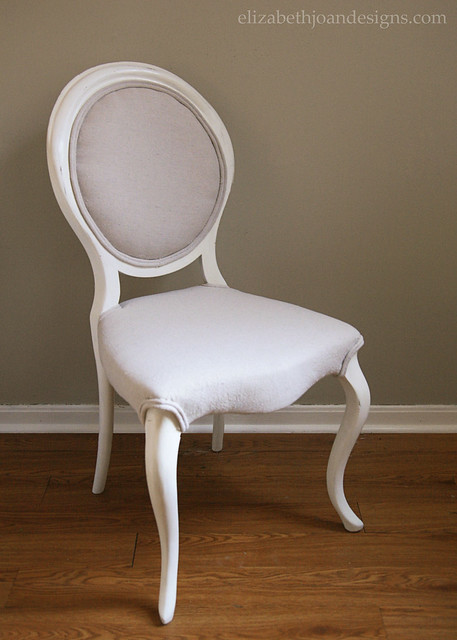
After a little looking around, I found this inspiration piece from Restoration Hardware. So, I grabbed my supplies and got started. First, I rippedremoved the existing fabric, back cushion, etc., and set it aside. Unlike the fabric, the seat was in pretty good condition, as well as foam back piece. The hardest part was pulling out all 2 million of the rusty, tetanus laced upholstery tacks that attempted to hold the whole shebang together.Next, the frame got a few coats of white paint and primer, plus a little sanding to give it an aged look.
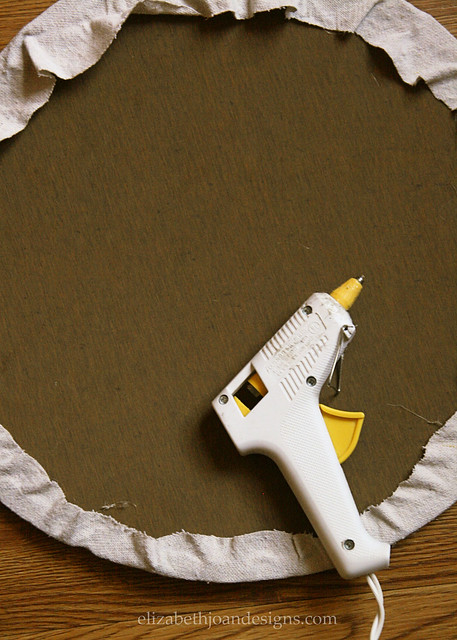
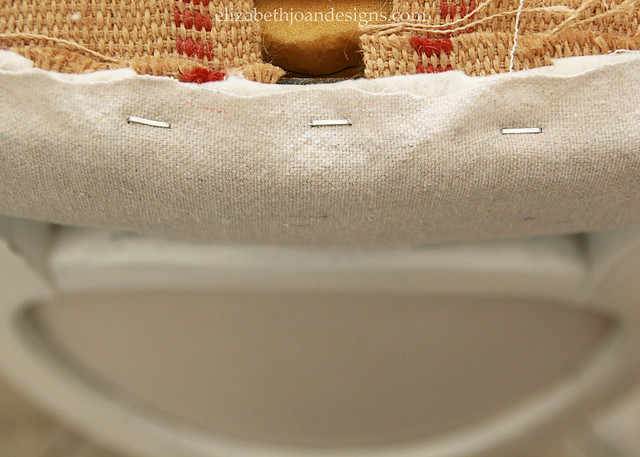
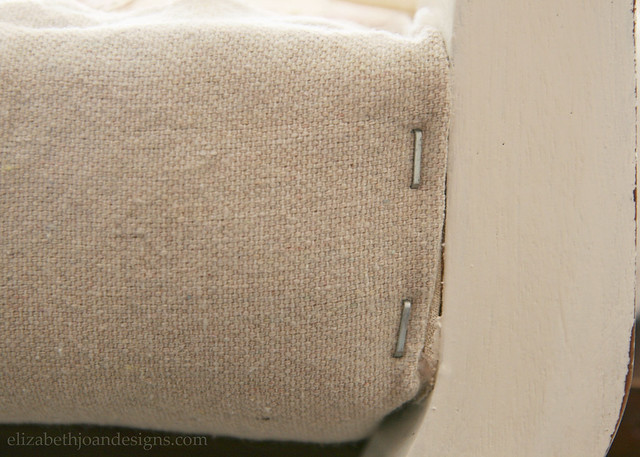
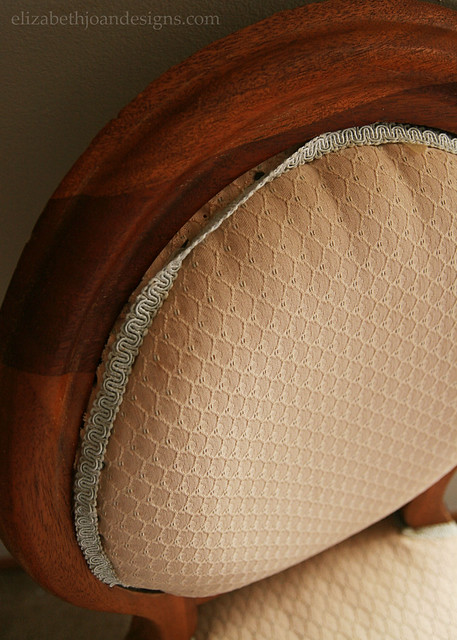
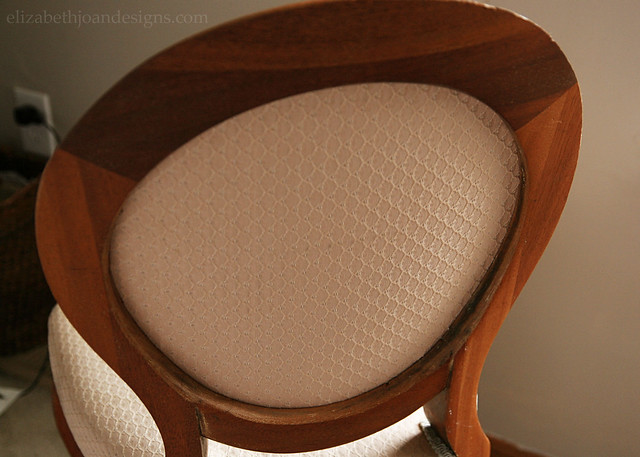
I made sure to trim any excess fabric beyond the staples.
_______________________________________________________________________ You may also like:
Scoop Chair Redo 
Vanity Makeover 
Lazy Upholstering 
Painting Upholstery -
Monogrammed Stamped Clay
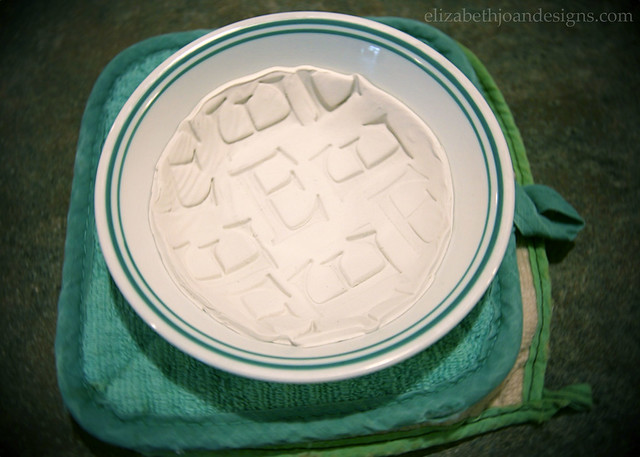
Last week, Emily came to visit. Yay! While we were at our parent’s home, they shared with us that they had found our grandfather’s old letter stamp set. So cool!
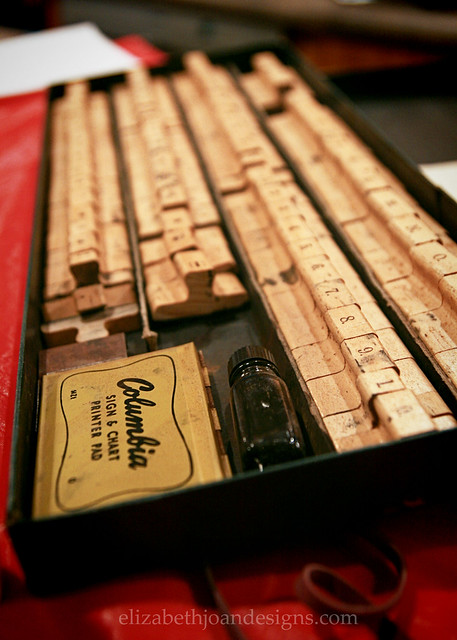
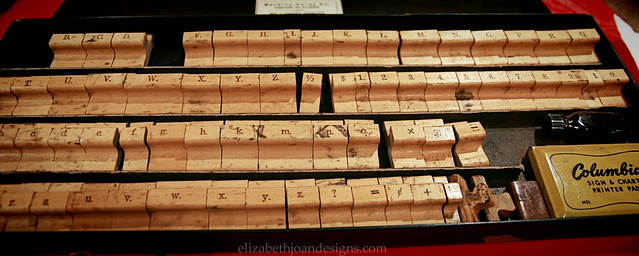
There was this great idea from a Better Homes & Gardens magazine (I believe the original photo from the magazine had a super cute leaf pattern stamped onto clay) and our step mom, Beth, suggested that we use Grandpa’s stamp set to make our own stamped clay project. So we rounded up some oven bake clay and got to work.
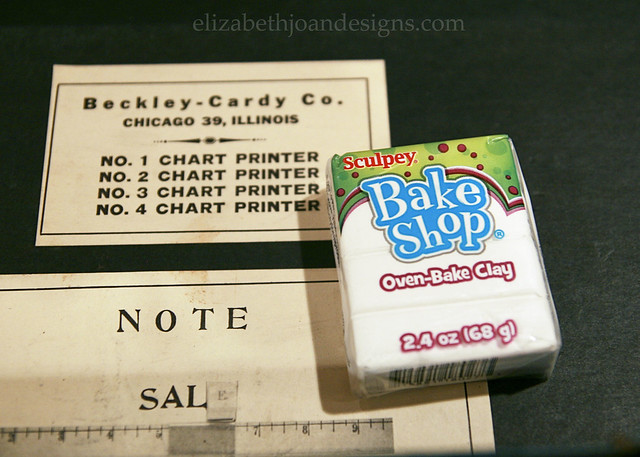
First, we each took a portion of the clay and worked it in our hands to loosen it up. Like we were giving it a deep tissue massage. Ahhhhhh. Next, we used a rolling pin to flatten clay.

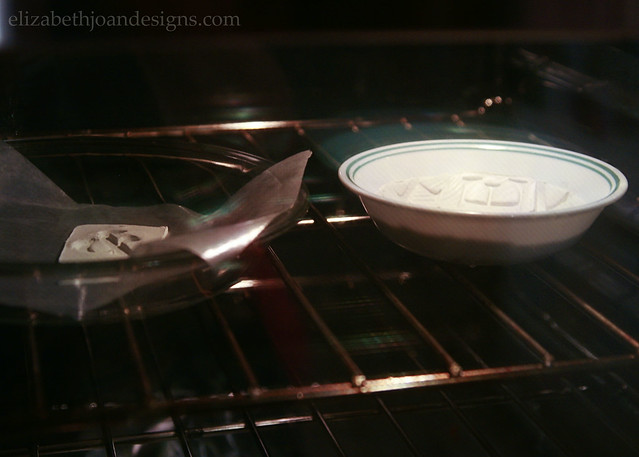
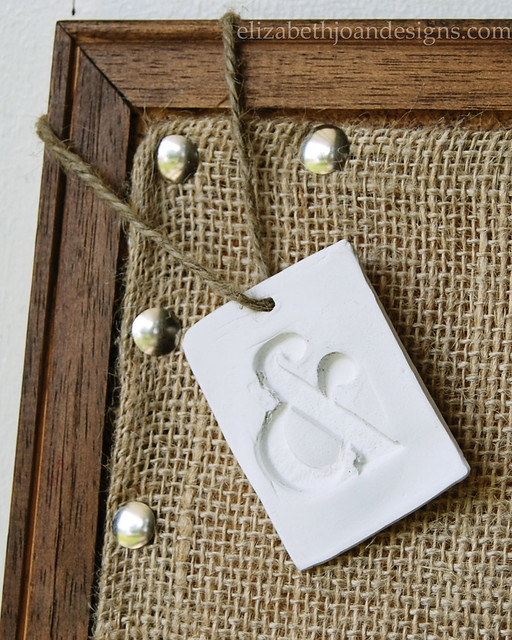
Then, with a little oil on each stamp to keep it from sticking, we pushed the stamp into the clay. Emily chose an ampersand, which she cut around and poked a hole through to make a hanging ornament.

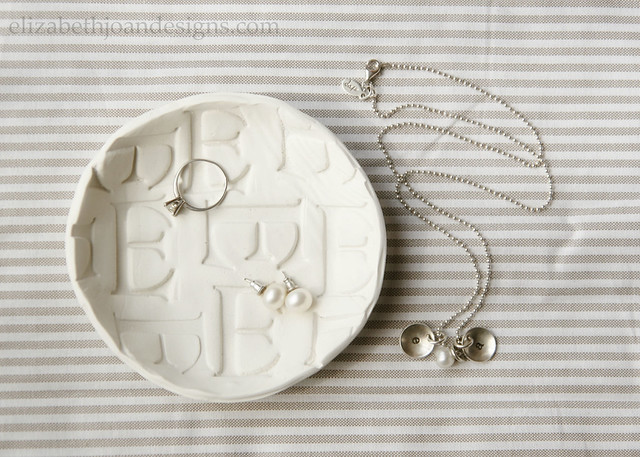
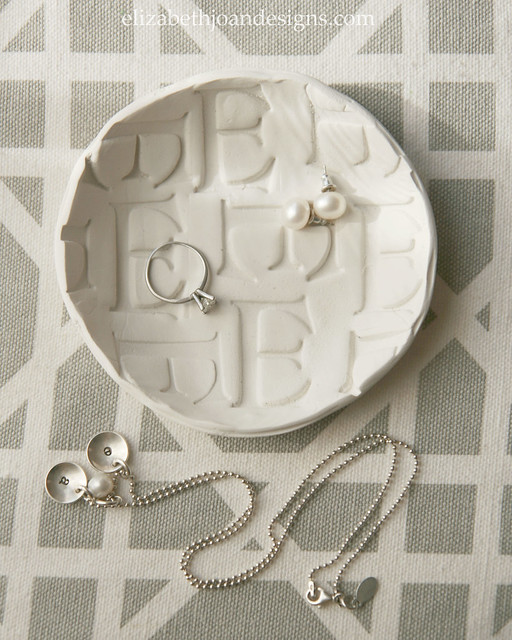
And I did a pattern with the letter E. Natural choice, right? You can see that I put the circle into a small bowl (oiled) to form it into a dish shape.
Each piece was baked in the oven at 250 degrees for 15 minutes. Just enough time to take a quick shower or straighten your hair. Or whatever you like to get done in 15 minutes.
After everything is cooled, you can sand the edges if things need smoothed out a bit. We love how both of our projects turned out!
____________________________________________________________ You may also like:

Ruler Drum Shade 
Closet To Office Part 3 
DIY Dining Table
Wire Mesh Pin Board -
The Summer List
School will be out for the summer soon (we are done tomorrow) and even though the kids may be eager to be home, it will only be a matter of time before that excitement will turn to boredom. Enter the Summer List.


The Summer List
- Visit Zoo
- Go Camping
- BBQ
- Make Stepping Stones
- Smores
- Picnic
- Popsicles
- Visit Parks
- Plant Seeds
- Scavenger Hunt
- Ride Bikes
- Watch Fireworks
- Hiking
- Splash Park
- Family Vacation
- Water Balloons
- Swimming
- Car Wash
- Visit a Farm
- Pick Berries
- Ice Cream
- Identify Bugs
- Movie Night
- Bird Watching
- Star Gazing
- Build Fort
- Lemonade Stand
- Garage Sale
- Fly Kites
- Summer Reading Program
Follow us on Instagram (@erinejd and @emilyejd1) to see our progress or join in the fun by tagging your own summer entertainment photos with #ejdsummerlist.
I also whipped up this simple printable so that you can have a pretty space to write down all of the fun stuff on your Summer List.
This printable is free of charge and for personal use only. Click the image below for the PDF link. Please download the file and open with Adobe Reader to ensure proper print sizing. When printing, make sure that Page Scaling is set to “Fit Printable Area” and Borderless Printing is selected. Enjoy!

______________________________________________________________________ You may also like:

Chalkboard Lettering
Laundry Basket Planter 
Nautical Theme Invitation 
Patio Makeover