-
Yum Yum Shrimp Boil
When it comes to seafood, my family seems to devour it like hungry wolves. We seriously can’t get enough. (Emily’s family – not so much, but that’s another story.) Not a week goes by where we don’t eat seafood in some form or another. Maybe we should seek out shrimp-aholics anonymous.
This recipe is one of our absolute favorites. There are many variations and ours is by no means an exact science. (It kind of mimics Old Bay’s Shrimp Boil Shrimp Fest Recipe with several tweaks.) I know we don’t share recipes on EJD very often, but when we do, you can count on them being something that we absolutely love to make and eat.
You will need some smoked sausage, polska kielbasa or something similar. I usually choose smoked turkey sausage, which still tastes amazingly sinful, but cuts out quite a few more calories and fat. We also use 5 red potatoes, 3 ears of corn on the cob, 1 lb. of shrimp, 1/4 cup Old Bay seasoning, and 1 Tbsp salt.

To start, fill a stock pot about half way full of water and put in on the stove top to boil.
While that is heating up, chop up the smoked sausage and red potatoes into bite sized pieces and cut your corn into 2-3 inch sections.

Next, add the Old Bay Seasoning and salt to the water, do the hokey pokey, and mix it all around.
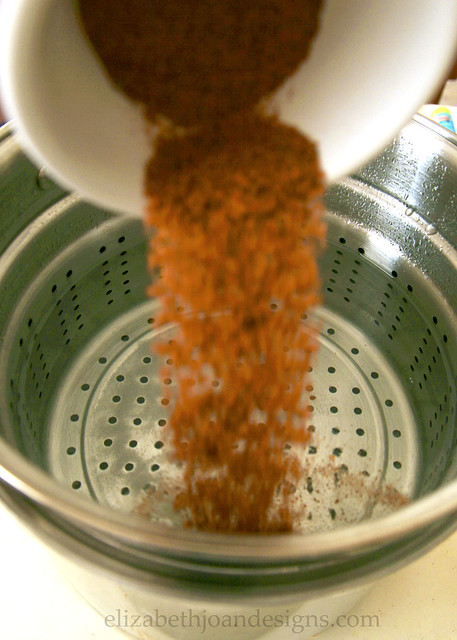
Once the whole combo is boiling hot, grab your timer. Throw in the potatoes and set the timer for 7 minutes. When the bell sounds, put in the sausage and allow another 4 minutes to pass. Ding, ding. Next is the corn. That needs about 8 minutes. By now it is smelling super yummy. Toss the shrimp in and allow everything to keep on cooking for another 4 minutes, then strain and serve to your hungry bunch.

There are only 4 of us and with this amount, we definitely had plenty. Feel free to tweak it to your liking.

Yum Yum Shrimp Boil from Elizabeth Joan Designs
Yield
4 servingsIngredients
– 1 lb. Uncooked Shrimp, Shell On
– 1 lb. Summer Sausage, cut into 1 inch portions
– 5 Red Potatoes, cut into bite size pieces
– 3 Ears of Corn, divided into 2-3 inch sections
– 1/4 Cup Old Bay Seasoning
– 1 Tbsp. Salt
– 12 Oz. Beer (optional)
– Water
– ParsleyPreparation
Combine the water, Old Bay Seasoning, salt and beer in a pot and bring to a boil. Add potatoes and allow to boil for 7 minutes. Add sausage and allow to boil for 4 minutes. Add corn and allow to boil for 8 minutes. Add shrimp and continue boiling for another 4 minutes. Strain, garnish with parsley, and serve.___________________________________________________ You may also like:

Buffalo Chicken Meatballs 
Grilled Bread Salad 
Loaded Red Potato Soup -
A Few Blog Changes
Hi, Friends! You may have noticed that our posts have been a bit sparse this week, but I just wanted to pop in quick and give a few details of what we’ve been up to.

If you ever check out the menu bar along the top of the blog, you will notice some new buttons. For several months now, we’ve wanted to have PROJECTS and PRINTABLES galleries for our readers to enjoy. (We do all of the technical background design stuff ourselves.) After struggling with the quirks of the plugin we were using (Catablog), we found this easy to follow tutorial and spent the next few days getting everything set up. Right now, the PROJECTS page is in chronological order, but eventually we would like to get everything categorized. Hopefully, these changes will make navigating the blog a bit easier.

We also revamped our ABOUT page with a little more info on who we are and why we chose to start this blog. Maybe one of these days we will be able to add some photos of our families, if only we could get everyone to sit in the same vicinity for more than two seconds. (If you are interested in learning more about our quirks, check out the questions and answers at the bottom of this post.)

Lastly, we’ve added a button on the sidebar for Google Plus, right between Facebook and Twitter. Feel free to connect with us on any of these social networking sites. We would love to hear from you!


Don’t forget to join us on Mondays at 8:00 am EST for Your Designs This Time. We can’t wait to see what amazing projects you will share with us this week!
-
Brightening the Foyer
It has been just a little over 3 months since we moved into our new home and I’m happy to report that we have finally finished unpacking almost everything. And that means that we can now park in our garage. Woohoo! This is a big deal people!
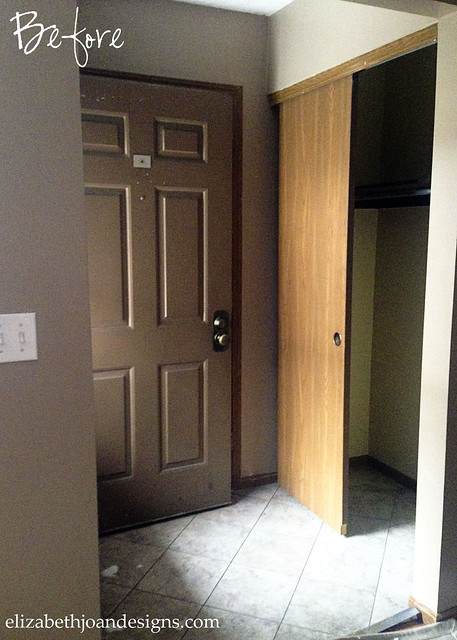
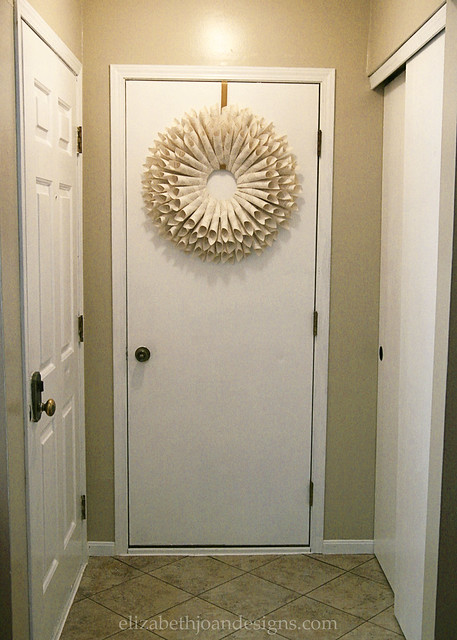
Besides moving everything around, we are slowly, but steadily, getting things painted. (Check out our newly revamped breakfast nook here.) Since we have an active toddler, our painting has been somewhat limited to the areas that we can secure with baby gates and door knob covers. We’ve been jumping around from space to space and next on our list of workable areas was our entryway. You may not be able to tell from the photo below (since the front door is hanging wide open in the middle of the day,) but the space was almost cave like with its dark paint and faux wood accents.
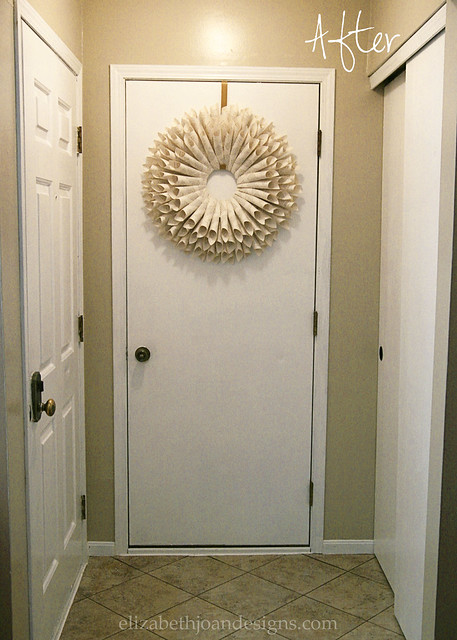
With just a few coats of pure white paint on the trim/doors and some Benjamin Moore Revere Pewter on the walls, the area looks completely different and a lot brighter. I love how paint can completely transform a room without breaking the budget.
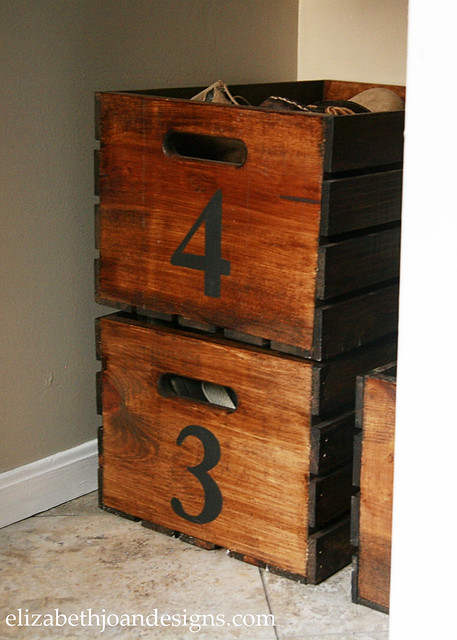
Eventually, we would like to remove the doors on the closet to open everything up and add some hooks along the walls for all of our coats, purses and scarves. We would love to be able to incorporate our numbered wooden crates…

But they don’t all fit lined up along the floor. Maybe we will do something similar to what Emily did in her Entryway Remodel.
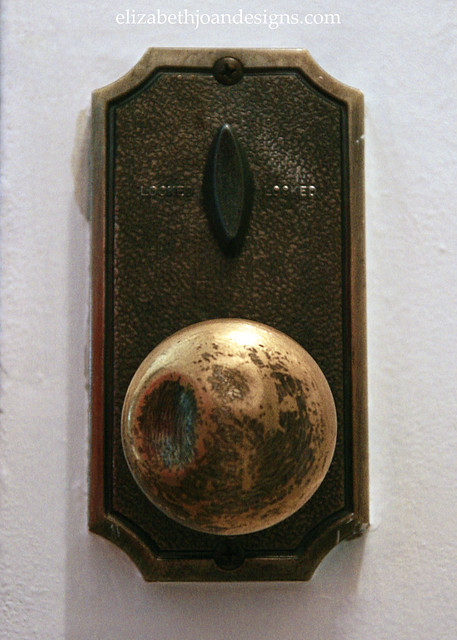
The hardware also needs to be updated, since it is looking pretty beat up.
And we will definitely be changing out the flooring. All in good time.
Other than that, we are really enjoying how much brighter the space is looking. Nothing says come on in and hang up your coat like a welcoming foyer.
-
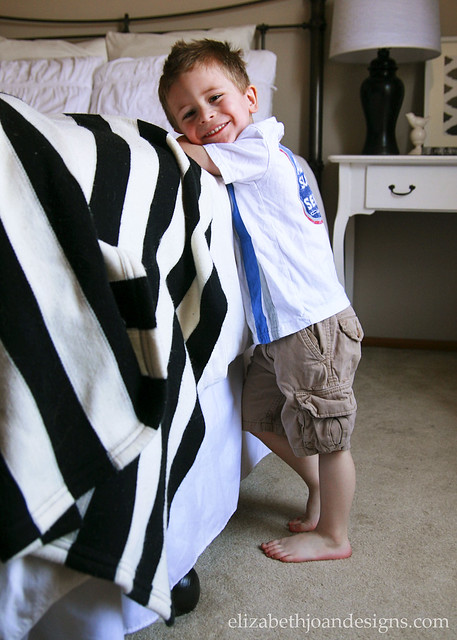
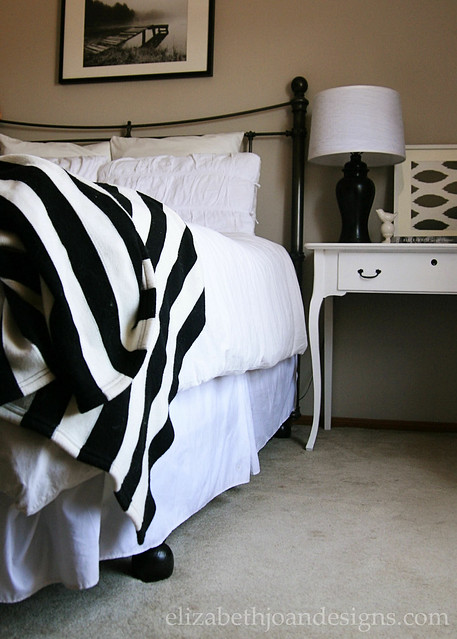
Raise Your Bed If You’re Sure
Last time you saw our bedroom was during a sneak peak revealed in this post. It still looks pretty much the same, except for one subtle difference in the form of a lift. See those pretty little dark feet hanging out at the bottom of the bed skirt? Yup, they are new.
Since we are hosting my office area in the corner of our bedroom, we wanted to add some extra storage space. The best place to achieve this was under the bed, since we didn’t want to add more furniture pieces. So, we researched some different ideas and after eliminating traditional, store bought bed risers (which we heard have a tendency to break in the middle of the night,) we decided to go the DIY route. No surprise there, right?
I found this tutorial on Pinterest and thought it looked cool, but unfortunately, our bed frame is made differently than theirs, so we had to think of another way to do it. After a little brainstorming, my genius husband figured out how to make it work.
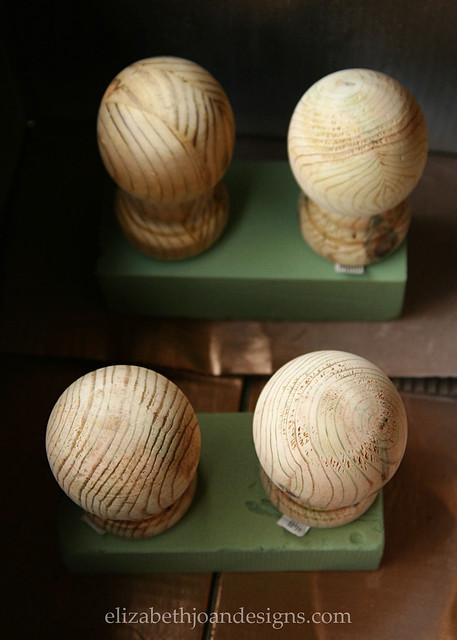
We started out with 4 round, wooden, deck post finials which we bought for around $16 from our local hardware store.
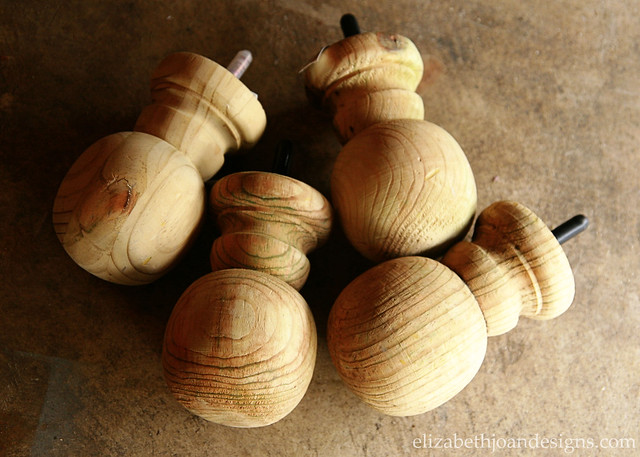
After a quick sanding to smooth them out, we popped the screws into some floral foam so that they would be easier to spray paint. We chose to use Rustoleum Universal Oil Rubbed Bronze spray paint with the hopes that they would semi-match our existing headboard. (I neglected to take a photo of them all together and painted though.)
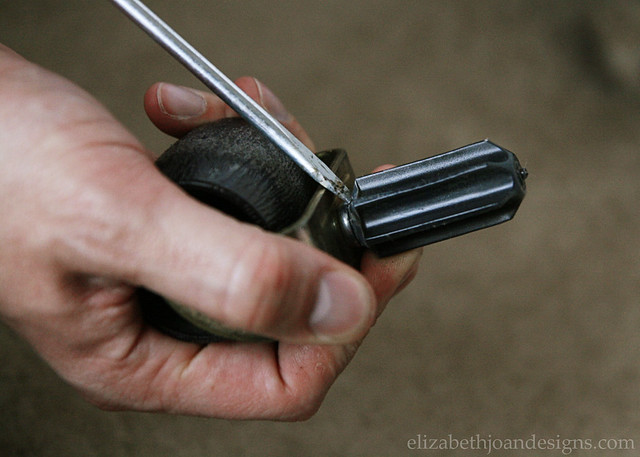
Here is our old bed frame’s little wheels that held everything up. Kind of pathetic, right?

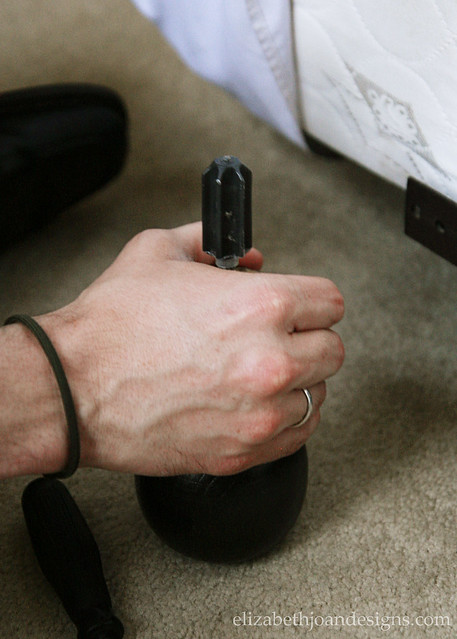
Well, the hubs figured out how to remove the entire wheel base and the plastic part that kept it tight inside of the leg. Then he pried the plastic piece off with a screw driver.
Lucky for us, the post screws fit perfectly inside of the original plastic frame pieces.
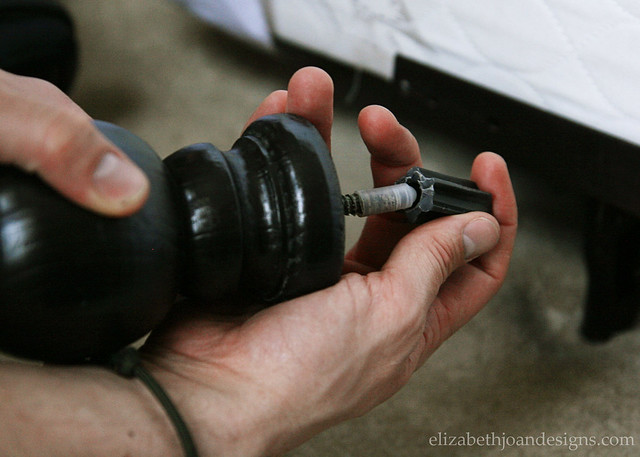
And with a few taps of the hammer, they were secured in place.
Finally, we just lifted the bed back up and positioned each post in place.

So far, the bed is holding up great and seems to be very secure. The kids even jumped on it a bit to double check the sturdiness. Plus, we gained several inches of storage space, which was exactly what we were looking for. Yay!

Here is my sweet little model showing off the new height of the bed
and how it is perfectly toddler proof.