-
Gift Guide: Mother’s Day 2014
When those gift giving holidays roll around, we always love to share some of our favorite ideas. Hopefully, this Mother’s Day gift guide will help you show the moms in your life how much you care, while keeping you from breaking the bank.

Personalized Family Tree – A wonderful way to showcase family names and important dates.
Largo Jewelry Box – This chic jewelry box is perfect for keeping all of those valuables organized.
Long Sleeve Woven PJ Set – Every mom deserves some down time and these comfortable cotton pajamas will do the trick to help her get into relaxation mode.
Universal (Phone, Cash, Cards) Case – This cute clutch like case comes in multiple colors and can hold the most important essentials.
Shea Butter Hand Cream – Labeled as “beauty must have” and “life changing,” this super creamy balm is sure to soften even the driest hands.
Initials on a Chain – This sweet necklace is one of our faves. Add each of the kiddos initials to the chain to completely personalize it!Black and Creme Mini Stripe Tote – This stylish cotton canvas tote can help corral all of the things that moms end up needing to carry with them.
Live Rabbit Foot Fern – We just love greenery and the pretty lacy leaves make this little plant a great choice for the indoors.
And remember, the biggest thing of all is just to let Mom know how much you love and appreciate her, whether with a sweet gift, a big hug, or both!
-
We Dig It April 2014
Each month we will be sharing some of our favorite finds from around the web. Enjoy!
1. Wow! This Nursery Reveal, by Lindsey from Simply Salvage, would make any baby feel right at home.

2. Corinna Ashley, from For The Love Of, made the coolest DIY Geode Specimen Art.

3. We love this Ottoman Makeover from Sarah at Little Red Brick House.

4. What an a great idea! The Queen and Her Court turned a Yoga Mat Into a Runner just by painting it.

5. This Paint Chip Abstract Art, by DIYPASSION, is totally awesome and such a fun way to make inexpensive art.


-
The Light Swap
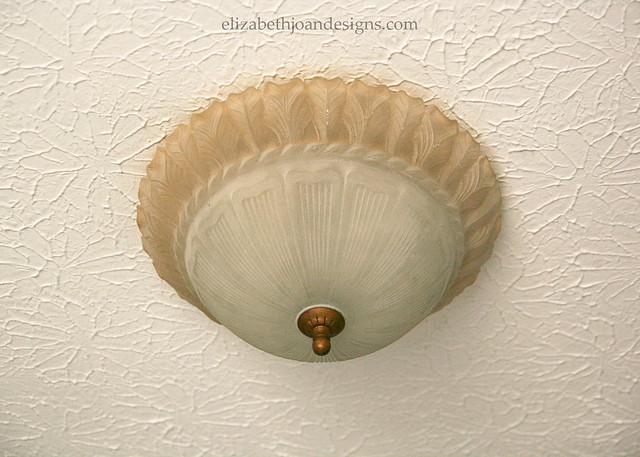
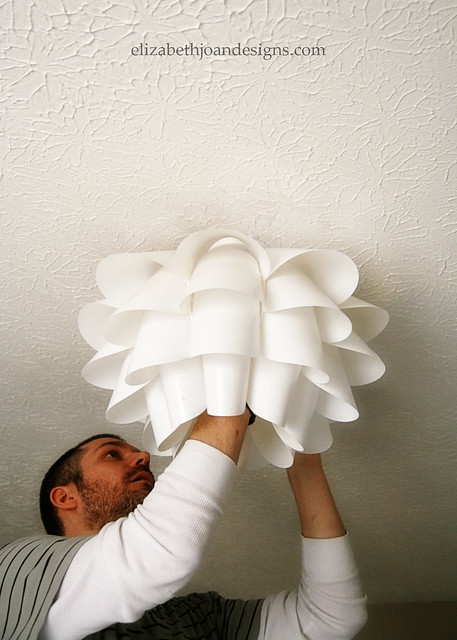
Our new house is unfortunately cursed with bad light fixtures. (And crappy ceilings, but that’s another post.) Lots of them. Specifically, the boob light. You know the ones I’m talking about. They look similar to the one below, which resides in our bedroom.
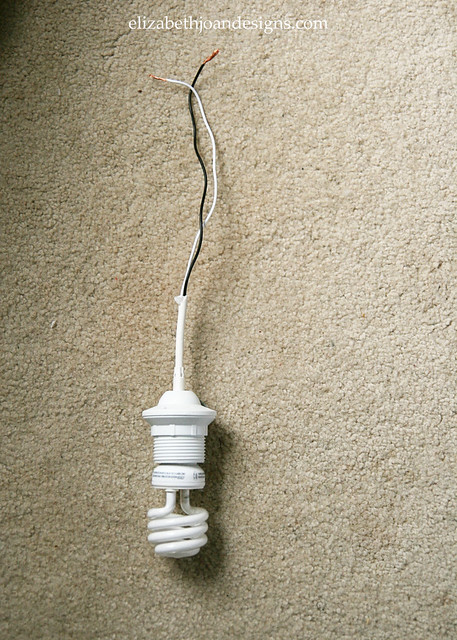
Since we have plans to replace pretty much all of the lighting here, we thought that we would start with the bedroom, since we already had most of our supplies. (Knappa Pendant Lamp and Hemma Cord Set from Ikea.) Eventually, we would like to put a ceiling fan/light combo, but it is not really high on our home improvement priority list.
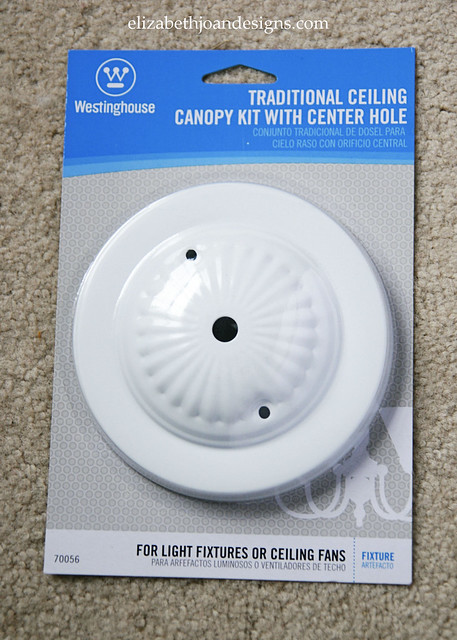
Anyway, after we gathered our supplies, which also included a stop by the hardware store to pick up canopy kit, we were ready to go. My hubby, Chris, gets most of the credit for this project, since I know nothing about electrical work and was armed with only my camera/knowledge of CPR. (Please remember to make sure the power is completely off before starting an electrical project.) He started out by cutting cord set and taking off the sheath on the end, exposing the wires. Next, he removed a small piece from the cord set, threaded it through the canopy, and put the piece back on. That kept the cord secure on the canopy.

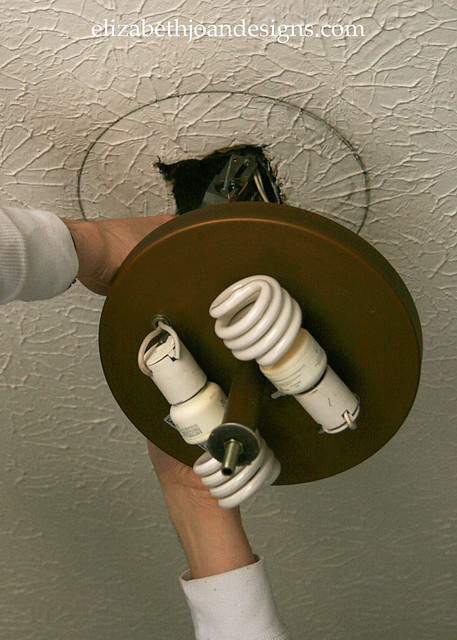
Once the new parts were ready to go up, he removed the original boob light. Buh bye! You can see that with it’s removal, it revealed a really dingy ceiling, so we whipped out the Mr. Clean Magic Eraser to try and clean it up. Once everything was clean, he connected the appropriate wires together and pushed it all back into the ceiling so that he could screw on the canopy. Finally, he put the pendant in place and we were done. Thank goodness I didn’t have to resuscitate him!

This project was quick and easy, taking only about 15-20 minutes. It is so nice to wake up in the morning and not see a boob light staring back down at me. *wink* Here is the finished product with a sneak peak of our bedroom.
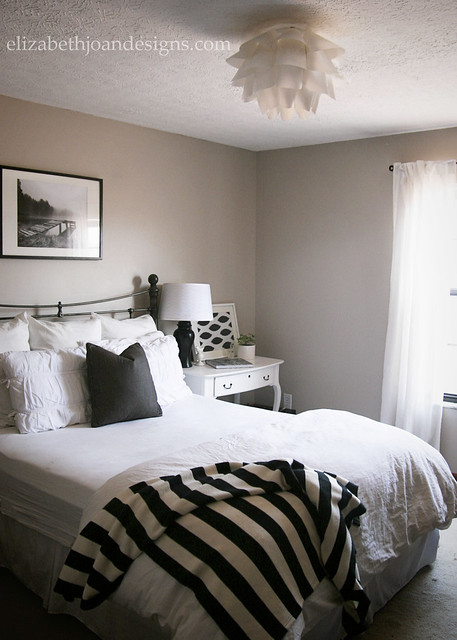
Not too shabby, right? Have you taken on any lighting or electrical projects at your home?
-
Gardening Easter Basket
It is always fun to come up with Easter baskets for our kids and we always try to integrate some fun, non-candy type items. This year, we decided to do some gardening paraphernalia, so that the kids could grow their own little plants. (Don’t get me wrong. There will still be plenty of Peeps, Cadbury Eggs and Jelly Belly Beans at our house.)
Since I was the one whipping these up, I decided to glam them a bit with some gold, much to my husband’s chagrin. However, once he saw how things were turning out, he decided that things weren’t looking too bad. Probably because I’m not gold-i-fy-ing furniture or decor in our home.
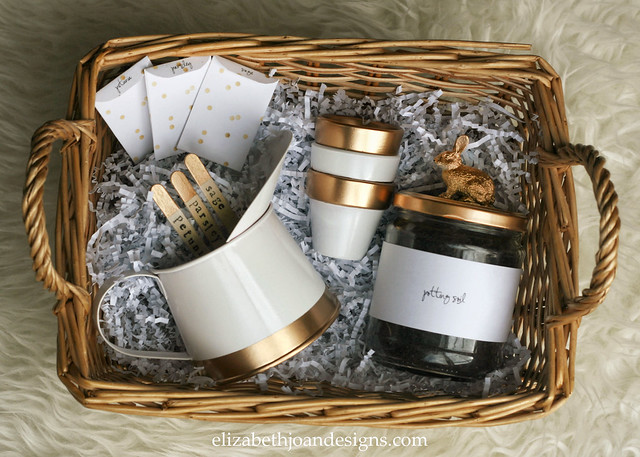
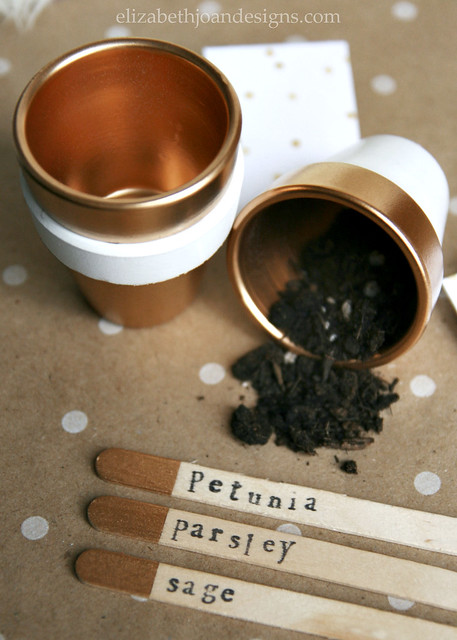
The set includes 3 small, painted terra cotta pots, potting soil, 3 seed packets, 3 plant markers, and a watering can. I used an old salsa jar to hold the soil and attached a small rabbit to the lid with some gorilla glue. Then that got a few coats of gold spray paint.
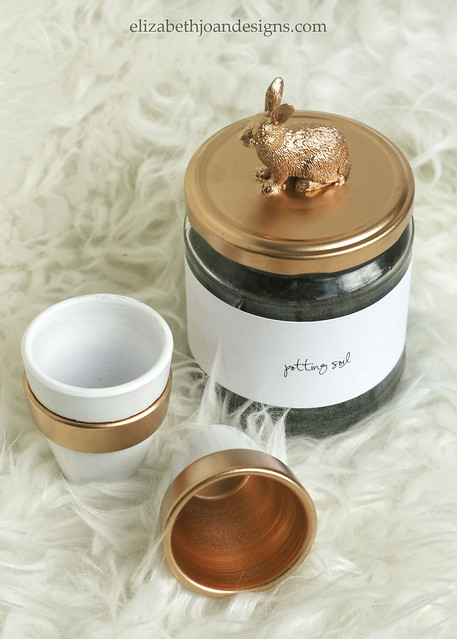
The cute little pots were so adorable and the perfect sizes for tiny hands. I dressed them up with some white and gold paint.
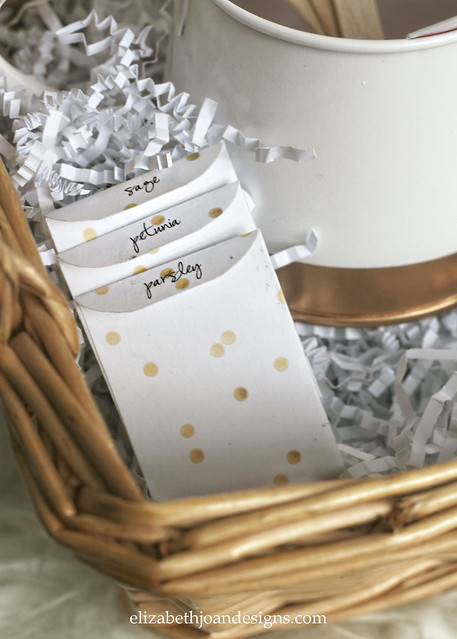
To make the seed packets, I printed out a template I found online and traced that onto some gold polka dot cardstock. Then I cut them out and glued them together. Super easy.
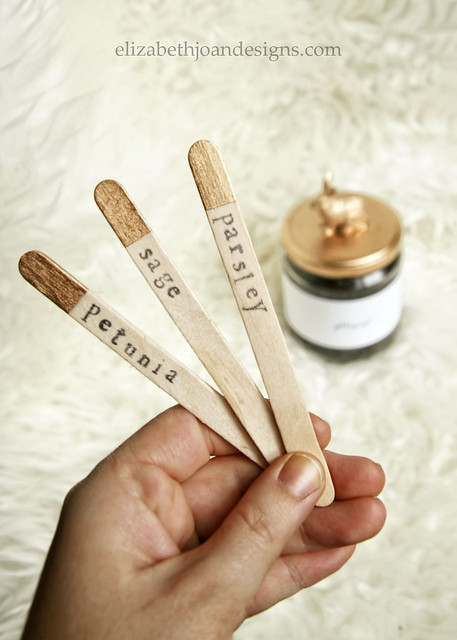
And the plant markers were simple too. A little gold paint and some fun stamping was all there was to it.
I’m sure that my kids are going to love planting these seeds and I love that this little Easter basket project turned out so cute! Now if I can just find some chocolate bunnies dipped in gold…

What kinds of items do you like to give for Easter? Do you go for candy or toys? Or something else completely?