-
Clip It. Clip It Good.
Papers! So many papers! Where do they come from? I can never keep them all organized! If you are anything like me, then you have mail, coupons and school papers consuming your kitchen counter, table and desk space.
I would go through them, sort them into neat little piles, but the minute my kids woke up or we were expecting guests I would chuck those puppies into a enormous basket to sift through at a later date. This method has been a giant waste of time!
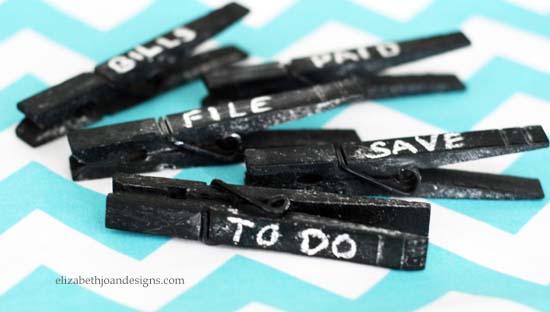
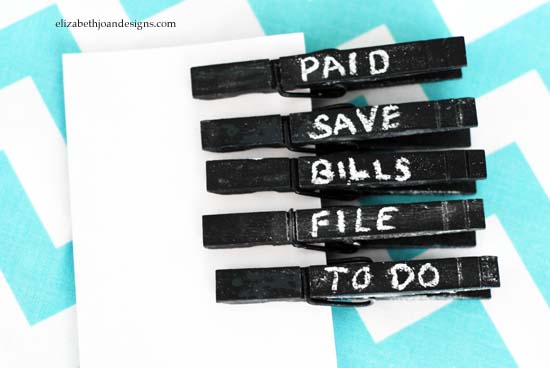
In the past, I attempted various systems of organization. These techniques seemed to work for a short period of time, but in the end we are creatures of habit and the basket chucking would commence. This time, I had to come up with a plan that worked with my nature. So, I created chalkboard clothes pins to clip to my tidy stacks and keep them together before being tossed in a bin.
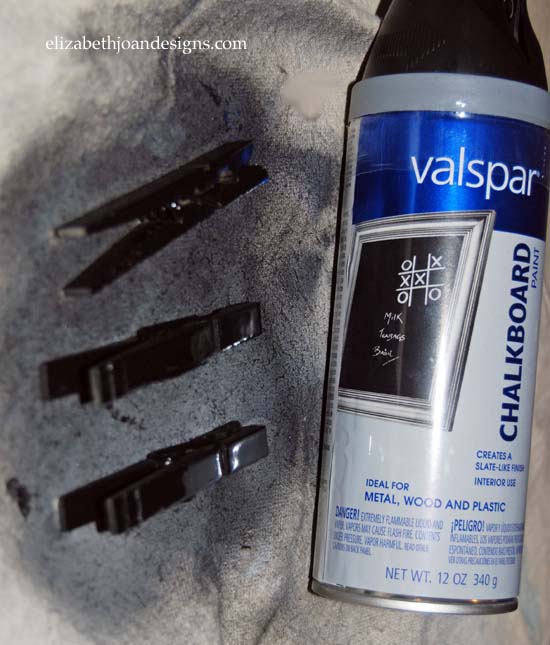
Such a simple solution only required a few wooden clothes pins, chalkboard spray paint, a drop cloths, chalk and a teensy bit of time.
I arranged the clothes pins on my drop cloth and began to spray paint. Each pin was given two coats of paint and the drying time seem to take forever!
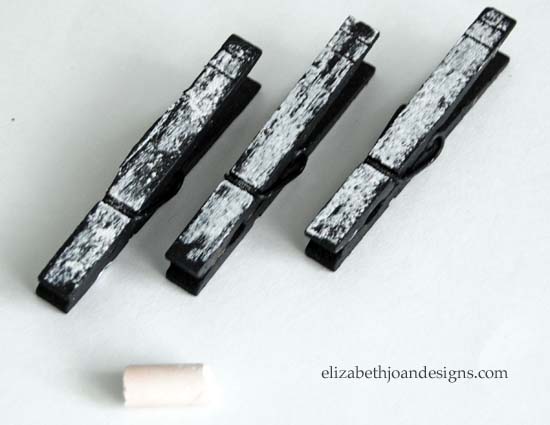
Once dry, I primed each clothes pin with chalk to prepare it for labeling.
Whoohoo! I was finished. Ready to organize all or our junk!
How do you keep all of your papers from devouring your kitchen, office, or entryway?
-
Closet To Office: Part 2
We have been turning our closet into an office. You can catch up here.
Finding room for everything has been a challenge. This closet is so teeny and with all of our office supplies in it, it was an insane mess. I really needed to find a way to utilize my space better.
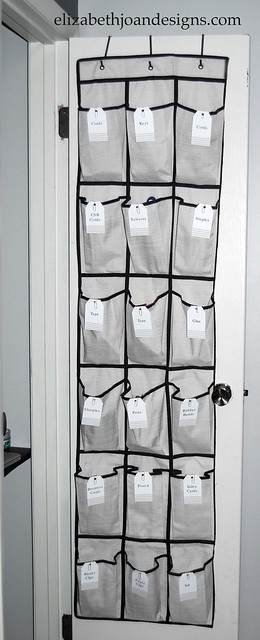
My brilliant idea: an over the door shoe organizer. There are so many pockets to stash an array of office necessities. I picked up one of these bad boys at Target.
There was one itty bitty problem with it, though. The pocket organizer was too wide to fit against our miniature door.

In fact, when I would close the door, I couldn’t actually close the closet door. This was completely unacceptable!

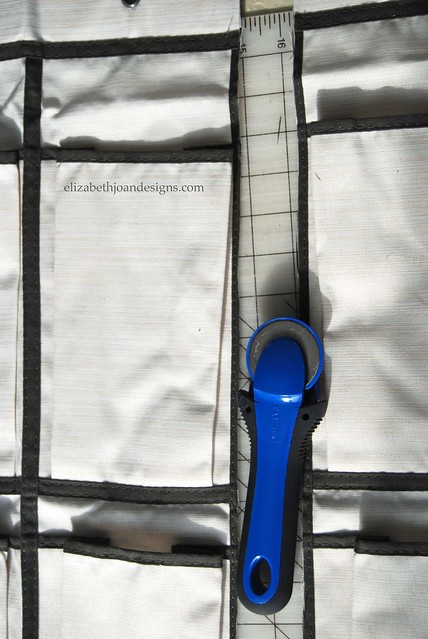
First thing I did was round up my cutting mat, rotary cutter, and straight edge ruler.
Next, I turned that twenty four pocket organizer into an eighteen pocket organizer by cutting off one column of pockets.
Ah, that was a much better fit! But there was still one little problem. When I would close the door, the organizer would bounce around. To remedy this situation, I needed to secure it to the door.


After that, I printed out label tags and secured them with paper clips to help locate my supplies with minimal effort.

I love the cute chevron pattern on these tags!

Doesn’t it look great?

This has been such a simple way to maximize our space!
Check back soon for more of our closet to office makeover!
-
Closet To Office: Part 1
We have been wanting to turn our office into a fun playroom for the kids which should be pretty simple. The challenging part though, has been trying to find a new home for all of the office stuff.
I will show you how we did it, but due to my kid’s nap times, husband’s work schedule and bad lighting, we did things a little out of order. So, try to keep up and consider yourself forewarned.
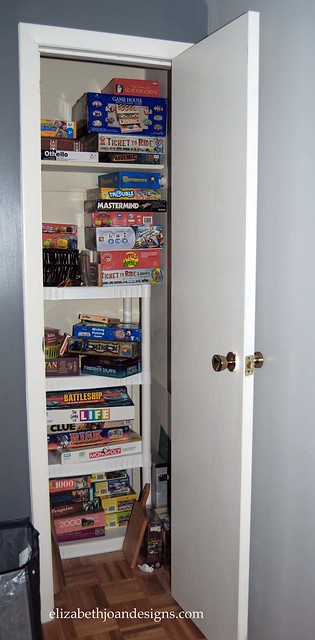
First, we removed our amazing, and not at all geeky, board game collection.
Next, we attached the shelving unit from our office in the closet. My husband, Adam, cut each board with a circular saw. He also made two additional shelves out of plywood we had leftover from our entryway remodel.

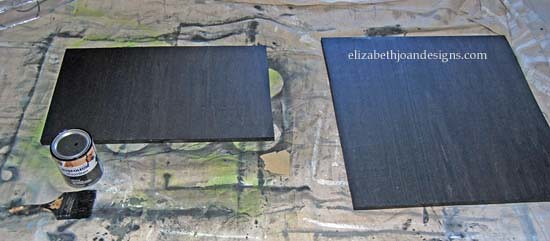
Then, I coated the two new shelves with Rust-Oleum wood stain in ebony.
After that, we removed the shelving unit and started to prepare the walls for paint by filling all holes (except the ones for the shelving unit) and cracks with spackle.

Then, I recruited my oldest son to help with the painting.
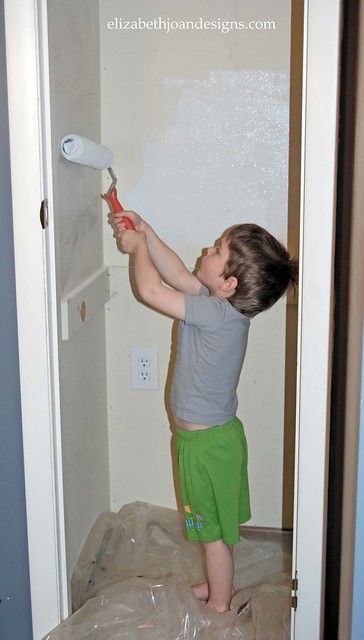
He had a blast and my walls got painted so it was a win-win for everyone.

Finally, we reattached the shelves. Again.

Check back soon to see how we organized all of this junk into our itty-bitty closet.

-
Mason Jar Paint Storage
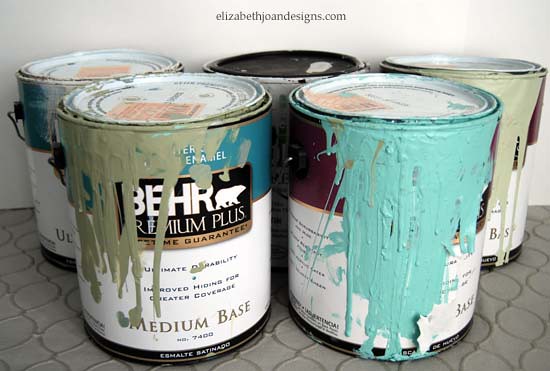
We had been stockpiling an assortment of partially-full paint cans and our supply was out of control! Do you know how much room all of those containers take up? I don’t have an exact unit of measurement, but let’s just say a great deal of our precious storage area housed those buckets. In an effort to gain more space, I decided to condense these latex paints into mason jars I already own. This storage method is also much more attractive. Bonus!
This is the process I went though:
First, I gathered up all of those half-full buckets. There were actually a few more than this photo shows, but I went ahead a got rid of them. The paint was either dried up or I couldn’t even get the cans open.
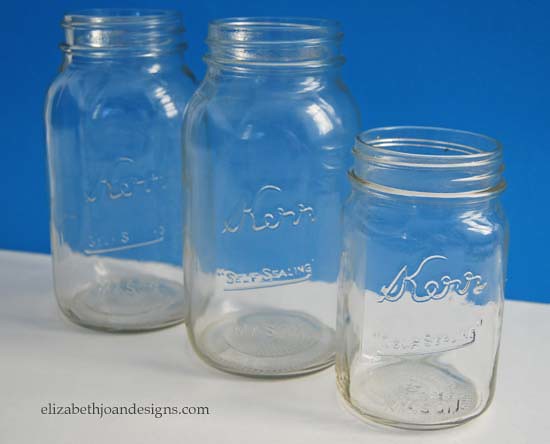
Next, I located some of our empty mason jars and started the transfer.
The pouring went fairly smoothly, but I did keep a few paper towels at arms reach for those moments when things got a little messy.
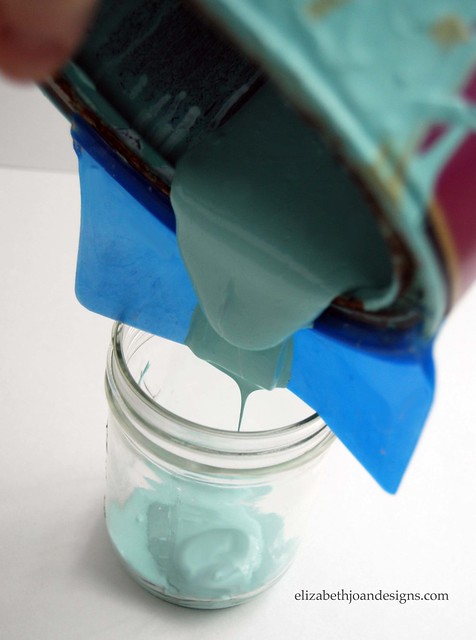
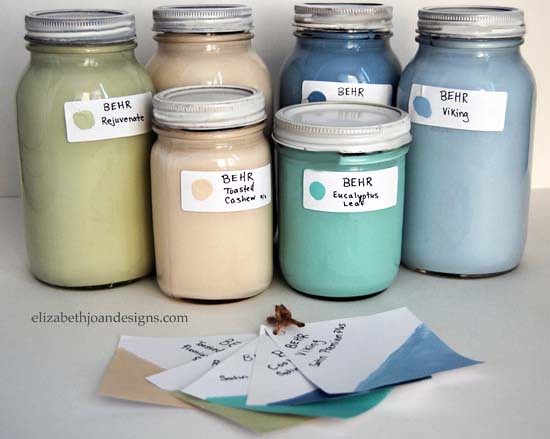
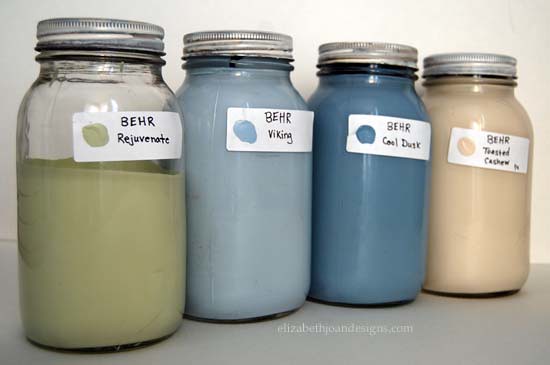
Then, I used address labels to mark each jar. This way I will know the exact name and brand of each paint color.

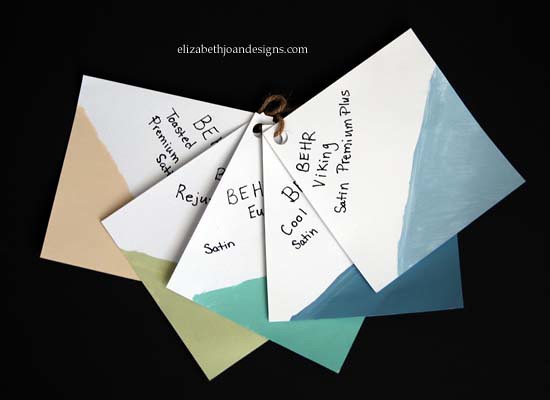
After that, I created my own paint samples that are a smidgen more detailed. (See photos below.)
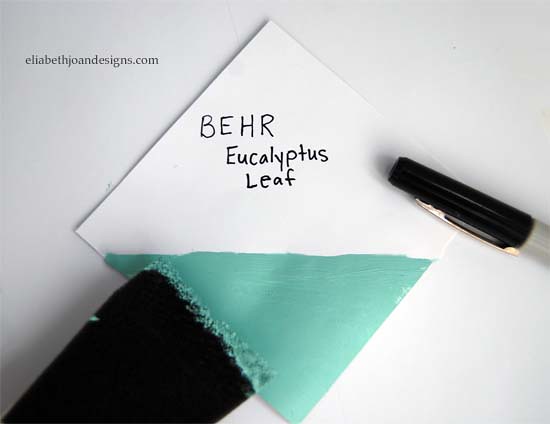
I punched a hole through them and tied them all together with twine.
Finally, I screwed the lids on each jar. Yay! Aren’t they cute?
Oh, the room I will save with this adorable paint storage alternative. Do you have any special tricks you use to save space in your own home?