-
Entryway Remodel Part 3: The Reveal
Trim. Check. Paint. Check. Bench cushion. Check. This check list can only mean one thing: the reveal of entryway is here!
When we last left off, it looked a little something like this:

Here are the final detail steps we took to get our beautiful hallway…
First, I filled all holes and gaps with nail hole filler and caulking. As you can see, there were tons of them on the shelf.


Next, we secured 5 hooks to the shelf. This provided more hanging space for coats, bags, scarves, etc.

Then, Adam framed the closet area with trim. He found that the air compressor nail gun attachment was the most efficient way to do it.


After that, it was time to paint the trim. I taped off everything with frog tape. Frog tape has proven to leave cleaner lines than plain old regular painter’s tape. Well, at least when I am painting.

Here are a couple great buys I found at Target. I love Target! These baskets were on clearance for $2.68 each. I purchased three of them. We mainly use them for school papers.

I also found these fun little chalkboard for a steal for $0.30 for a pack of eight.

I made this seat cushion out of foam and upholstery fabric purchased at Jo Ann Fabrics. Don’t be fooled. I found this cushion to be extremely challenging to make. I just couldn’t seem to get the fit right, but once I did, it was awesome. Yippee!

On the wall opposite of the bench, we hung a few hooks to hang our coats and backpacks.

Now the details are all wrapped up.
Can I get a drum roll please?
Tada!

I added five of my boxes to baskets on the top shelf. They house hats, gloves, reusable bags, umbrellas and other items we like to grab on the way out.Once the weather is a bit nice, I am hoping to get out in our garage and build a couple crates to toss our shoes in.

What do you think? We are so pleased with this area. Yes, it did take over a year to complete, but we LOVE it!
-
Kid’s Table Makeover
About a year and a half ago, I was browsing a neighborhood garage sale near a friend’s home and I found a really adorable matching kid’s table and chairs. It was priced at $20.00 for the set. We had already owned a table and chair set for the kiddos, so 20 bucks was a bit out of my price range, even though I liked this one much better.

Later that evening, I headed back to that same friend’s house for a girls’ night and noticed that cute wooden set, curbside, as if it was just waiting for the garbage man to collect it. My natural instincts to rescue it kicked in and before I knew it, it was mine. *Insert evil laugh here.*
After sitting around here for quit some time, I decided to give the table and chairs the makeover they had been screaming for.

First, I used our hand sander and 80 grit sandpaper to remove the old finish from the wood. This process was a huge pain in the butt. It seemed like years had passed before I had finished removing it all, but in reality, it was only 4 days.

There were a few hard to reach places I used the sanding attachment on our dermal tool to buff.

Once all of the old stain had been cleared away, I treated the wood with 120 grit sandpaper.

Next, I wiped down all surfaces to eliminate the dust.
Then, It was time to stain the wood. The stain my husband and I agreed on was Rustoleum Weathered Gray. When, I applied it to a small section, I was surprisingly disappointed with the look. It was too gray! (That is something I never thought I would say, since each room of my house contains some form of gray.) It looked more like I had painted it rather than stained it. My solution to this problem was to mix this weathered gray with Minwax Special Walnut stain. The Minwax is the exact stain I had used on my dining room table. Hooray for no additional cost!
The combination of these two stains worked perfectly! It was exactly the look I going for, a warm distressed gray-ish color.

Finally, I applied 4 coats of Minwax Polycrylic to give the table and chairs a little shine and a lot of durability. It is a kid’s table after all.

I am so happy with the final product! Even with all the work of sanding, this has been one of my favorite projects to date.
-
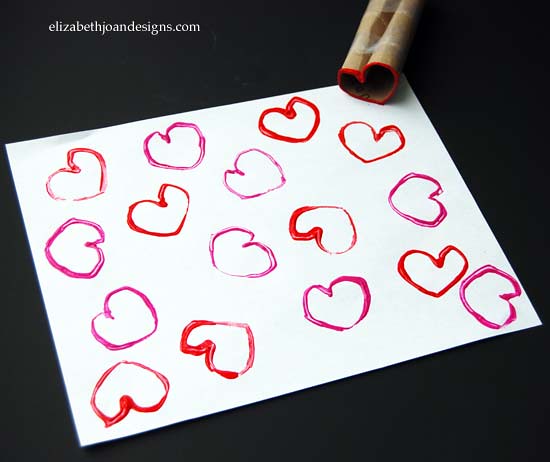
Heart Stamps
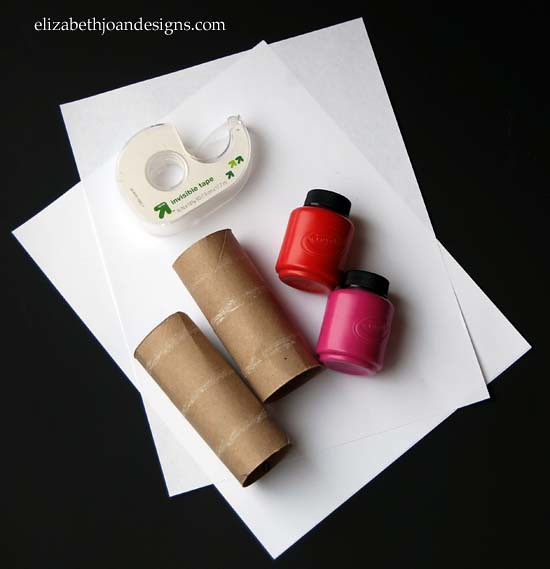
I am always looking for fun, simple crafts to do with my 2 year old and 4 year old. Just in time for Valentine’s Day, I came across this easy project full of love. Heart stamps made from toilet paper rolls! Genius idea!
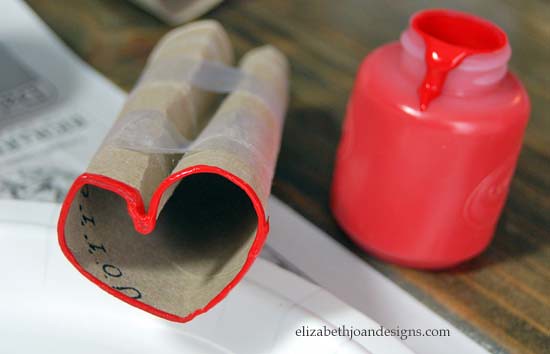
Because we are making these hearts for Valentine’s Day, I dug out our red and pink washable paints.
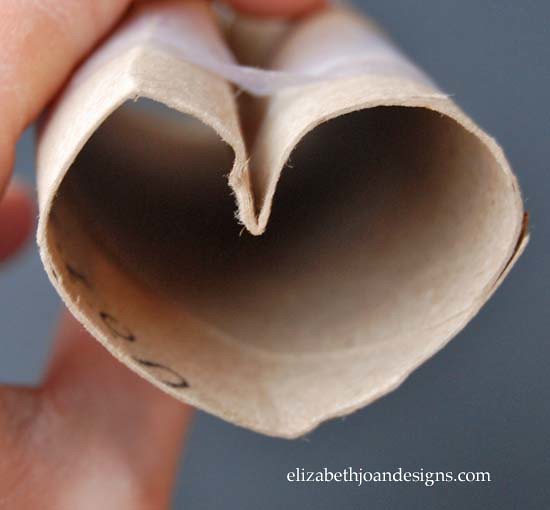
Next, I formed a heart shape with the paper roll. Then, I secured the shape with tape.
Finally, I handed it to my little men and they created beautiful, but messy, works of art.
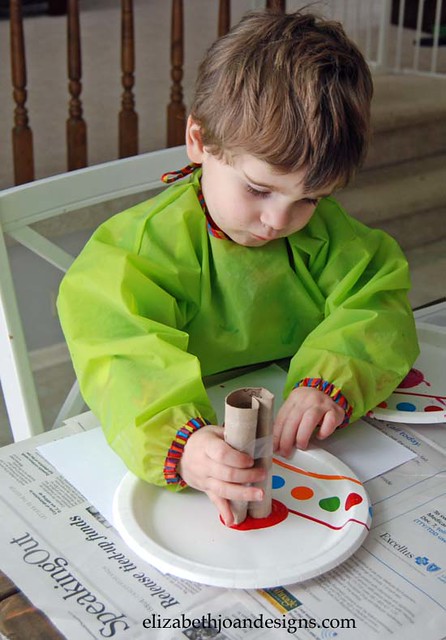
They had such a great time working on these pictures, that the next day we did it again. The second time we we used different colors and experimented with different shapes.
Love the way this turned out!!! Check out Instagram to see the experimental art from round two.
-
Out With The Old
Do you feel like your home is so cluttered, that your stuff might just eat you and your family alive? No? Okay, maybe it’s just me then. Well, if you find yourself in this situation, you can use this as a guide to help you simplify your life.
With hobbies like garbage picking and extreme couponing, my garage and basement are full of potential DIY projects and a year’s supply of toiletries. While I do think it is important to have things on hand, I think that this time my hobbies may have gotten out of hand. Trust me; there are no arguments from my husband on this one.

It is time to get rid of things!
To help my cause and to indulge in my passion of going through other people’s trash, I decided to host a swap party. This is a fun, free way to get rid of things you no longer want or need and take home a few new treasures.

Here’s how it worked:
Everyone brought useful junk to get rid of. Next, we spread out the loot. Each guest was given a stack of colored post-its; one color per person. Then, they chose a new item for each one they brought and claim it with their colored post-it. If more than one colored post-it was on an item, we put them in a hat and drew one out and that person kept the item.

Rules:
1. Each guest brings up to 10 items (new or used) to get rid of.
2. Make sure everything the guest brings, is something they are willing to part with.
3. All items should be clean and in good condition.
I set up a donation box for any items that went unclaimed.
The swap party was a huge hit! So much so, that I will be hosting another one later this month.
As I was packing up the unclaimed items in our car from the swap party, I decided to use this opportunity to sift through more crap in our house to also take along to donate.
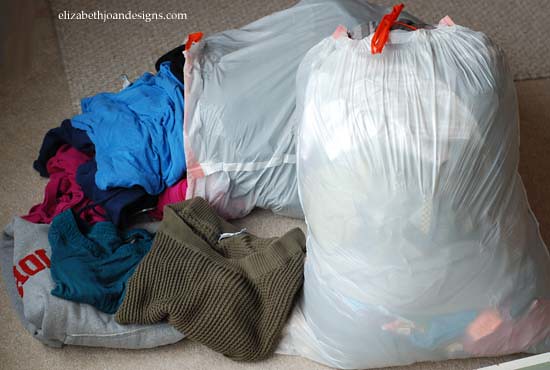
First, I decided to tackle my closet. Wow! There were a lot of outfits in there I didn’t even know I had anymore! You know, a lot of those “someday I can fit into that again” type items. I decided if it was a surprise to see that shirt from 10 years ago, that it probably needed to go. I came up with 2 large garbage bags full of stuff to donate.
Next, it was time for the garage and basement. This was a gigantic undertaking. For each piece I asked myself these questions:
1. When was the last time I actually used it? If the answer was more than six months, it needed to leave the house.
2. Do I love it? This seems obvious, but there really is no need to hold on to something we only sort of like.
3. How much is it really worth to me now? I took a few pictures of a couple things to persevere the memory of the items, but save some space in our home.
4. Does it serve more than one purpose? We decided to get rid of our tea kettle, because it is just as easy to heat water in a pan. We just don’t need the extra clutter lying around here.
5. When will I get around to finishing this? This is a big one for me. I have so many potential projects just taking up space, waiting to have a second life.
In the end there were a total of ten boxes and three bags of stuff we were able to eliminate from our house. Yay!
And remember, if you are donating items, you can get a receipt to use for a tax write off.