-
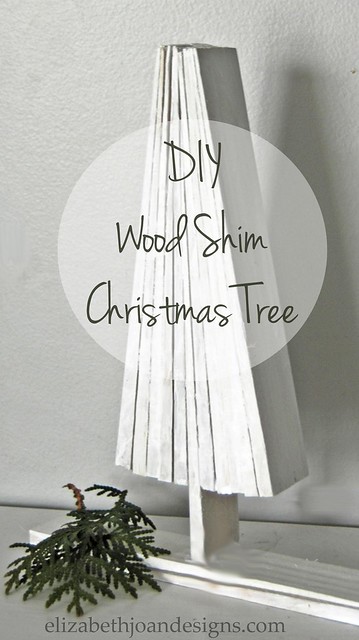
Wood Shim Christmas Tree
Hello! Welcome to Day 11 of The 12 Post of Christmas, where 12 blogs have come together to bring you a variety of amazing Christmas projects for $24 or less. So if you like to spend hundreds of dollars on each of your holiday decor items, then this post isn’t for you. But if you like cute, cheap, and easy projects then stick around and I will show you how I created an adorable wood shim Christmas Tree for less than $2.00.
Supplies
– Wood Shims – (I used Nelson Wood Shims, 1.25-in x 7.75-in.)
– White Paint
– Paint Brush
– Hot Glue Gun and Glue Sticks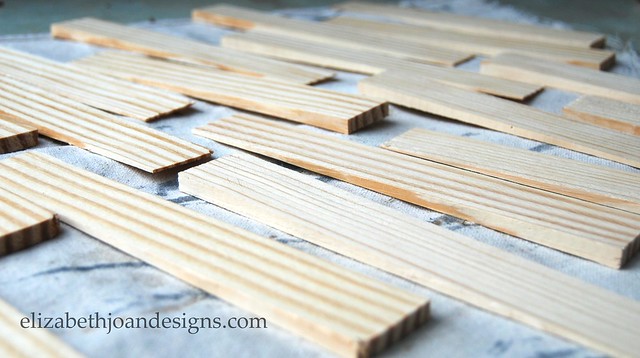
First, lay out all of the shims and brush them with one nice coat of white wash.
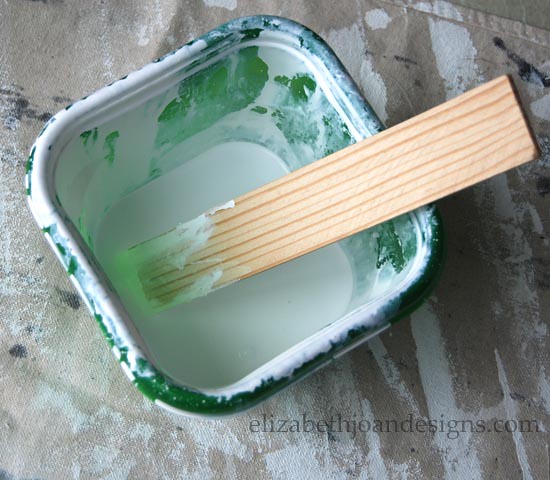
I mixed up a solution of equal parts water and white paint. This seemed to give the wood a whitish look, but I loved how you could still see the wood grains through it.
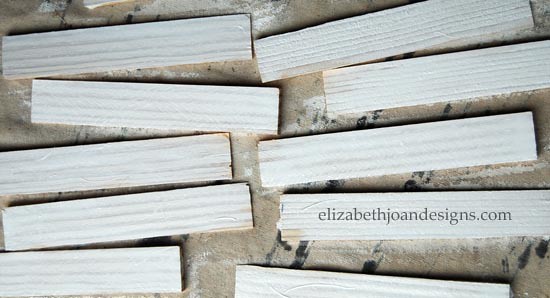
Once the paint dries, it’s time to assemble the tree. This process may sound a bit confusing, but trust me. It’s a breeze.
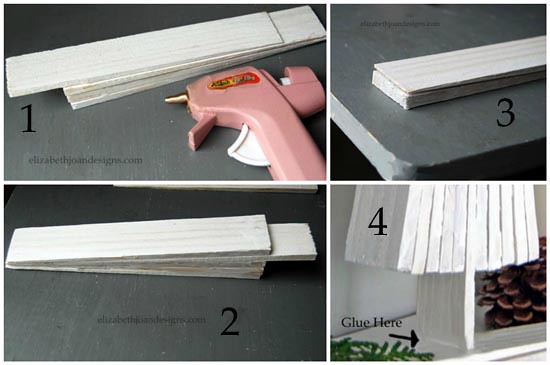
1. Start by hot gluing a few of the wood shims flat on top of one another. Make sure to line up the narrow ends, which this will be at the top. For the trunk piece. you will want to glue it about 1 1/2 inches down from the top of the other glued pieces. It should stick out a little bit from the rest.
2. After the trunk is in place, glue the next shim on top of the trunk. Line up the narrow end with the top of your tree, not the trunk piece you just placed. Continue to glue shims directly on top of each other. For balance, you will want an equal number of wood pieces on both sides of trunk. (I went with 5 on each side.)
3.For the base, take two shims and glue them together. You will want the narrow end to line up with the thick end. This will create an even foundation for your tree to stand on. (A leaning tree might not be quite as cute in the end.)
4. Finally, attach the tree trunk to the base with a dab of hot glue and you’re done! Yay!

This project is a fun modern spin on a traditional Christmas tree decoration. What do you think? I think I am in LOVE!
__________________________________________________________________ If you have not yet, be sure to check out all of the other amazing projects for the 12 Post of Christmas.

1st Day
2nd Day
3rd Day
4th Day
5th Day
6th Day
7th Day
8th Day
9th Day
10th Day
11th Day
12th Day
____________________________________________________________________ You may also like:
Stocking Hanger 
Advent Calendar from Shoe Organizer 
Festive Paper Stars 
Ten Minute Infinity Scarf -
Holiday Gift Wrapping
With the holidays approaching, we decided to re-share our holiday gift wrapping ideas to help inspire you. Hopefully some of these ideas will come in handy as you conceal all of your loved ones presents.

Check out this post for more details. ____________________________________________________________________ You may also like:
Wrapping Paper Bow
Advent Calendar from Shoe Organizer 
Salt Dough Starfish Ornament
Stocking Hanger -
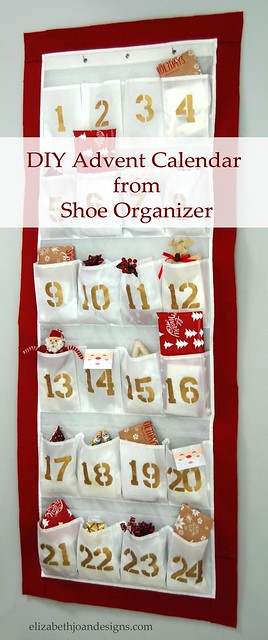
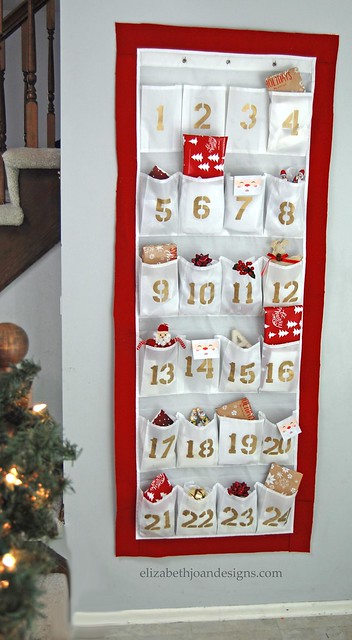
Advent Calendar Made from Shoe Organizer
I love a good count down to any holiday, so making an Advent calendar this year was a no-brainier. I found inspiration here while browsing the holiday section. To me, using a 24 slot over the door foot-gear organizer made the most sense for my budget.
Follow along and you can make your very own Advent Calendar!
Supplies
– 24 pocket over the door shoe rack – white
– Red wool
– Gold paint
– Spouncer
– Reusable number stencils
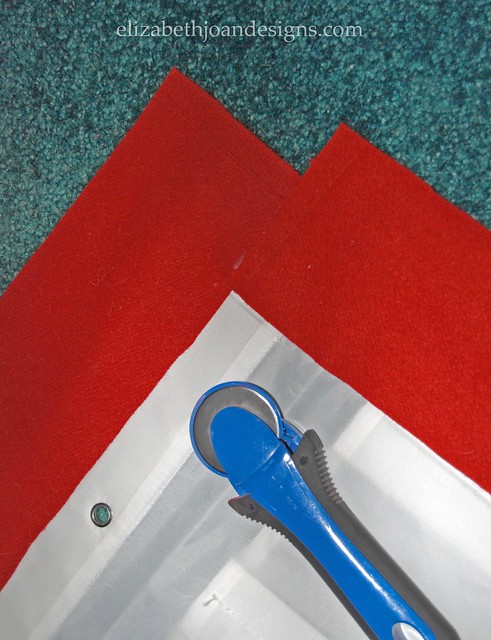
– Scissors or rotatory cutter
– Glue gun and glue sticksFirst, I began making my Advent calendar by stenciling numbers in sequential order to the fronts of the 24 pockets on the sneaker holder. I used my spouncer, gold paint, and stencils to make the
flawlessnumerals.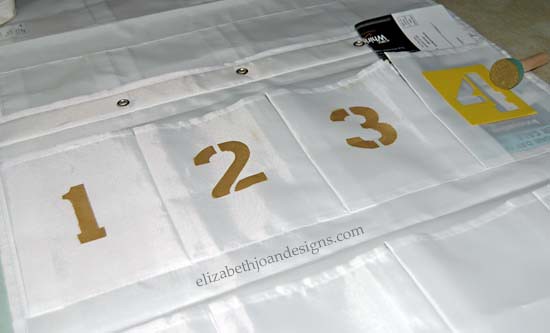
My recommendation to you if you are attempting this project, is to splurge a little bit on the plastic stencils vs. paper. Once my papers ones got wet, they started to pucker which made it hard to get crisp lines. There were also hours spent sitting around waiting for the paper stencils to dry. I had to reuse the 1 and the 2 many, many times so I am sure you can image the boredom I put myself through.
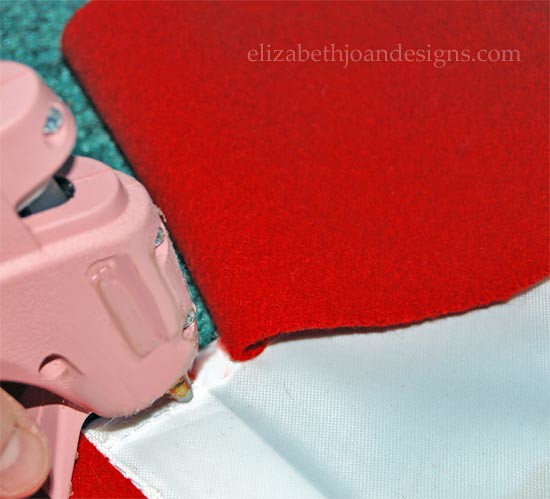
Next, I cut 4 strips of the red wool about 5 inches wide that are for the outline of the calendar. There was no exact science to this, I just eyeballed it. The red wool I used was something I had inherited from my grandmother. This just seemed like such a wonderful project to use this special fabric for. It adds another layer of meaning and a pop of color to the Advent calendar. I used the hot glue gun to attach the fabric strips to the edges of the footwear organizer and trimmed the entire border with a rotatory cutter to give it clean straight edges.
< 
Finally, it was time to hang it up and place all kinds of Christmas goodies for our little ones in the pockets. There are a few toys and candy dispersed throughout the days, but most of the pockets have a festive family activity for us to do.
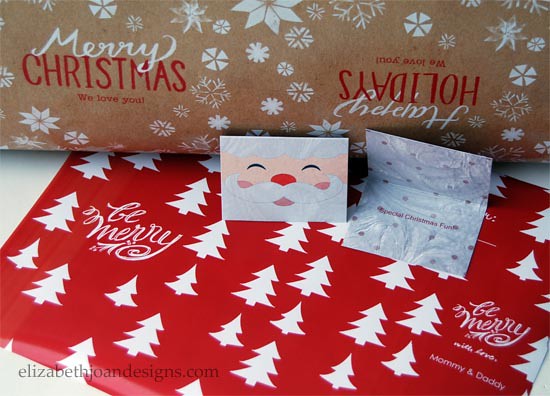
Just because I love personal touches, I decided to use these adorable personalized gift wraps and gift tags from Tiny Prints to conceal our packages and write special messages in.
I am really excited how this project turned out and our boys really love it too!
____________________________________________________________________ You may also like:
Festive Paper Stars 
Whitewashed Brick Fireplace 
Chalkboard Tins 
Knit Vases -
A Simple Desk Redo with Big Meaning
I have been working hard on transforming my oldest son’s room from nursery to a “big boy” room. I am so excited to share this desk redo with you and the meaningful story that goes along with it.

We grew up in a small town in Ohio. During the days when our parents were working and my big sister (Erin) was at school, I spent my time at an in home daycare. Lucky for me, it was also our grandparents’ house.
I have so many fond memories from this period of my life. One of my favorites is the time when my cousin Amy and I discovered where our grandfather kept his secret stash of chewing tobacco. The hiding spot was in the bottom, back of a drawer in his desk. In the exchange for our silence in not telling our grandmother, he gave my cousin and I our very own special drawer in that same desk to keep our drawings and art work in. Our Grandpa was definitely not someone who was afraid of conflict, but he always said “Grandma is the boss and don’t want to make Boss Nanny mad.” So we kept our silence and our drawer.
It has now been 25 years since then and our grandpa has passed away. The desk remains in pretty good shape and I am now the proud owner.
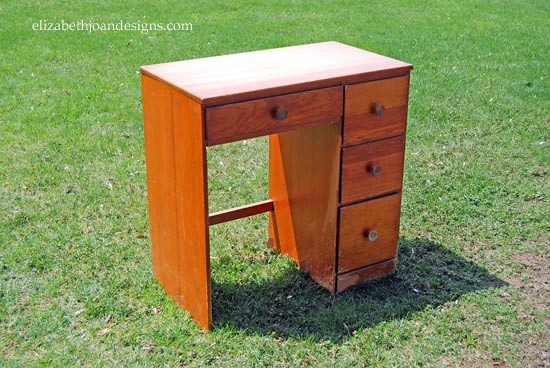
When I first inherited the desk, I opened each of the drawers and was hit with a very familiar smell. Tobacco. Ah, Grandpa. As I opened our special drawer, I saw crayon marks all along the walls of the it. The memories just kept coming back to me.
As much as I loved this desk as it was, it did need a little work. When trying to decided what to do with it, I thought about my grandpa and how back in 2010 he was in the nursing home, not doing too well. I was pregnant with my first son and he kept saying he wanted to see that baby before he died. He did end up getting his wish and I hope our grandfather would be pleased that my oldest son will be getting this desk in his room.
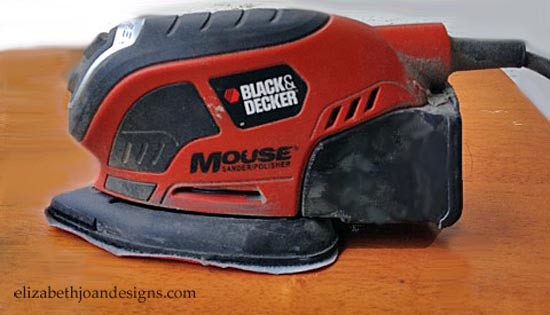
To spruce this baby up, I first sanded down the entire exterior.
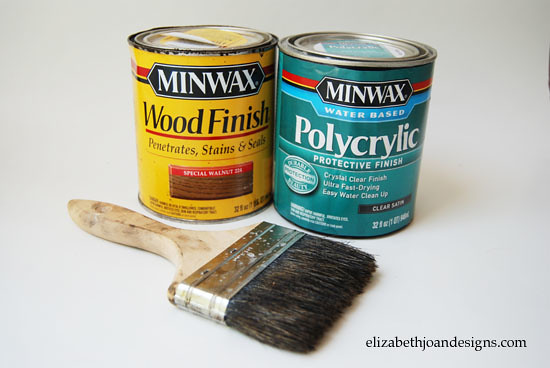
Next, it was time for the stain. Using a natural brush I applied a coat of Minwax Special Walnut to the desk and drawer fronts. I made sure to wipe off any excess stain that did not soak into the wood with a rag.
Then, I used a synthetic brush and swept on three coats of Minwax Polycrylic. I love this stuff because it is water based and does not leave the surface looking yellow.
Finally, I added some new hardware, stood back, and admired my work.
I just love how it turned out and my little guy is pretty excited too. His one and only request was that we display a few pictures of our family on top of it. Do most four year old boys request pictures of their parents to have in their bedroom? I think it is so sweet. I found these fun art frames at Tiny Prints and they work perfectly for our needs.

It’s so wonderful to have this meaningful piece of furniture in my home. And someday, when my son gets older I will have the pleasure of explaining to him why his desk smells so weird. Haha.
____________________________________________________________________ You may also like:
Upcycled Tripod Table 
Upcycled Corkboard 
Numbered Wooden Crates 
Cable Spool Clock