-
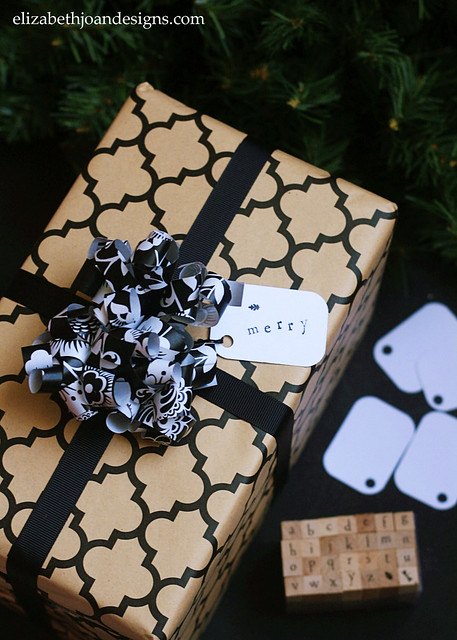
Wrapping Paper Bow
I would love to be one of those people who has all of their holiday presents purchased and wrapped by the beginning of December. But, alas, I am not. I’m typically the person at the other end of the spectrum, who is running around like a mad woman on Christmas Eve trying to tie up all of the loose ends. However, this year has been a little bit different. Most of the gifts we are giving are at our house or on their way. (Thanks online shopping!) We’ve even had one Christmas celebration already this year, so those presents have been given to their recipients.
Since I had all of these presents just lying around, waiting for my kids to “accidentally” stumble upon, I decided to start my wrapping a bit early this year. Lucky me that I didn’t inherit the same present wrapping skills as Emily. (Just kidding. You can see her beautifully wrapped present ideas here.)
One thing that I have found that saves me some moolah and makes my gifts look good is to make my own curly wrapping paper bows. They are super easy and only take a few minutes to make. Saved time and money? That’s my jam. It is the theme song to my busy and frugal existence.
Anyway, let me show you how you can whip up one (or 100) of these puppies for your own gifts. Follow the steps below.
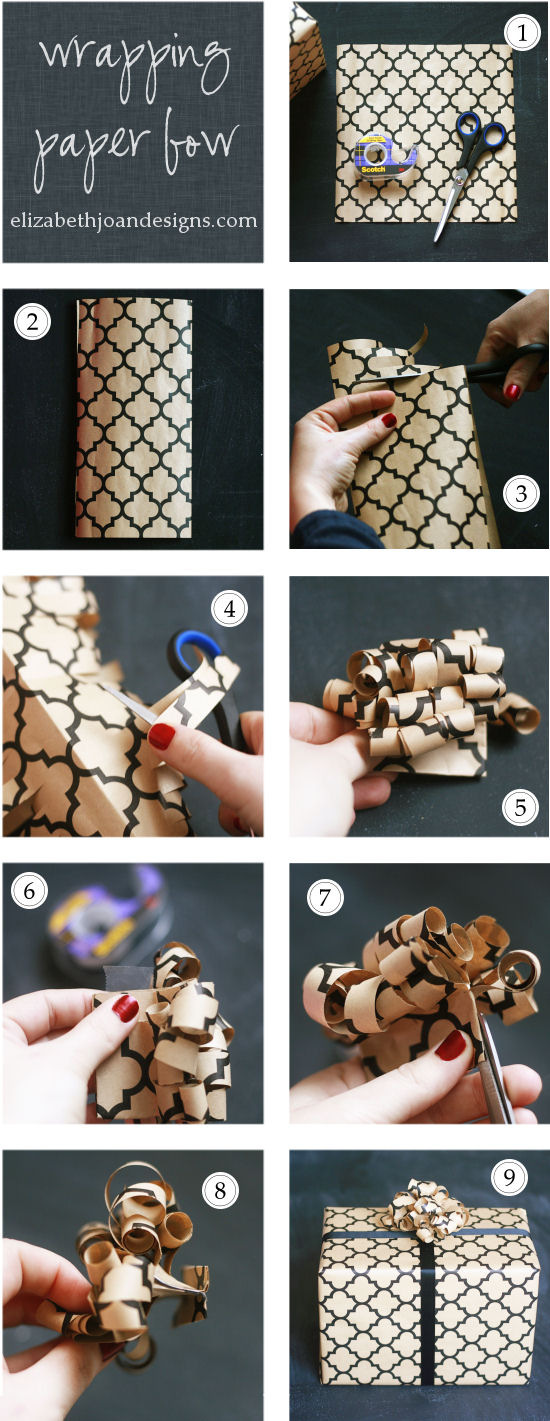
1. Gather supplies. All you need is a 9″ x 9″ cut piece of wrapping paper, a pair of scissors, and some Scotch tape. Simple, right?
2. Fold the wrapping paper piece in half and crease.
3. Using scissors, cut 1/2″ strips into the open side of the paper all the way along the edge, leaving about 1″ uncut next to the fold.
4. Next, use one side of the scissors to curl the wrapping paper like you would with regular curling ribbon. Don’t pinch too tight or the paper will rip.
5. Hold the paper with the crease towards you and fold it in half to the left (or right) twice.
6. Add a piece of tape to close off the open end, opposite of the new fold.
7. Cut a half inch up both sides, through both the fold and the tape.
8. After that, fold the bottom halves up in opposite directions. This will be the base where you will attach the ribbon to the package.
9. Fluff those little, curly tendrils a bit and place the bow on your package. Voila! All done.
This seems to work with pretty much any wrapping paper that I have found and also works with book pages and sheet music. I have yet to try newspaper or anything that thin, but if you give it a go, let us know!
-
Gift Wrapping Ideas
When I initially told my husband, Adam, I was going to be doing a post on gift wrapping, he literally laughed out loud. The funny thing was, Adam was not alone in his laughter. My dad also found this to be particularly entertaining news. I am the type of person that gives every gift in a gift bag. No wrapping here. I can barely wrap a present to save my life.
Because this post is about gift wrapping ideas, I informed Adam he would be helping with the wrapping portion and I would do all the embellishing. At that point, he was no longer laughing. Here’s what I came with:
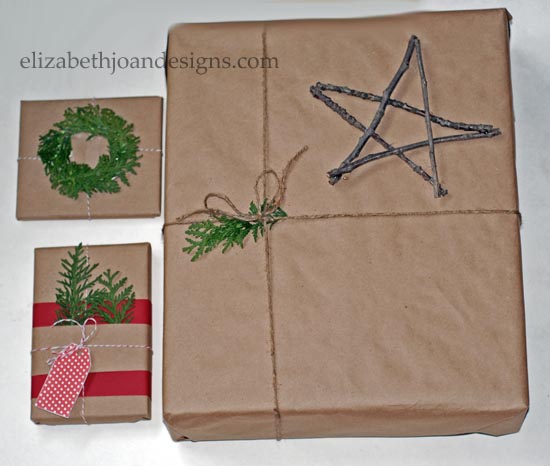
1. Incorporating natural elements provides these gifts with rustic charm. I used some items from my own yard.
2. A multidimensional “Lorax” look was achieved with yarn, burlap and sticks. I found how to make these pom poms on Pinterest.

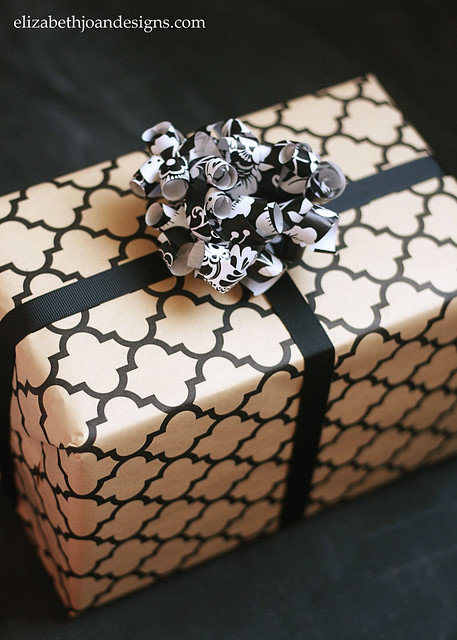
3. Black, white and read all over. I decoupaged a box with book pages and tied it with twine.

4. This package is right up my alley. If you are also not an origami specialist (I am not) just spray paint a box with chalk board paint. No wrapping evolved. Then grab some chalk and go to town.

5. Placing a single layer book page wreath on top of white wrapping paper has such a simple elegant look any reader would love. Tutorial here.

6. I topped this present with a beautiful tissue paper flower (pom pom). This super easy puff makes a great alternative to the traditional stick down bow.

I did wrap a few of these gifts and they didn’t turn out too bad. I think I should just stick to the embellishing portion.
Do you love the gift tags I used? These are Erin originals. Go here to print out your own.
-
Mercury Glass Ball Jars
Hopefully everyone had a wonderful Thanksgiving yesterday. I’m still in a food coma, so this post may be a little lacking, but I wanted to share a pretty way to package holiday treats!
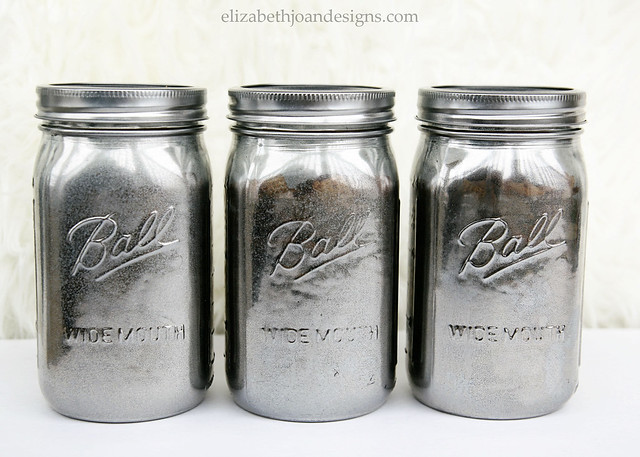
I love the look of mercury glass and this little project is so easy, that you may end up using this technique on all kinds of glass.
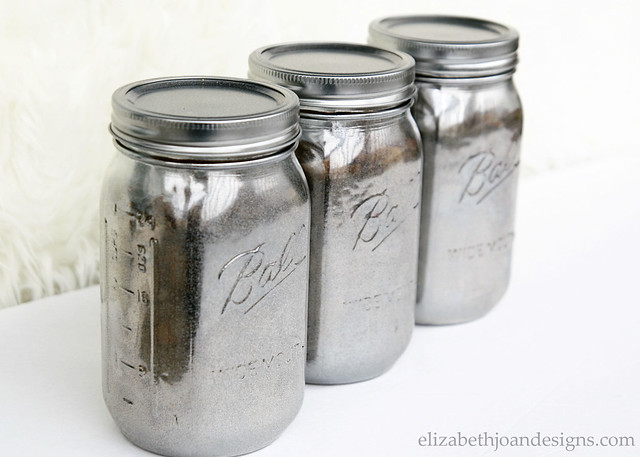
After reading about how several people had used Krylon’s Looking Glass spray paint to achieve the look of mercury glass, I decided to give it go on some Mason jars. All I did was place the jars upside down on a plastic drop cloth and sprayed about six thin coats of the paint on them. (Make sure you are in a well ventilated area if you are using this paint. It is super duper fumy!)
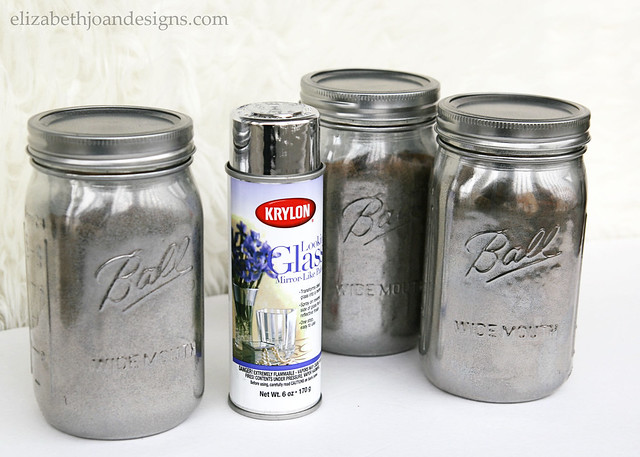
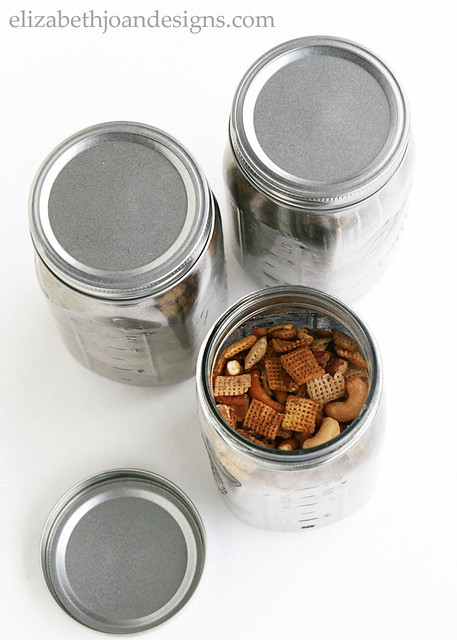
Once they were all dry, I brought them inside and rinsed them off. (If you prefer the flakier looking mercury glass, rubbing a jar randomly with a piece of sand paper would totally do the trick.) Then, I whipped up some party mix, using my grandma’s recipe and filled the jars with its yummy goodness.

After that, they were ready to share with the fam. You could totally put all kinds of delicious homemade candies and treats in these pretty jars and give them as gifts. Speaking of deliciousness, I’m off to enjoy some more pumpkin pie. Toodles!
-
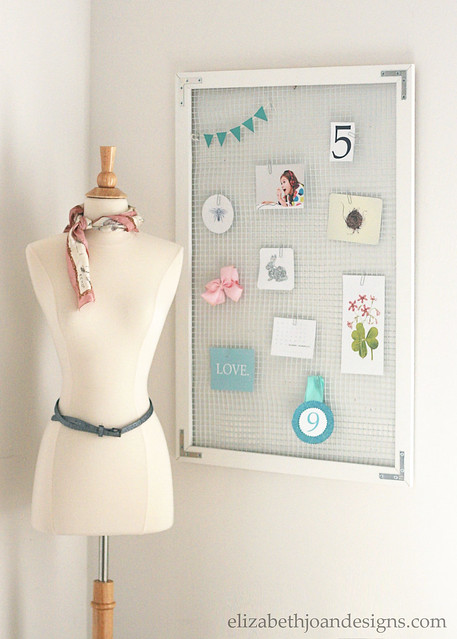
Wire Mesh Pin Board
Pinterest is a big deal. If you haven’t explored the many different pins and quickly become addicted to looking at pretty pictures and organizing them into neat little boards, then you are definitely missing out. However, when you are a sweet little 9 year old, like my daughter, Pinterest is something for the ol’ folks, because honestly, you are just too innocent to have to experience some of the randomness that pops up on the internet. So, to give our daughter a way to collect and display her own creative and pretty photos, my husband and I created a pin board out of wire mesh (aka hardware cloth, aka square chicken wire.)
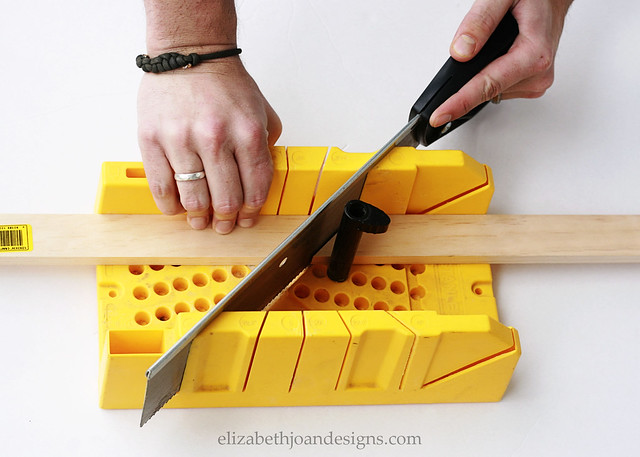
After a trip to the local hardware store to gather supplies, we quickly started putting everything together. We bought four 36″ x 2″ x 1/2″ pieces of craft board for the frame and hubby used a hand saw and miter saw box to cut the boards on a 45° angle, so the corners would meet up nicely.
Next, he cut some hardware cloth a little smaller than the outer dimensions of our frame.
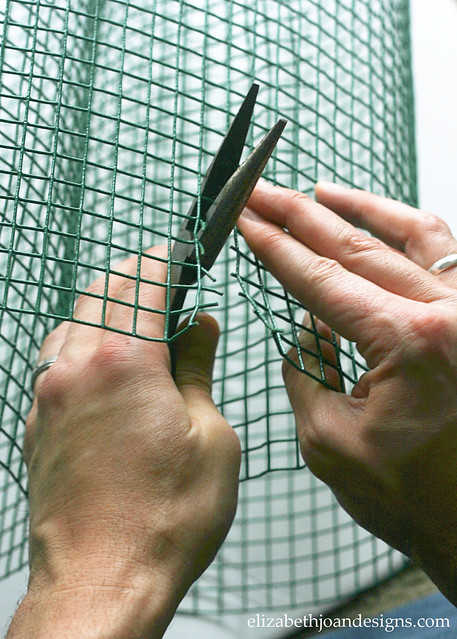
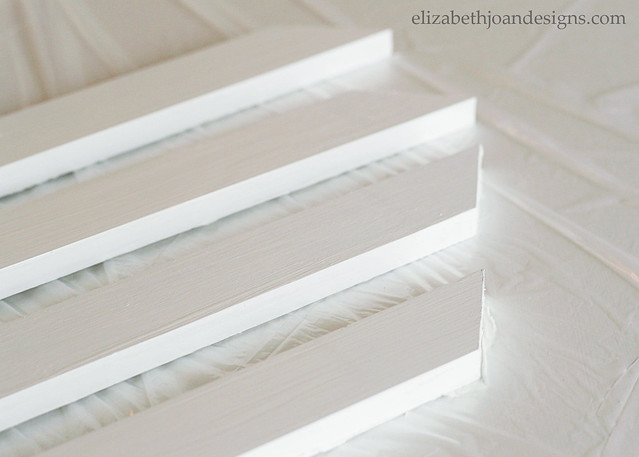
Then, it was my turn. Since we couldn’t find any galvanized wire mesh at the store with reasonable dimensions (hello, we didn’t need 50 feet,) we went with the green coated stuff. I placed the cut piece on top of a drop cloth and coated it with a few layers of white spray paint to match the frame, which I also painted white.
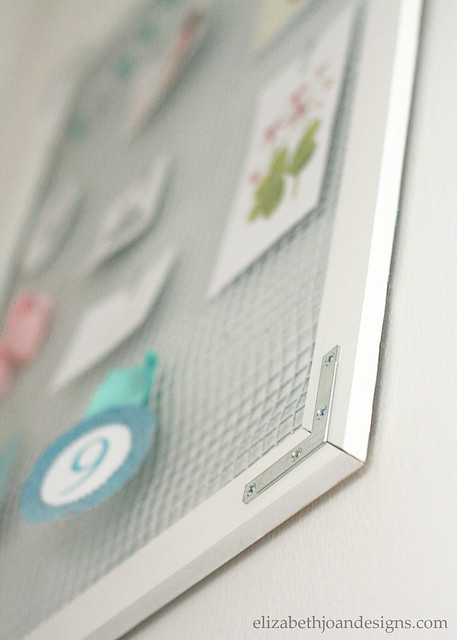
Once everything was dry, it was time to piece it all together. We found some corner braces that reminded me of something you might see on campaign furniture, so I opted to put them on the front of the frame and give it that same type of look.
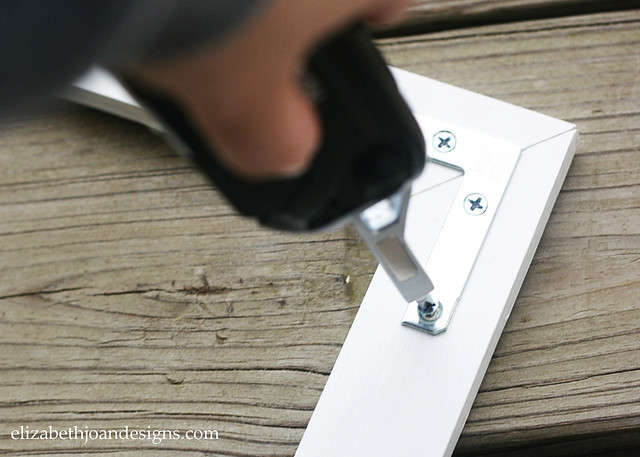
Lastly, using a staple gun, I attached the painted wire mesh to the back of the frame, stretching and pulling it, as best as I could, to get it to lay flat. (It still is a bit bumpy/wavy, but works perfectly for our needs.)
Here it is up on the wall, doing its duty. Not doody. Because that would be gross.
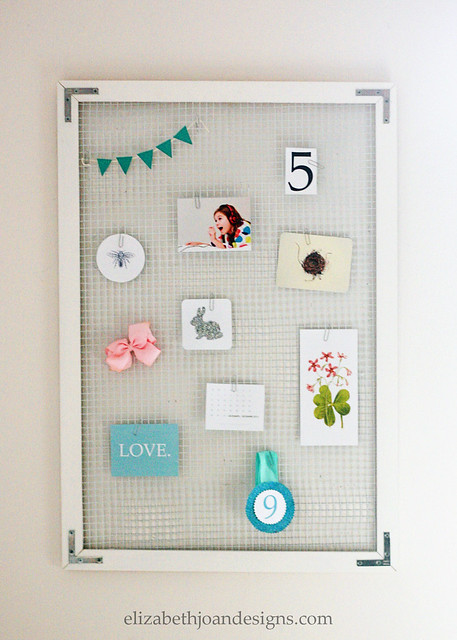
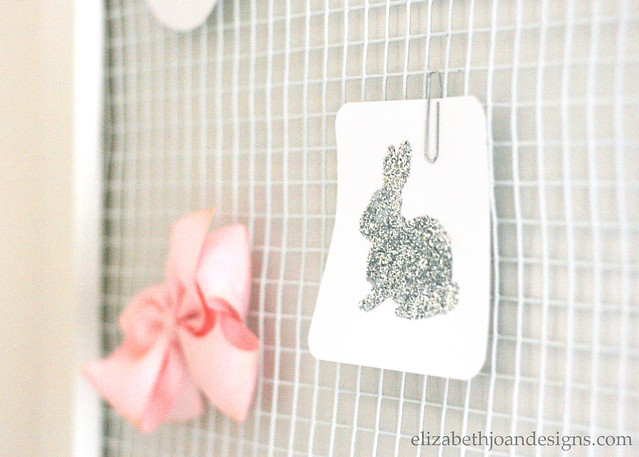
I grabbed a handful of paper clips to attach a few pretties to the board. I’ve seen clothes pins used in a similar manner, but probably any sort of small clips would work.
Buying a regular, old bulletin board would have probably been easier, but isn’t this one so much cooler?