-
The Cheapest Moss Letter You Will Ever Make
If you are a DIYer and have ever perused Pinterest, you have undoubtedly come across someone’s version of a monogram. I think everyone and their brother has probably made one, especially of the moss variety. So, this tutorial is not so much of a brand new innovation that will knock your socks off. However, I am going to tell you how you can create the cheapest moss letter that you will ever make that also looks pretty too!

Typically, I see monograms which use prefabricated letters, either paper mache or wood, from the craft store. There are usually only a few font choices and of course, you have to pay for them. Even though they aren’t expensive (usually $10 or less), I chose cardboard (free) and liked that I could customize the size and font.
I started out with a cut out print of my letter which measured 16.5″ x 14.5″. (I set it up in Illustrator, but if you aren’t familiar with that program, you can use Picmonkey to design your letter, save that to your computer and then upload it to Block Posters to be printed out.) I traced the letter onto a piece of cardboard with a pencil…

Next, cut it out with a run-of-the-mill box cutter.

If you want to be extremely frugal, you could grab some naturally growing moss from outdoors.
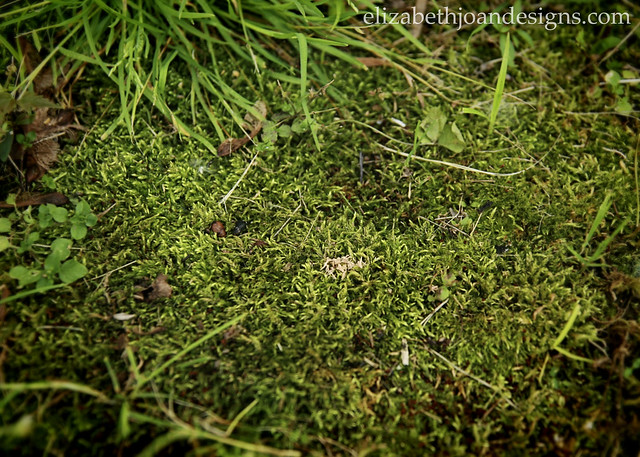
However, I bought my moss from the craft store and paid $2.50 after a 50% off coupon.
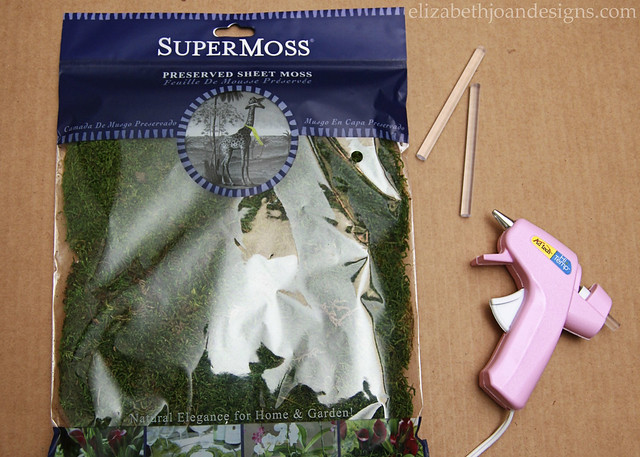
Then, came the really hard part. Just kidding. This was super easy. I glued the moss on top of my letter C with a hot glue gun.
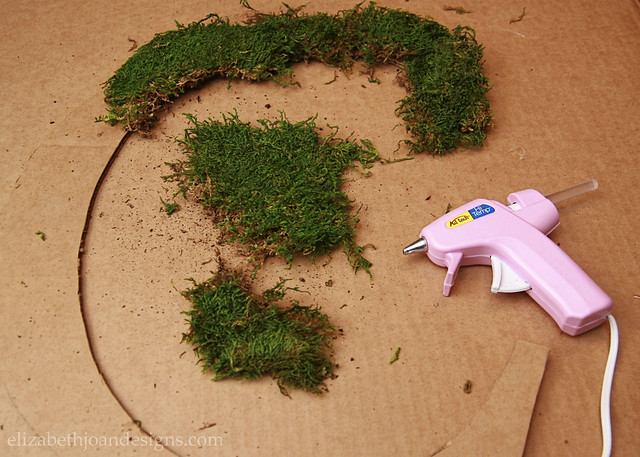
As you can see, it looked kind of wonky with all of that haphazard moss everywhere, so I turned over my monogram and trimmed the moss around the edge of the letter with scissors to clean everything up.
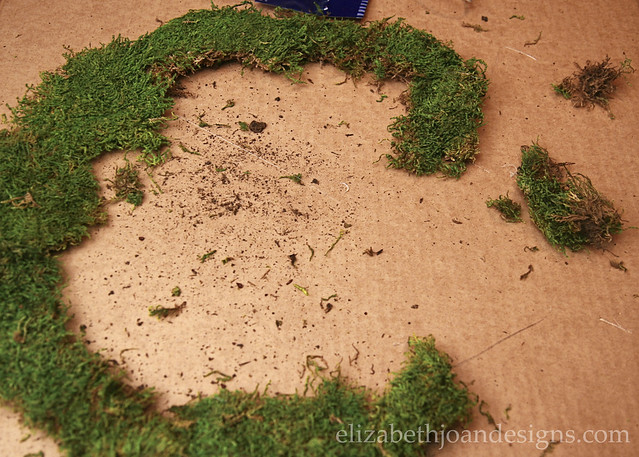
Voila! A lovely (and easy) moss letter for only $2.50. Or it could be free for you if you can find some moss outside!

Since this letter is made of cardboard, it is super lightweight and easy to hang. I placed it here above this vintage wash tub with just some tape. But I think it would also look gorgeous hanging from a ribbon on a door or placed on a mantle/shelf to bring a little life into a room.

The best part is that no one will know that you put this fancy monogram together for merely nothing!
___________________________________________________________ You may also like:

Split Pea Wreath 
Printable Paper Collection and BBQ Blog Hop 
Laundry Basket Planter 
Placemat Pillow -
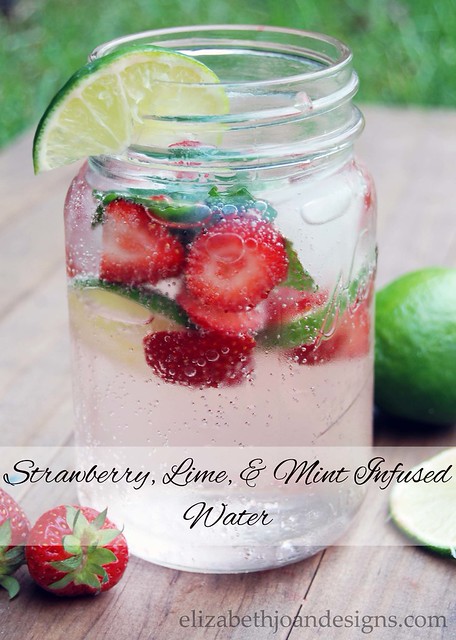
Strawberry, Lime, and Mint Infused Water
Over the past several summers, gardening has become one of my favorite hobbies. So far this year, we have an insane amount of peppermint and more strawberries than we know what to do with. I have been enjoying experimenting in the kitchen with our garden bounty. One of my favorite combinations is Strawberry, Lime and Mint Infused Water. Yum! The perfect thirst quencher for those hot summer days.
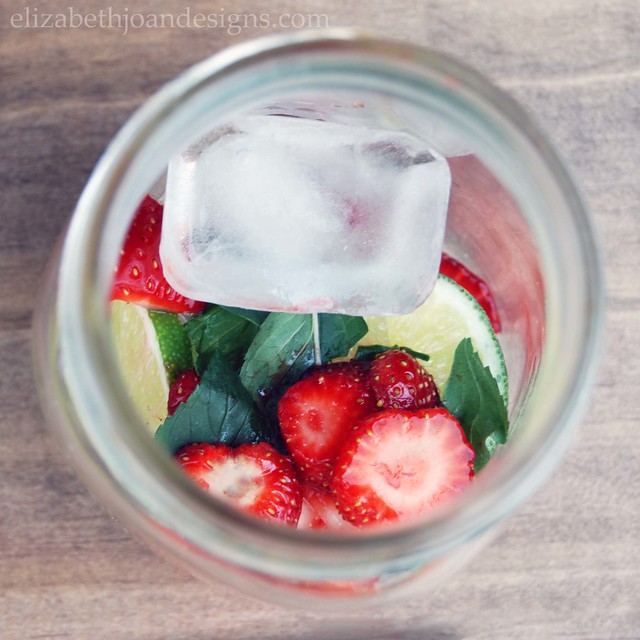
To make this tasty beverage, you will need 2 lime slices, 3 strawberries thinly sliced, 3 peppermint leaves, 2-3 large ice cubes, and water.

First, toss the fruit, leaves, and ice into a glass or mason jar. Add more or use less of the ingredients depending on what you like! If your desire is a more intense flavor, crush the mint leaves before adding them or push the strawberries against the side of your container when you stir.
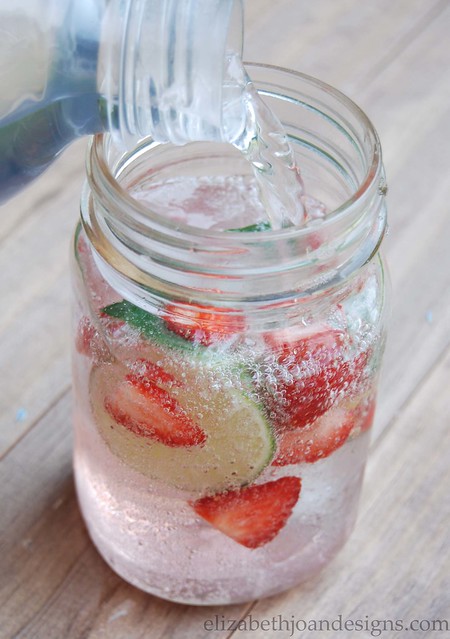
Next, pour the water (sparkling or still) into the glass and let sit for at least 10 minutes before consuming. The longer you let it sit the more flavor your drink will possess.
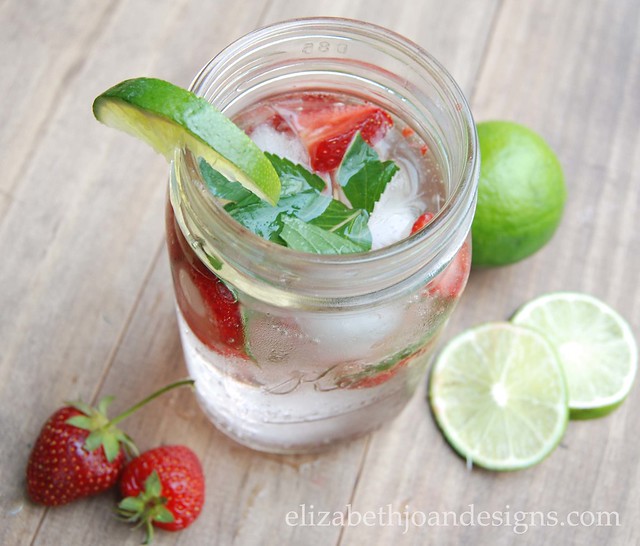
Finally, sit back, relax and enjoy!
Strawberry, Lime, and Mint Infused Water from Elizabeth Joan Designs
Ingredients
2 Lime Slices
3 Medium Strawberries- thinly sliced
3 Mint Leaves
2-3 Large Ice Cubes
Water- sparkling or stillPeperation
Add slices and leaves to your glass/mason jar, whatever you’d like to keep your drink in. Then fill with water.__________________________________________________________ You may also like:

Grilled Bread Salad 
Mediterranean Chicken Packets 
California Club Pizza 
Yum Yum Shrimp Boil -
Revamped Mini Folding Table and Chairs
It’s no secret that Emily and I enjoy grabbing
junktreasures from trash piles on the side of the road. Especially, when we can see so much potential in the item. For example, this cute revamped mini folding table and chairs that I recently found and made over.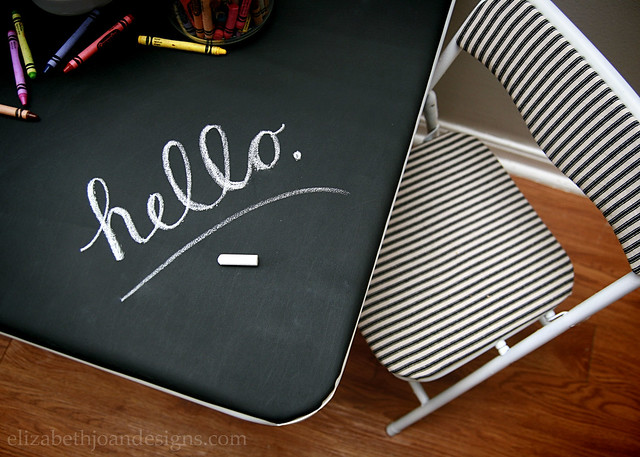
Since we didn’t already own a little table and chair set for the kids, when I saw this small set abandoned on the curb, I thought it would at least be worth the effort to try and fix it up. We don’t have tons of extra space for un-needed furniture, but since these fold up, they will be easy enough to store when they aren’t in use.

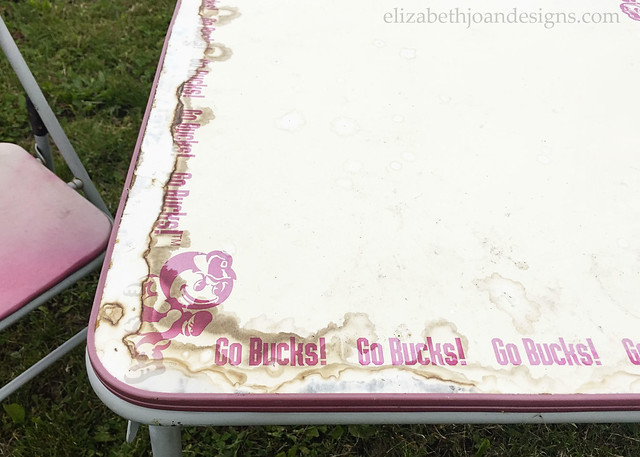
As you can see, they were in pretty rough shape. The chair seats and backs were faded and the table top had some ugly water damage. We love the Buckeyes here, but some changes needed to happen to make this little grouping look better.
Unfortunately, I didn’t document taking the screws out of the seats, backs and table top to detach them. Or spray painting each of the frame pieces white. Oops! But I did do those things.
I decided to recover the parts of the chairs with black and white ticking fabric and the top of the table with chalk cloth.
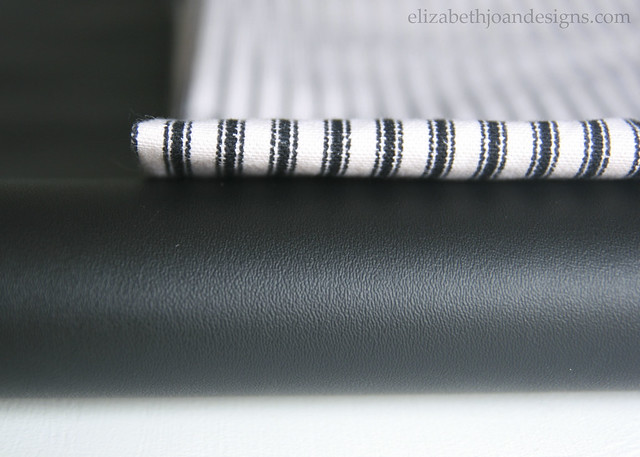
Using a combination of staples and E6000 multipurpose adhesive, I attached the fabrics (cut to size) to each item.

Finally, everything was reattached to the newly painted frames and ready for use.

What do you think of this little table and chair set? Isn’t it adorable in it’s new black and white attire? I love that the kids will be able to use this for so many things. Coloring, crafts, snack-time, etc. Plus, since there is chalk cloth on the top, they can draw directly on it. Yay!
__________________________________________________________ You may also like:

Chalk Cloth Bunting 
Kid’s Table Makeover 
Chalk Cloth Map 
Vintage School Desk Makeover -
Kitchen Pegboard
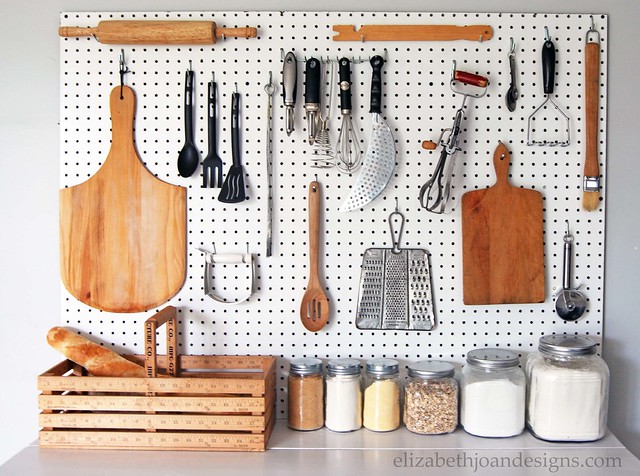
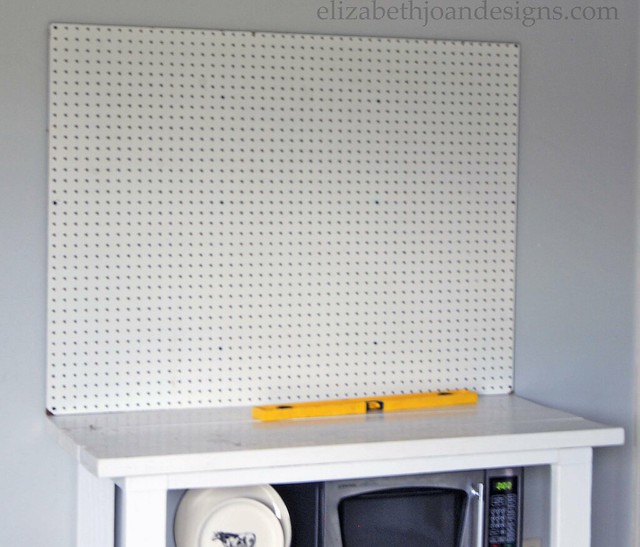
Do you ever attempt to open a drawer in your kitchen that it is so packed full of junk it gets stuck and you start screaming four letter words at it? Yeah, me either. Just Kidding. My utensil drawer has been know to be a bit troublesome from time to time. To minimize my usage of foul language, I turned to Pinterest for practical storage methods. I saw that other genius bloggers had used kitchen pegboards to keep everything neat and organized. Perfect! So, that’s what I did.
First, came the trip to the hardware store. I picked up a pegboard (obviously), and several multi-packs of pegboard accessories including wall spacers.
*Just a little piece of advice: Be sure to measure the size of your car’s trunk before you purchase the pegboard. This way you will be able to fit it in without having to go back into the store feeling like a fool and having to ask an angry employee to re-cut it for you.
Next, using some teamwork, my husband and I attached it to the wall above our buffet table. We used the spacers and screws that came in the accessory packs. They were a bit tricky to figure out. Hence, there are no photos of this process.
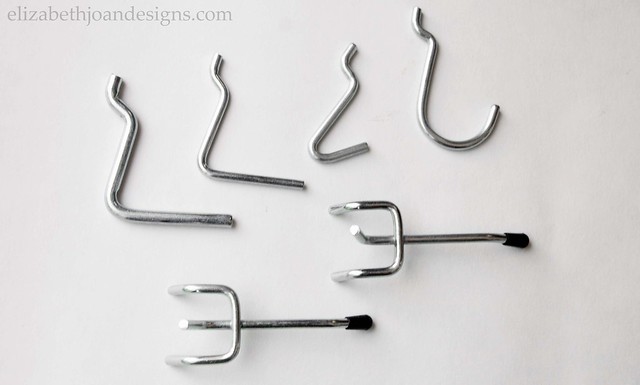
Finally, it was designing time. We used all kinds hooks to hang things up trying to create a balance between decorative and functional.
I LOVE it!
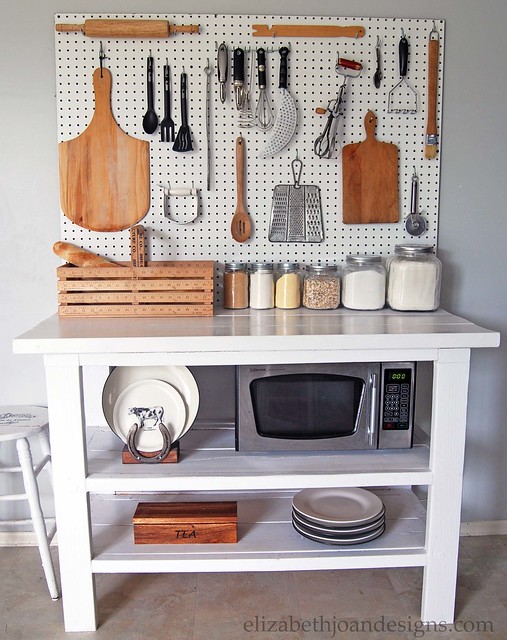
I am probably one of the most indecisive people when it comes to wall decor, so this kitchen pegboard is absolutely perfect for me. On the days I want to switch things up, I easily can in no time. And for the win, my drawer now opens and closes with no problems at all.
_______________________________________________________________ You may also like:

Horseshoe Plate Holder 
Range Hood Makeover 
Open Shelving in the Kitchen 
Magnetic Oven Mitt