-
Airplane Picture Clips for a Corkboard
Last week, I updated you on the happenings of my oldest son’s Vintage Airplane Bedroom. Writing that post really got the wheels turning in my head and I was once again inspired. This room really needs a few airplane accents to even be considered as having a vintage airplane theme. All of this thinking led me to my latest project – airplane picture clips for a corkboard.

These are so amazingly easy to create. Feel free to follow along if you would like to make your own.
Supplies
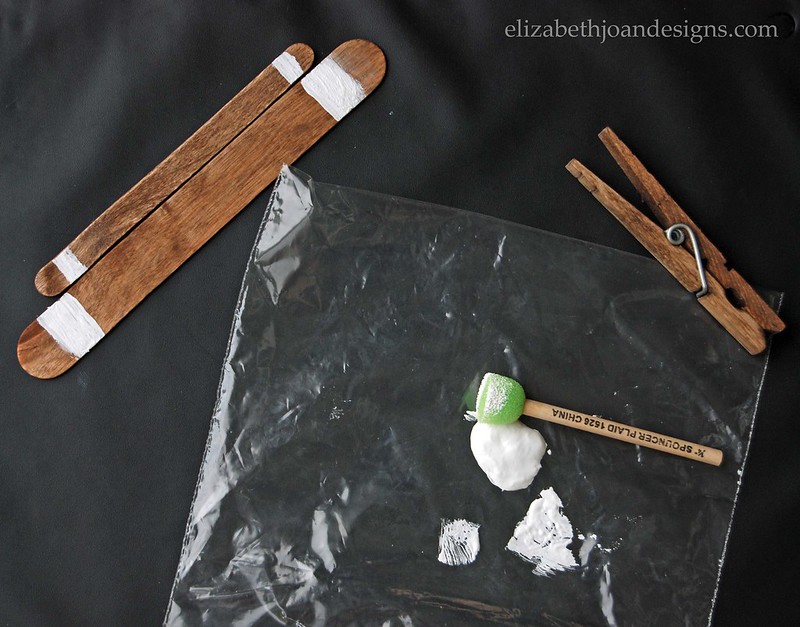
1 Standard Wooden Clothes Pin
1 Large Popsicle Stick
1 Small Popsicle Stick
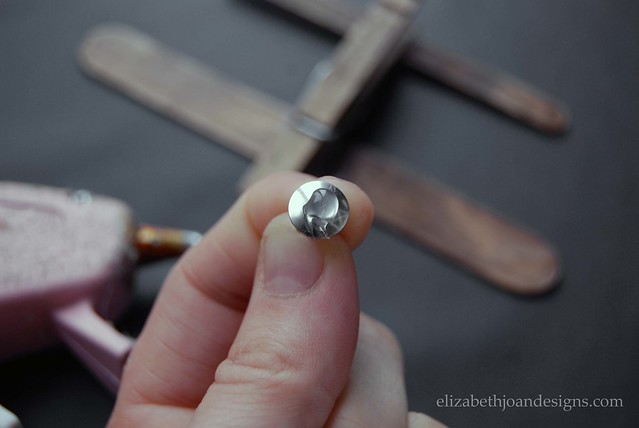
1 Thumbtack
Glue Gun and Glue Sticks
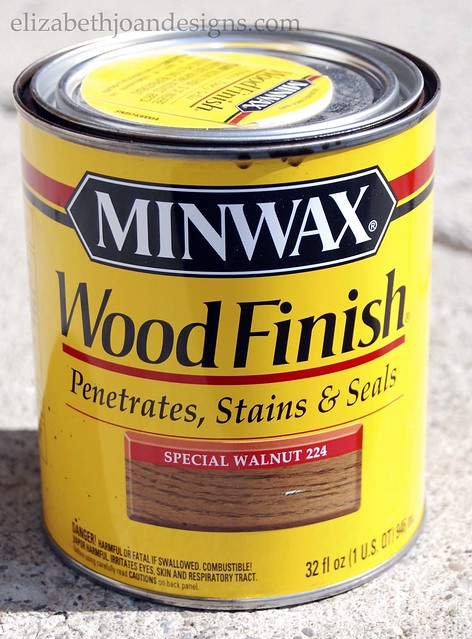
Wood Stain & Brush (optional)
First, I stained both Popsicle sticks and the clothes pin with Minwax Special Walnut.
I used a foam brush and white acrylic paint to give the sticks matching white stripes. This step is entirely optional if you are making your own.
Next, the large Popsicle stick was hot glued to the clothes pin. I positioned it to cover the metal piece.

Then, I repeated the same step for the smaller stick. This time I placed the stick near the end of the clothes pin.

Finally, I flipped over the clothes pin and hot glued the thumbtack near the end that clamps down.

Doesn’t it look cute on the upcycled corkboard?
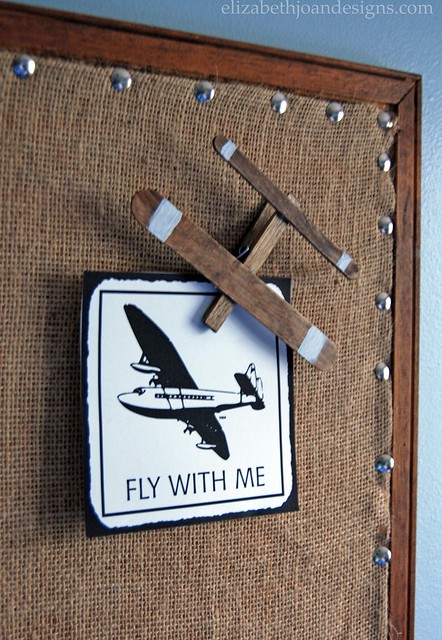
My little guys both loved it so much they helped me make a few more for them to play with. Minus the thumbtack of course.
_______________________________________________________________ You may also like:

2×4 Art 
Painting the Bunk Bed White 
Upcycled Tripod Table 
Upcycled Corkboard -
Patio Update on a Tiny Budget
Our little patio is nothing special. Until recently, we only had a couple of cheap, second hand patio chairs, a sand box for the kids, and our grill, which totally met our needs. However, with the warmer weather we’ve been having, I’ve been feeling the need to spruce things up. The only problem is that we don’t have a huge amount of money to throw into a patio makeover. We are currently saving for a few other big projects inside of the house, so I had to do a patio update on a tiny budget.
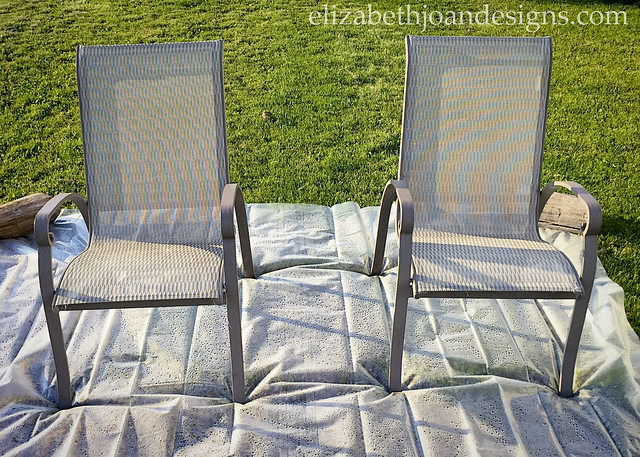
Unfortunately, I didn’t get a before photo, but you really aren’t missing out on much. These chairs were super cheap to buy and after a couple of years of use, the seats had started to fade and look weird.
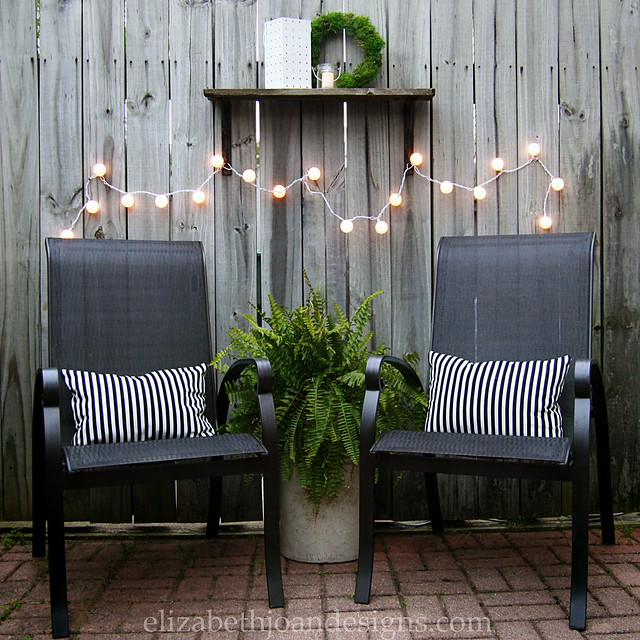
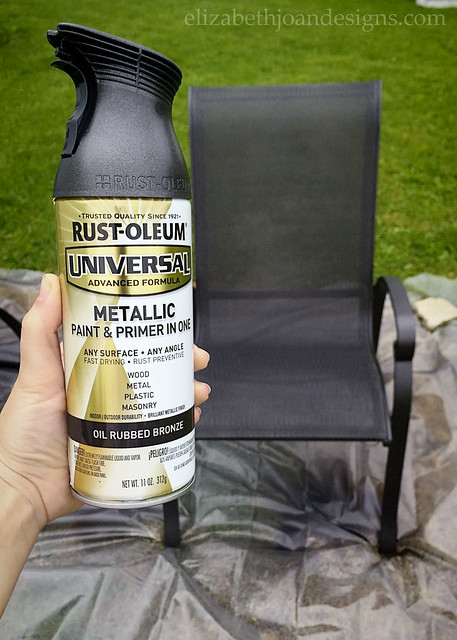
So, I grabbed a few cans of Rust-oleum Oil Rubbed Bronze spray paint and went over all parts of each chair. I was a tiny bit worried that the paint would effect the feel of the seats, but they are exactly the same to the touch as they were before painting. Plus, changing up the color really makes the outdoor space feel so much different and saved us from having to buy new chairs. Woohoo!
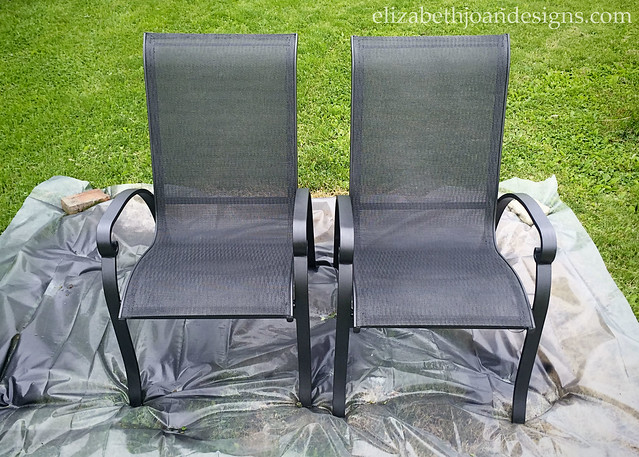
Here they are still drying, but I think they turned out pretty nice.
I also found some cool indoor/outdoor globe string lights at Target that I thought could be fun for the patio. (Dollar Spot for the win!) I wasn’t crazy about the blue color, so I grabbed some ping pong balls from the dollar store and changed them out for a more neutral look.
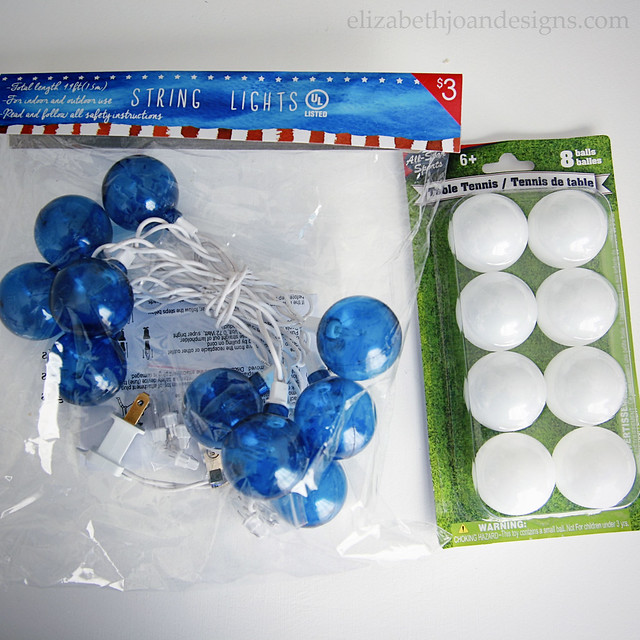
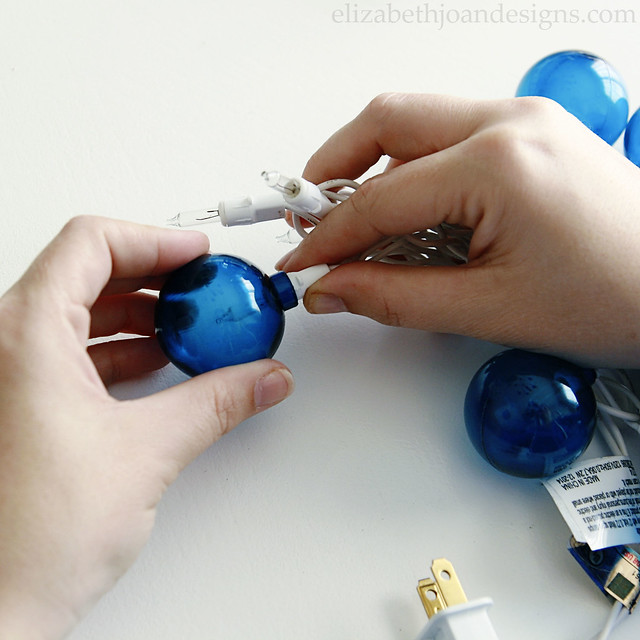
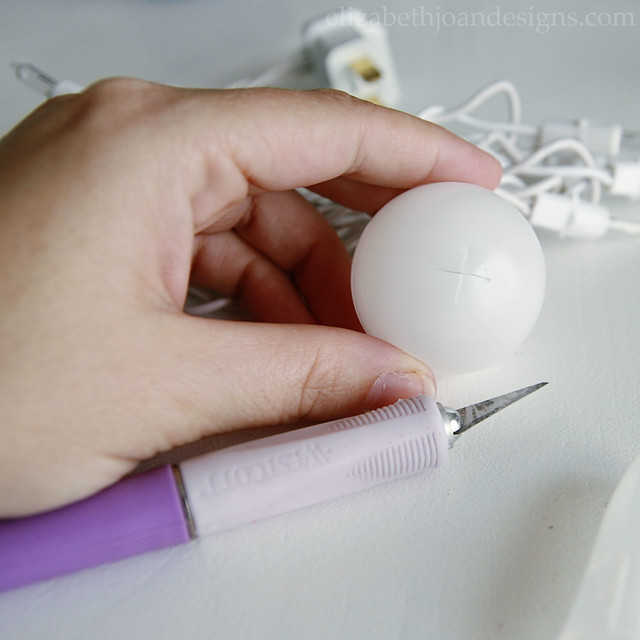
To add the ping pong balls, I used a craft knife to cut an X into each ball and then inserted a bulb into each. Easy peasy.

The striped lumbar pillows were a last minute idea. The fabric is from Ikea and I was hoping to cover some existing placemat pillows. Sadly, I measured everything incorrectly, so I had to wing it and sacrifice a couple of old throw pillows to stuff these. They turned out cute though, right?

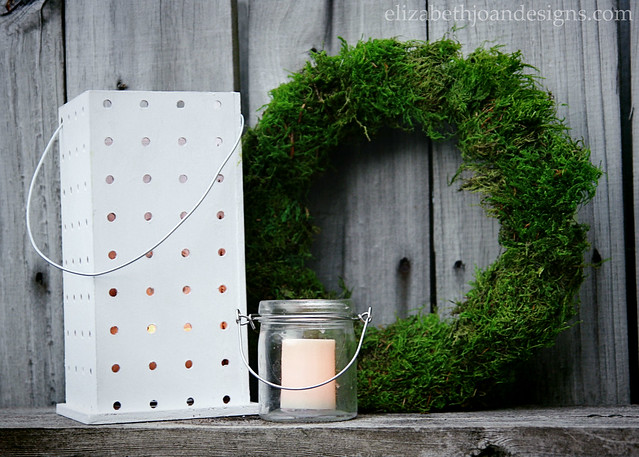
As for accessories, I grabbed our pegboard luminary and added a few other items from around the house. I love this pretty, yet simple, vignette.
In all, I think we spent about $30 total on this update, with the cost of paint and the little bulb lights. Not bad, huh? Although this is not the patio makeover of our dreams, I think it will totally make our time outdoors a bit more enjoyable. What do you think?
_______________________________________________________________ You may also like:

Painting Upholstery 
Bassinet Makeover 
Concrete-Esque Planter 
Patio Makeover -
Grilled California Club Pizza
Last night we had pizza on the grill. Yes, you heard that right. Grilled California Club Pizza, with chicken, bacon, cheese, tomato, lettuce, and avocado on it. Yum. But before you start to think we’ve lost our minds, hear me out.
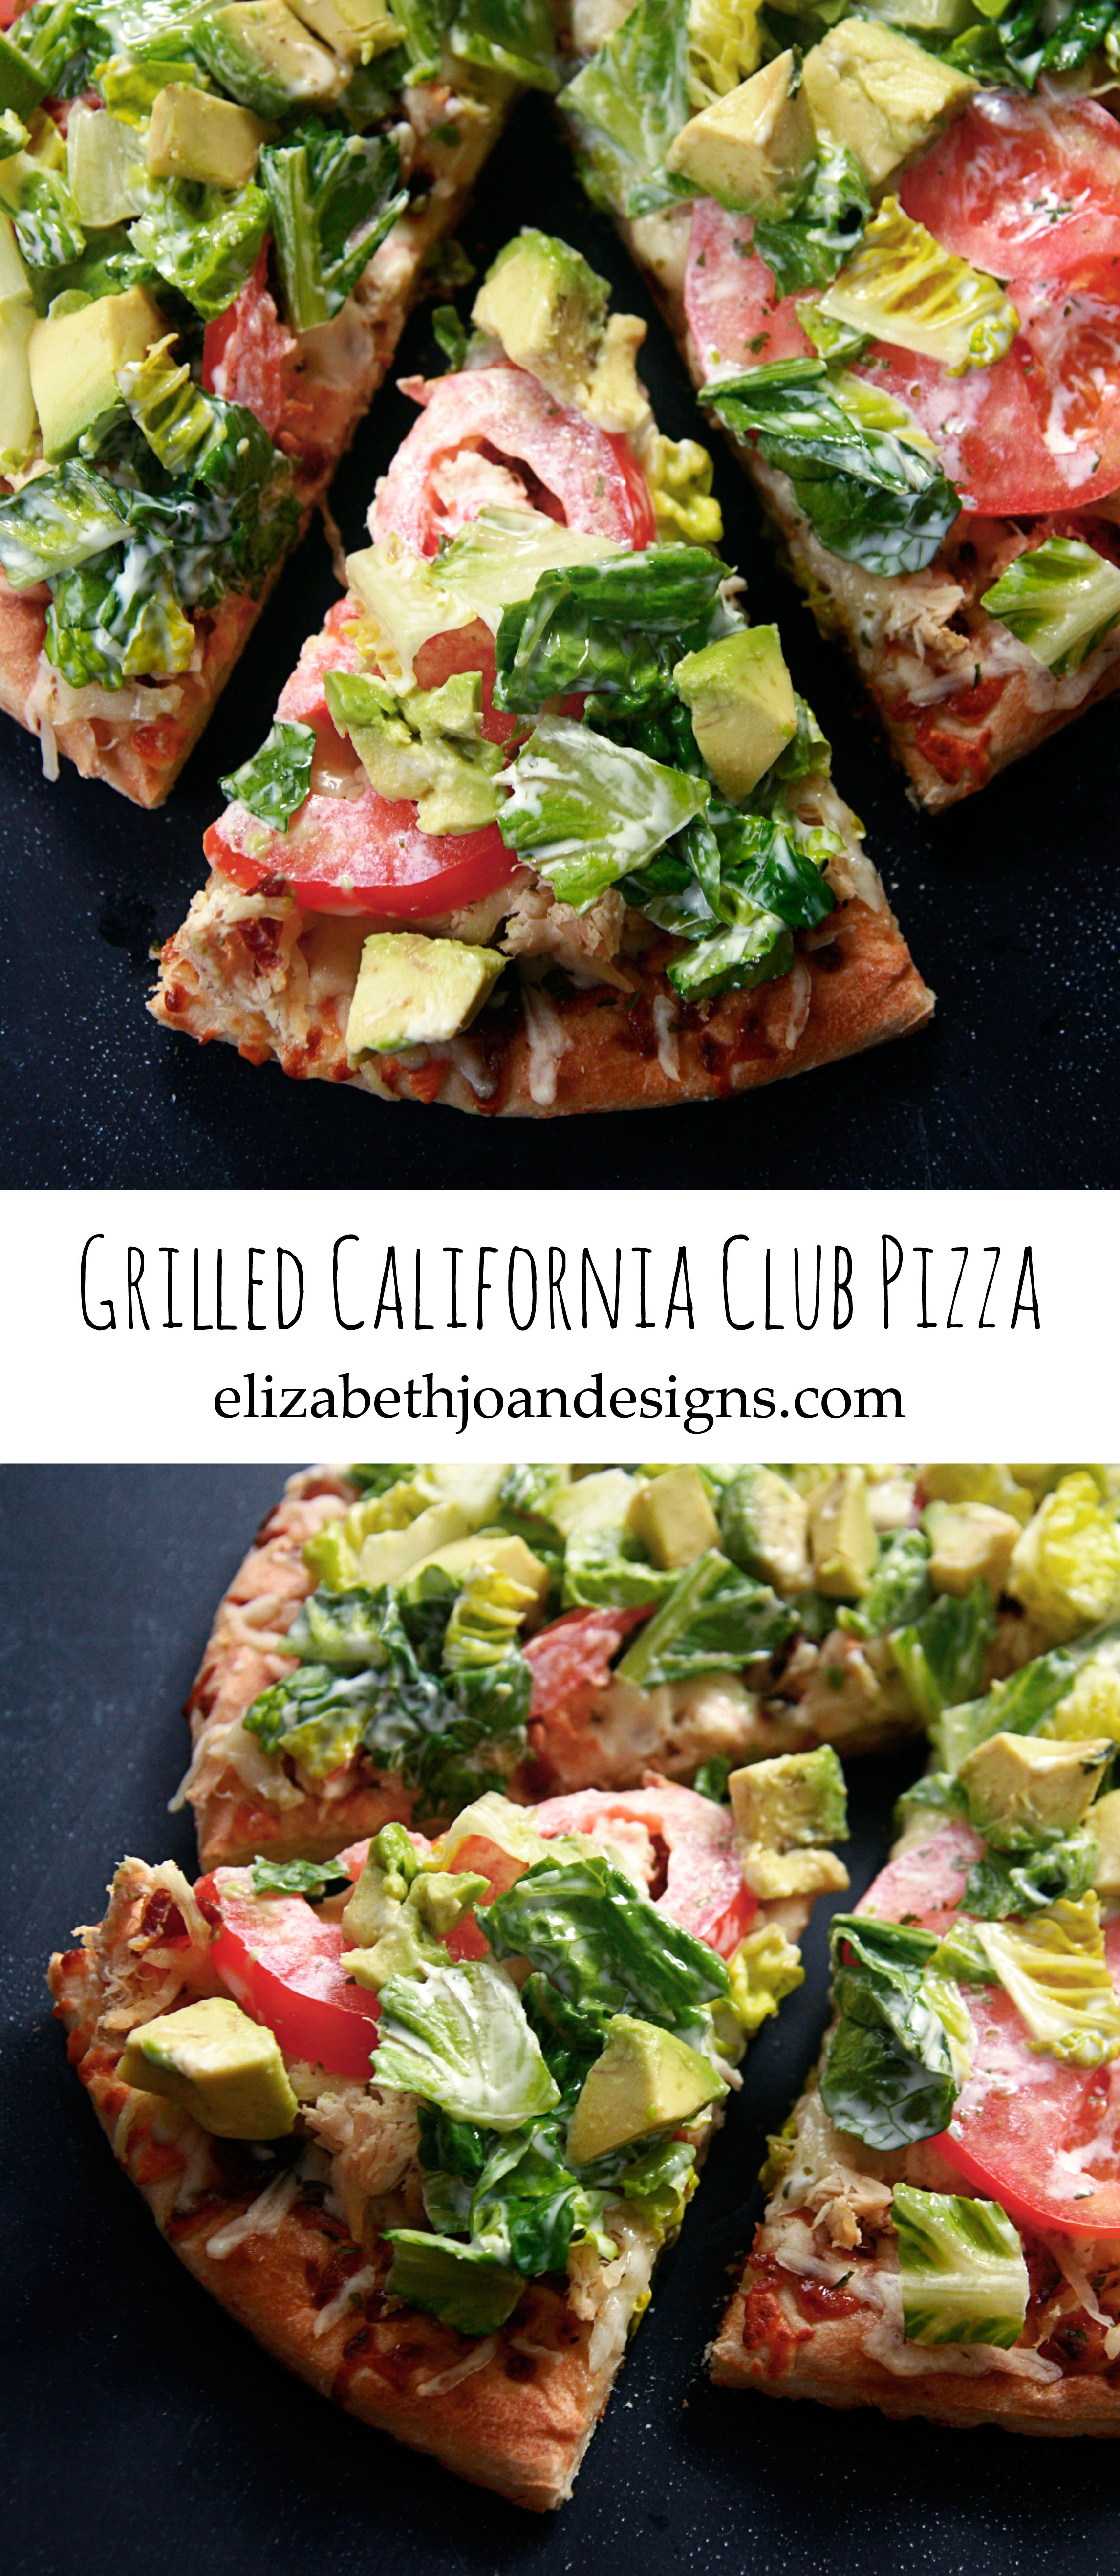
If you’ve never had pizza with lettuce and avocado on it, then you may be missing out. Seriously, this pizza is the bomb dot com. My mouth is watering just thinking about all of the yummy ingredients.
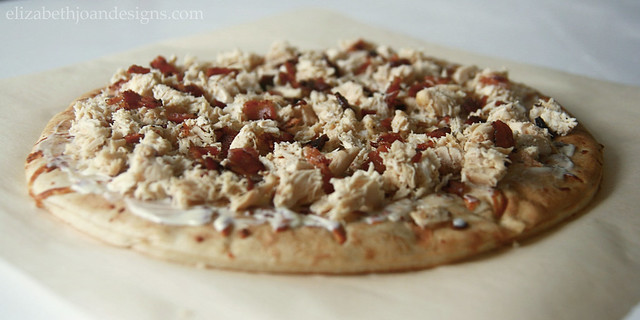
To make your own, start out by firing up the grill. Grab a pre-made pizza crust and spread some mayonnaise on top of it. That’s right. I said mayonnaise.

Next, sprinkle on some diced chicken and bacon pieces (both pre-cooked.)
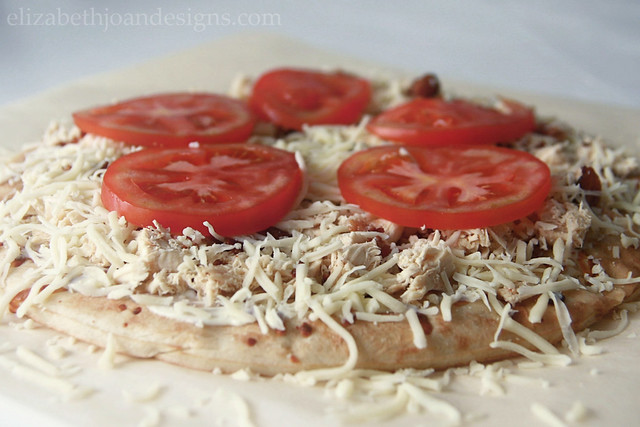
Then, add some mozzarella cheese and a few tomato slices.
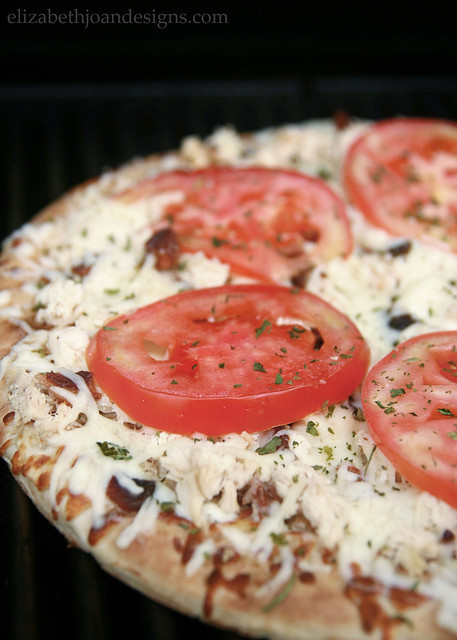
Place the pizza on the grill and let it cook until the crust is crispy and the cheese is ooey-gooey.
While the pizza is still on the grill, mix a couple of tablespoons of mayonnaise with some chopped lettuce. Try to resist dumping the whole bottle of mayo in the bowl. Add the lettuce/mayo combo, along with diced avocado, to the top of the pizza when it is finished.

Now, just to keep things real, I
don’t really likeloathe tomatoes, so I always pass them off to my hubby. However, our whole family absolutely loves this pizza. And it is totally tweak-able if you don’t like/can’t have some of the ingredients. (I.e. gluten, pork, etc.) Let us know if you try this one out!
California Club Pizza from Elizabeth Joan Designs
Ingredients
Premade Pizza Crust
1 Boneless Skinless Chicken Breast, cooked and diced
3 Slices of Bacon, cooked
1/3 C. Mozarella Cheese
1 Tomato, Sliced
4 Tbsp. Mayonnaise
1 ½ C. Lettuce, Chopped
½ Avocado, Sliced or ChoppedPreparation
Preheat Grill. Spread 2 tbsp. of mayonnaise evenly on the pizza crust, then layer with chicken, bacon, cheese and tomato. Grill until crust is crisp and cheese is melted and bubbly. In a bowl, toss the remaining 2 tbsp. of mayo with the lettuce. Layer lettuce and avocado on top of the hot pizza and serve.______________________________________________________________ You may also like:

Grilled Bread Salad 
Crock Pot Pizza Soup 
Ooey Gooey S’mores Bars 
Yum Yum Shrimp Boil -
Vintage Airplane Room Update
If you follow our blog regularly, first off THANK YOU. Secondly, you may have been wondering what’s happened with the “big boy” bedroom transformation I have been working on for my oldest son. Well, it’s not quite finished yet. (I know, I am taking forever.) But, I do have a vintage airplane room update to share with you of what we have done so far.
Let’s go back to the beginning. Here is what the room looked like before we started.
Our journey began with a new wall color. We had the paint color matched to Restoration Hardware’s Atmosphere Blue. My son helped me sand down each of the stripes that were part of his nursery and he also assisted with painting the walls. He really enjoys helping with any project.
One by one, we crossed projects off the list the desk, chalkboard and pin board, nightstand, headboard, and lighting.
(See how to create a clickable image with multiple links.) Still to come…
White is nice, but we were ready for a change with this dresser. It has a brand new color that I am hoping to unveil to everyone soon.
This room needs some airplane accents. Stay tuned to see what I will be doing with this guy.
As you can see, the closet needs a little TLC. We have big plans for this space and are hoping some day to find some time to work on them.
While there is still some work to do, I am extremely pleased with all we have finished so far and so is my son.
___________________________________________________________ You may also like:

Chalkboard Succulent Planter
Painting the Bunk Bed White 
Ikea Trofast Makeover 
Simple Silhouette