-
Simple Silhouette
Warning: Extremely easy tutorial ahead. I know that some people enjoy working really hard for long periods of time with little to no progress (yeah, right), but I’m not one of them.
I love the classic and timeless look of silhouettes. They are so fun to decorate with and also make great gifts. And the only supplies you need to make one are a camera, a printer, white card stock to print on, scissors, a pencil, colored card stock (I chose black card stock to keep to the with the traditional look, but I think using other colors would also work great), and a few extra minutes.
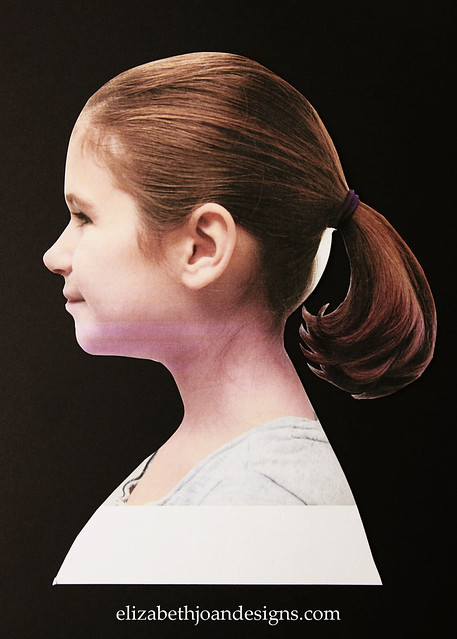
First, take a side view photo of your subject, preferably in front of a solid background. It doesn’t need to be good quality; any image will work, as long as you can make out the perimeter of your image. I used my daughter, Pinky, who likes to intentionally make funky faces when I take her picture. Goofball.

Next, print out the photo on to white card stock (this was an 8″X10″ print) and cut around the outside of your subject. I left some extra white space on the bottom and added a little extra roundness on the lower back of her head to balance out the poof above her pony tail. Excuse my freaky looking print out. My printer is super low on colored ink.
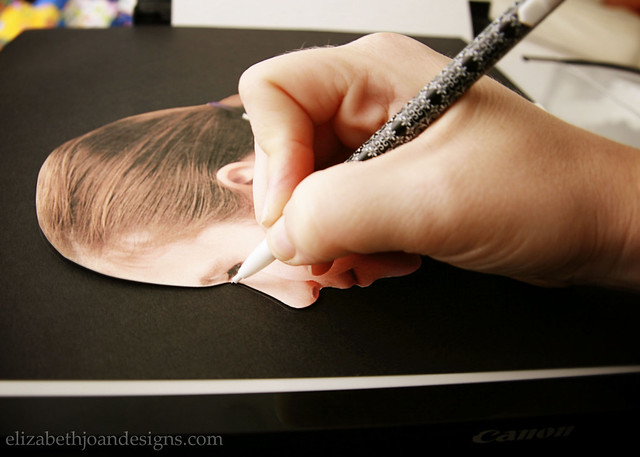
Then, trace the template on to the colored card stock, add embellishments, like longer eyelashes and a curved bottom if you like, and cut out your silhouette.
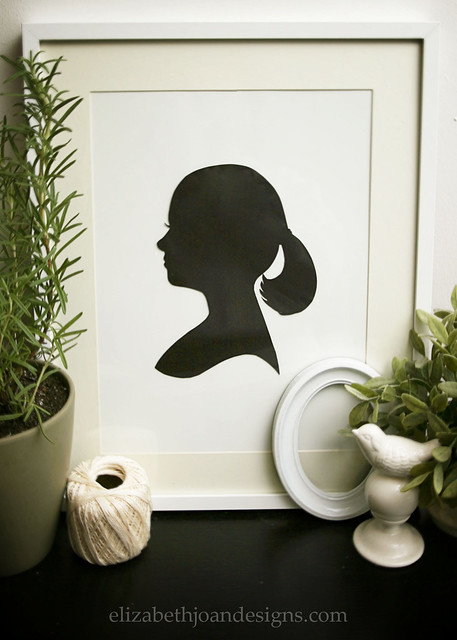
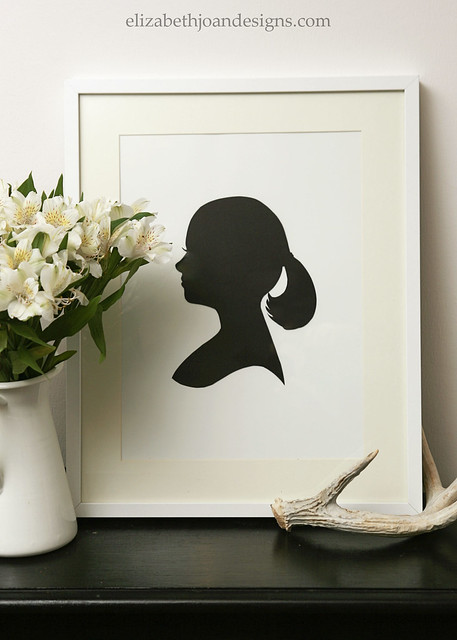
And there you have it!

I framed my silhouette by centering and taping it to a piece of white poster board, which was cut to fit the size of my frame.

-
Range Hood Makeover
This month marks the four year anniversary that we have lived in this house. When we moved in, it was like traveling back to 1984, the year the house was built. We are slowly making updates to bring it to present time.
Our kitchen has changed the most. The cabinets were originally stained oak, in need of updating. First, I decided to paint them green. I didn’t hate the green, but it did look like Dr. Seuss lived here. A year later, my grey obsession took over and I repainted them. We had the grey for two years and were ready to brighten things up, so once again I got out my rollers and brushes and this time painted them white.
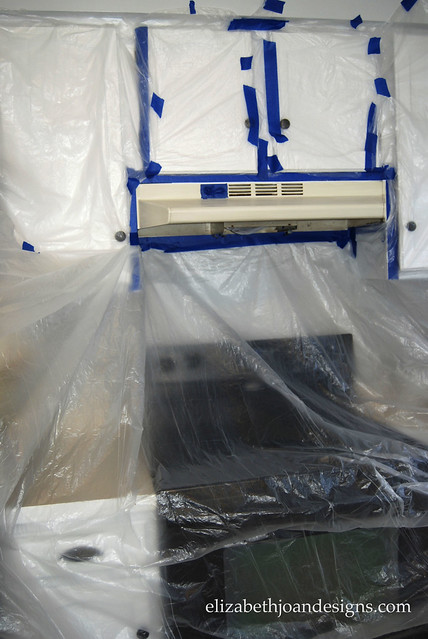
With white cabinets and black appliances, my 1980’s almond colored range hood suck out like a sore thumb. After doing a little research, we decided spray painting it was the best option for us.

This post contains affiliate links for you convenience. I was very hesitant to spray paint in the house, as I had never done anything like this before. So I tried to remove it. After about 2 minutes, I could tell that was not going to happen. I took a little break, gave my self a pep talk, and tried to erase the thought of black over spray all over my bright white cabinets out of my head.
Then, it was back to work as I cleaned, lightly sanded, and wiped off all dust on the vent. I covered literally everything near the hood with a plastic drop cloth, secured by painters tape.

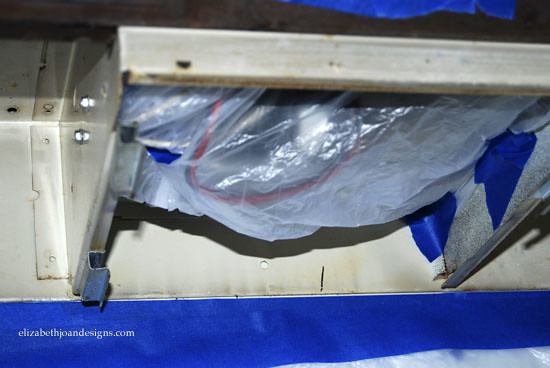
After spray painting a couple coats, I removed the drop cloth to reveal my pretty hood.
Ain’t it purdy? Now if only I could figure out what to hang on the wall between the hood and stove. Any ideas?
-
Lavender Wreath
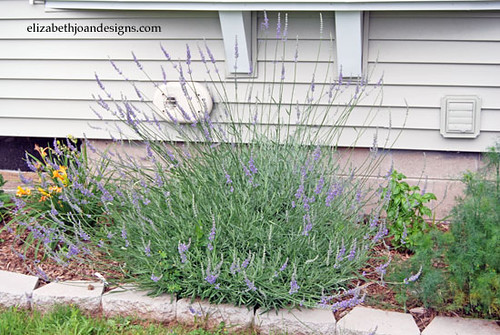
A few years back, my sweet and loving parents purchased a small lavender plant at a flea market for me. When I got it home, we carefully picked out the perfect place to plant it. One year later, we decided that spot wasn’t as perfect as we thought, so we move it. We transplanted it again, that fall. This year, it proved it’s hardiness and finally bloomed. Our backyard smells amazing. I decided to make a lavender wreath to bring some of my favorite scents into our home.
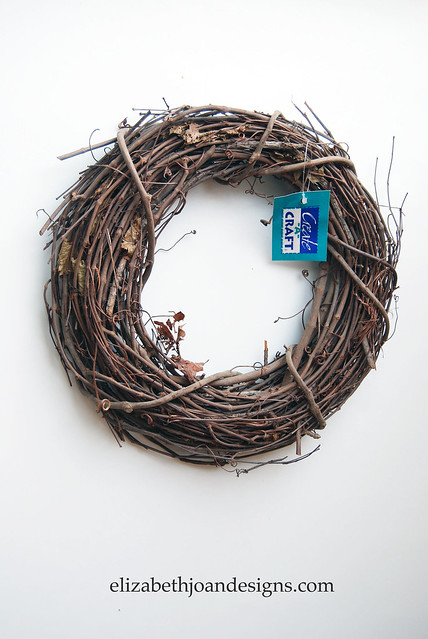
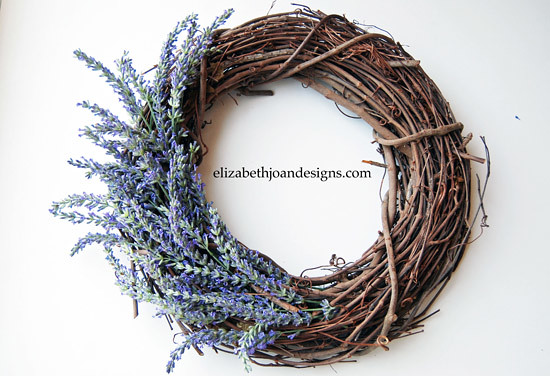
Recently, I purchased this grapevine wreath at a garage sale for $0.25. Sweet!
I started by sticking the lavender stems in between the grapevine. I continued around the entire circle.
Finally, I hung it on my front door. Some may say that decision was based solely on laziness, because there was an existing hook, but I like to think it is in a place visible to the whole wide world.
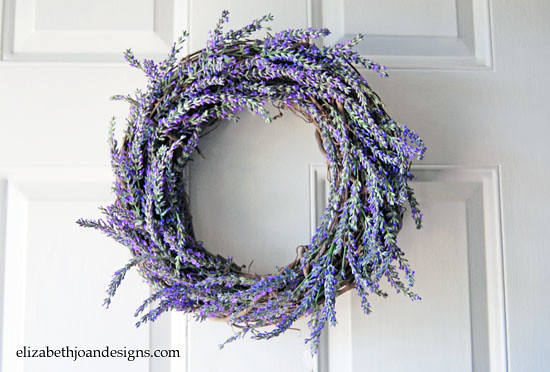
I love the way the grape vine and lavender look together, so I didn’t make it very thick. Plus, now there is still plenty left in my backyard to keep it smelling awesome.
What natural items do you use in wreaths?

-
Chalkboard Lettering
Back when I shared my dry erase board turned chalk board, several people had pondered about the process I used to create the lettering. It really is quite simple and probably any creature with opposable thumbs could do it.

Here is what you will need:
-Chalkboard
-Chalk
-Print Out (I whipped this puppy up in Photoshop, but you could easily create something in a word document, or physically cut out words with fonts you like.)
-Tape
-Pencil
Make sure your chalkboard is {primed.} Then start out by using the side of a piece of chalk and completely color over the backside of your print or words. This chalk dust is what will transfer onto the chalkboard later on in the process.

Turn the print over, carefully place it on the chalkboard, and tape it down. I just kind of eyeballed it to make sure it was centered. It doesn’t have to be perfect.

Using the pencil, trace around the outside edges of each letter and image. The pressure from the pencil tip will transfer the chalk.

Here, I lifted up a couple pieces of tape to check and see how things were looking. I decided that I wanted the letters filled in, so I went back and did that too.

Once you are finished, remove the print and you should have awesomeness on your chalkboard. That’s it! Easy peasy lemon squeezy.
