-
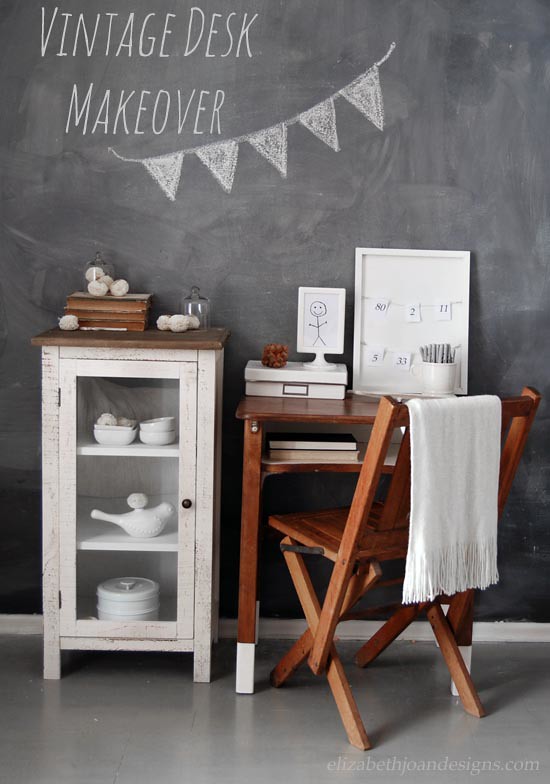
Vintage School Desk Gets Modern Makeover
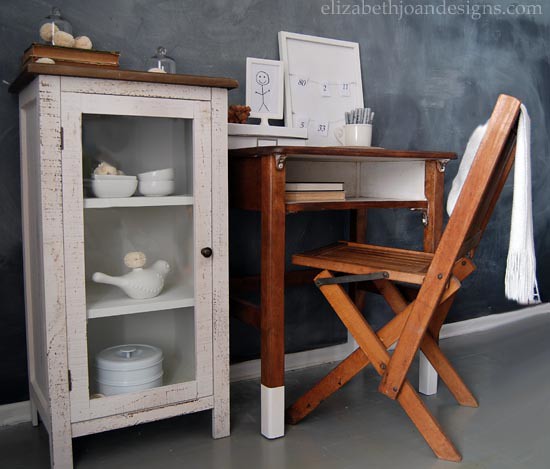
During one of my trash picking adventures last summer, I discovered this amazing vintage school desk sitting road side. I absolutely loved the shape of it and could not resist shoving it into my car to take home for a future project.
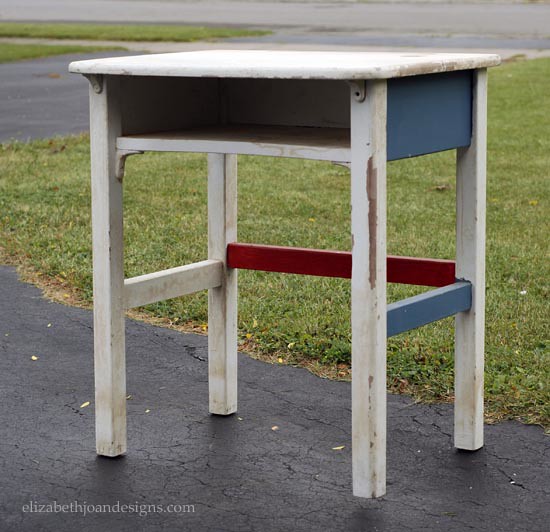
When I had time to work on this guy, I started by sanding down the entire surface. The miss-matched paint colors where just not doing it for me. The ultimate goal of this project was to give it some modern paint dipped legs, so I didn’t spend too much time removing all of the old paint off of the bottoms.
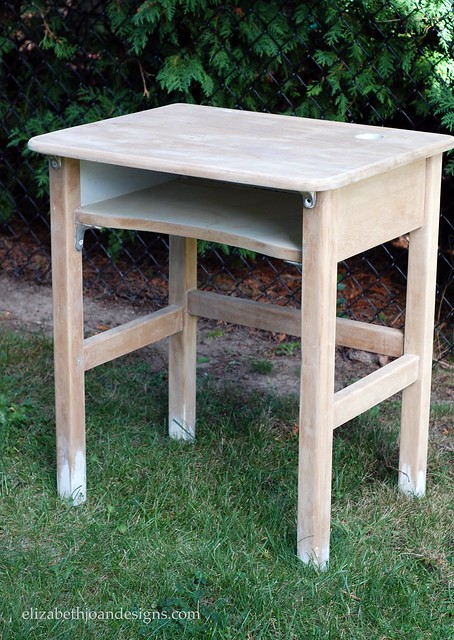
Next, the desk was stained with Minwax Special Walnut. Once it was dry, I started sectioning off the portions of the legs I wanted to paint with painter’s tape. I have always admired paint dipped furniture, but never attempted it before. So, I was pretty excited to see how this was going to end up.

Then, I brushed two coats of white paint onto the leg sections and in the desk cubby hole.

Finally, the desk received 3 coats of Minwax Polycrylic. This will protect the surface and also prevent the paint from chipping.
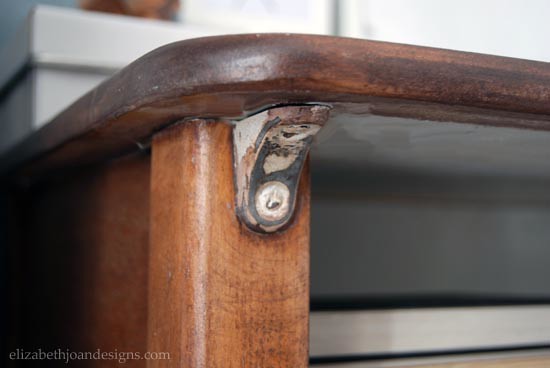
The original hardware I left untouched. I love the beautifully aged look it already possessed.
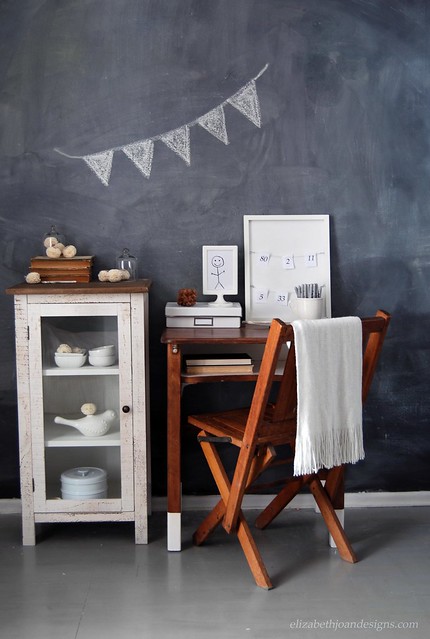
Tada! What do you think? I love the way this turned out!
For such a fun makeover, I am very sad to report that currently this guy doesn’t have a spot in our home. I was hoping to use him in my youngest son’s room, but that just didn’t work out space wise. Unfortunately, for now, he will be hanging out (looking good of course,) in my basement until further notice.
________________________________________________________________ You may also like:

Reclaimed Wood Fence Headboard 
Easy Gallery Wall 
Upcycled Tripod Table 
Pinky’s Painted Desk -
Concrete-Esque Planter
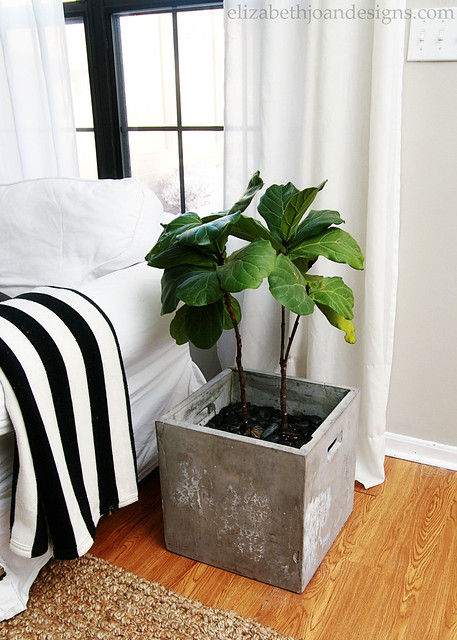
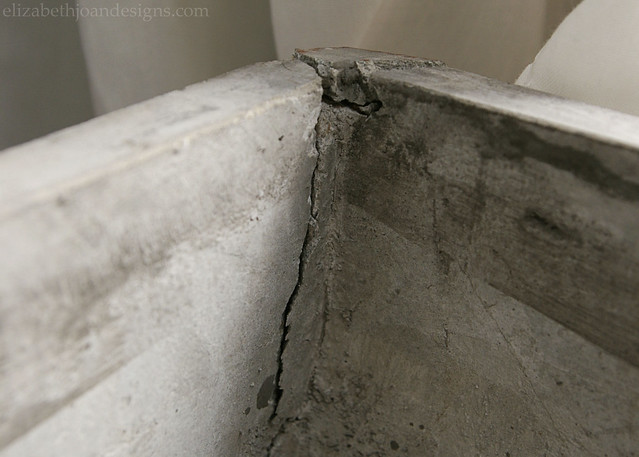
OK. I admit it. Sometimes I drive behind furniture and decor stores and look to see if they have any goodies hanging out next their trash bins. Weird? Maybe. But every once in awhile, I see something cool. Like this awesome concrete-esque planter. Of course, I had to grab it.
When I brought the planter home, I immediately went online and attempted to look it up on the store’s website. Unfortunately, I couldn’t find anything listed regarding this particular piece, probably because it had been discontinued. However, after doing a Google image search I found out that it wasn’t even a planter at all, but some sort of storage stool. Interesting, but whatever.
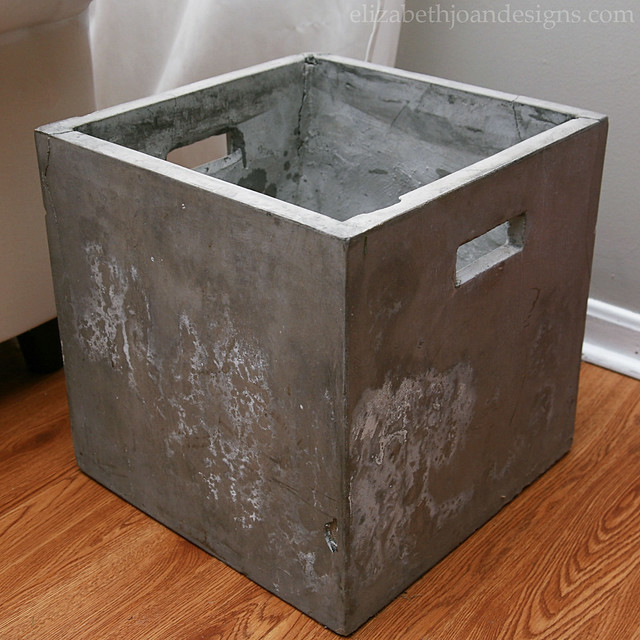
It had a lot of cracks in it, as you can see. And a cat too! Oh wait, that is just Rowan helping with me. He does that sometimes.

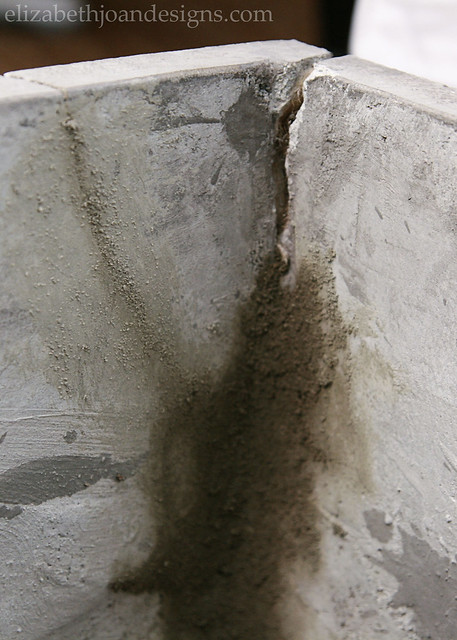
Since I still planned on using it as a planter, I wanted to make sure to fill the cracks in a bit to deter dirt and water from leaking out.
My hubby brought home concrete mix for me and I got to work stirring it up with some water.
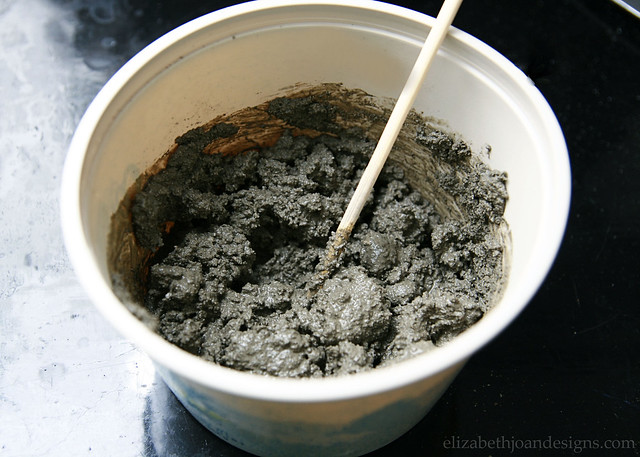
Using disposable gloves, I applied a layer of wet concrete to the cracks on the inside of the planter. I left the outside of the cracks alone, since I wasn’t sure how well it would match the existing color and texture.
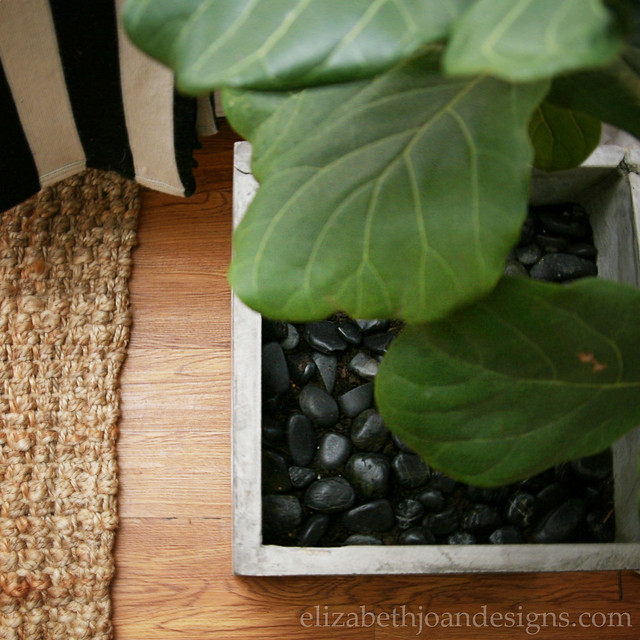
Once the concrete patches were dry, I added a few packages of river rocks (from the dollar store) to the bottom of the planter for drainage.
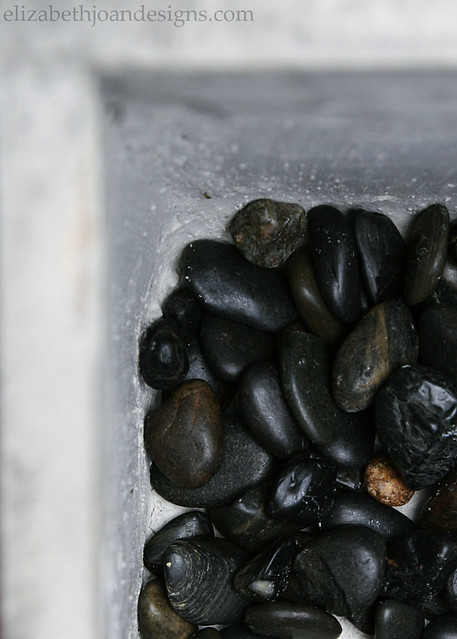
Finally, I added some dirt and my trusty Fiddle Leaf Fig Tree. To keep this Rowan proof, I added an extra layer of river rocks to the top of the planter too. This keeps mischievous kitties from digging in the dirt and using it as an extra litter box.
Doesn’t this planter look great?
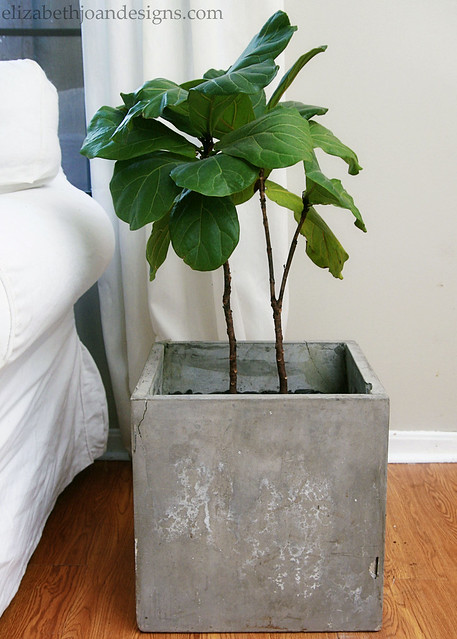
I love the character that the cracks add and we hope that this holds up and allows our pretty plant to grow bigger and stronger!
-
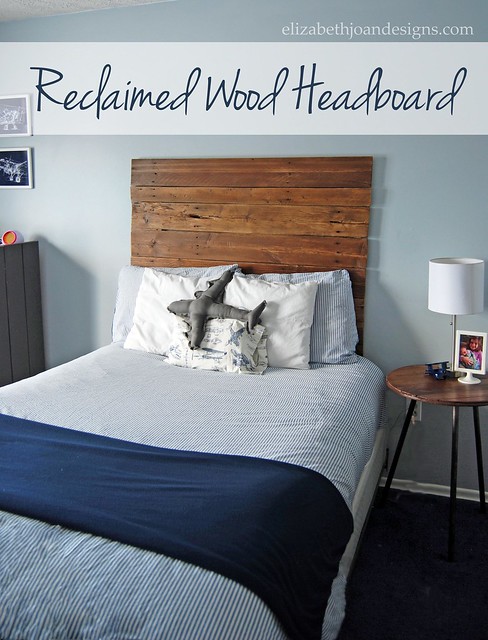
Reclaimed Wood Headboard
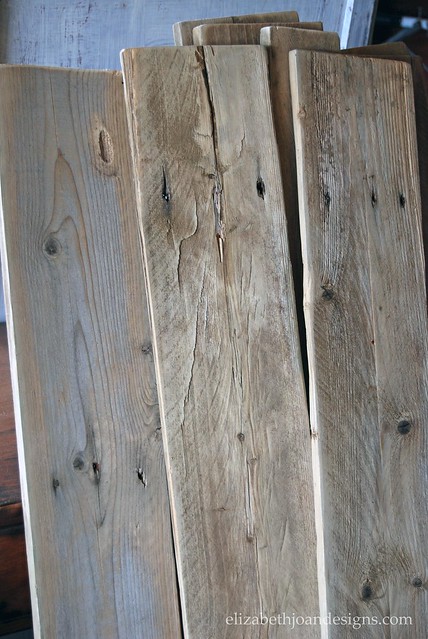
During a drive to the store one evening, I spotted an old 6′ stockade fence tossed to the curb. Well, of course I had to pick it up. Free lumber! To fit this wood in our Pontiac Vibe I had to push the passenger’s and the driver’s seats as far as they could possibly go forward. Good thing I’m short. My knees were a bit more jammed into the dashboard than I like, but for these extremely weathered planks, it was totally worth it. I decided this material would be perfect for creating a reclaimed wood headboard for my son’s vintage airplane room.
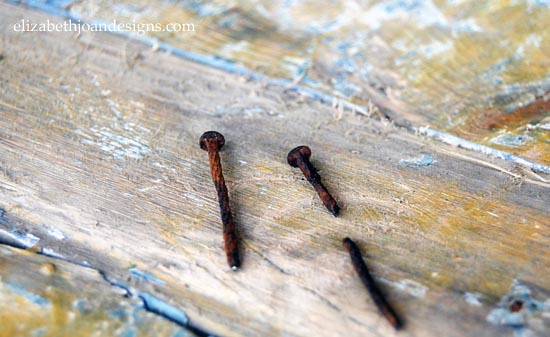
*This post contains Amazon Affiliate links.The first step I took to create the headboard was disassembling the fence and removing all nails.

Sure that may sound like an easy task, but I assure you it was not. The rusty nails kept breaking apart and getting stuck in the wood. It took a while, but I did eventually get all those little spikes removed.
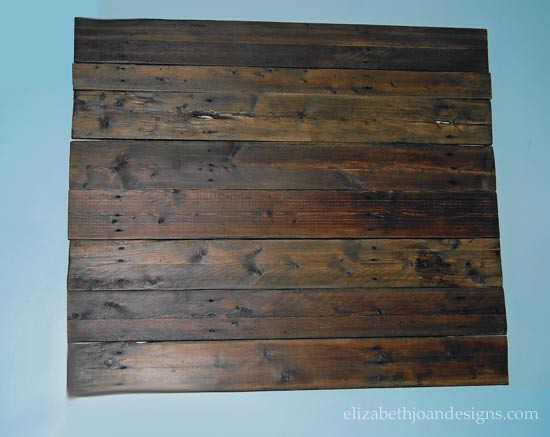
Next, I used my mouse sander to smooth out each board.
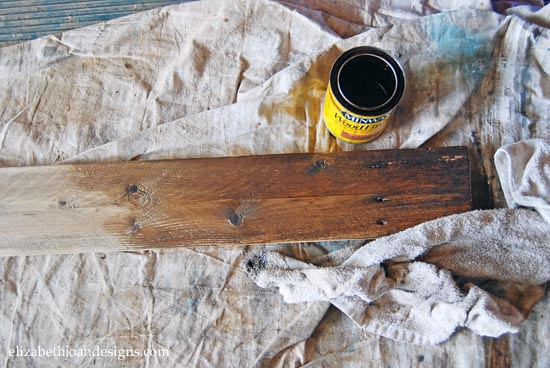
Then I stained each board using my favorite stain, Minwax Special Walnut and added a nice protective finish with three coats of Minwax Polycrylic
.
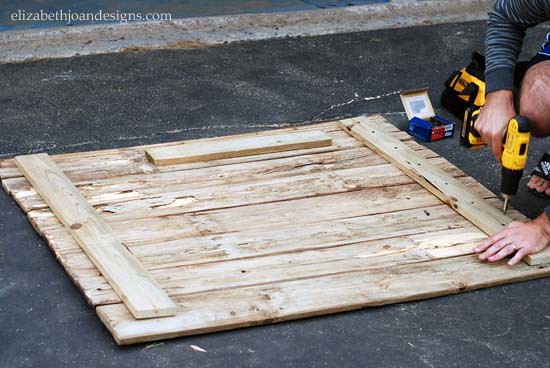
After that, my husband used the drill to screw two 1″ thick boards perpendicular to the planks. He made sure to secure each plank to these wood pieces for stability. We also added a third piece that was attached parallel to the top plank. This board is what we used to attach the entire headboard to the wall. (More on that in a minute.)
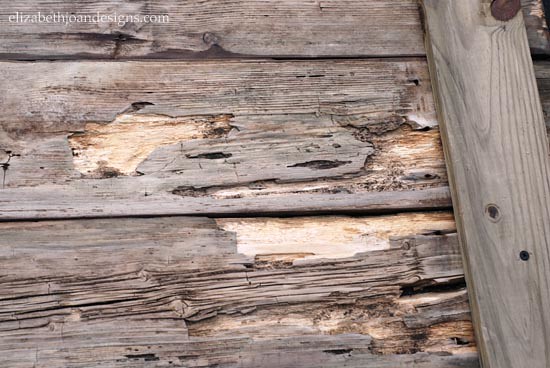
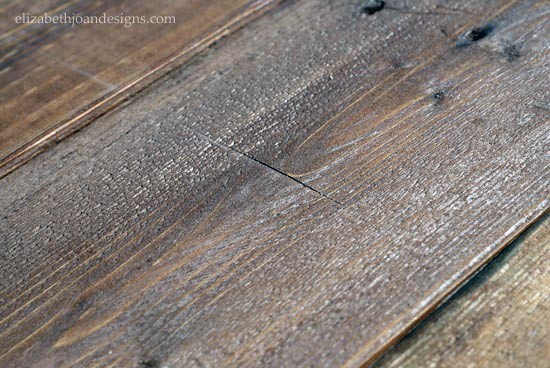
As you can see, the wood possessed LOTS of character right from the beginning. And if that wasn’t enough…
We accidentally drove right over the headboard when making one of those emergency trips to the hardware store mid-project. Oops! (If you work on a lot of projects, then you probably understand the type of emergency I am referring to.)
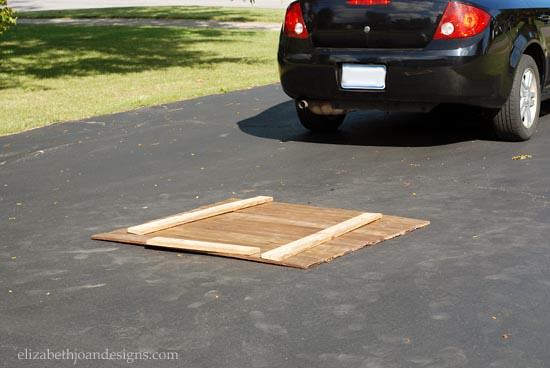
Look real close. You can see a big ol’ ding across the planks. Good thing we like that “weathered” furniture look or we would have had some extra work to do.
For the last step of this project, I had purchased a French Cleat Picture Hanger Kit
and closely followed the instructions on the packaging to attach the headboard to the wall of my son’s room. This little do-dad was the perfect find for hanging up something so heavy.
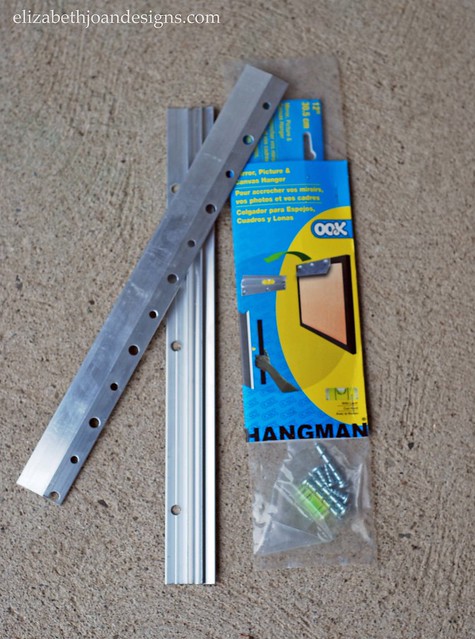
Of course this step took two people to accomplish, because I had no interest in breaking my back and I probably would have if I would have attempted this as a solo task.
This project turned out awesome! I could not be more proud of all of our hard work we put into this headboard.

The price to us was $10. Woo-hoo! We had to purchase the French cleat, but everything else we had on hand. The most important part though, is that our son loves it!
_____________________________________________________________________________ You may also like:

Desk Makeover
Upcycled Tripod Table 
Upcycled Corkboard 
Open Shelving in the Kitchen -
Favorite Painting Tools & Supplies
Between Emily and I, there is a lot of DIY going on in each of our homes. One of our favorite ways to fix something up and make it our own is to slap a little paint onto it. So, it is only natural that after completing a bunch of projects, we have both found a few go-to items. Here is a list of our favorite painting tools & supplies that we love to use.

No. 1 – Benjamin Moore Paint
– One of our most favorite paint brands is Benjamin Moore. We love how these paint colors look in different lighting and have not come across one that we’ve used our homes and didn’t like. Great for walls, trim and furniture.
No. 2 – Dollar Tree Paint Brushes – We like to use these brushes for stain and oil based paint projects because they are so inexpensive and if you don’t want to spend time trying to clean them up, you can just throw them out.
No. 3 – Zinsser Oil Based Primer
– This primer is the bomb. It sticks to pretty much any kind of surface and creates a wonderful base for paint to stick to.
No. 4 – Black & Decker Mouse Detail Sander
– Power, precision and smoothness all packed into a tiny little sander. Who could ask for more?
No. 5 – Purdy Cub Angled Paint Brush
– This may just be the best brush ever! It is so perfect for cutting in and works great when trying to paint smalls spaces or decorative molding.
No. 6 – Minwax Wood Finish (Special Walnut)
– If you are looking for a great stain that is not too warm or cool in color and covers pretty evenly, this is the stuff.
No. 7 – Rustoleum Universal Metallic (Oil Rubbed Bronze)
– This spray paint gets a huge amount of use from both of us. We’ve used it on door handles, curtain rods, table legs and even a light fixture. (Tutorial to come soon!)
No. 8 – Restoration Hardware Paint – We are also obsessed with Restoration Hardware paint because their velvety colors look good in pretty much any room of the house.
This post contains affiliate links.
_____________________________________________________________________________ You may also like:

Mason Jar Paint Storage 
Removing Oil Based Paint & Primer 
Tips For Mixing Paint