-
Brought To You By The Letter C
Editor’s note: This post was originally published in Nov. 2013. Last week, while perusing the Land of Nod catalog, I found these super cool Magnificent Metal Letters. I love the industrial look and that they can even be used as a tiny little shelf.

I started to think about how I could make something similar on my own and that’s when I remembered seeing Becca’s DIY Cardboard Letters on Pinterest. So, I figured I would take some tips from her tutorial, but leave the front of the letter off and tweak a few things to achieve the desired look.
This is what I started with:
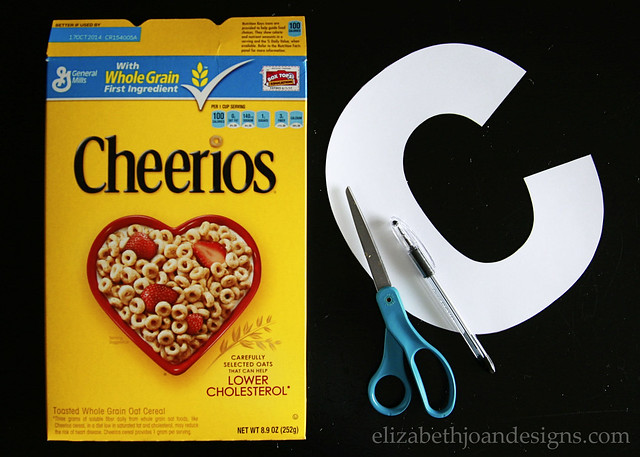
– Cereal box swiped from the recycling bin
– Scissors
– Pen
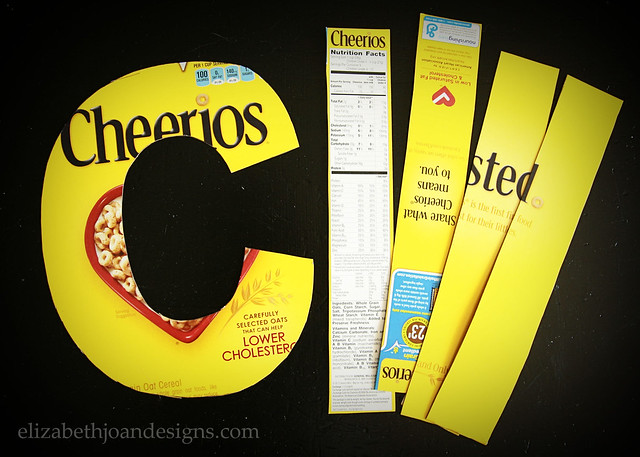
– Template of letter CUsing the template, I carefully traced around the edges onto the cereal box.
Then I cut it out and also trimmed off the sides of the cereal box. (Depending on the size of your letter, you may also need to cut out some strips from the back of the box as well.)
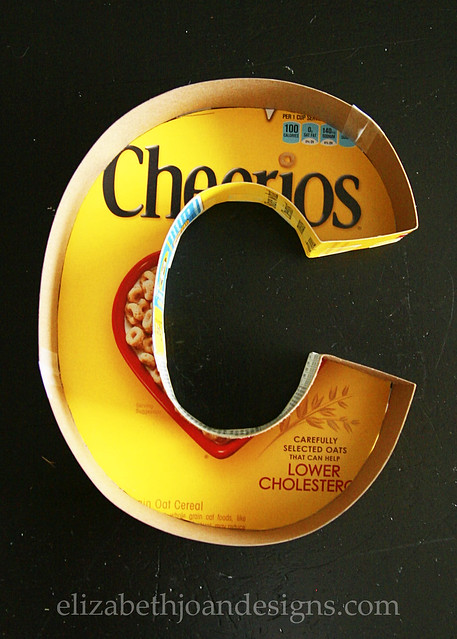
I attached the sides of the box to the letter with plain ol’ scotch tape. Exciting, right? But it works to hold everything in place until the paper mache’-ing is done.

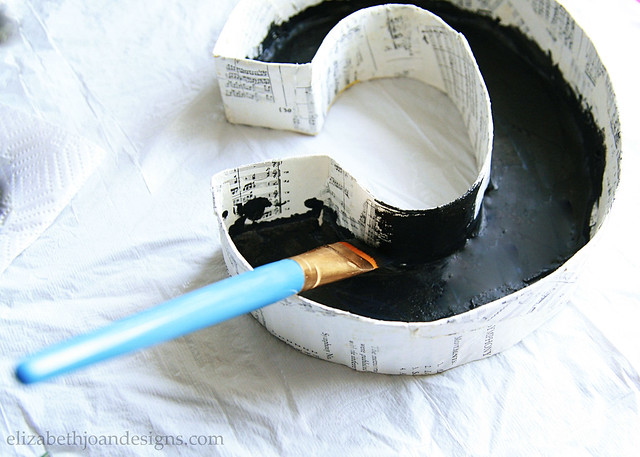
Next, I mixed up equal parts of water and flour and dipped torn up pieces of The Nine Symphonies of Beethoven into the concoction. (I only did one layer because I didn’t want my letter to become too thick.) Each strip was applied to the C in random directions, which helped it adhere better.
Sorry, I don’t have any photos of the process. It was super messy!
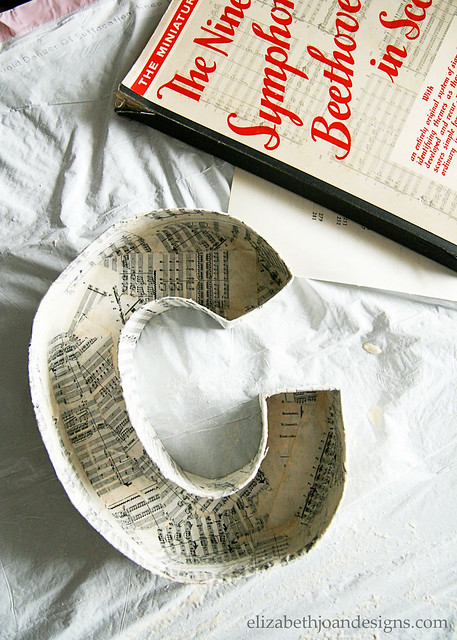
Lastly, I slapped on a couple of coats of black paint and I was finished.
Isn’t this cool??
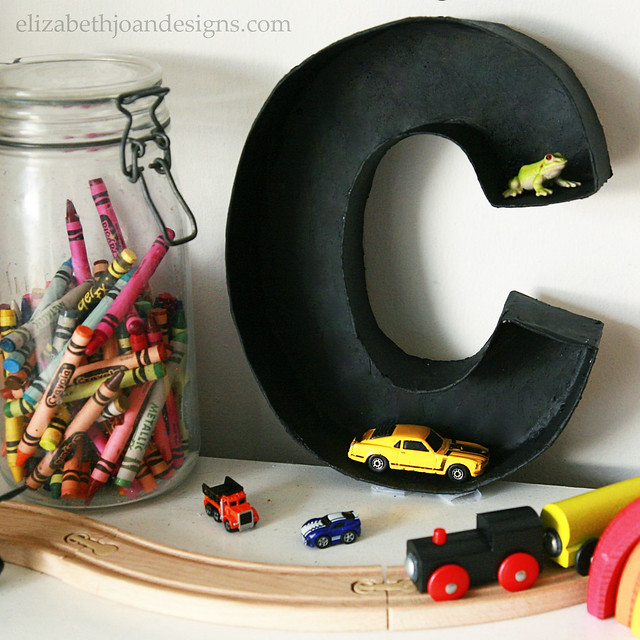
I would love to make a more letters, so I could spell out whatever is catching my fancy and then be able to change it up for the seasons or whatever. However, I think it will be quite some time until we have enough cereal boxes saved up to complete the alphabet.
-
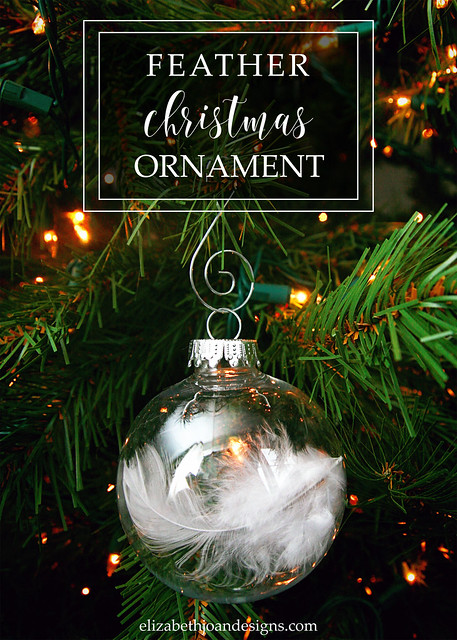
Five Minute Friday: Feather Christmas Ornament

This post contains affiliate links.
This is probably one of easiest, yet elegant ornaments you could possibly make. And it actually only takes about one minute (or less!) to complete each one, so that makes it a major score in my book.
You will need:
- Glass or Plastic Clear Ball Ornament
- White Feather
- Ornament Hanger
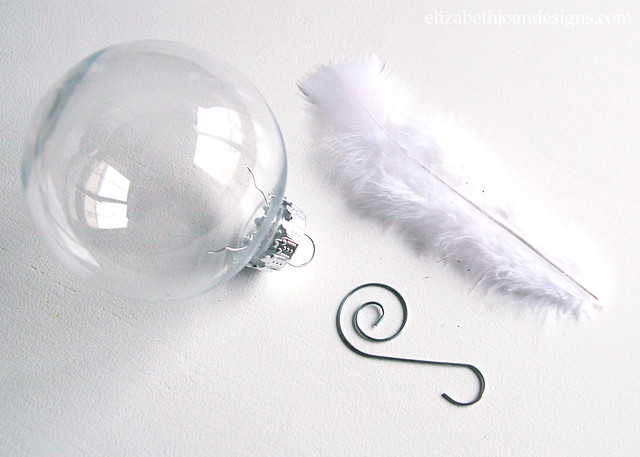
Remove the top piece from the ornament. (I chose plastic because… Kids, Puppy, Cat.)

Insert one white feather. (Depending on the size of the feather, you may want to cut it down a bit. Or not.) If needed, use a pencil or something similarly slim to move the feather around inside of the ornament until it is situated to your liking. Replace top piece.
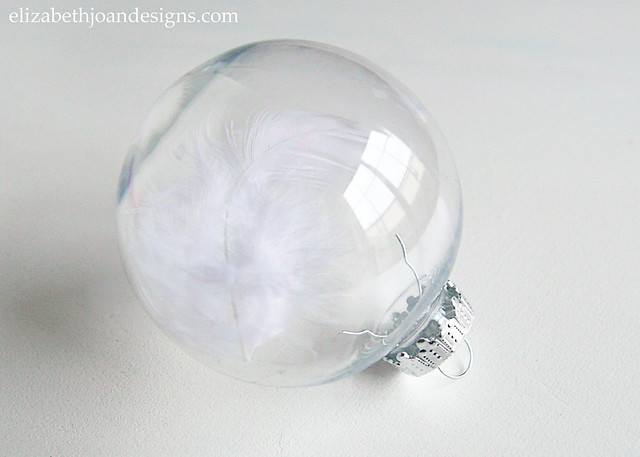
Attach ornament hanger.
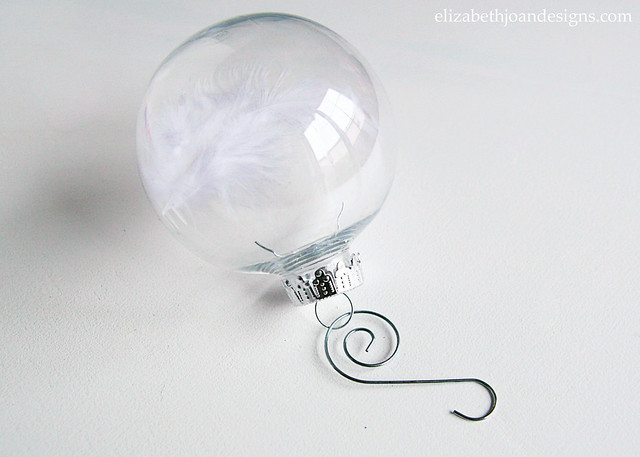
And you are done! Super easy, right? I love the way these ornaments look on a Christmas tree. They are very simple, but the light reflects perfectly off of the ball. It kind of gives them an ethereal presence.
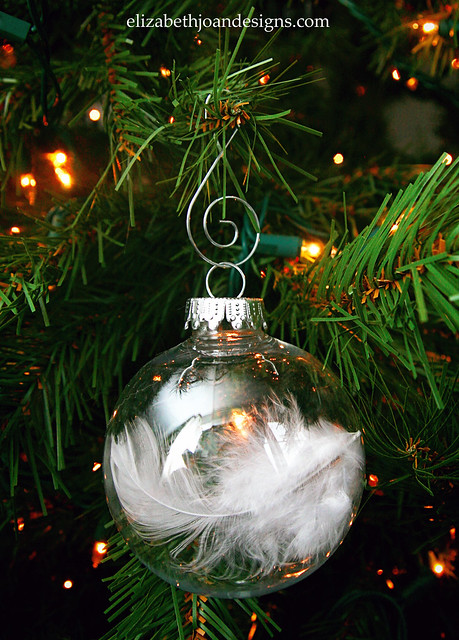
We’ve had these pretty ornaments hanging on our Christmas tree for over 10 years and they are still one of our favorites! Check back soon to see our Christmas tree all decked out for the holidays.
______________________________________________ You may also like:

Last Minute Silhouette Ornament 
Gift Wrapping Ideas 
Dollar Store Scarf Wreath 
Festive Paper Stars -
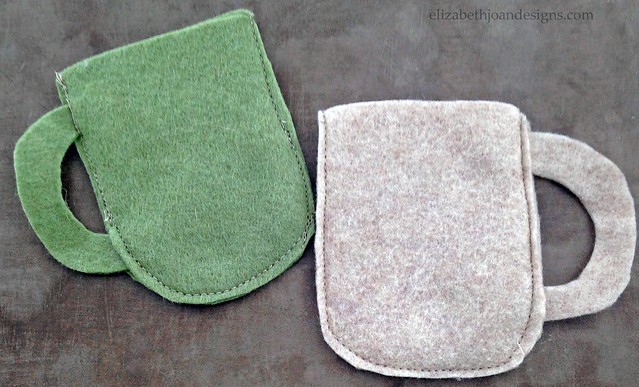
Five Minute Friday: Coffee Mug Gift Card Holder
Welcome to 5 Minute Friday. This is a weekly post where we share quick tips, projects, and recipes that can all be completed in 5 minutes or less! The topic this week is Coffee Mug Gift Card Holders.
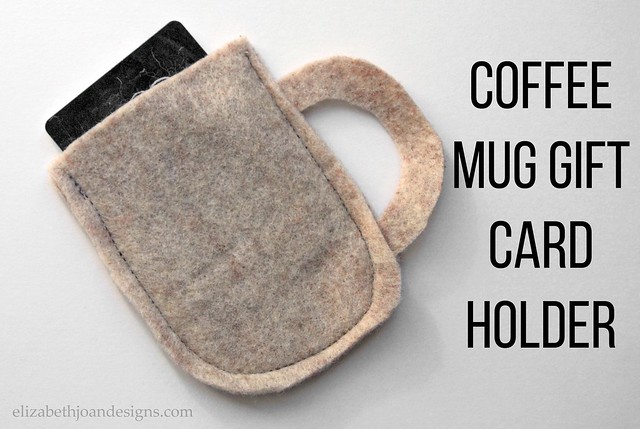
To make this super easy, adorable, gift card keeper you need wool felt, scissors, paper, pencil, sewing machine or needle and thread.

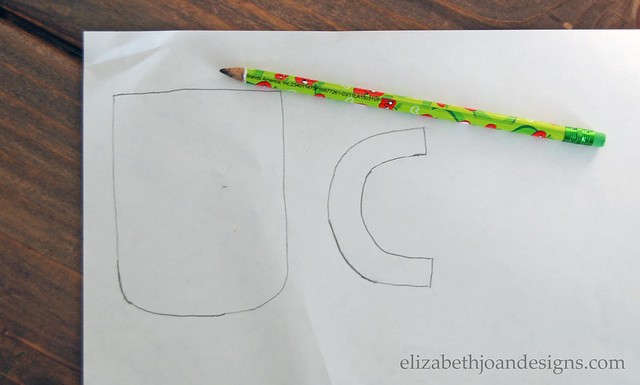
First, create a template by drawing on paper what you would like your mug and handle to look like. (I am one of the world’s worst drawers. So if I can do it, I know you can too.) FYI: The mug portion and the handle are separate templates. Make sure you make the mug big enough to hold a gift card and remember to account for seam allowances too.
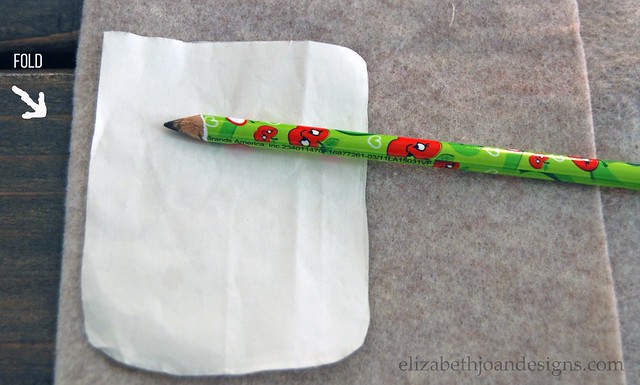
Next, cut out your templates with scissors and lay them flat on the felt. Trace around them with the pencil or chalk. You need 2 mug pieces and 1 handle piece. I folded the fabric when tracing the mug section on so I could trace and cut the 2 cup pieces at the same time. When selecting your fabric for this project keep this in mind that the felt I used was fairly thick. If you choose a thinner fabric you will end up with a floppy handle.
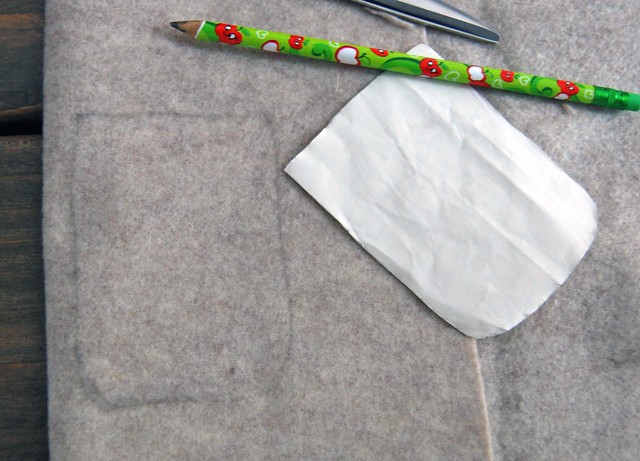
Then, remove the paper and start cutting out your felt shapes.
After that, lay the two mug pieces one directly on top of the other and insert the tips of the handle in between the two pieces.
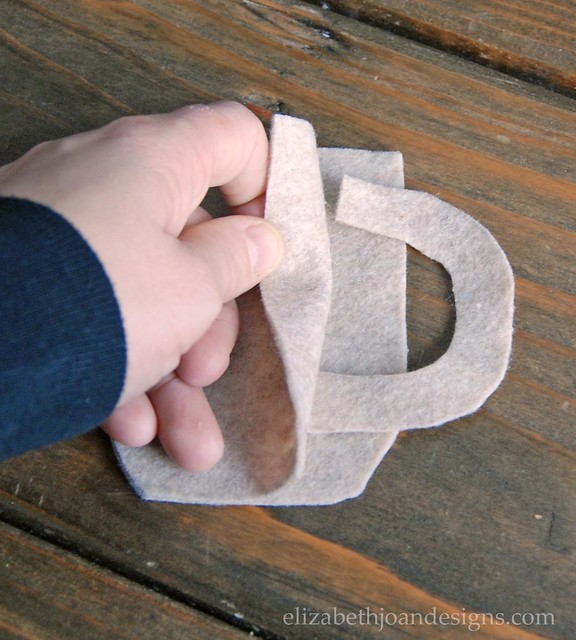
Finally, sew down one edge of the mug, across the bottom, and up the other side securing the handle in place.

Trim any loose thread and you have yourself a very cute coffee gift card holder. Happy Gift Giving!
______________________________________________
You may also like: 
Nightstand Makeover 
Rusty Plant Stand Makeover 
Faux Roman Shade 
Faux Topiaries
-
Knit Vases
Warm up your holiday decor with these cute knit vases!

I have a few unfinished knitting projects our grandmother was working on before she went into the nursing home. Grandma did teach me to knit. As you know, practice makes perfect and well, I didn’t practice. So instead of trying to finish her work, I decided to combine these pieces with a few of her old canning jars to make some cozy holiday vases.

First, using a rotary cutter, I cut out sections to fit around the jars.

Then, the knit fabric was wrapped around the jars and secured with safety pins. I knew the backs of mine would not be seen, so I sort of haphazardly placed my pins. If yours will be seen, you may want to hide thems a little more or use a hot glue gun instead.

Finally, I filled my vases and was done. It only took about five minutes from start to finish!
I love that I was able to find a use for these special hand knit pieces that would otherwise have just sat in a box in my basement. If you do not have your grandmother’s unfinished knitting projects and want to make these vases, there is no need to worry. You can achieve this same snugly decor look with an old sweater.