-
Build It Yourself, Family, Kids, Pets, Furniture Makeovers, Home Decor, One Room Challenge, Organization & Storage, Painting Projects, Room Makeovers, The Country House
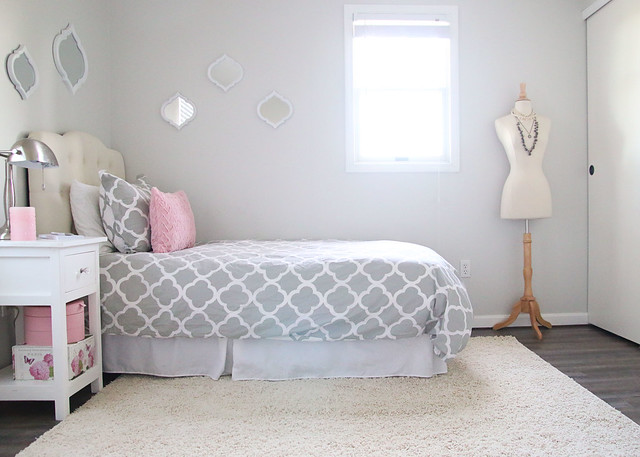
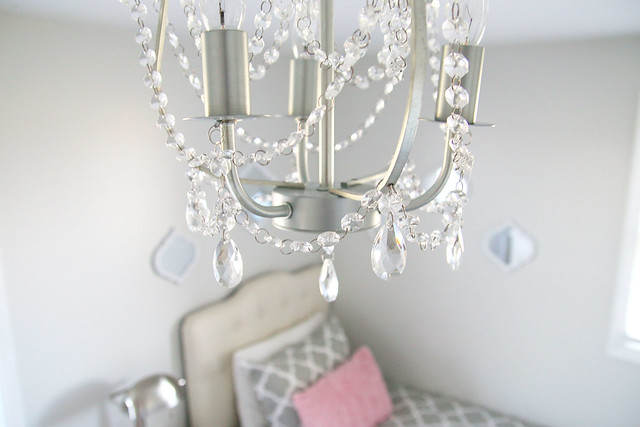
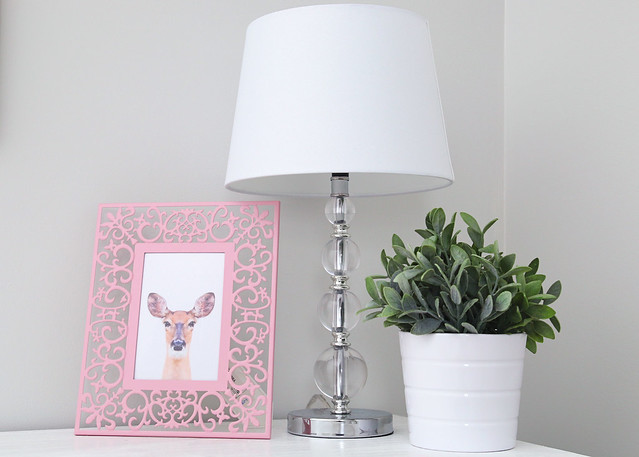
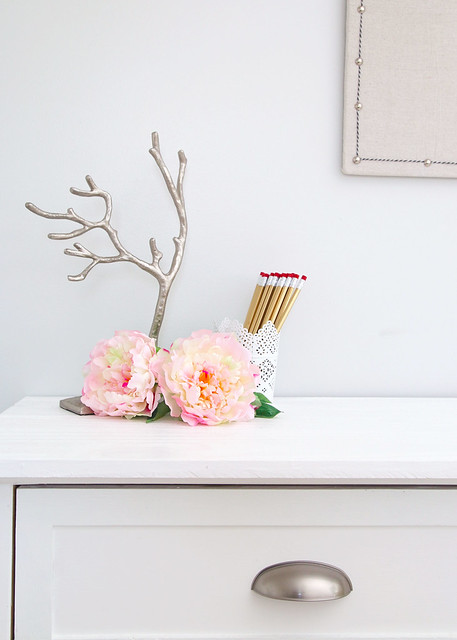
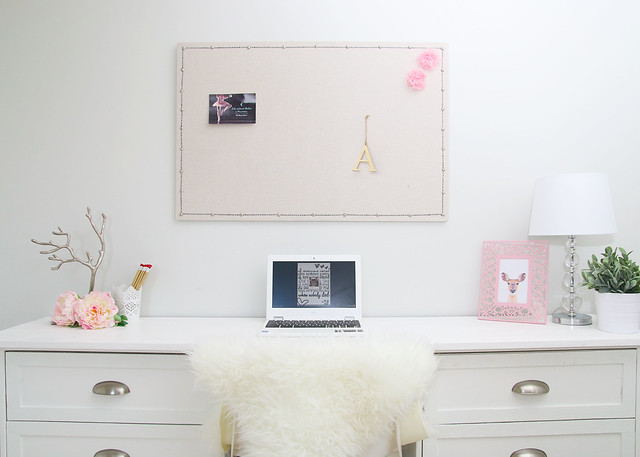
Tween Bedroom Reveal
You guys! It is the end of week six of the One Room Challenge and to say that I am ecstatic would definitely be an understatement. These past six weeks have been a crazy whirlwind of work, but we are so excited with the way everything turned out. Check out our Tween Bedroom Reveal!
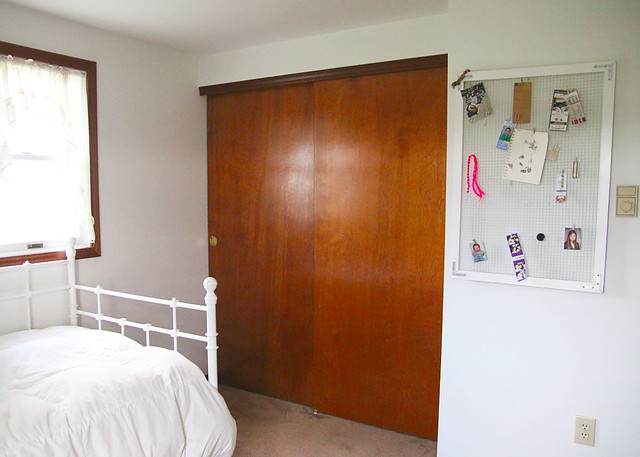
But first, let’s go back to the beginning and review where we started. Ugh. This room really needed some help.
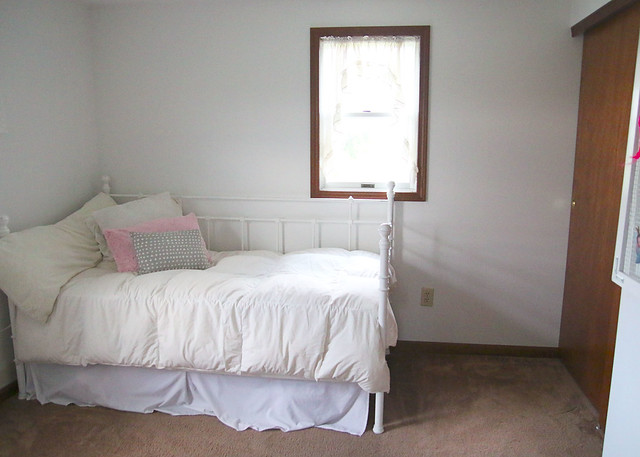
The old carpet and dark trim were just not working for us, not to mention the mismatched random furniture and lack of accessories just made to room look blah.
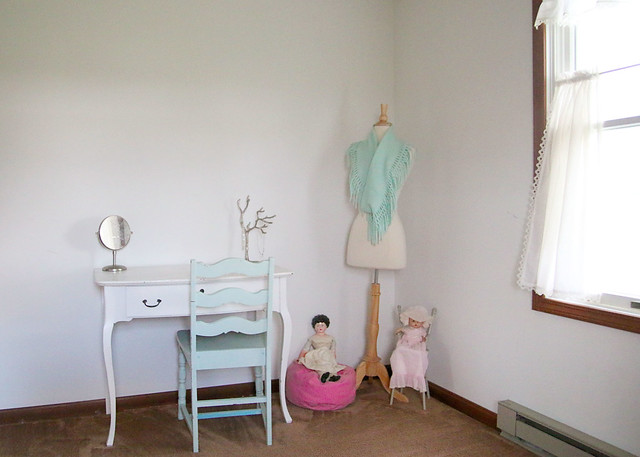
OK. Now, scrub your brain of those old, mismatched images and let’s move on to the pretty pics!
After some brainstorming with my daughter about how she wanted her room to look, plus some research to achieve that look on a budget, we came up with a beautiful and affordable mood board and design plan.

Here’s what was on the to-do list…
- Remove old carpet and replace flooring
- Paint walls, trim, & doors
- Replace old electrical plates, outlets, and switches
- Add new lighting
- Install window coverings
- Create a workspace that can also double as clothes storage
- Bring in color and textures with accessories
- Organize craft & art supplies, books, toys, and clothing
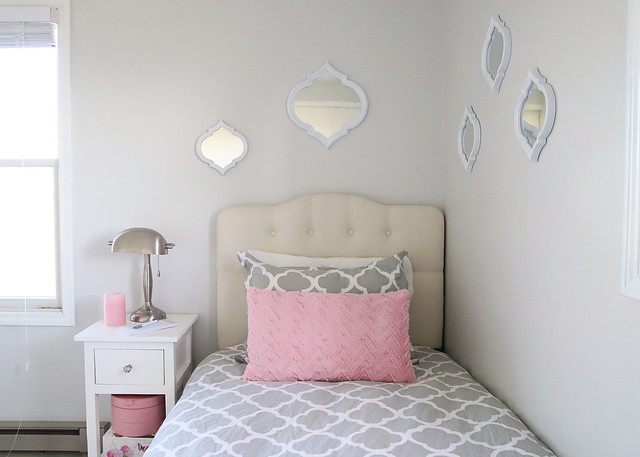
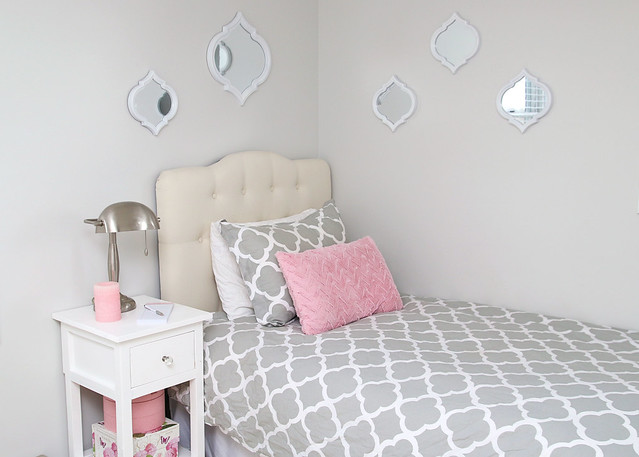
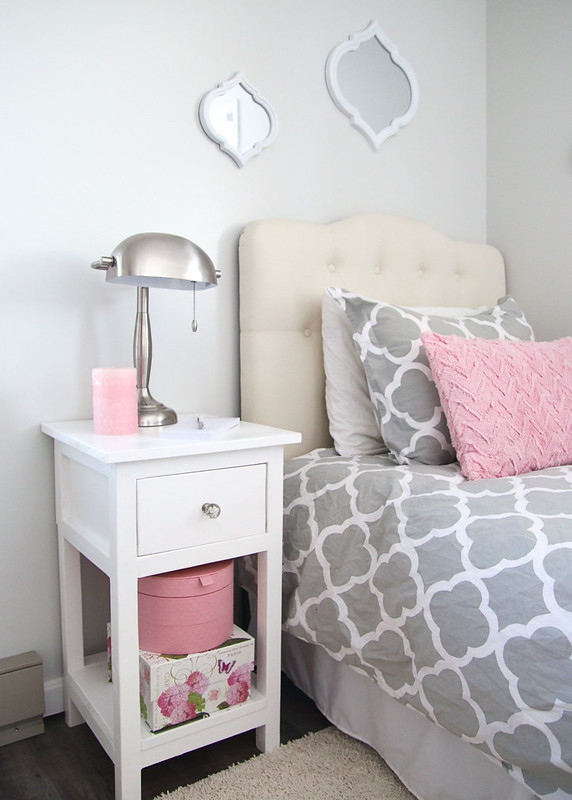
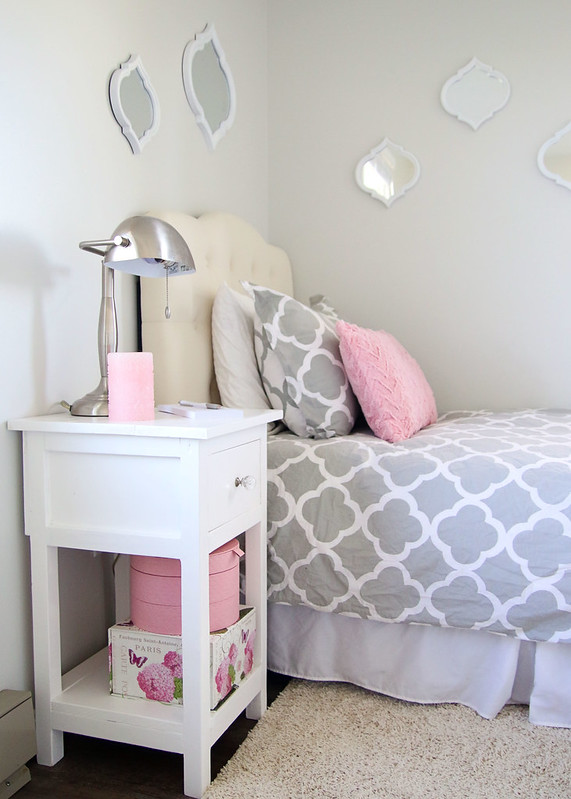
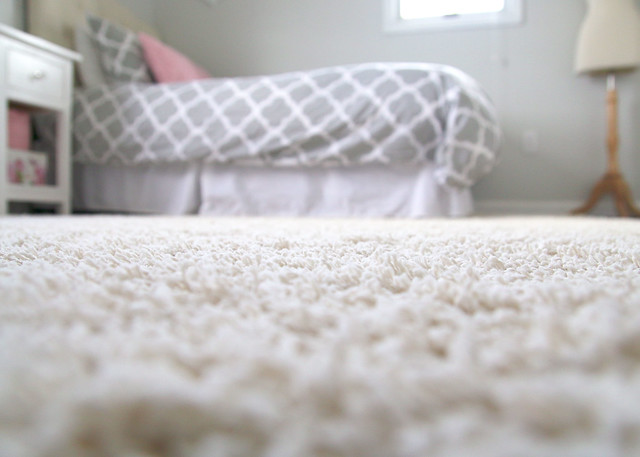
Come on in. Stay awhile.
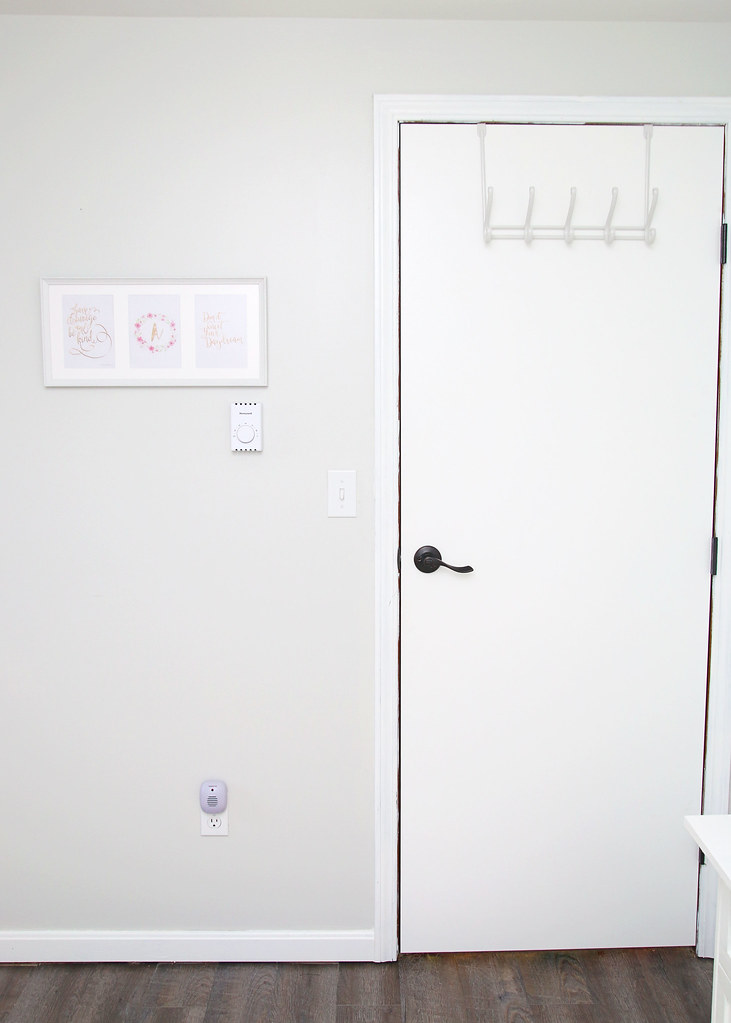
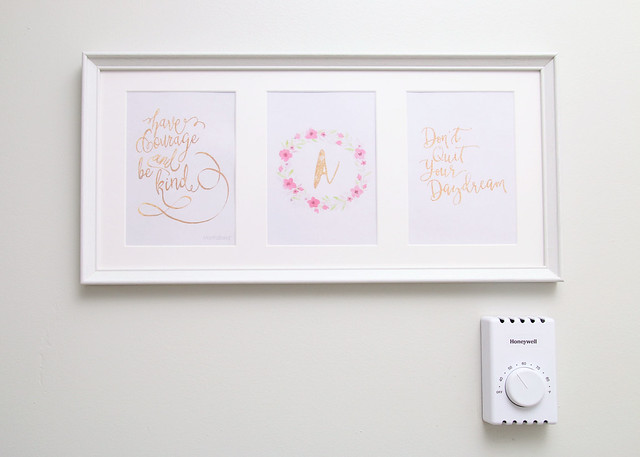
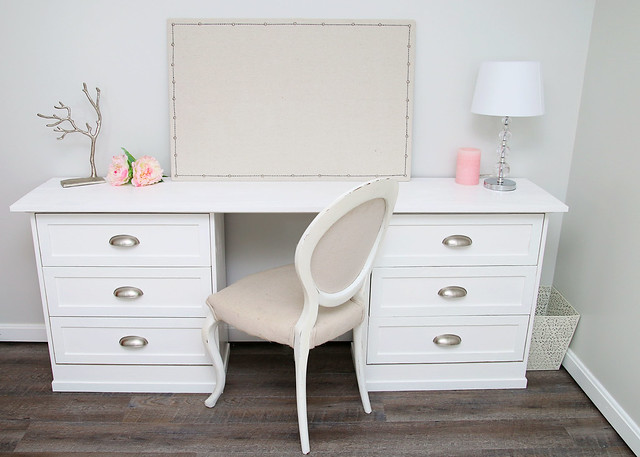
This room is now our favorite in the house and we hope you enjoy the visual tour as much as we (especially our daughter) are loving the real thing. Let’s start at the entry door and work our way around the room.
Since this reveal is so pic heavy, I will be sharing more details and all of the sources next week in a separate post. Enjoy!


There was so much to do and we didn’t know if six weeks would be enough time to finish! Thank goodness we’ve lived to tell the tale of our first One Room Challenge. Now I think it is time to hibernate for the winter and recover from this whole process. Well, maybe just for the weekend. *Wink*
If you have missed any of the progress in this room, feel free to go back and check out how we went from meh to marvelous!
-
Build It Yourself, Family, Kids, Pets, Furniture Makeovers, Home Decor, One Room Challenge, Painting Projects, Room Makeovers, The Country House
Ikea Rast Dresser Desk
Can you believe that it is week 5 of the One Room Challenge? That means that there is only one week left and oh my goodness, we have so much to finish up! Last week, I teased that we had an exciting build that I would be sharing this week and I’m happy to say that we’ve finished it! Check out our Ikea Rast Dresser Desk!
(Affiliate links included for your convenience. Click here to read my full disclosure.)
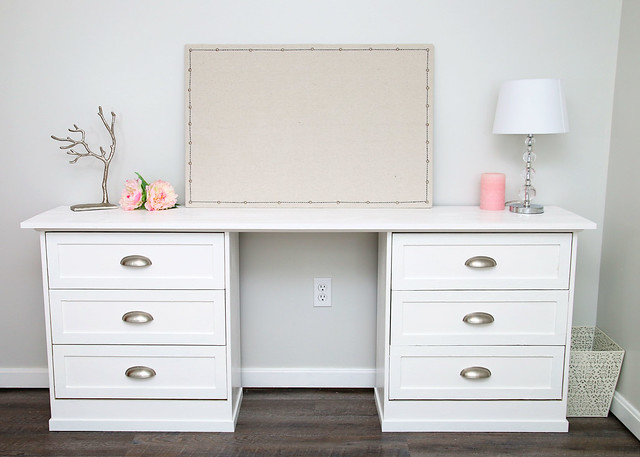
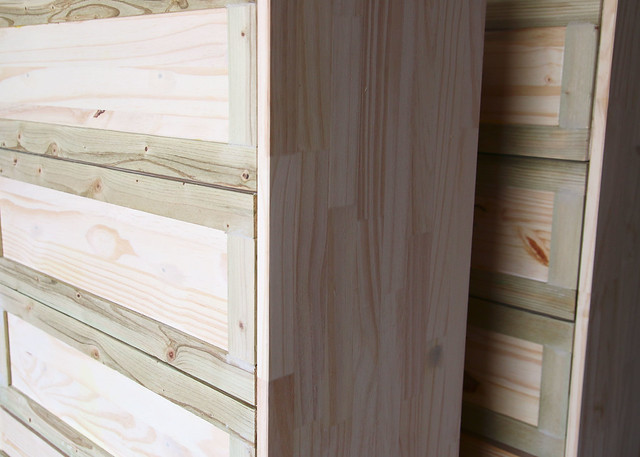
In the DIY blog world, completing a Rast hack is sort of a right of passage and there have been some really amazing variations done. So, when we started working on our tween daughter’s bedroom, we decided to use two unfinished ones that we had temporarily been using as nightstands.
Unfinished Ikea Rast 3-drawer chest

Even though she already has a small dresser, our daughter needed some more storage. She also needed a desk for homework and such. Since she doesn’t have a large room (10’x12′), finding a way to fit so many different types of furniture pieces in was a bit challenging. So, after some brainstorming, we decided to donate our nightstands to the cause and make what we lovingly refer to as a “Dresker”. That’s right. A dresser and a desk in one.
Since our little dressers were already put together, it was just a matter of spiffing them up. We started by adding lattice pieces to the front of the drawers, a 1×4 piece of wood to the bottom front, and more lattice as trim around the bottom.
Then they both got a few coats of white primer/paint.
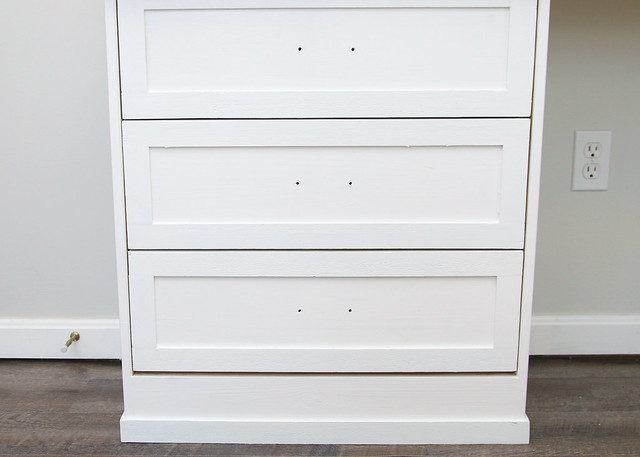
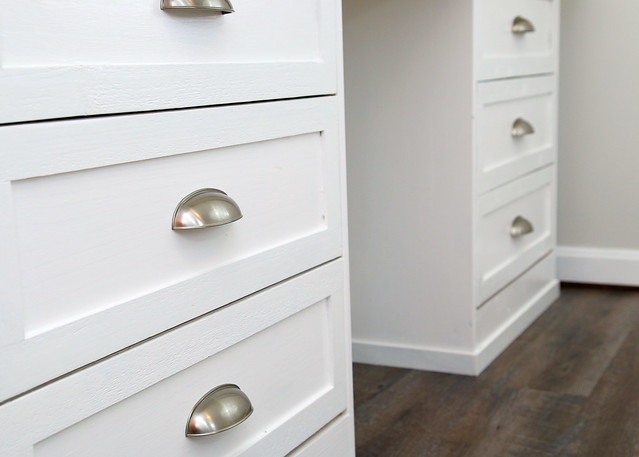
And some new, shiny cup pulls.
We brought them in from the garage after painting so that we could set them up in the room and attach the top pieces.

For the top, we used a 72″ x 15″ piece of poplar screwed in from inside the drawer and trimmed underneath with quarter round.

Finally, the top was painted to match and the dresker was finished!
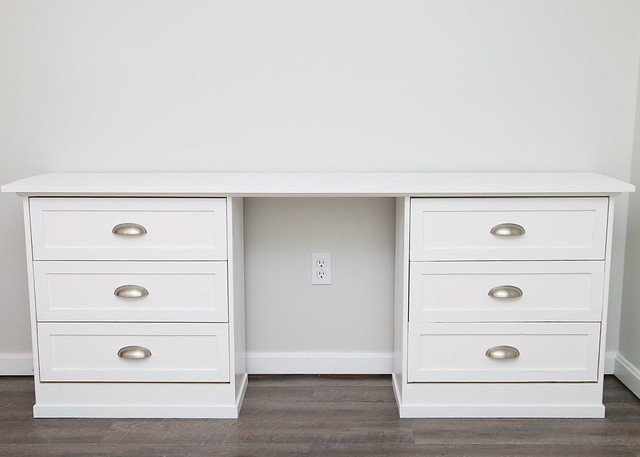
Isn’t it glorious? We are so happy with how it turned out and think that this piece will work great for the various needs of a growing tween.
With only one week left, I feel like we are going to be super busy over the next several days trying to finish up all that we have to do. Here’s what is still on the to-do list.
Remove old carpet and replace flooringPaint walls, trim, & doorsReplace old electrical plates, outlets, and switches- Add new lighting
Install window coveringsCreate a workspace that can also double as clothes storage- Bring in color and textures with accessories
- Organize craft & art supplies, books, toys, and clothing
See what we’ve done in previous weeks!
Go to Week
1 || 2 || 3 || 4 || 5 || 6 -
Seasonal Character Door Hanger
This post is sponsored by The Home Depot. Click here for my full disclosure.
#sponsored #DIHWorkshopWoohoo! Today is the day that I get to show you my Halloween themed version of the Seasonal Character Door Hanger. It was so fun to actually get my hands on some power tools and build this project on my own!
You can build and style your own too!
If you enjoy creating projects, The Home Depot offers Workshops at all of their locations for do-it-yourselfers of all ages and experience levels. There are three types of Workshops offered:
- Do-It-Yourself (DIY)
- Do-It-Herself (DIH)
- Kids
As a memory refresher, here is the original image supplied by The Home Depot for this project. If you sign up for a workshop, customers can learn how to build décor projects, how to make easy home repairs and how to operate tools through demonstrations and step-by-step instructions. Visit http://workshops.homedepot.com to learn more.

OK. Here is mine.
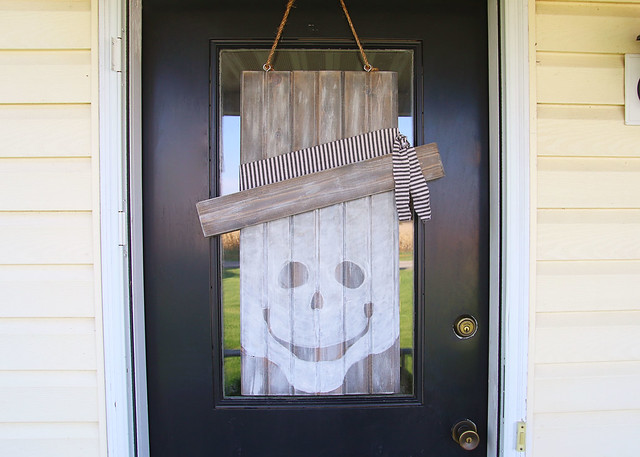
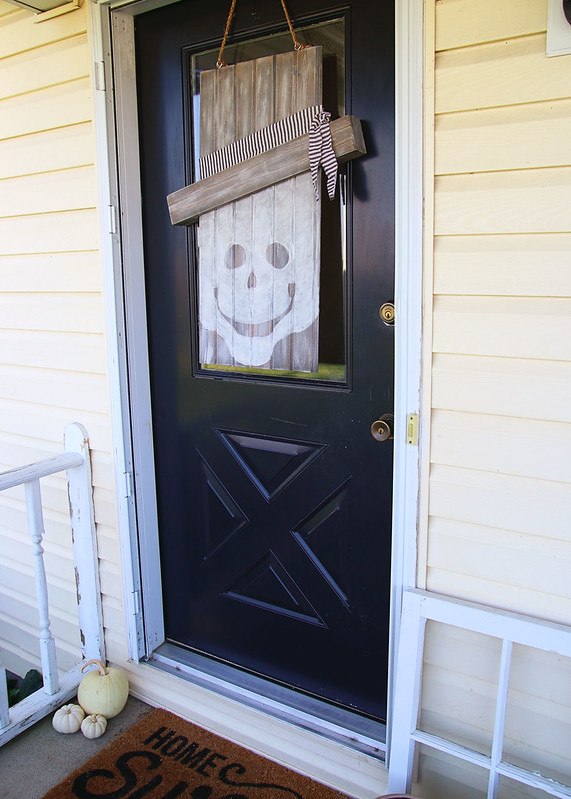
I decided that I wanted to create a neutral skeleton look for my Seasonal Character Door Hanger to go with our light & neutral decor.
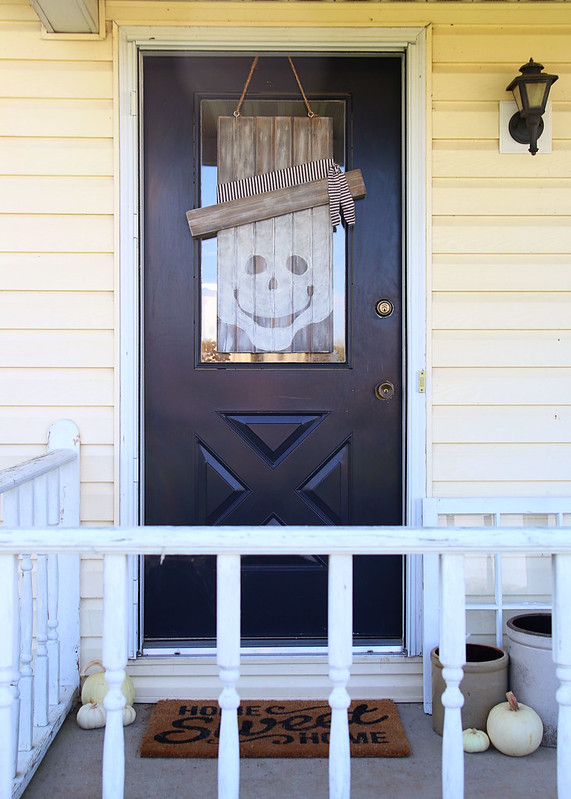
I’m not sure if this cute guy looks more like a skeleton, a ghost, or a jack-o-lantern, but he is sure is happy and welcoming. Maybe he needs some teeth?
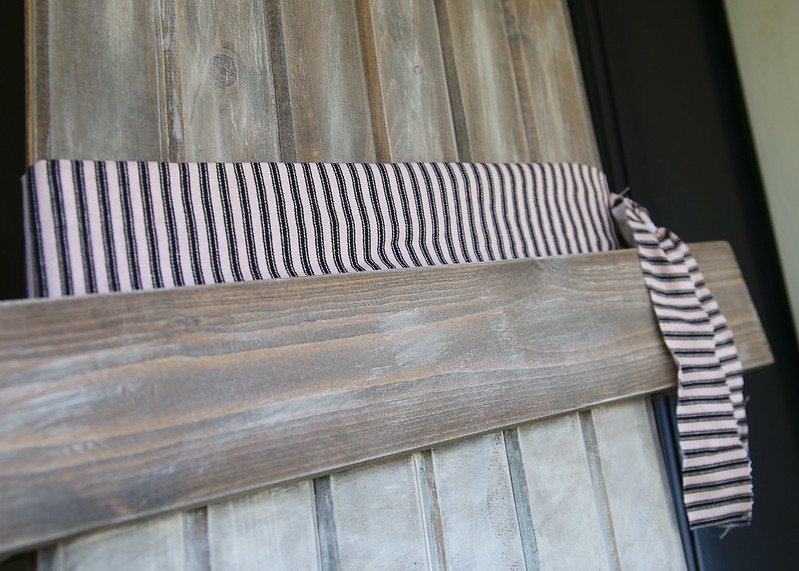
The building process was super easy. (Click here to sign up to make your own at your local Home Depot store.) After putting this together, I stained the wood with a combo of Minwax Jacobean and Classic Gray. Next, I dry brushed the entire thing with white chalk paint. Then, with a pencil, I freehand the face and filled it in with a thicker application of my dry brushing technique, which gave it an airy, ghosty feel.
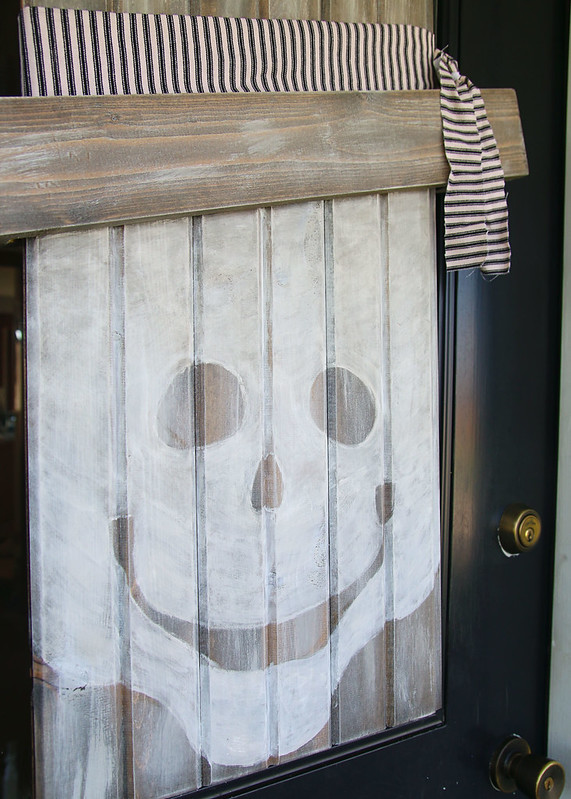
I added my favorite black and cream ticking fabric around the top of the hat brim to finish off the look.
Isn’t this guy a cutie? If I wouldn’t get crazy looks, I would consider leaving him up year round.

If you liked this project, you can register here to learn how to build your own in person at your local Home Depot Workshops. You should also definitely check out the other amazing and unique versions of the seasonal character door hanger from the participants in this Workshop Virtual Party!
Live Laugh Rowe
The Turquoise Home
Cherished Bliss
TIDBITS
Refresh Restyle
The Creative Mom
My Sister’s Suitcase
My Love 2 Create
Sweet Charli
Not Just A Housewife
Domestically Speaking
Lovely Etc
Redhead Can Decorate
Yesterday on Tuesday
Elizabeth Joan Design
The Rustic Life
One Artsy Mama
Tonality Designs
She Leaves A Little Sparkle
Our Vintage Nest
All Things Thrifty
Our Thrifty Ideas
Junque Cottage
The Crafted Sparrow
Sweet Rose Studio -
The Home Depot Workshops: Seasonal Character Door Hanger
This post is sponsored by The Home Depot. Click here for my full disclosure.
#sponsored #DIHWorkshopYou guys! I’m so excited to announce that I am partnering with The Home Depot in their Workshop Virtual Party to bring you an awesome holiday project! Aren’t the seasonal character door hangers pictured below so cute? On Monday, October 17th at 1 pm, twenty-five bloggers will be participating in the party, building and sharing their own take own on these. (Hint: Mine is Halloween themed!) Plus, you can register here to learn how to build your own in person at your local Home Depot Workshops.

WHAT ARE THE HOME DEPOT WORKSHOPS?
Did you know that The Home Depot offers Workshops at all of their locations for do-it-yourselfers of all ages and experience levels? That’s right! You can totally join in on the fun. Participants can pick from three types of Workshops offered:
- Do-It-Yourself (DIY)
- Do-It-Herself (DIH)
- Kids
Customers can learn how to build décor projects, how to make easy home repairs and how to operate tools through demonstrations and step-by-step instructions The Home Depot Workshops.
YOU CAN LEARN MORE BY VISITING http://workshops.homedepot.com.
I can’t wait to show you guys my take on this Seasonal Character Door Hanger! Join me back here on October 17th to see my version and view the other amazing projects by my fellow bloggers. Also, don’t forget to register so you can build your own!
