-
Two Year Blogiversary Celebration – Day 4
Today, we are wrapping up our two year blogiversary celebration. And before I share another of our most popular posts, we would like to thank our readers. You guys are AMAZING! Thank you so much for all of your sweet comments and support over the past two years!!! Thank you! Thank you! Thank you!

If you’ve been following along this week, you’ve seen some our favorite/popular projects (Boxes to Baskets, Bed Risers, and Personalized Utensil Crock.) One of our most loved posts has also been our Vintage Inspired Chalk Cloth Map.
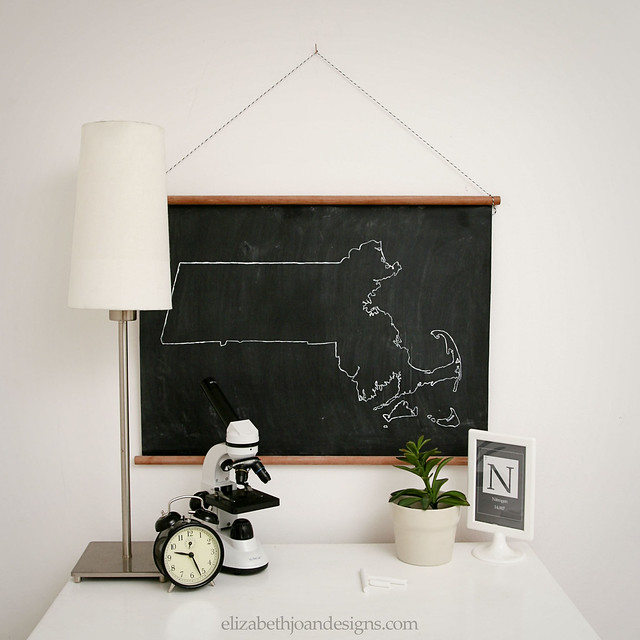
This project was sentimental for our family and even though it took a little bit of time to complete, it has been wonderful to see it everyday hanging in our
son’skid’s bedroom to remind us of our time in MA. You can find out how we put this together here.Thanks again for hanging out with us this week! And don’t forget, there is still time to enter The Home Depot Challenge Giveaway for your chance to win a $100 gift card to The Home Depot.
Want more? Follow us on social media! We would love to connect with you! ____________________________________________________________


-
Two Year Blogiversary Celebration – Day 2
It is day 2 of our two year blogiversary week and we are so happy you are here! It seems like Elizabeth Joan Designs started just a short time ago, but it is also hard to believe that we’ve met so many amazing friends and accomplished over 300 DIY projects and tutorials! Today, I’m going to share one our favorites with you: finial bedrisers!
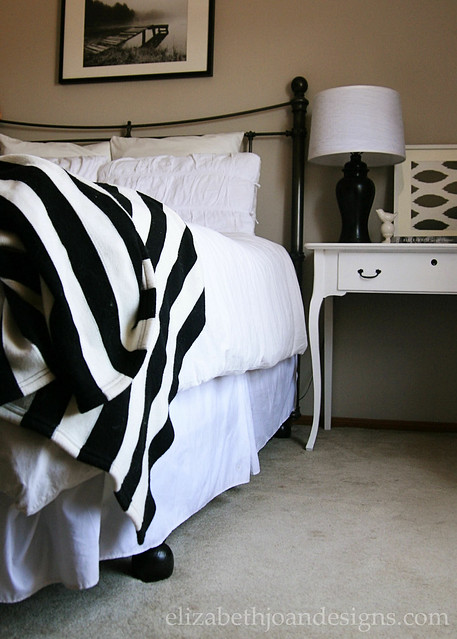
We needed more storage space and decided to use deck post finials to give our bed a lift and attempt to toddler proof it a bit.

The bedrisers have been the perfect storage solution for us and have held up great over the past year. They lift everything up just enough for us to be able to store a couple of our paint dipped box baskets underneath.
I’m sad to say though that they didn’t make our bed toddler proof in the way we had hoped. Our son has grown some and now has no issue climbing up. However, he has given them rigorous testing with his many trampoline attempts on the top of the bed. To see how we attached these pretty, yet sturdy feet, check out Raise Your Bed If You’re Sure.
Also, there is still time to enter The Home Depot Challenge Giveaway for your chance to win a $100 gift card to The Home Depot. Check back each day this week to celebrate with us and see more awesome Elizabeth Joan Designs’ projects!
-
The Cheapest Moss Letter You Will Ever Make
If you are a DIYer and have ever perused Pinterest, you have undoubtedly come across someone’s version of a monogram. I think everyone and their brother has probably made one, especially of the moss variety. So, this tutorial is not so much of a brand new innovation that will knock your socks off. However, I am going to tell you how you can create the cheapest moss letter that you will ever make that also looks pretty too!

Typically, I see monograms which use prefabricated letters, either paper mache or wood, from the craft store. There are usually only a few font choices and of course, you have to pay for them. Even though they aren’t expensive (usually $10 or less), I chose cardboard (free) and liked that I could customize the size and font.
I started out with a cut out print of my letter which measured 16.5″ x 14.5″. (I set it up in Illustrator, but if you aren’t familiar with that program, you can use Picmonkey to design your letter, save that to your computer and then upload it to Block Posters to be printed out.) I traced the letter onto a piece of cardboard with a pencil…

Next, cut it out with a run-of-the-mill box cutter.

If you want to be extremely frugal, you could grab some naturally growing moss from outdoors.
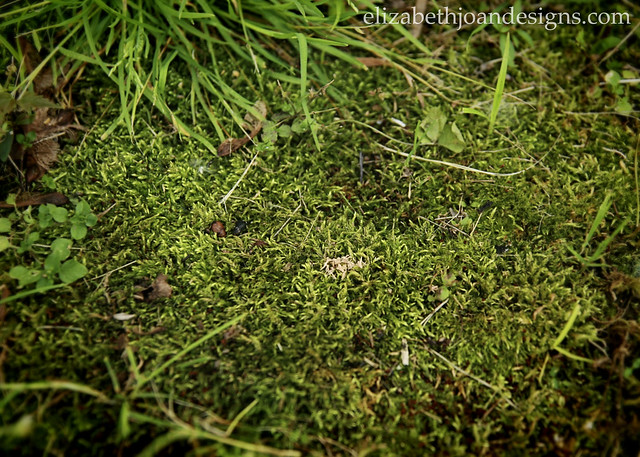
However, I bought my moss from the craft store and paid $2.50 after a 50% off coupon.
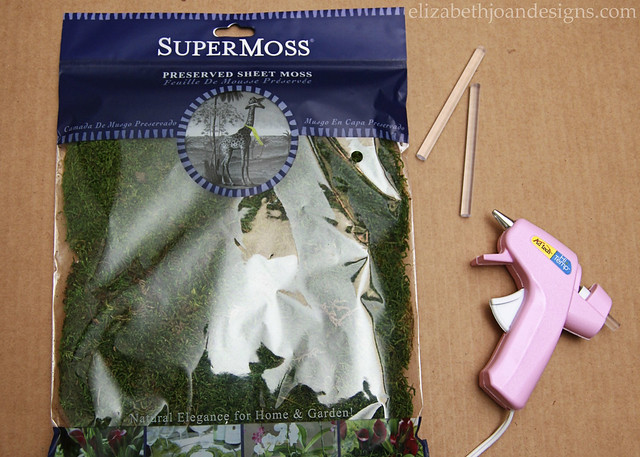
Then, came the really hard part. Just kidding. This was super easy. I glued the moss on top of my letter C with a hot glue gun.
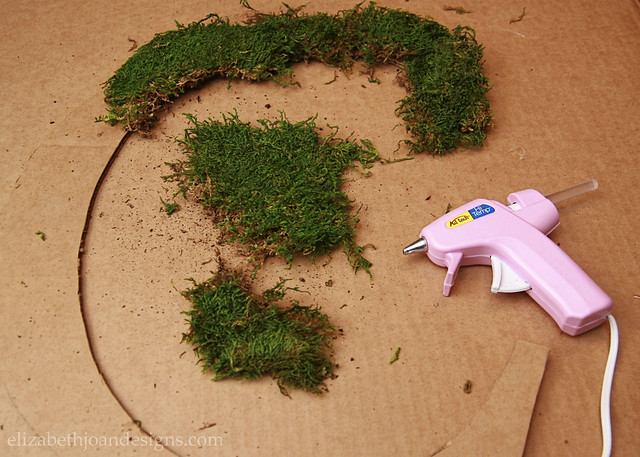
As you can see, it looked kind of wonky with all of that haphazard moss everywhere, so I turned over my monogram and trimmed the moss around the edge of the letter with scissors to clean everything up.
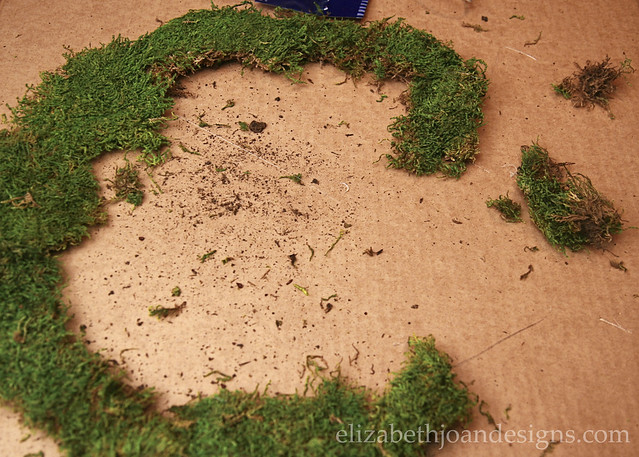
Voila! A lovely (and easy) moss letter for only $2.50. Or it could be free for you if you can find some moss outside!

Since this letter is made of cardboard, it is super lightweight and easy to hang. I placed it here above this vintage wash tub with just some tape. But I think it would also look gorgeous hanging from a ribbon on a door or placed on a mantle/shelf to bring a little life into a room.

The best part is that no one will know that you put this fancy monogram together for merely nothing!
___________________________________________________________ You may also like:

Split Pea Wreath 
Printable Paper Collection and BBQ Blog Hop 
Laundry Basket Planter 
Placemat Pillow -
Revamped Mini Folding Table and Chairs
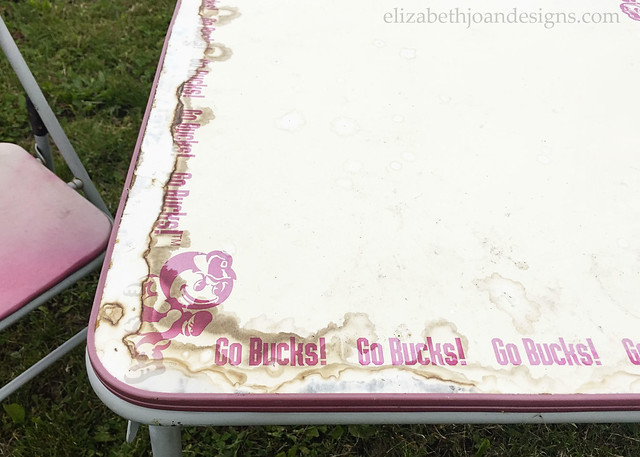
It’s no secret that Emily and I enjoy grabbing
junktreasures from trash piles on the side of the road. Especially, when we can see so much potential in the item. For example, this cute revamped mini folding table and chairs that I recently found and made over.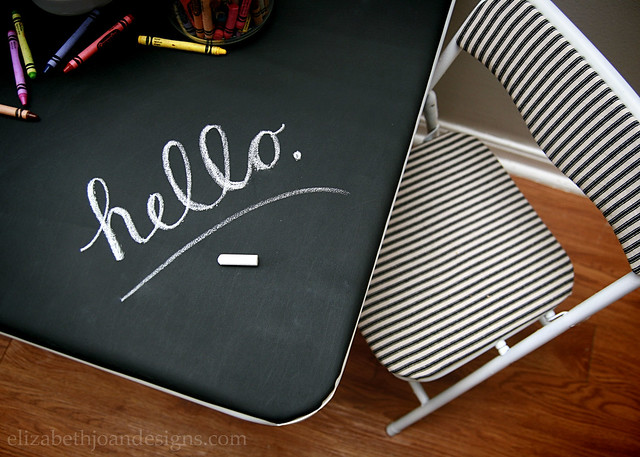
Since we didn’t already own a little table and chair set for the kids, when I saw this small set abandoned on the curb, I thought it would at least be worth the effort to try and fix it up. We don’t have tons of extra space for un-needed furniture, but since these fold up, they will be easy enough to store when they aren’t in use.

As you can see, they were in pretty rough shape. The chair seats and backs were faded and the table top had some ugly water damage. We love the Buckeyes here, but some changes needed to happen to make this little grouping look better.
Unfortunately, I didn’t document taking the screws out of the seats, backs and table top to detach them. Or spray painting each of the frame pieces white. Oops! But I did do those things.
I decided to recover the parts of the chairs with black and white ticking fabric and the top of the table with chalk cloth.
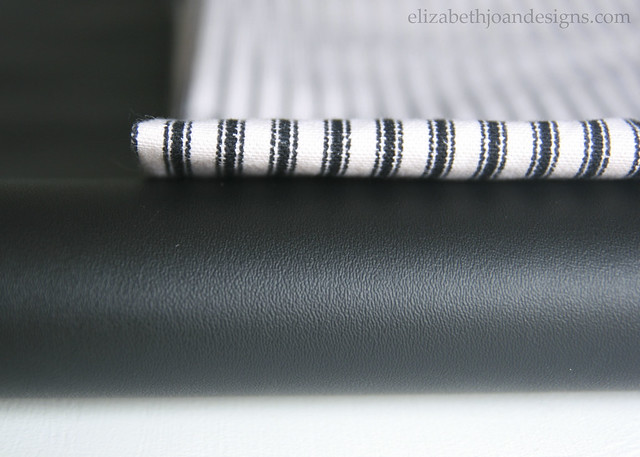
Using a combination of staples and E6000 multipurpose adhesive, I attached the fabrics (cut to size) to each item.

Finally, everything was reattached to the newly painted frames and ready for use.

What do you think of this little table and chair set? Isn’t it adorable in it’s new black and white attire? I love that the kids will be able to use this for so many things. Coloring, crafts, snack-time, etc. Plus, since there is chalk cloth on the top, they can draw directly on it. Yay!
__________________________________________________________ You may also like:

Chalk Cloth Bunting 
Kid’s Table Makeover 
Chalk Cloth Map 
Vintage School Desk Makeover