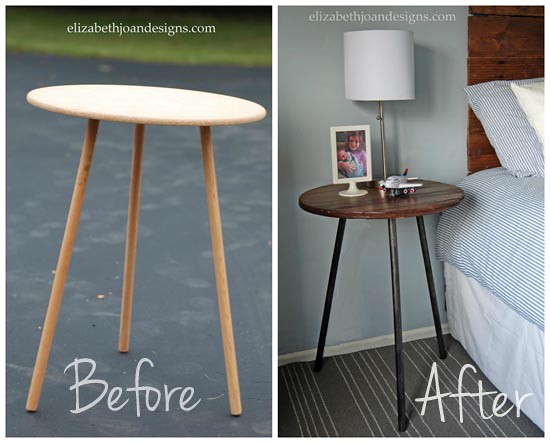
Upcycled Tripod Table
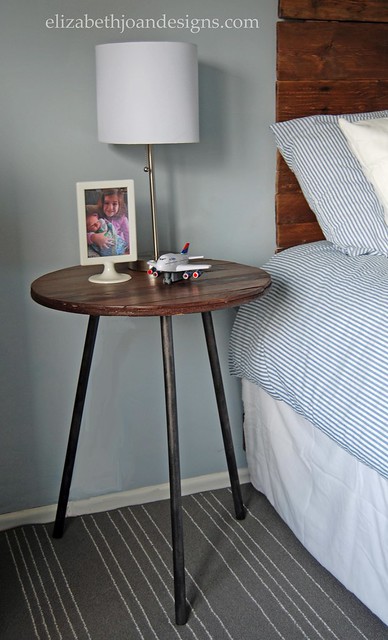
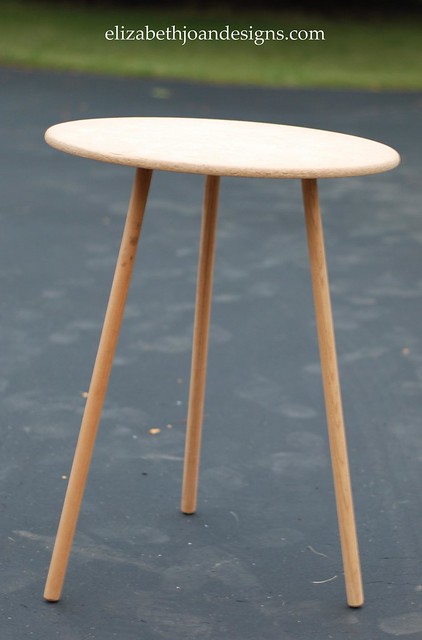
I had been searching everywhere for the perfect table to use as a nightstand in my son’s room. (And by everywhere, I really mean the side of the road and garage sales.) I was looking for something narrow, tall, and with an interesting shape when I came across a basic tripod table. The asking price was a whopping $1 at a yard-sale. I decided it was a fair price, skipped the negotiation step, and went straight for the purchase. I was so excited to have found something so cheap.
When I got home, the first thing I did was check to make sure it fit in it’s previously picked out place. Yay, it did! It was time to get to work! But then life got in the way. Honestly, the table just sat in his room looking kinda sad for a couple of months. We all know how that goes, right?
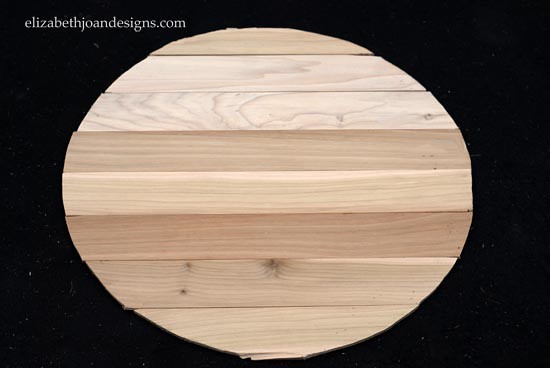
Once things in my personal life mellowed out a bit, or as much as they could, my vision for this table was pretty clear. I really wanted to give it a plank top.
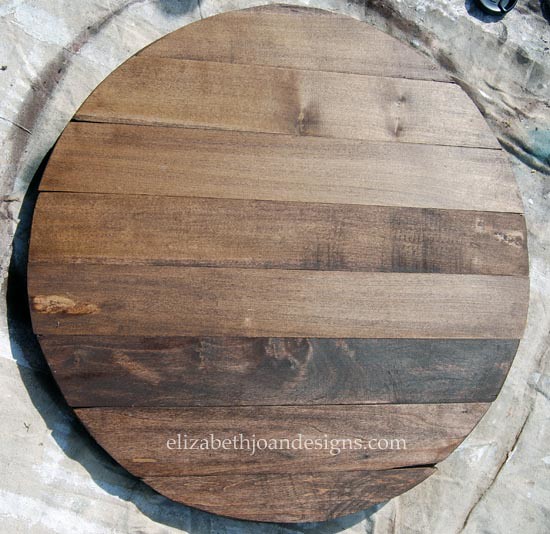
To achieve the round shape I wanted, I removed the legs from the table. Next, I layed the table face down on the wood planks and traced it with a pencil.
Lucky for me, my sis had been visiting and accidentally left her jigsaw here. I used this fun power tool to cut each piece of wood. You are probably wondering who travels with a jigsaw? Answer: Someone with a DIY blog, that’s who. Or a power tool salesman.
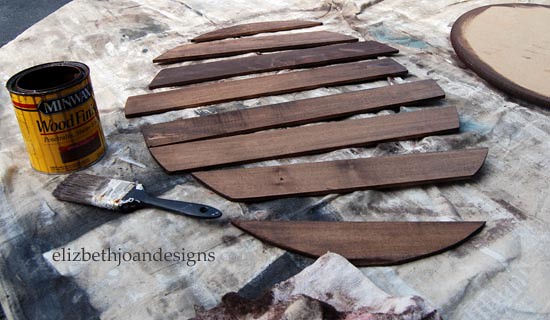
Then, I sanded each plank and stained them with my favorite wood stain, Minwax Special Walnut. Love the color! I applied a couple coats of Minwax Polycrylic to give the table top a little extra durability.
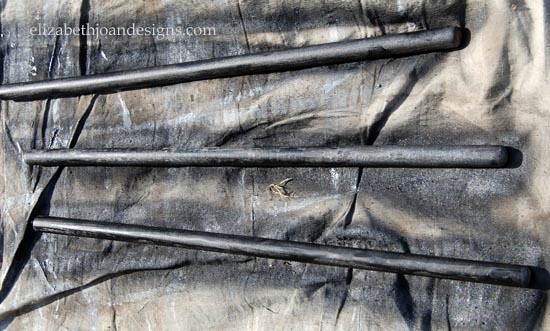
While the planks were drying, the three legs were sprayed with Rust-Oleum’s Oil Rubbed Bronze Paint and Primer in One to give them a slight metallic look. At this point in the process, I was already lovin’ the look and excited to see it finished.
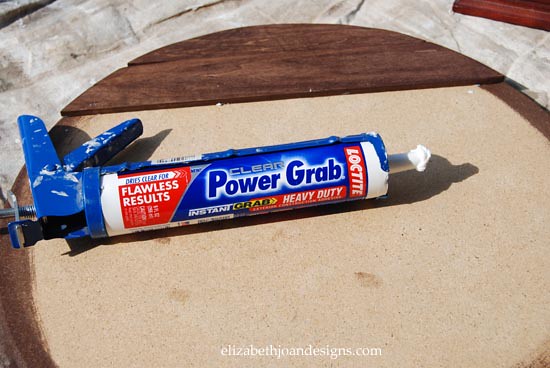
For the final step, I used adhesive to adhere the planks to the top. The processes was pretty quick and I left the table over night to dry. In the morning I reattached the legs and the table was ready for use.
I am in love with how this basic tripod table turned out. Much better than how it started.
What do you think?


13 Comments
Breanna
This is so clever! I love that you cut the pieces and put them back together, it looks awesome!
Emily
Thanks Bre! It really was a fun project to do!
Jenny
Emily – what a cute idea! I have one of those tables and I think I will be taking off the old table cloth and bringing it to this decade!
Thanks,
Jenny @renovardesign.com
Jenny
Emily –
Thanks for this post! What a great idea!! I have the same table and I think I just found the inspiration to remove the ugly table cloth and bring it up to par for this decade! :)
Thanks,
Jenny @ renovardesign.com
Emily
Thanks Jenny! Glad you like it! This was a fun project to do. Please let us know if you try this one your table. I would love to see pictures.
Kyla @HouseofHipsters.com
Turned out great! Love it! Found you on the Dwell Beautiful link up!
Amanda @ Dwelling in Happiness
OHH this is SO NEAT!! I absolutely love this little table, it has such life now! :) I really like the wood planks on top. Such a fun piece for your son’s room! Thanks for linking up to Motivational Monday!! Join us again at our new time starting on Sunday’s at 6pm PDT! :)
Emily
Thanks Amanda! Don’t the planks look awesome? Thanks for hosting and we will definitely be back!
The DIY Homegirl
Great project! You really made a basic table shine with the planks, stain, and legs!
Emily
Thanks! So glad you like it!
laura@notatrophywife.com
Hi Emily- Thanks for joining Friday Favorites. This is a Friday Fav feature this week! Party goes live tomorrow night and would love for you to link up again this weekend! laura
Emily
Thank you so much, Laura! What an honor!
Keisha | The Girl Next Door is Black
This.is.awesome. One of the best redos I’ve seen of this kind of table. Great job! Pinning!
(Found you through the NotaTrophyWife linkup! :) )